AMRAY Scanning Electron Microscope - Complete Optics and Stage Disassembly Part 1 of 3
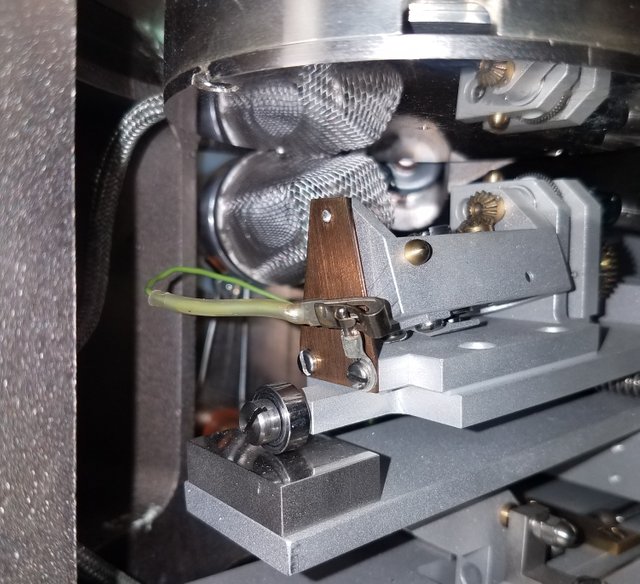
Fig 1. Looking inside the AMRAY SEM stage.
We have had this ~70s vintage AMRAY 1000 (I think) SEM Column and Chamber sitting around taking up space for a while. I have been meaning to disassemble it for parts, and finally got around to its complete teardown yesterday. I took LOOOTS of pictures, like 85. I am sharing the better ones. Anyone interested in how a SEM works should follow along as I take it down, piece by piece. This series will be about pictures more than anything.
DISCLAIMER...and again, ad nauseam, ad infinitum.
These things are no joke...high voltage outputs, good amount of current going in (This guy probably 15 - 20 amps), and they make X-rays. There should never be a concern for X Ray radiation when you get a SEM or TEM new from a manufacturer, however finding one used you cannot possibly be sure what has been done to it. I have seen all kinds of modifications, even ones that created X- Ray leaks. Then there are all the chemicals you need for staining and sample prep. Anyways, you better be at the least competent in electronics, before you dabble with one of these, and once you get it fired up get a suitable X-ray detector. Oh and uh...that electrical bill. That’s another killer ;-p
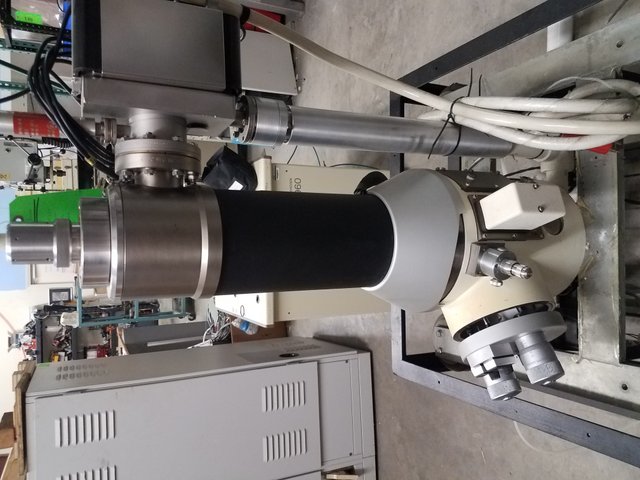
Fig 2. The entire optics column and stage sections. On the chamber/stage section, the white box houses the Secondary Electron Detector. To its left is the objective aperture. It has 2 knobs (X & Y) for adjusting one of three apertures into a direct path of the electron beam. Up at the top, the Ion Getter Pump is attached directly to the gun. Below the IGP, is a manual valve that would be opened when the chamber reaches sufficient vacuum. PS anyone know how to fix this problem with steemit flipping vertical photos 90 degrees? I was going to crop it but....
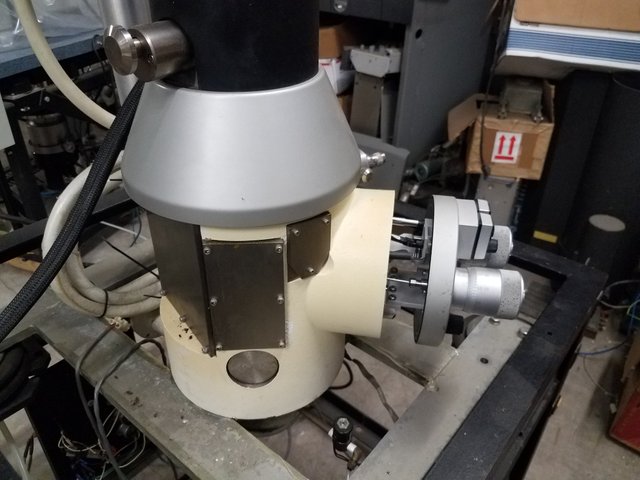
Fig 3. Above the grey/silver conical shroud sits what I will call the column valve. It is manual as well and with the IGP Valve isolates the condenser and gun section from the rest of the vacuum, which I believe in this case was a retrofitted Turbopump and a Rotary Vane Pump. A Oil Diffusion Pump will work in place of the Turbo, but some electronic mods will have to be made, and it takes longer to pump, and will need a recirculating chiller.
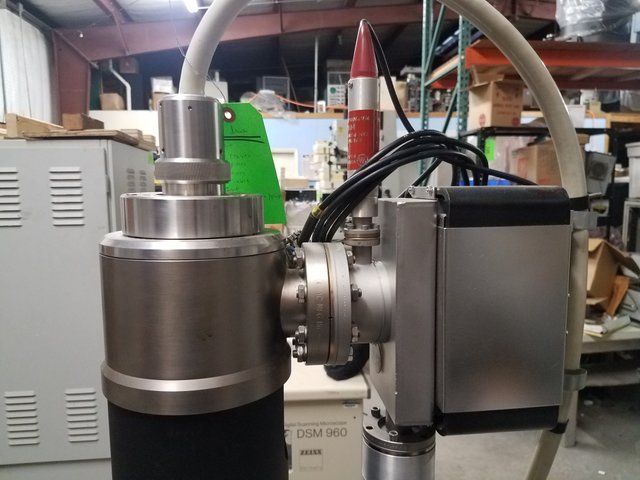
Fig 4. Gun chamber , High Tension Cable (White) and IGP.
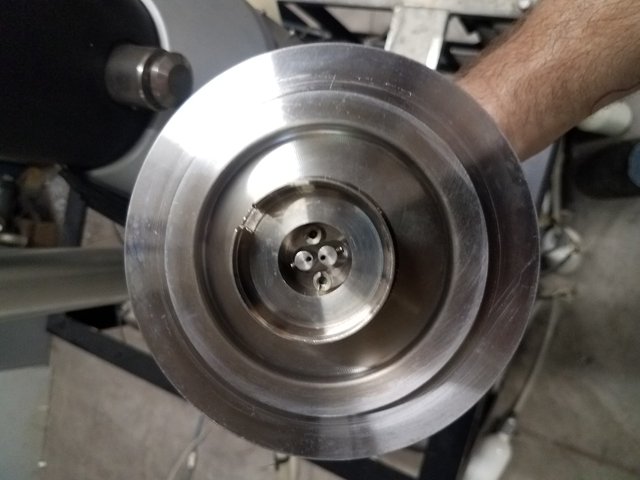
Fig 5. Gun cap and Wehnelt Plug, which just pulls right off the top of the column when it is not under vacuum. Amrays used the same Wehnelts as Philips, FEI, and Thermo Fisher .
Somebody removed the wehnelt long ago.
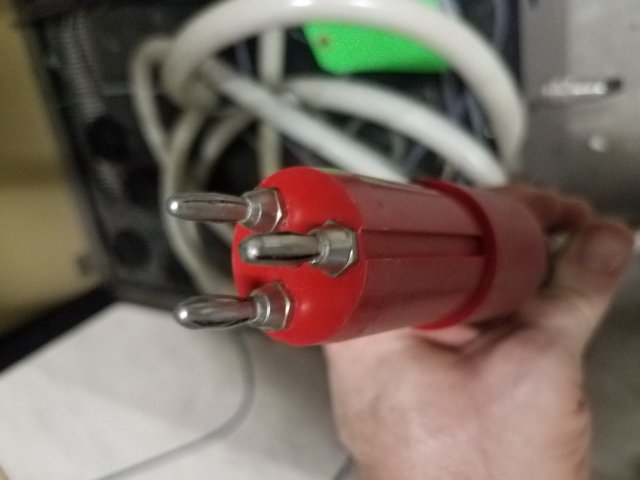
Fig 6. High Tension Cable. It has three prongs, one for accelerating voltage and two for filament heating.
If it was still attached to a High Tension Tank I would have shorted the prongs to each other (with something insulated) because the cable can hold a BIG capacitive charge.
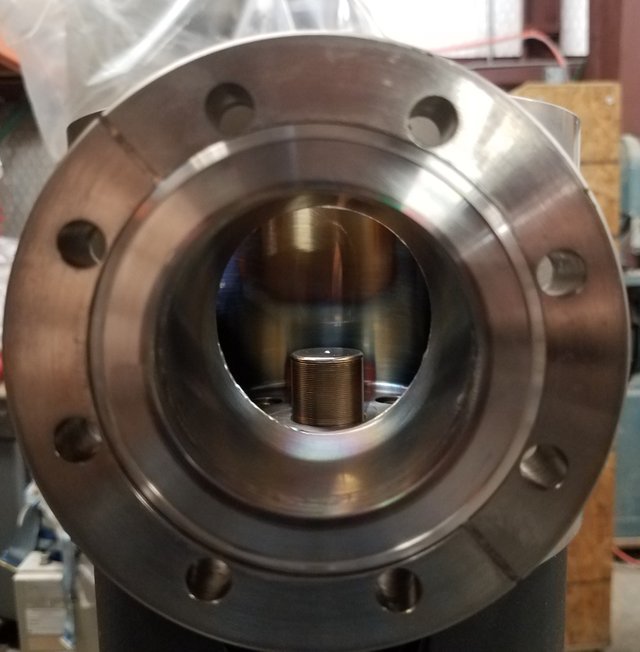
Fig 7. Viewing into Accelerating Chamber from where the IGP was. You can see the Anode, it is almost directly centered in this image. The Varian IGP pump was held on with 8x 14mm nuts on threaded rods. Every other screw and bolt are standard sizes.
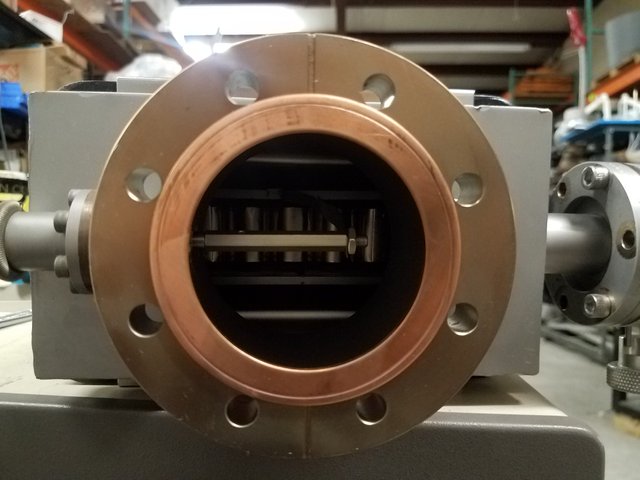
Fig 8. Looking into the Ion Getter Pump. I has a 82.25mm OD Conflat Copper seal, which is compressed by a edge on both contacting surfaces. It is kind of hard to see in the picture, but it has a circular knife edge. If you look at the copper seal, you can see a ring near the outer edge. That is formed by the knife edge pressing into it, when the pump is bolted to the gun. With a torque wrench, evenly, of course. Copper seals are used in very high vacuum applications and is over kill for this scope, but I guess it just came off the shelf this way.
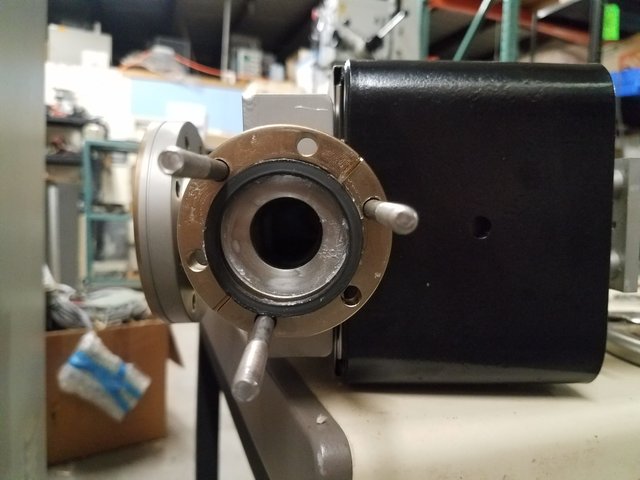
Fig 9. Looking at the bottom side of the IGP. Right below this sits the manual Gun Valve, which is of the paddle type.
The rubber seal is of a unusual type, that I have had to find before, but cannot recall the name :-P. Fortunately, every other seal is an ISO o-ring in this instrument. The bolts are 3/16 Socket Head and run through the Gun Valve Assembly.
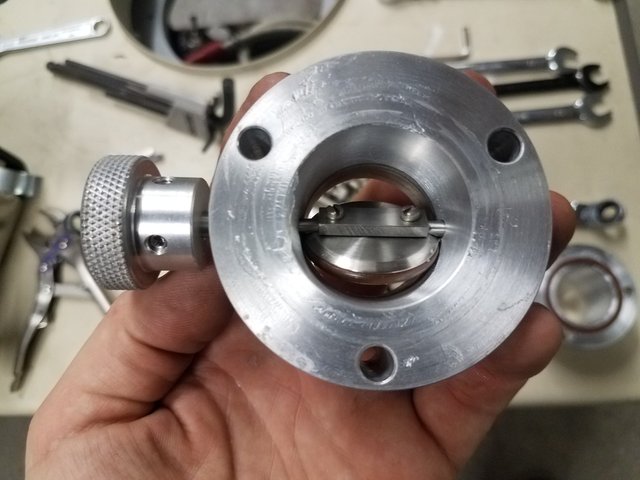
Fig 10. Gun Valve. Pretty straight forward, the body is made of aluminum and the paddle is some sort of stainless steel. I came across a manufacturing defect in a paddle valve once where there was a cavity right next to the o-ring that isolates the knob from the paddle. When it comes it comes to vacuum leaks, it was the last thing I was thinking of really!
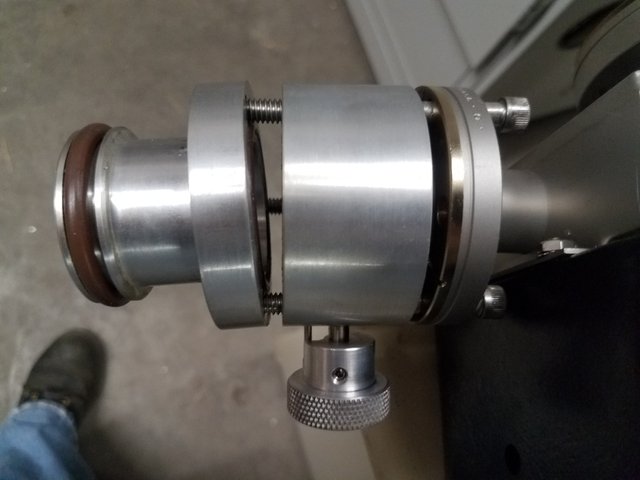
Fig 11. Left to right: Back pipe connector, Gun Valve Assembly and IGP. I put them all back together loosely so yall can see. All the o-rings are ISO sizes, and personally I prefer fluoroelastomer AKA Viton which I think these are.
All right, I am almost half way through all my pictures (the best ones of course) so that is it for this very late evening.
So many of these could use googlyeyes :o)
Very true! Googlys for days!
Posted using Partiko Android
Hi, @roguescientist84!
You just got a 0.01% upvote from SteemPlus!
To get higher upvotes, earn more SteemPlus Points (SPP). On your Steemit wallet, check your SPP balance and click on "How to earn SPP?" to find out all the ways to earn.
If you're not using SteemPlus yet, please check our last posts in here to see the many ways in which SteemPlus can improve your Steem experience on Steemit and Busy.
Congratulations @roguescientist84! You have completed the following achievement on the Steem blockchain and have been rewarded with new badge(s) :
You can view your badges on your Steem Board and compare to others on the Steem Ranking
If you no longer want to receive notifications, reply to this comment with the word
STOPTo support your work, I also upvoted your post!
Do not miss the last post from @steemitboard:
This post has been voted on by the SteemSTEM curation team and voting trail. It is elligible for support from @curie and @utopian-io.
If you appreciate the work we are doing, then consider supporting our witness stem.witness. Additional witness support to the curie witness and utopian-io witness would be appreciated as well.
For additional information please join us on the SteemSTEM discord and to get to know the rest of the community!
Please consider setting @steemstem as a beneficiary to your post to get a stronger support.
Please consider using the steemstem.io app to get a stronger support.
Hi @roguescientist84!
Your post was upvoted by Utopian.io in cooperation with @steemstem - supporting knowledge, innovation and technological advancement on the Steem Blockchain.
Contribute to Open Source with utopian.io
Learn how to contribute on our website and join the new open source economy.
Want to chat? Join the Utopian Community on Discord https://discord.gg/h52nFrV
Stay tuned, I am taking down a Zeiss EM109 next, and as soon as I can I am finishing the EM420 revive. My priorities change a lot around here. LOL