DIY: Pull and Reveal Card (Step by Step)
Hello friends! I love to personalize the gifts that I give to my loved ones because I think that the little details make it much more special since we dedicate time and effort to do something creative. That is why, the father's day gift I bought for my father was accompanied by this card that I made with my own hands. While I was doing it, I asked my mom for help to document the process to share this tutorial with you so you can duplicate it if you want to.
It is a very peculiar card because little by little the message that we want to deliver is revealed, this one is written in spanish and said: "Dad, I'm your number 1 fan". I have done this type of card on other occasions and I assure you that it is super easy and quick to make.

MATERIALS

- Colored cardboard.
- White paper.
- Marker.
- Scissors.
- Ruler.
- Glue.
PROCESS
Once we have devised the design, we select the colors with which we want to work. In this case, I decided to use red and black cardboards to maintain a masculine style.
Step 1. Cut a strip for the base of the card of 5cm wide by 30cm long and five squares of 5x5cm.

Step 2. Decorate the squares according to the selected design. In this case, I made decorations on white paper, red and gold cardboard and I used the black marker to add the text and some details.

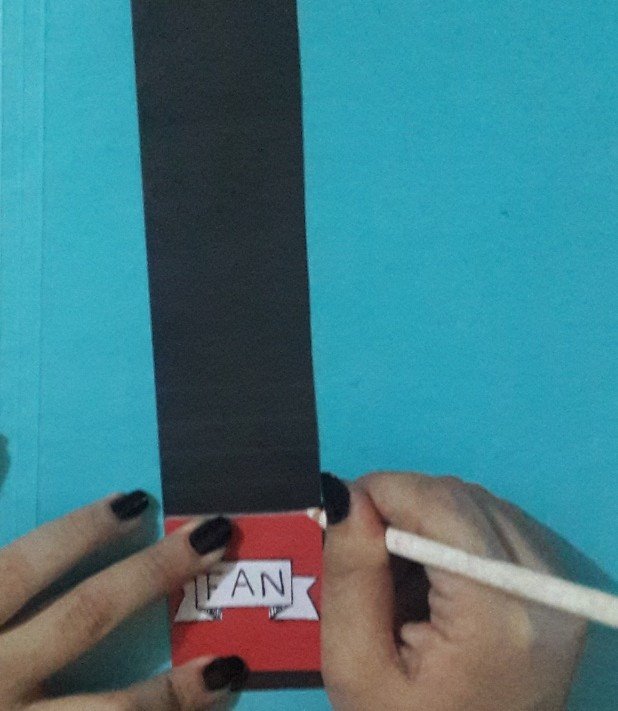
Step 3. Place one of the squares half a centimeter from the edge of the long strip to draw our first mark and, from it, make four lines leaving a separation of 1 centimeter between each one.
 | .jpg) | 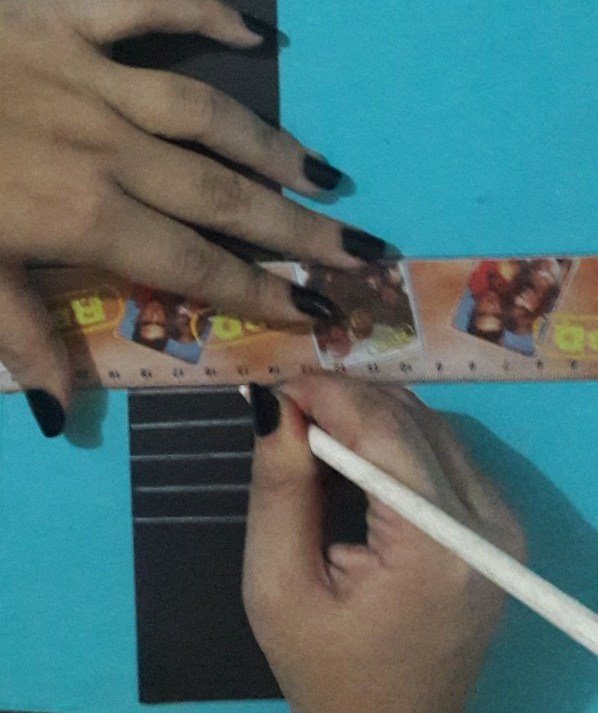 |
|---|
Step 4. Fold the card in each of the lines drawn in the previous step to create the folds that will make the card flow perfectly.
 |  |  |
|---|
Step 5. Stretch the strip again and proceed to glue the squares in the corresponding area. It is important to remember that we must start by pasting the last card of our sequence and finish with the first one as indicated in the following images.
 |  |  |
|---|---|---|
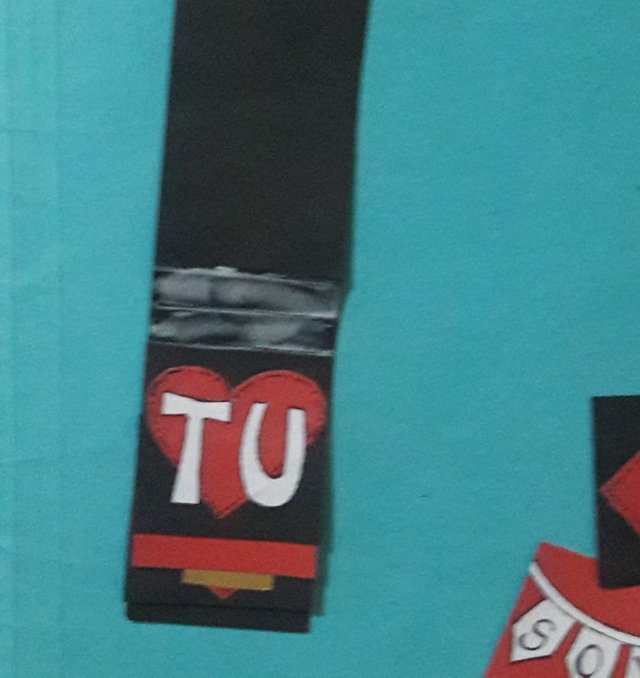 |  |  |
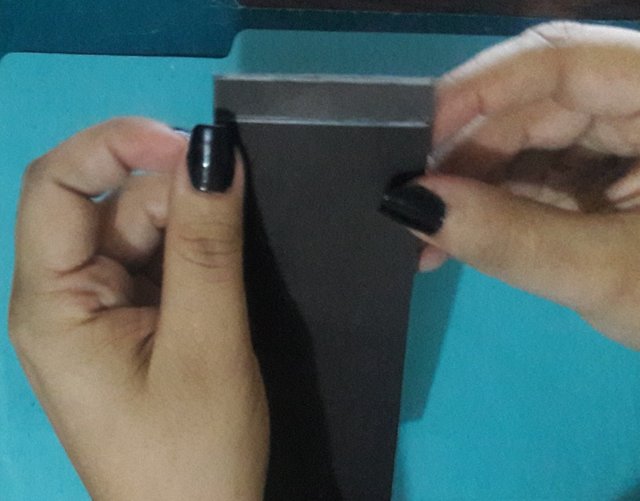
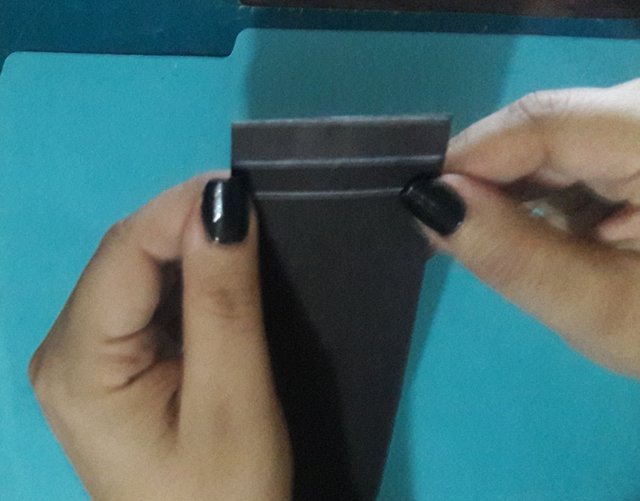
Step 6. Once the glue is dry, fold the remaining cardboard back and cut it triangular to create the strap that will operate the mechanism of the card.

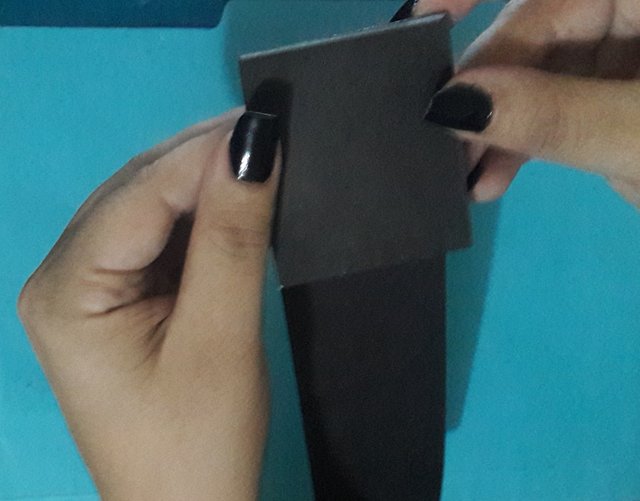
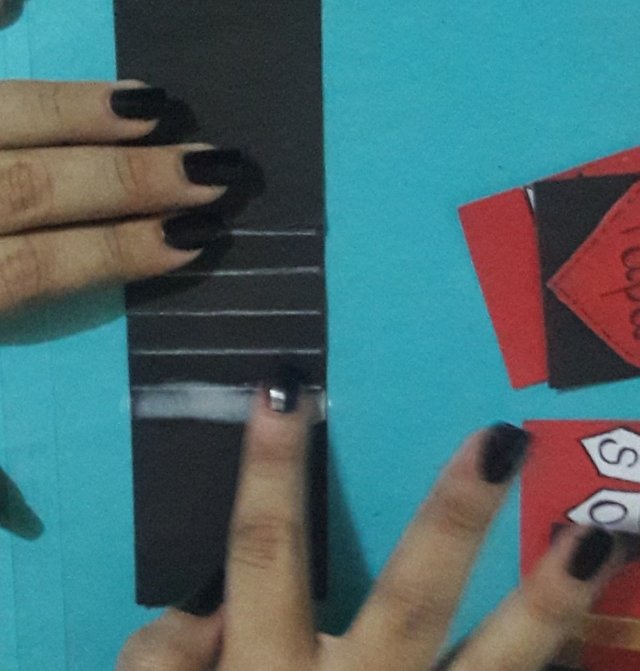
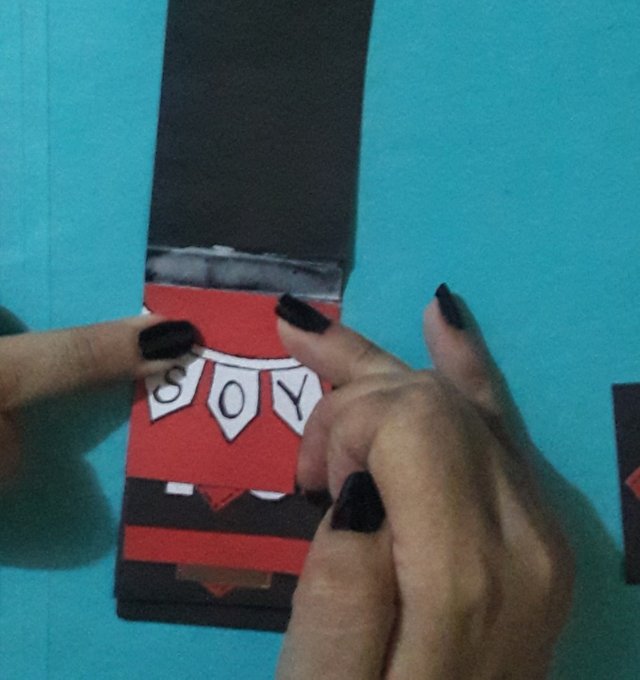
Step 7. Take a small strip of cardboard of the same color as the base and place it behind the card.
 |  |
Then, fold the excess of the strip inwards and glue it on the upper part of the base card, behind the last decorative square (in the following image I indicate the correct place with red arrows.)

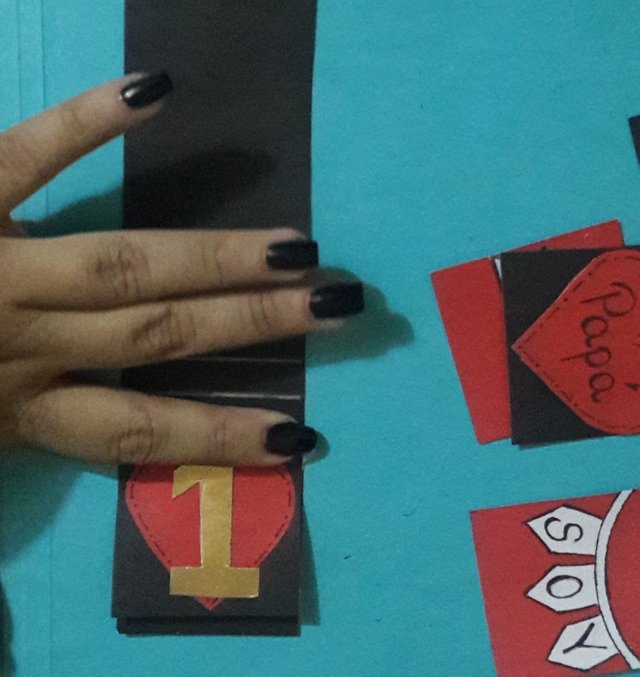
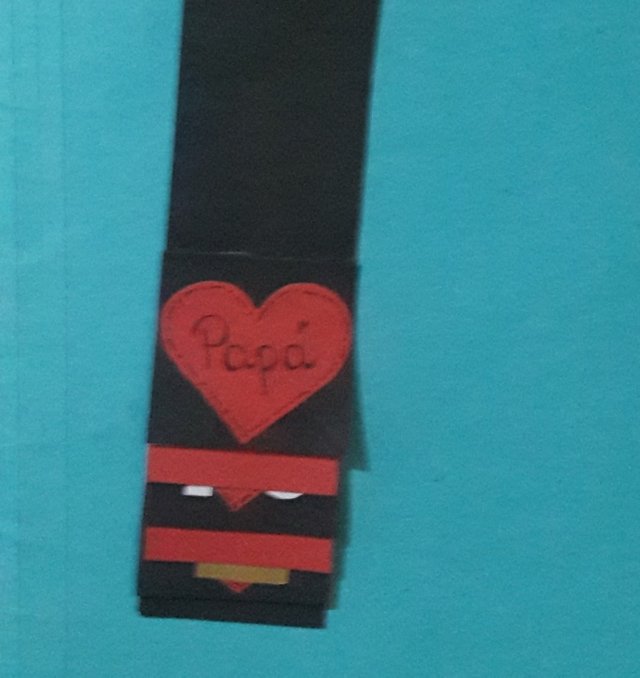
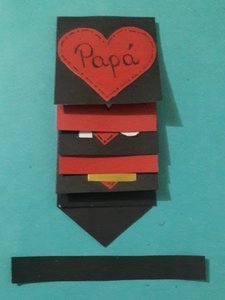
Step 8. Finally, add some decorative details and make sure that the mechanism of the card works perfectly. You just need to pull the strap down (as I show on the gif below) and you will se how the magic happens!.

FINAL RESULT
My dad loved this customised card that I added to the gift and I hope that you also like it and now feel encouraged to make a similar card for your loved ones, I'm sure they will also love it. Thanks for your support friends!

Posted from my blog with SteemPress: https://leribyleri.000webhostapp.com/2018/06/diy-pull-and-reveal-card-step-by-step
HI @leribyleri, I just stopped back to let you know your post was one of my favourite reads and I included it in my Fiber Ramble. You can read what I wrote about your post here
Join us on Mondays for Creatives' Coffee Hour at 1pm EDT in the Steemit Ramble on Discord.
Ohhh I'm so glad you like it! Thank you very much for the support and the invitation, I'll be there on monday!
Wow this is so cool., We have to love our father while we still can. God Bless You.
That's soooo true! A lot of people take them for granted but I do my best! Thanks for your support!
That is so clever! I love your design! Thanks for sharing this great idea! 😊
Thanks for passing by! I hope you can do one too in the future!
I love this post and the amazing care that you have shown to your father! This tutorial is very easy to follow, I want to try to make this one myself so I resteemed so I can find it for later. Thanks so much for sharing!
Ivy
Ohh nice! If you do it please send me the photo, I'm sure that would make me feel proud! Thanks for your help btw, you are awesome!
Congratulations! This post has been upvoted from the communal account, @minnowsupport, by leribyleri from the Minnow Support Project. It's a witness project run by aggroed, ausbitbank, teamsteem, theprophet0, someguy123, neoxian, followbtcnews, and netuoso. The goal is to help Steemit grow by supporting Minnows. Please find us at the Peace, Abundance, and Liberty Network (PALnet) Discord Channel. It's a completely public and open space to all members of the Steemit community who voluntarily choose to be there.
If you would like to delegate to the Minnow Support Project you can do so by clicking on the following links: 50SP, 100SP, 250SP, 500SP, 1000SP, 5000SP.
Be sure to leave at least 50SP undelegated on your account.
I love this post and suddenly i missed my father who's already in heaven!:(
Ohh I'm sorry, It was not my intention to make you sad, but I'm glad you like it, thanks for the support!
Awww. that's such a nice gift! this looks like fun to do.
It is indeed very fun to do and make it move Lol Thanks for the support!
Wao no deja de sorprenderme todos tus talentos.
Me gusta, no solo el diseño sino como lo presentas en el post. Excelente maquetado. Éxitos.
Gracias Mari me alegra mucho que te guste y espero que quizás esto te anime a hacer algo así también jeje No es tan difícil!
Es que no tengo a quien dedicarselo%20(503).png)
%20(516).png)
%20(482).png)
This post was shared in the Curation Collective Discord community for curators, and upvoted and resteemed by the @c-squared community account after manual review.
Thanks for the support!
Very cute! My kid loves making cards we'll have to try this.
Definitely! if you do it please send me a photo! I would love to see it!