AI Camera for Raspberry Pi/Arduino
If you have been following the news recently, there was an explosion of start-ups developing chips for accelerating ML(machine learning) algorithms inference and training. However most of those chips are still under development and not really something your average maker can get hands on. The only significant exception so far was Intel Movidius Neural Compute Stick, which is available for purchase and comes with a good SDK. It does have a few significant disadvantages - namely the price(around 100 USD) and the fact it comes in USB stick format. It's great if you want to use it with laptop or Raspberry PI, but what if you want to do some image recognition projects with Arduino? Or Raspberry Pi Zero?
Sipeed MAix: AI at the Edge
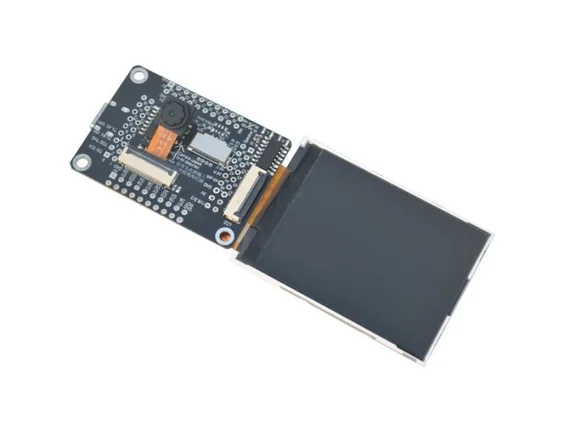
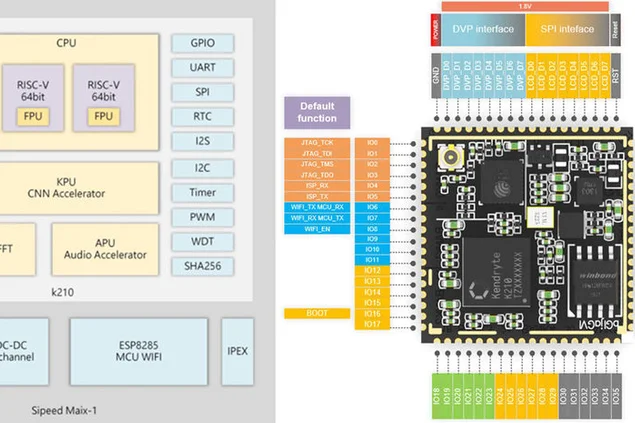
Not so long time ago I got my hands on Sipeed M1w K210 development board, which has dual-core RISC-V 64bit CPU and boasts an on-board KPU (Neural Network Processor), specifically designed for accelerating CNN for image processing. You can read more details here.
The price of this board frankly shocked me, it is just 19 USD for full fledged AI-on-the-edge development board with Wi-fi support! There's a caveat though(of course there is): the micropython firmware for the board is still in development, and overall it is not too user friendly as of now. The only way to access all of it's functions right now is to write your own embedded C code or modify some existing demos.
This tutorial explains how to use Mobilenet 20 class detection model to detect the objects and send the detected object code through UART, from where it can be received by Arduino/Raspberry Pi.
Now, this tutorial assumes you're familiar with Linux and the basics of compiling of C code. If hearing this phrase made you a little dizzy :) then just download the code from my github repository and then skip to Step 3, where you upload my pre-built binary to Sipeed M1 and skip the compiling.
Step 1 Prepare Your Environment
I used Ubuntu 16.04 for C code compilation and upload. It is possible to do that in Windows, but I myself didn't try it.
Download the RISC-V GNU Compiler Toolchain, install all the necessary dependencies.
git clone --recursive https://github.com/kendryte/kendryte-gnu-toolchain
sudo apt-get install autoconf automake autotools-dev curl libmpc-dev libmpfr-dev libgmp-dev gawk build-essential bison flex texinfo gperf libtool patchutils bc zlib1g-dev libexpat-dev
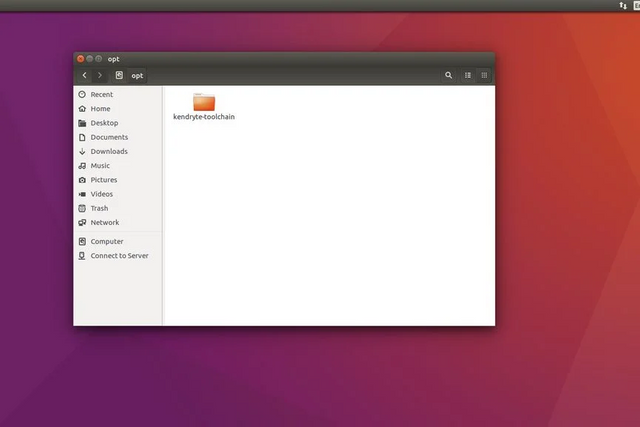
Copy the downloaded toolchain to /opt directory. After that run following commands
./configure --prefix=/opt/kendryte-toolchain --with-cmodel=medany
make
Add /opt/kendryte-toolchain/bin to your PATH now.
You are now ready compile the code!
Step 2 Compile the Code
Download the code from my github repository.
Download Kendryte K210 standalone SDK
Copy /kpu folder from my github repository to /src folder in SDK.
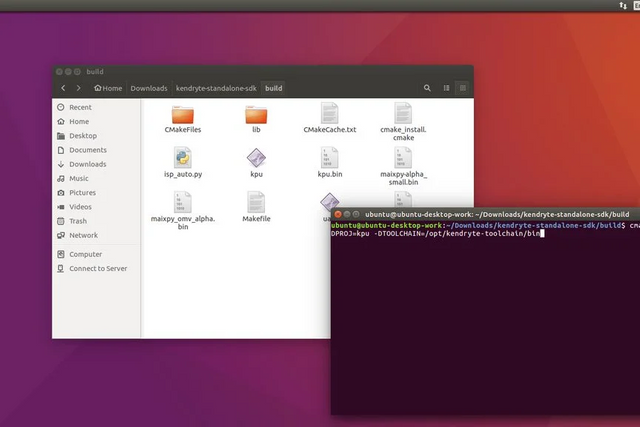
Run following commands in SDK folder(not /src folder!)
mkdir build && cd build
cmake .. -DPROJ=project_name -DTOOLCHAIN=/opt/kendryte-toolchain/bin && make
where project_name is the name of your project(up to you) and -DTOOLCHAIN= should point to the location of your risc-v toolchain(you downloaded it in the lst step, remember?)
Great! Now hopefully you'll see compilation finished with no errors and you have a .bin file you can upload.
Step 3 Uploading the .bin File
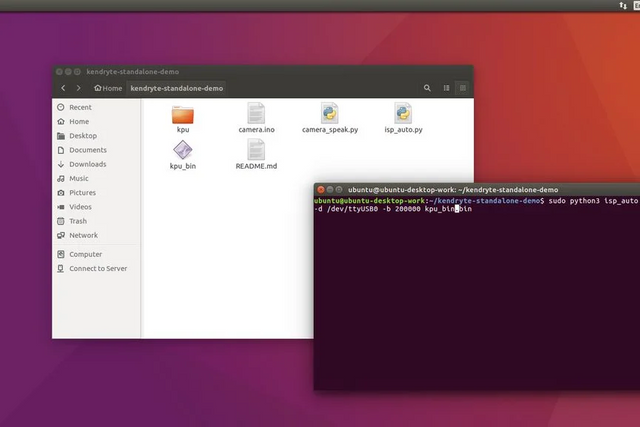
Now connect your Sipeed M1 to the computer and from the /build folder run the following command
sudo python3 isp_auto.py -d /dev/ttyUSB0 -b 200000 kpu.bin
Where kpu.bin is the name of your .bin file.
The upload usually takes 2-3 minutes, after it's done you'll see the board running 20 classes detection. The last step for us is to connect it to Arduino mega or Raspberry Pi.
!!! If you just came from the Introduction !!!
Run the following command from the folder where you cloned my github repository
sudo python3 isp_auto.py -d /dev/ttyUSB0 -b 200000 kpu_bin.bin
The upload usually takes 2-3 minutes, after it's done you'll see the board running 20 classes detection. The last step for us is to connect it to Arduino mega or Raspberry Pi.
Connecting to Arduino

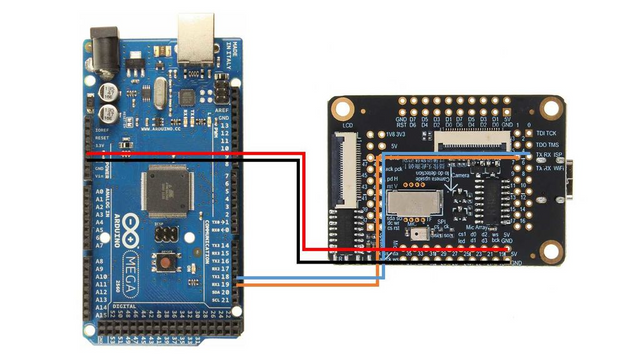
I used the Arduino Mega with Seeed Studio Mega Shield, this is why I soldered a Grove connector to Sipeed M1 board. However you can just use jumper wires and connect Sipeed M1 directly to Arduino Mega, following this wiring diagram.
After that upload the camera.ino sketch and open the Serial monitor. When you point the camera to different objects(the list of 20 classes is in the sketch) it should output the name of the class in the serial monitor!
Congratulations! You now have working image detection module for your Arduino!
Connecting to Raspberry Pi
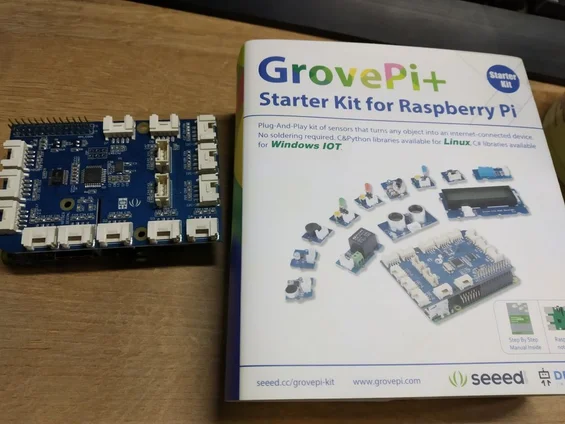
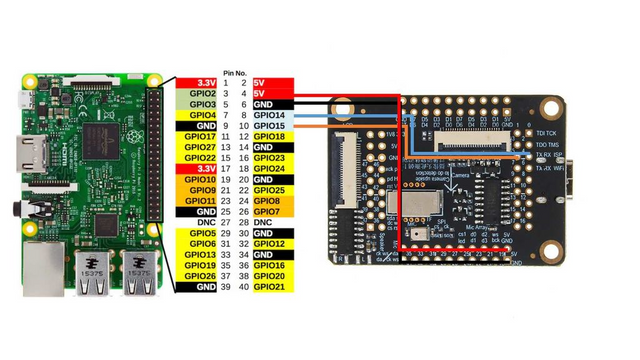
I used Grove Pi+ hat for Raspberry Pi 2B, but again, as with Arduino you can just directly connect Sipeed M1 to Raspberry Pi's UART interface following this wiring diagram.
After that launch camera_speak.py and point the camera to different objects, the terminal will output the following text "I think it is " and also if you have speakers connected, it will speak this phrase out loud. Pretty cool, isn't it?
Conclusion
This is very exiting times we're living in, with AI and machine learning penetrating all the areas of our lives. I'm looking forward to the development in this area. I am keeping in touch with Sipeed team, and I know they're actively developing micropython wrapper for all the necessary functions, including CNN acceleration.
When it is ready I will very likely publish more instructables on how to use your own CNN models with micropython. Think of all the exciting applications you can have for a board that can run your own image processing neural networks for this price and with this footprint!
That's pretty cool, indeed.
Of course, one of the immediate questions is how hard is it to increase the size of the recognized objects from the image feed? 20 is nice, but odds are they aren't the most important 20 to my particular project. Is that something that is trivial or does it require retraining the neural network from more appropriate data?
Posted using Steeve, an AI-powered Steem interface
They have a converter tool that allows you to convert your tf and tf lite models to the format that can be used by KPU. So, the solution here would be to train your NN for recognizing specific objects you need. I plant to publish a tutorial on how to do that as well
https://www.instructables.com/id/Transfer-Learning-With-Sipeed-MaiX-and-Arduino-IDE/
Here is my new article on how to train your custom model! Since you mentioned it before, thought it might be useful.
Congratulations @wintermuteai! You have completed the following achievement on the Steem blockchain and have been rewarded with new badge(s) :
Click here to view your Board
If you no longer want to receive notifications, reply to this comment with the word
STOPHello @wintermuteai! This is a friendly reminder that you have 3000 Partiko Points unclaimed in your Partiko account!
Partiko is a fast and beautiful mobile app for Steem, and it’s the most popular Steem mobile app out there! Download Partiko using the link below and login using SteemConnect to claim your 3000 Partiko points! You can easily convert them into Steem token!
https://partiko.app/referral/partiko