Watch my Queen B come to life - with process photos and art tips
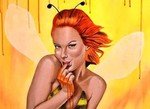
I had this idea in my head for a while now of creating some human/animal/insect hybrids, and Queen B was the first one in what will be a series of paintings throughout the year.
I wanted to make sure that she had a sweet but sassy look to her, kinda seductive but innocent at the same time.
So with an idea in my head and the creative juices following, I pulled out a canvas, the same size of my last piece enchantress, cleared off my work table and pulled out a stick of vine charcoal.
I started out with the initial drawing as usual, just using a thin stick of vine charcoal because it's very easy to erase, and I erase a lot! I tend to change my mind and not like how anything looks right off the bat so constantly change little things until I'm happy with the design.
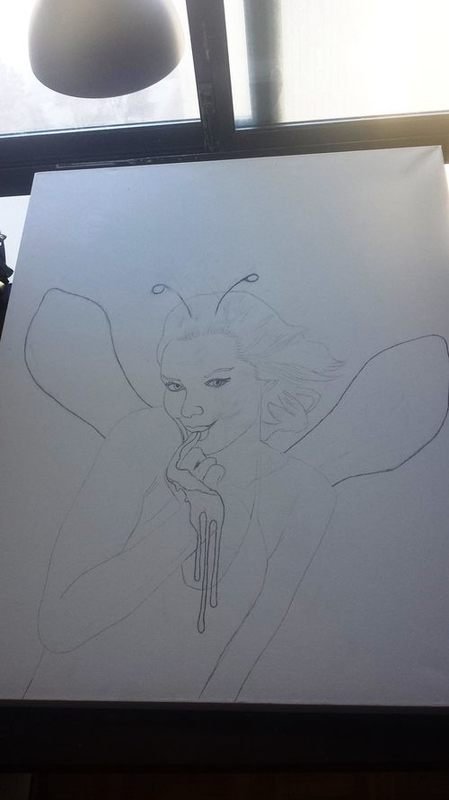
Art tip
spraying the entire canvas with hairspray helps fix the drawing to the surface and avoids the graphite or charcoal getting into the paint and muddying up your colours.
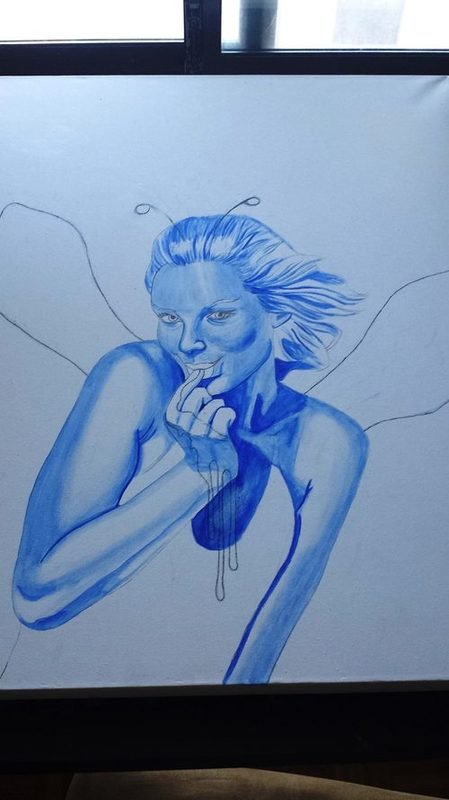
I pull out my Ultramarine blue, because like I've said before, the blue underpainting for me is crucial, It really helps bring out realistic skin tones, and get great darks where they need to be. so I start by painting in the darkest darks with pure blue paint, then gradually start thinning it down with flow improver and water to get a creamier consistency and a more workable paint for the parts that are lighter. In some parts, I just use water and a dab of paint for the really pale blue areas, but believe it or not, even those faint blue areas make a big difference in the underpainting.
With that done, I start out with what will be the first of many layers of skin tone. I pull out my skin jar (a jar of paint where I keep premixed base skin colour, just to clarify .LOL) I mix in a little more yellow and burnt sienna, then thin it down with my flow improver and start to cover every part of the painting that has skin, painting right over the blue underpainting.
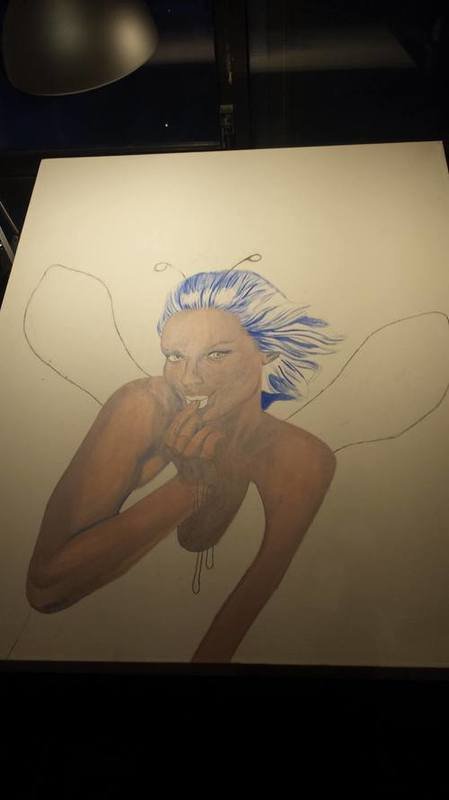
The first layer of skin tone, helps to coat the entire surface and make it a bit smother for the following layers, it also covers up the blue but still allows you to see through the transparent layers as if they have subtle shadows.
I move on to her dress, and I really wanted something that would be "bee" related so I decided to go with Yellow and black stripes.
I pulled out my liquid acrylics and watered them down with plain ole water. Once they were very watery, I started painting on each stripe using a thick brush until her entire dress was covered. I then grabbed my jar of coarse salt (which has to be one of my favorite tools to use in a painting) and started to sprinkle it all over the areas I had just painted. In certain spots I used more watered down paint and painted over the salt, it gives it a deeper and different pattern and I really wanted to get a buzzing effect, as if her dress was made of bees.
Art tip
sprinkling salt onto wet watery paint, can give the piece some amazing texture and depth. Salt can be used with watered down acrylics and watercolour, but not oils.
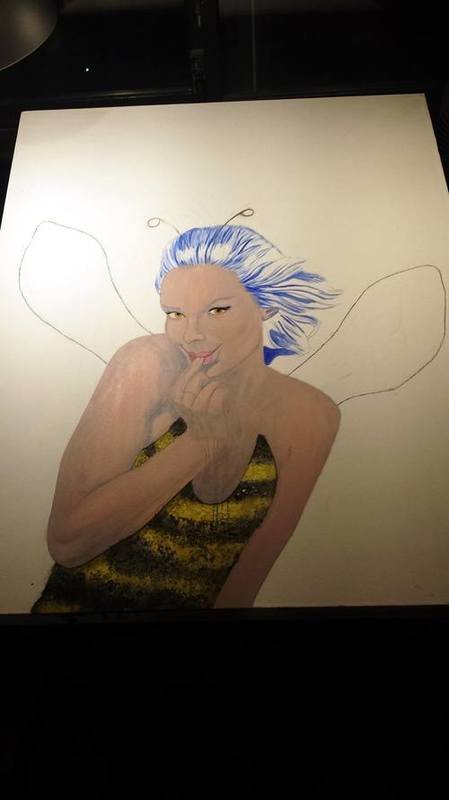
While that's drying, I paint in her lips with a rosey magenta and her eyes with a new colour I had just picked up called, "Quinacridone nickel azo gold" yeah, I know, its quite the name, and an amazing colour, almost like an orangey brown golden honey..LOL
I thin down my new "Quinacridone nickel azo gold" colour (which btw I can't say out loud without getting my tongue in a knot) and start layering in her hair adding a dark mixture to the shadow areas.
Now it's time to start re-enforcing the shadows, which I did by mixing my skin base colour with some burnt umber and blue until I got a tanned shadow colour to start creating some depth.
I add some rose to her cheeks, start painting in her eyebrows and mix together some skin tone with white to get some mid tones and highlights, at this stage she starts coming together nicely and I can start thinking about the final details and the background.
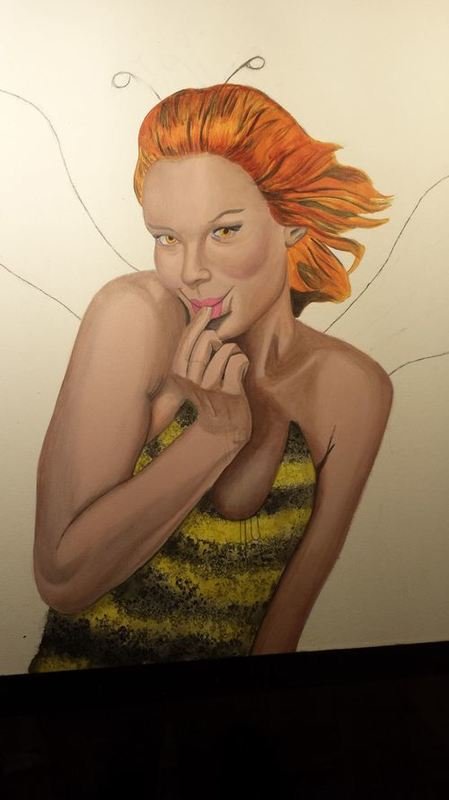
For the background I wanted a mixture of yellows, oranges and browns to give it the feel of a beehive and honey, so I brushed on some blending medium all over the canvas and just starting mixing the colours together until I got the look I wanted.
Once that was dry I thinned down my new colour and started to let it drip down the canvas and then added some coarse salt to it while still wet.
I start on her wings by making a translucent mixture of honey and white, I wanted to make sure that you could see a bit of the background behind her wings so I tried to make the mixture as thin as possible.
Now getting all of the salt off of the canvas was a huge pain with this piece, it got stuck in the blending medium a bit and I actually had to pick some out grain by grain.
I put on the finishing touches, a little white here, a dab of white there, I add the focal point of her gaze with some bright highlights in her eyes, paint in her antennae, fill in the dripping honey and voila!! she's all done and ready to fly.
Below is the finished piece
Title: Queen B
Medium: Acrylic on canvas
Size: 24x30
Hope you like here :)
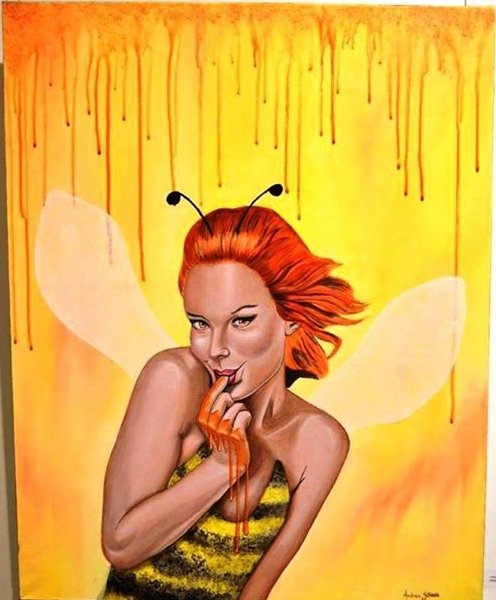
“This piece has to be one of my personal favourites so far, I love how she came out and I actually borrowed a friends cheek bones to make Queen B’s more prominent”
If you enjoy my work, please click this button to  go on, you know you want to!
Also check out my work on the below sites, just click and away you go :)


Really great blog and amazing work, keep it up!
Thank you @future24 I really appreciate it :)
You are very talented! I like it.
Thank you @the-future I really appreciate that :)
Beautiful. I love the warm colours on this and the bee costume:)
Thanks @thecryptofiend it was fun to use a different colour palette than what I would normally use :)