My Art in the Making - Seascape Part 3, The Final Details
Hi guys
Here's the final part to this article and if you missed the first 2 parts,
Check out the link to Part One and Two:
https://steemit.com/minnowsupport/@andrew.tischler/my-art-in-the-making-seascape-part-1-sketching-and-blocking-in
https://steemit.com/art/@andrew.tischler/my-art-in-the-making-seascape-part-2-modelling-individual-zones-and-refining-the-image
Step Five – Finessing the scene
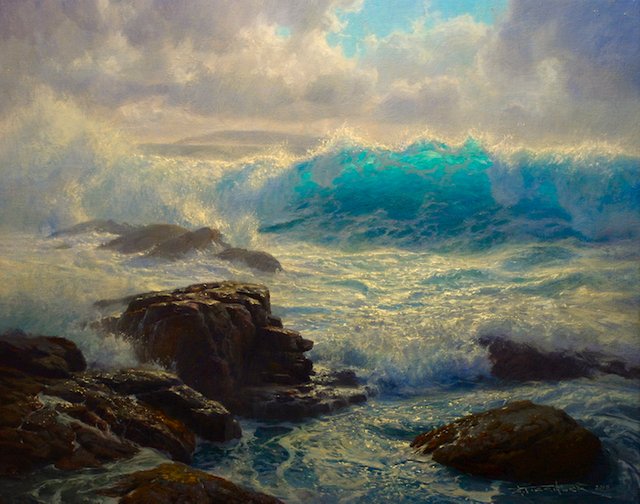
Getting rocks to look solid and stable can be a bit of a challenge. Here the drawing aspect in the composition planning stage can be crucial. It plays out here in the final stages. Once I have my forms in the correct areas, I start to really hone in on the materiality of the granite. The shadows are comprised of various mixtures of dark and de-saturated hues. I do not use black. I find that I have difficulty getting this to coordinate and diffuse into adjacent colours without it looking flat and lifeless. Rather than using black, I mix a variety of dark tones comparable to black that have added dimension. My favorite is Ultramarine Blue and Burnt Umber at a 50/50 mix. The two cancel each other out, and I am able to push this either into the blue or brown ranges. Similarly, I can use another mix for even deeper shadows, of Pthalo Green, Quinacridone Magenta and Burnt Umber. At this stage I use these darks to define where the shadows occur.
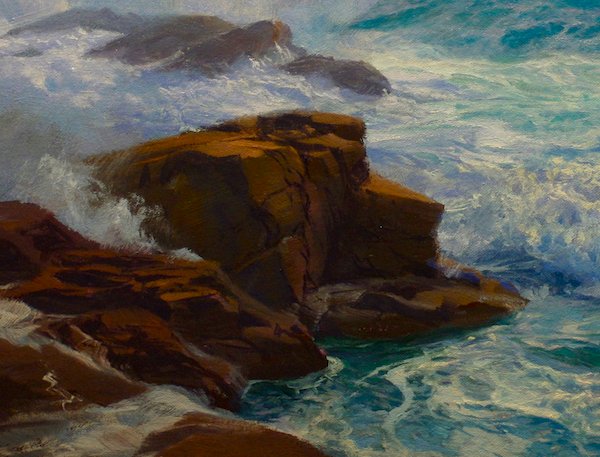
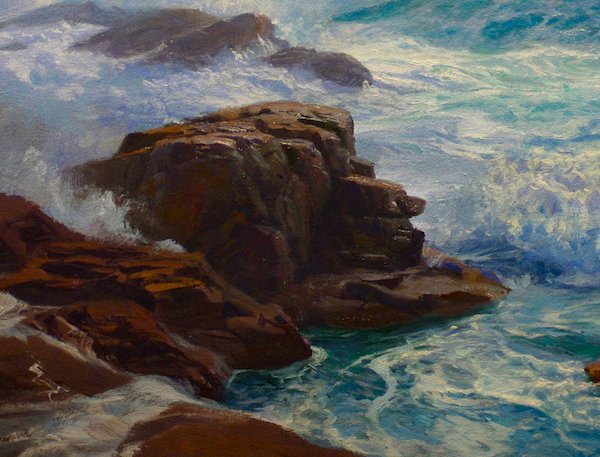
In addition to the darker tones, I focus on reflected light. The shadows can’t all be black! We must have another element in the mix to give our form definition and life. The reflected light is a variation of rocky tone mixed with Yellow Oxide, Umber, Burnt Sienna, Quinacridone Magenta, and the same trio of blues. However, I don’t use all three of these at once and mix a large puddle on the palette. That would spell mud, instantly! I mix no more than three colours at a time, and compartmentalize my strokes. The colour of the granite is thus comprised of a variety of tones. The multitude of marks complete the picture.
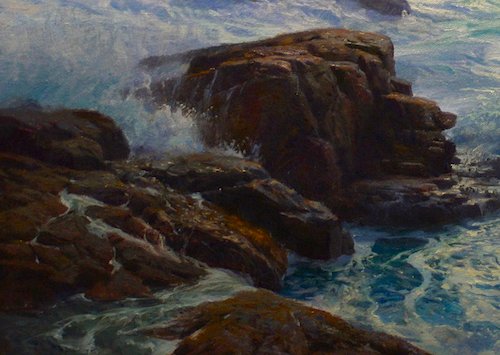
Again, the interaction of rock and water is something that I wish to highlight in the painting. By added water spilling into the rock zone, I am able to further define the form of the granite. The area of the lower left in the foreground where a tendril of sea spill-off snakes its way through a crack, adds yet another dimension to the scene. Where solid rocks enter water bodies, white water accumulates at the base.
Step Six – The Final Details
Sea Mist and Spray
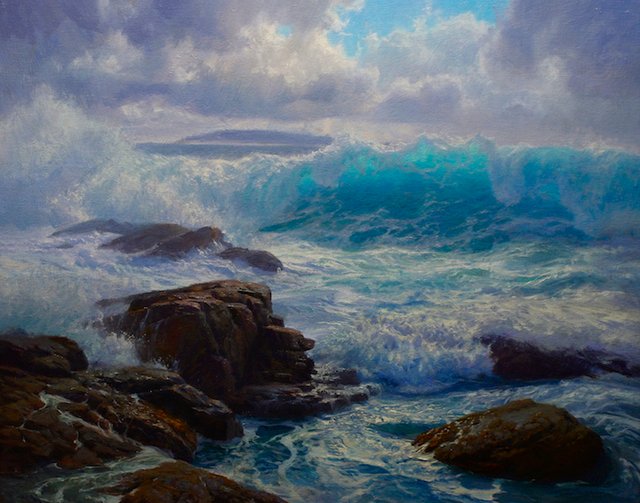
The final details are what make a painting. My ultimate goal is to achieve a convincing sense of reality. Here in this stage I focus on the materials portrayed in the scene and tease out the individual visual effects they display. Seas mist and spray can be added as a diffused glaze of medium mixed with Titanium White and varied blue shades used throughout the scene. This glaze forms a film that obscures the underlying layer ever so slightly. This is to mimic the effect that wave spray has. It hides and obscures elements behind it. Also, I focus on limiting its range in places. As the spray begins to fade out, I use less opaque white, and more medium. More and more is visible toward the periphery of the splash zone. It may be only a small area, and very subtle, but this little trick can make a huge difference.
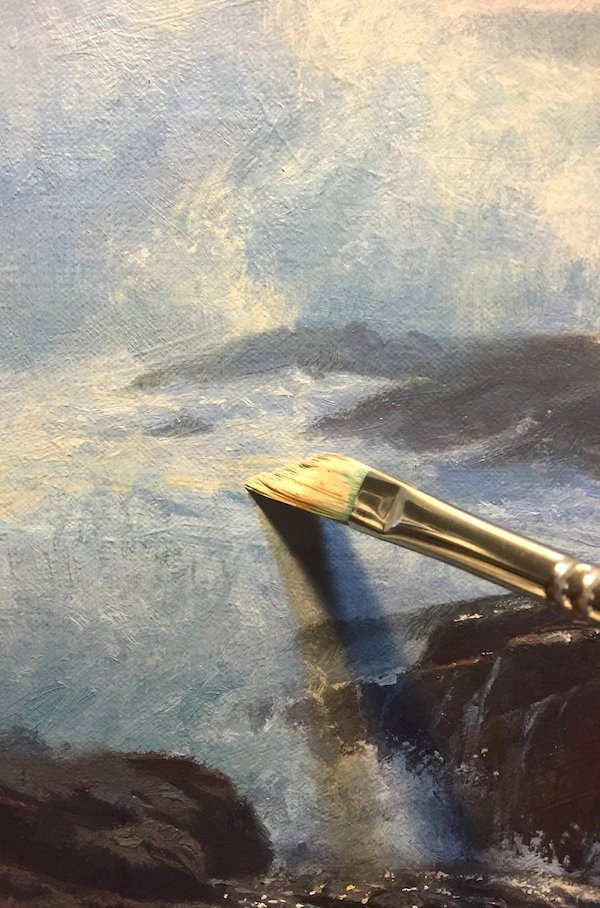
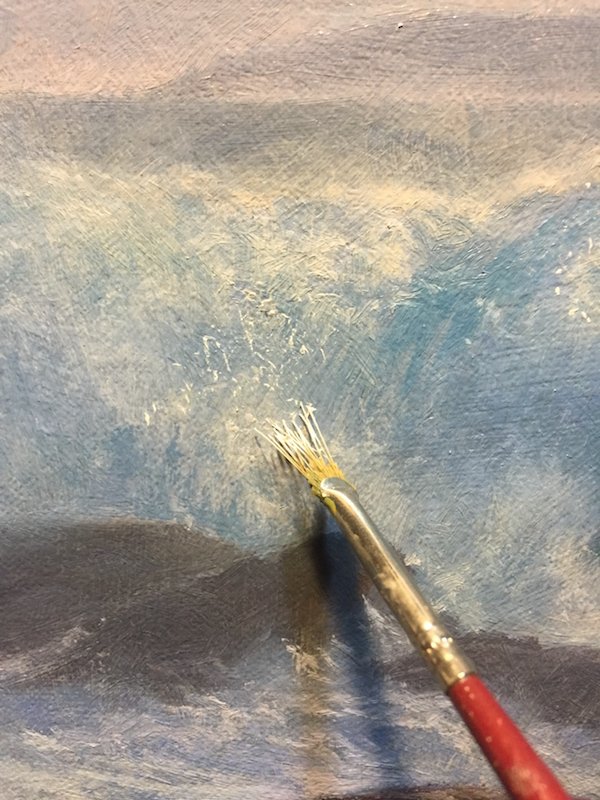
I use a fan brush loaded with Titanium White, and warm tones Yellow Oxide and Burnt Sienna. The paint is loaded towards the tips of the individual hairs of the brush and then delicately laid in place. The accumulation of marks give the effect of white water spraying upwards and breaking apart.
Glazing Effects
After completing the vast majority of the painting it’s time to re-visit the colour. I am happy overall with the effects achieved, however I want a slightly different hue across the painting that may allow all of the colours to gel. Colour coordination happens when there is a common element throughout. I also want to change the tone of the light only a little. I decide to go for a golden-glaze of transparent Langridge Nickel Azo Yellow, and Liquin Original.
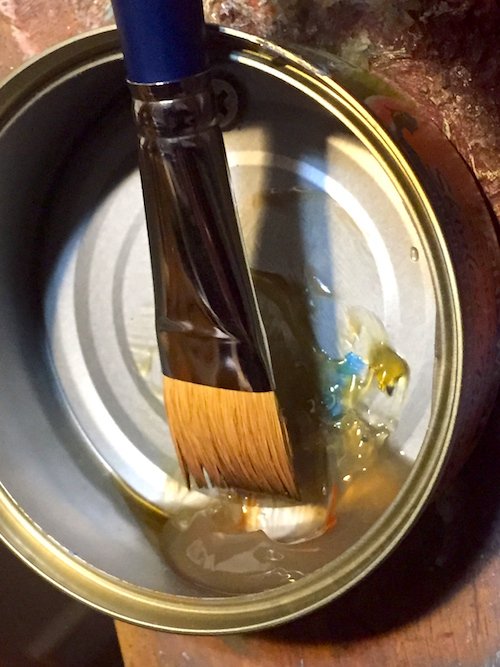
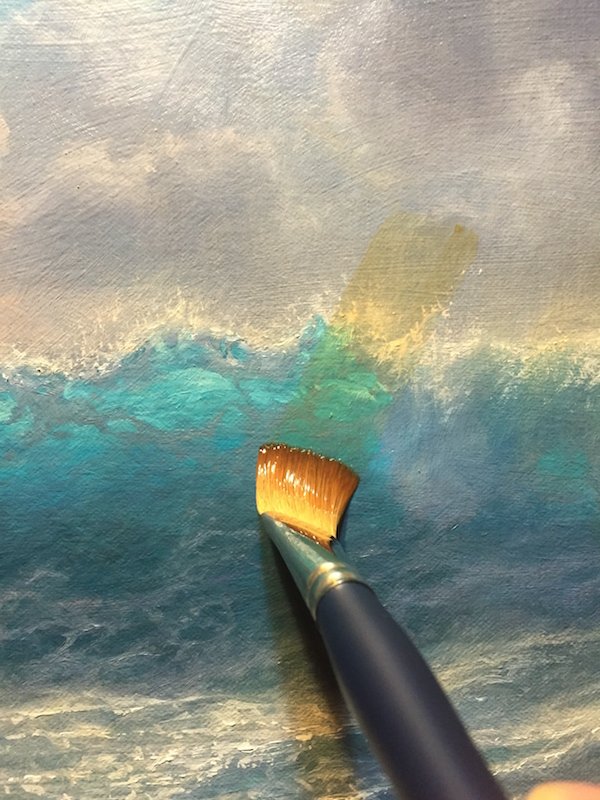
The Glaze is applied with a flat sable. The softness of the bristles allows the brush to mold and form into the grooves of the painted surface. I am using pure clean medium as the body of my glaze and just a hint of the transparent Nickel Azo Yellow. When painted on thinly, the panting starts taking on a more classical feel.
Saving your Tonal Best For Last
I just love that tones across the painting can seem to vary to such an extent, that it creates the illusion of a much more diverse range than is actually present. All we have is pure white, and the darkest black we can muster that encompasses our entire tonal range. It is the relationship between these tones that gives the illusion of light. When teaching workshops, my students will often hear me say “Save your tonal best for last”. This means that if Titanium white is the lightest we can go. Titanium White will be our brightest bright and therefore only should be reserved for the very end. Where we have a reflection of a direct light source, may be appropriate places to use this pure white. I apply the smallest flecks of paint I can use a synthetic round that had been stiffened with plenty of use. This starts to form a “sparkle” of dancing light across the surface of the white water.
For more video tutorials you can find me on YouTube @ youtube.com/user/AndrewTischlerArt/
or hit me up on my website @ www.andrewtischler.com
ENJOY! and let me know what you think.
Wow!! Beautiful colors. The way you have shown the light shinning through the top of the wave is spot on. Love it.
nice art good job andrew
Thank you !
Beautiful! Keep on posting!
Nice work.
Wow beautiful work!
I appreciate your comment, thank you.
Wow! @andrew.tischler
That is a great painting. Keep up the good work.
great post
wow you are a great artist, you paint HD my friend. I like what you did, thank you for sharing this i lucky to check your blog to see this beautiful painting @andrew.tischler
Thank you for checking it out, I hope you stick around for more!
This is so impressive.
I will follow you for more. I have a friend who paind and i will show to him what you did.
It's perfect!
Cheers @dasarts
great technique,you have a great eye for light and color...nice piece!
Thanks for your kind words.