Robin in Nest: Mixed Media Art Lesson
Hi Everyone, I am a well-being professional and fine artist. I live in Australia and teach art for positive well-being!
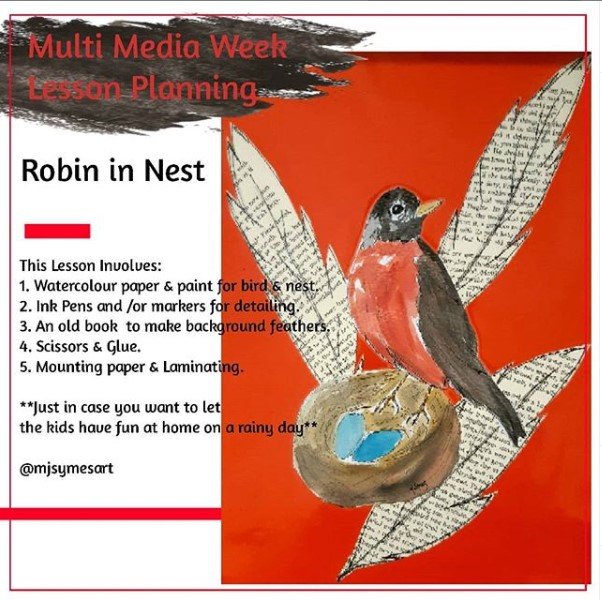
This is a lesson I created for my children's beginner, group art classes. It's a mixed-media lesson I called "Robin in Nest".
I decided this lesson was worth passing on, as not only was it incredibly popular, I thought it may help some of you with an easy art lesson, or afternoon activity for your children at home on the holidays!

Here is a simple, step-by-step lesson plan:
Introduction & Practice: Show the students a completed example of the Robin in the nest with eggs, and explain this is the prominent feature of this mixed-media art piece.
Provide each student with a sheet of paper (half A4 size) a pencil and an eraser.
Have the students practice sketching the bird, nest and eggs. You may need to demonstrate this yourself.
Some important tips for re-drawing this piece are as follows; start with the head of the bird and ensure the head is drawn in the center of the paper towards the top of the page. This allows room for the bird's body and also the nest! A helpful tip for students when drawing the nest is to think of it as a 'bowl' shape.
Stage 1 (Robin, Nest & Eggs): Once students can draw the basic outline of the Robin, nest and eggs, provide them with either thick paper, pencils and markers, or watercolor paper, paint, brushes and ink (either works well) and instruct them to draw their best and original version of the Robin, nest and eggs. Once complete and fully dry, set aside.
Stage 2 (Background Feathers): In this stage of the mixed media project, provide students with paper of choice (I used old book paper in the above example). Also provide pencils, fine black markers, and examples of feather outlines. Again, you may need to demonstrate a simple method for drawing the outline of a feather.
Odd numbers work best in art and design, so instruct students to draw 3 or 5 feathers on their paper and outline in black fine maker.
Stage 3 (Cutting and Assembling): The students now need to cut out their bird and nest and feathers. They then can choose a colored background piece of paper and have fun assembling their pieces on the page the way they like.
Stage 4 (Lightly Glue and Background Extras): Have student place a small amount of glue (glue sticks work best for this) on the back of their pieces to hold design in place on background paper.
The students can then decide if they would like to add any extra elements to their piece before laminating. Some of my students used markers and added extras to their background paper such as; hearts, dots, stars and words. This really personalized their pieces.
Stage 5 (Laminating): To secure the students' mixed media art pieces laminate and you're finished!
Take care, have a great day, Melanie.
Cool lesson :)
Will we see more?
Thanks!