How to Fix a Stabbed Painting
What do you do when your son stabs your painting with a spoon?
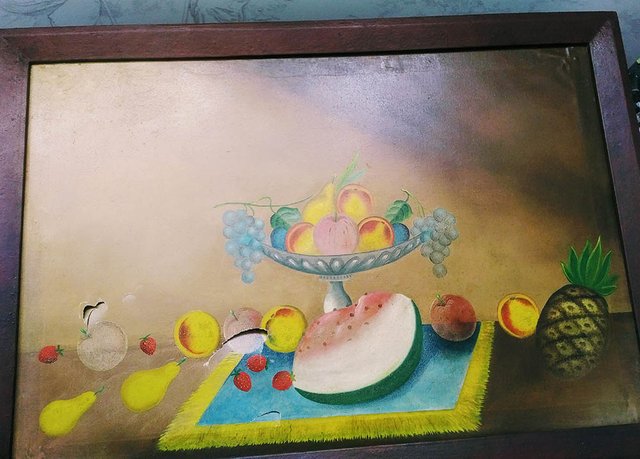
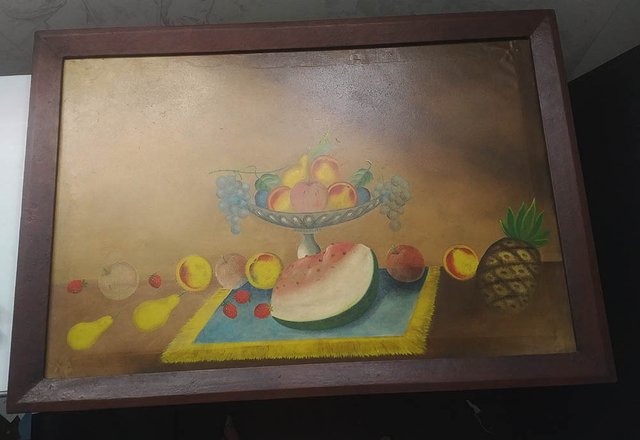
This is the question I had to answer when a customer asked me if I could fix this painting.
It was a special painting in his family, a collectible, and his then 2-year old son got a little excited one day with the silverware, adding a new dimension to the surface of the picture.
"I haven't done anything like this before, " I more or less told the customer when he asked if this kind of repair was possible. "But let's give it a try."
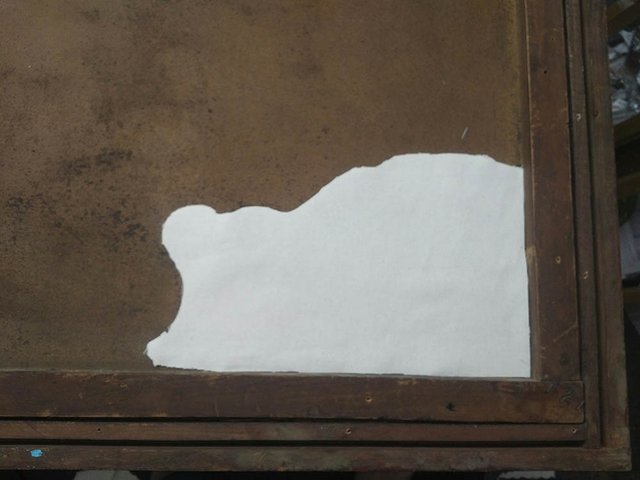
And so I laid the canvas out on a table and assessed the damage. There were several punctures in the canvas, so it wasn't going to be easy.
I researched on how to repair paintings, and many websites suggested using a patch, but that it might be possible to see it from the other side, so you have to be careful with a repair like that.
What do you use for a patch?
I had some canvas lying around, so I figured it would be good to use the same material.
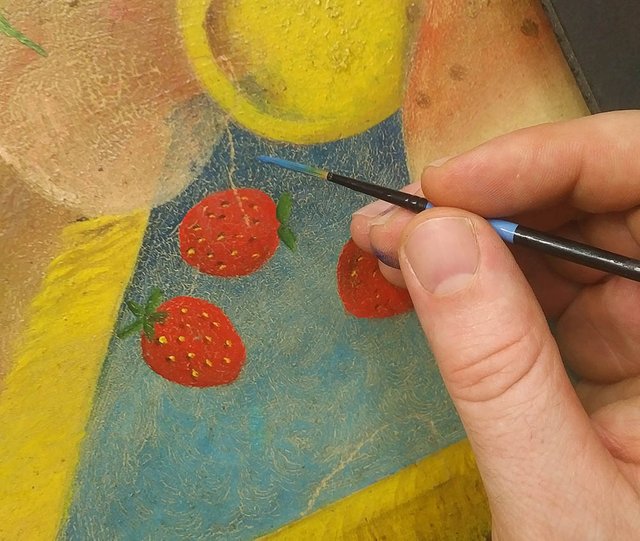
And then just to make sure it didn't leave an impression on the other side years later, I cut the fabric to match the shape of the painting's contours--in this case fruit in the still life.
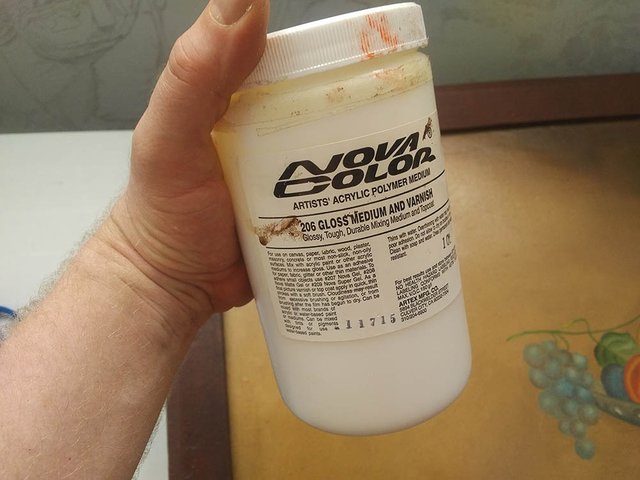
I applied gloss medium (clear acrylic without pigment that also can be used as an adhesive) to the patch and praying a quick prayer, weighted it down. This step is critical. If I misaligned the patch or caused the holes in the canvas to buckle, after the adhesive dries, the damage would be permanent.
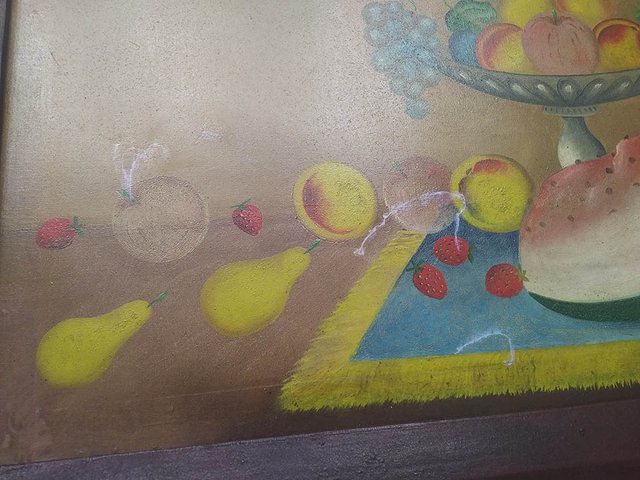
30 minutes later I took the weight off and inspected the other side. How did it look? Excellent. The tears were lined up almost perfectly.
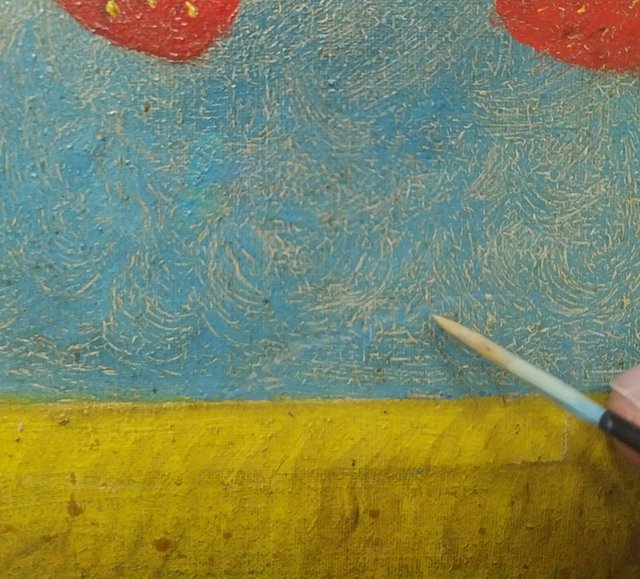
But this is where the real work began. I had to fill the cracks in. The tears still left very noticeable crevices in the surface of the canvas. It had to be filled in.
So I thought, let's use some acrylic medium and fill in the holes like wall spackling. It does work, I discovered, but it takes several layers to do the job. I applied each layer with a brush and then began to scrape over it with a flat-edged blade.
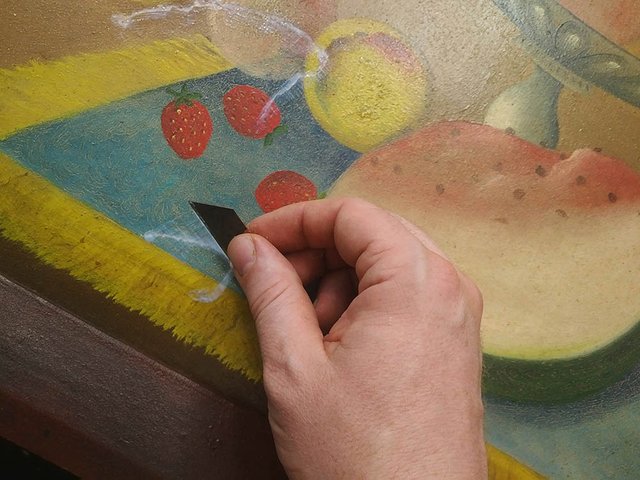
Eventually, the surface was flat. I used a piece of shop towel to stipple the last layer--helping it to match the texture of the canvas, which is slightly putted.

Fantastic.
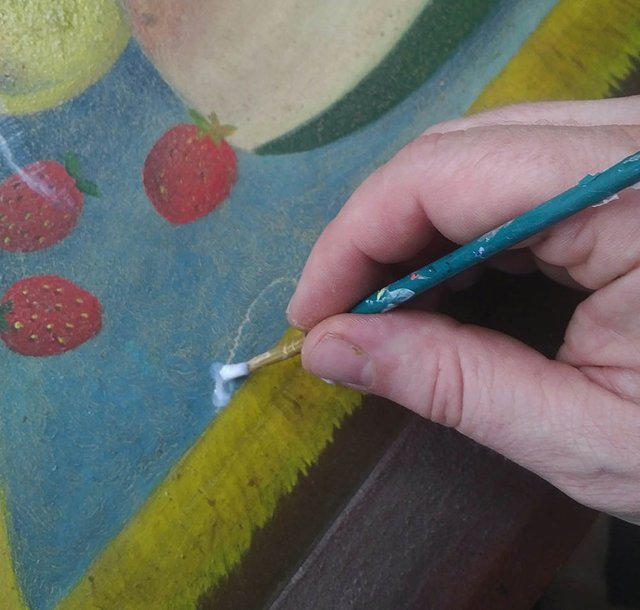
Now, with the surface matching perfectly it was just a matter of matching the color of the painting to fill in the little lines and cracks left by the tear.
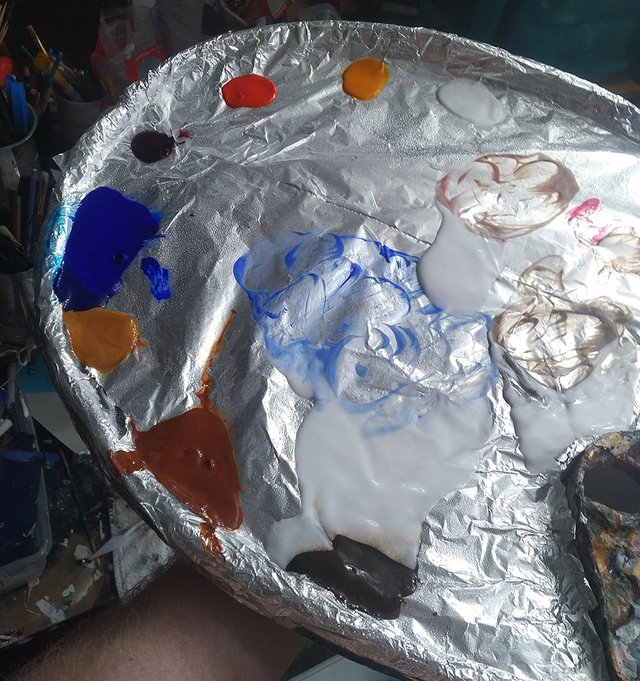
Matching each color up by eye, I filled the areas in. I also tried to match the sheen by mixing matte (flat) and gloss medium together and cover over the top.
When I was all done it was really hard to tell that anything even happened to the painting. I had trouble even seeing some of my repaired areas. I gave it to the client and he was amazed too. I thank God. It was a profitable project for me and it really blessed the customer to have their painting back and be able to hang it up on the wall.
I don't know. Maybe they'll hang it a little bit higher this time. :)
Thanks for reading and have a blessed day,

If you like this post, please comment, upvote, follow me ( @mattphilleo ) and resteem. I post regularly on art, tips on painting and drawing, and encouraging thoughts. You are helping me to do art full-time and support a family. Thank you so much!--Matt
See more of my artwork at: MattPhilleo.com
Wow! Incredible job on that.
Thanks!!
Hello @mattphilleo, thank you for sharing this creative work! We just stopped by to say that you've been upvoted by the @creativecrypto magazine. The Creative Crypto is all about art on the blockchain and learning from creatives like you. Looking forward to crossing paths again soon. Steem on!