Be a better Instagrammer/Basics of a 3-Point Lighting Setup

Did this nameart long time ago for a contest on Steemit
First of all, this is just the basic of basics in photography. I do take photos from time to time as a hobby and I think that these little essentials will help you probably take a better photo whether it's for instagram, facebook or just having that photo look nicer.
Often times, you would wonder why does he/she take such great photos and when it comes to me, my photo is either too dark, overexposed or even losing details and sharpness. Well, lighting plays a VERY important role in this. You do not NEED high-end equipment but in this post, I would share how you can also use natural light to angle your photos and snap them.

Photo taken from unsplash
I have a very simple yet effective guide/lesson for you that can be quite useful whether you are an animator, photographer or even a person who loves taking insta-worthy photos. This will be a knowledge so easy to learn and have it applied in many of your photos. What I'm going to show you here is the basic 3-point light setup that is sufficient to take create great images.
The Basics of 3-Point Lighting
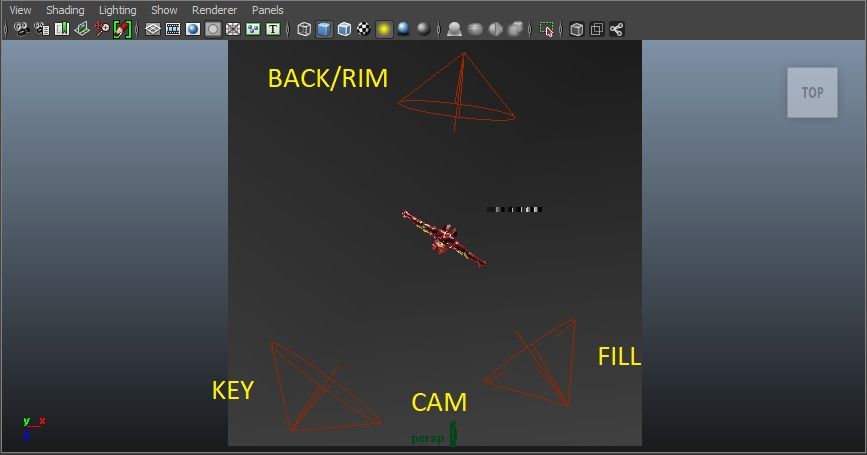
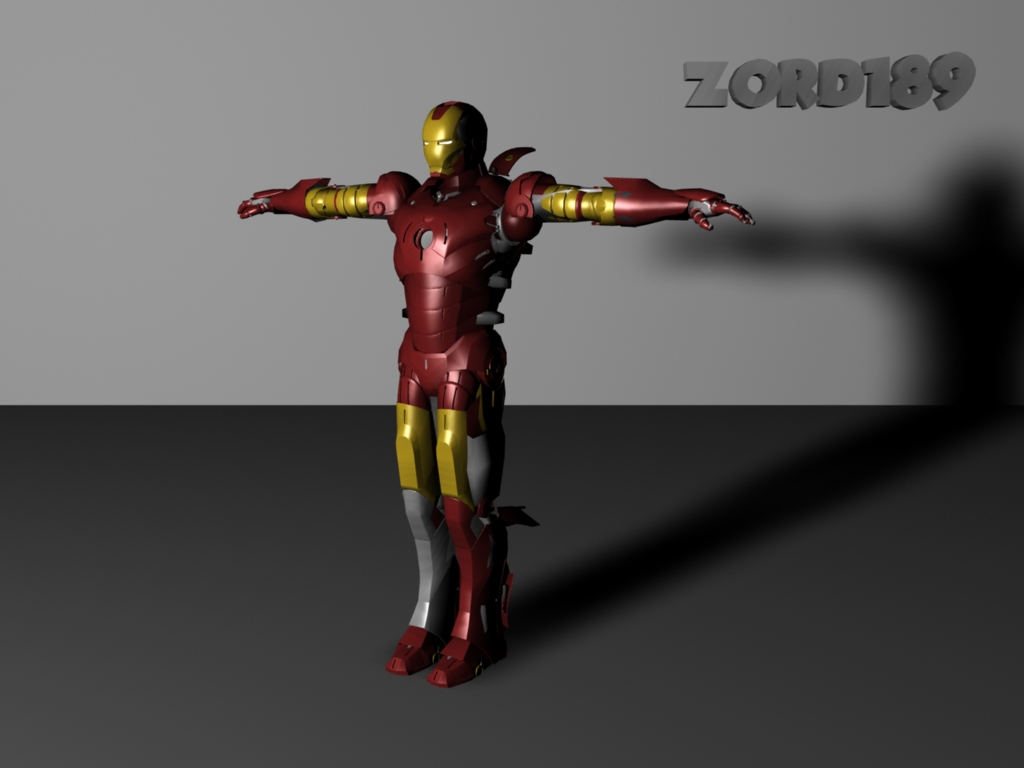
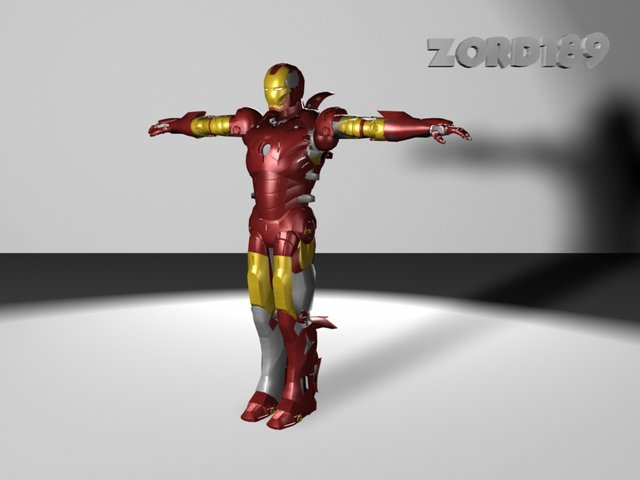
It's going to be a tad bit technical starting here, but bear with me as it will be worthwhile to have this simple knowledge of how to setup your lighting. I kinda dug out my ironman model which I got from 3D model stock site long time ago and decided to use it as the model for the day. Mainly because of its curves and edges.... all it's perfect imperfections... - John Legend.
Well, in a 3-point lighting setup, all you need is Three Lights and you're good to go. These three lights consists of the Key Light, Fill Light, Back/Rim light and they all have their specific role to play.
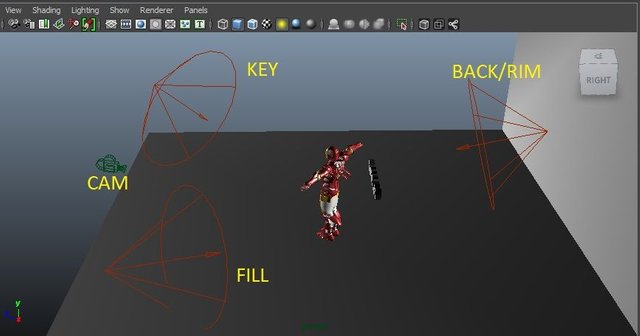
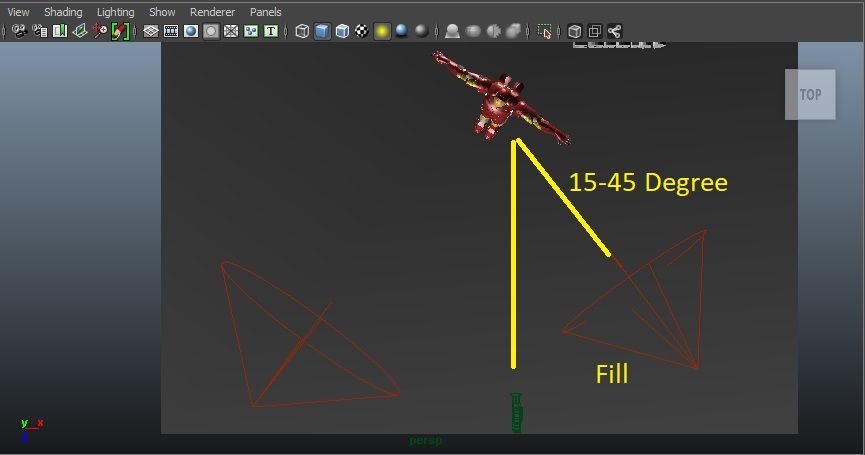
Shortly, I will explain what each light does and it's purpose. But for now, this is how the setup would look like be it in a 3D Rendering setting or in a photography studio when you're taking your family portraits or wedding photos.
The Key Light
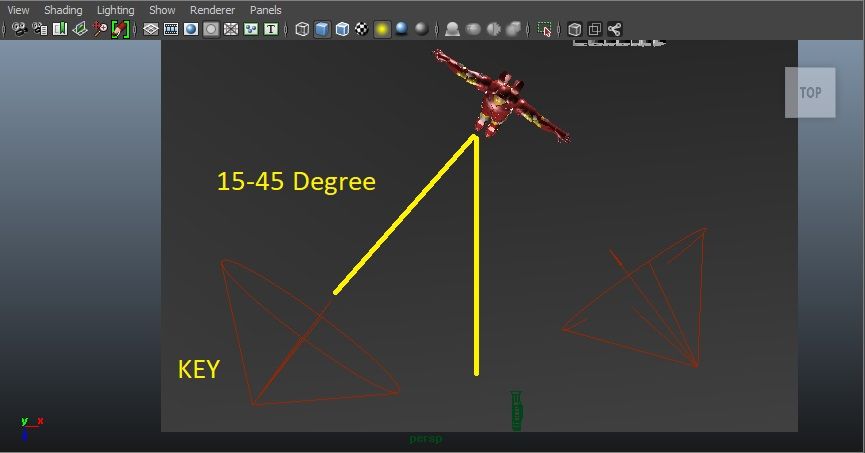
The Key Light is the MOST IMPORTANT light source in this 3-point lighting setup. Why? Because it is the MAIN light that will illuminate your objects. This light will be the most dominant light and will be the one that defines the shadow.
In the real world, your Key Light is the sun, light through the window, strongest light in your room, the moon at night. With that in mind, there is a way to stage your object so you get the best visibility of light.
The Key Light as shown in the photo above is best placed at a 15-45 degree angle left of your camera.
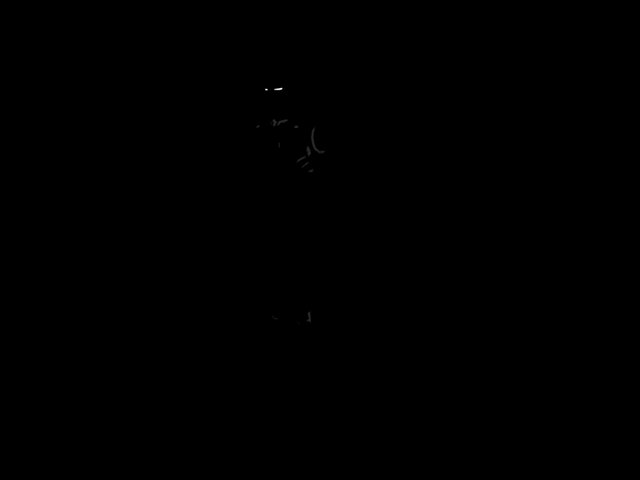
This is the Ironman without any light
Key Light added
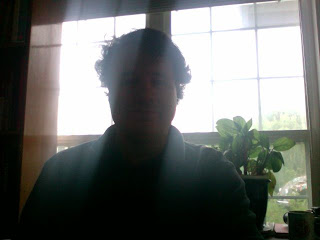
Now, I know you all will be wondering how do you use this knowledge for your photos. Well, It's simple, just make sure your brightest/main light source from the natural surrounding is always 15-45 degree angled from your camera. Remember! Don't have the Key Light coming from behind, or it'll look like this.
Fill/Secondary Light
Next would be the Fill Light AKA Secondary Light. This fill light would usually come from other sources of light for example, small lamp and sky. Usually this light would be the light that bounces off your walls and hits your object and giving it a nice smooth/soft and light illumination on your object. This light usually is of softer and lower value but it helps shaping your object by reflecting colours from other objects surrounding on your object.
Fill Light added
As shown in the photo above as well, the Fill Light will usually be placed 15-45 degrees opposite of the Key Light. Though, you can add as many Fill Lights for special cases. Just like our surroundings, we have many other small light sources that act as our Fill Light.
Back/Rim Light

Well, the Back Light is like the cherry on top of for the object. It will create a thin light over the rim of the edges of your object making it more define. Sometimes, there are no backlights so it is still okay to take that photo.
Well, to be honest, you don't really get GREAT backlighting unless if it's artificial lights from a studio setup like this ironman here. But you can also be artsy-fartsy by taking backlight images for your instagram. Like this!
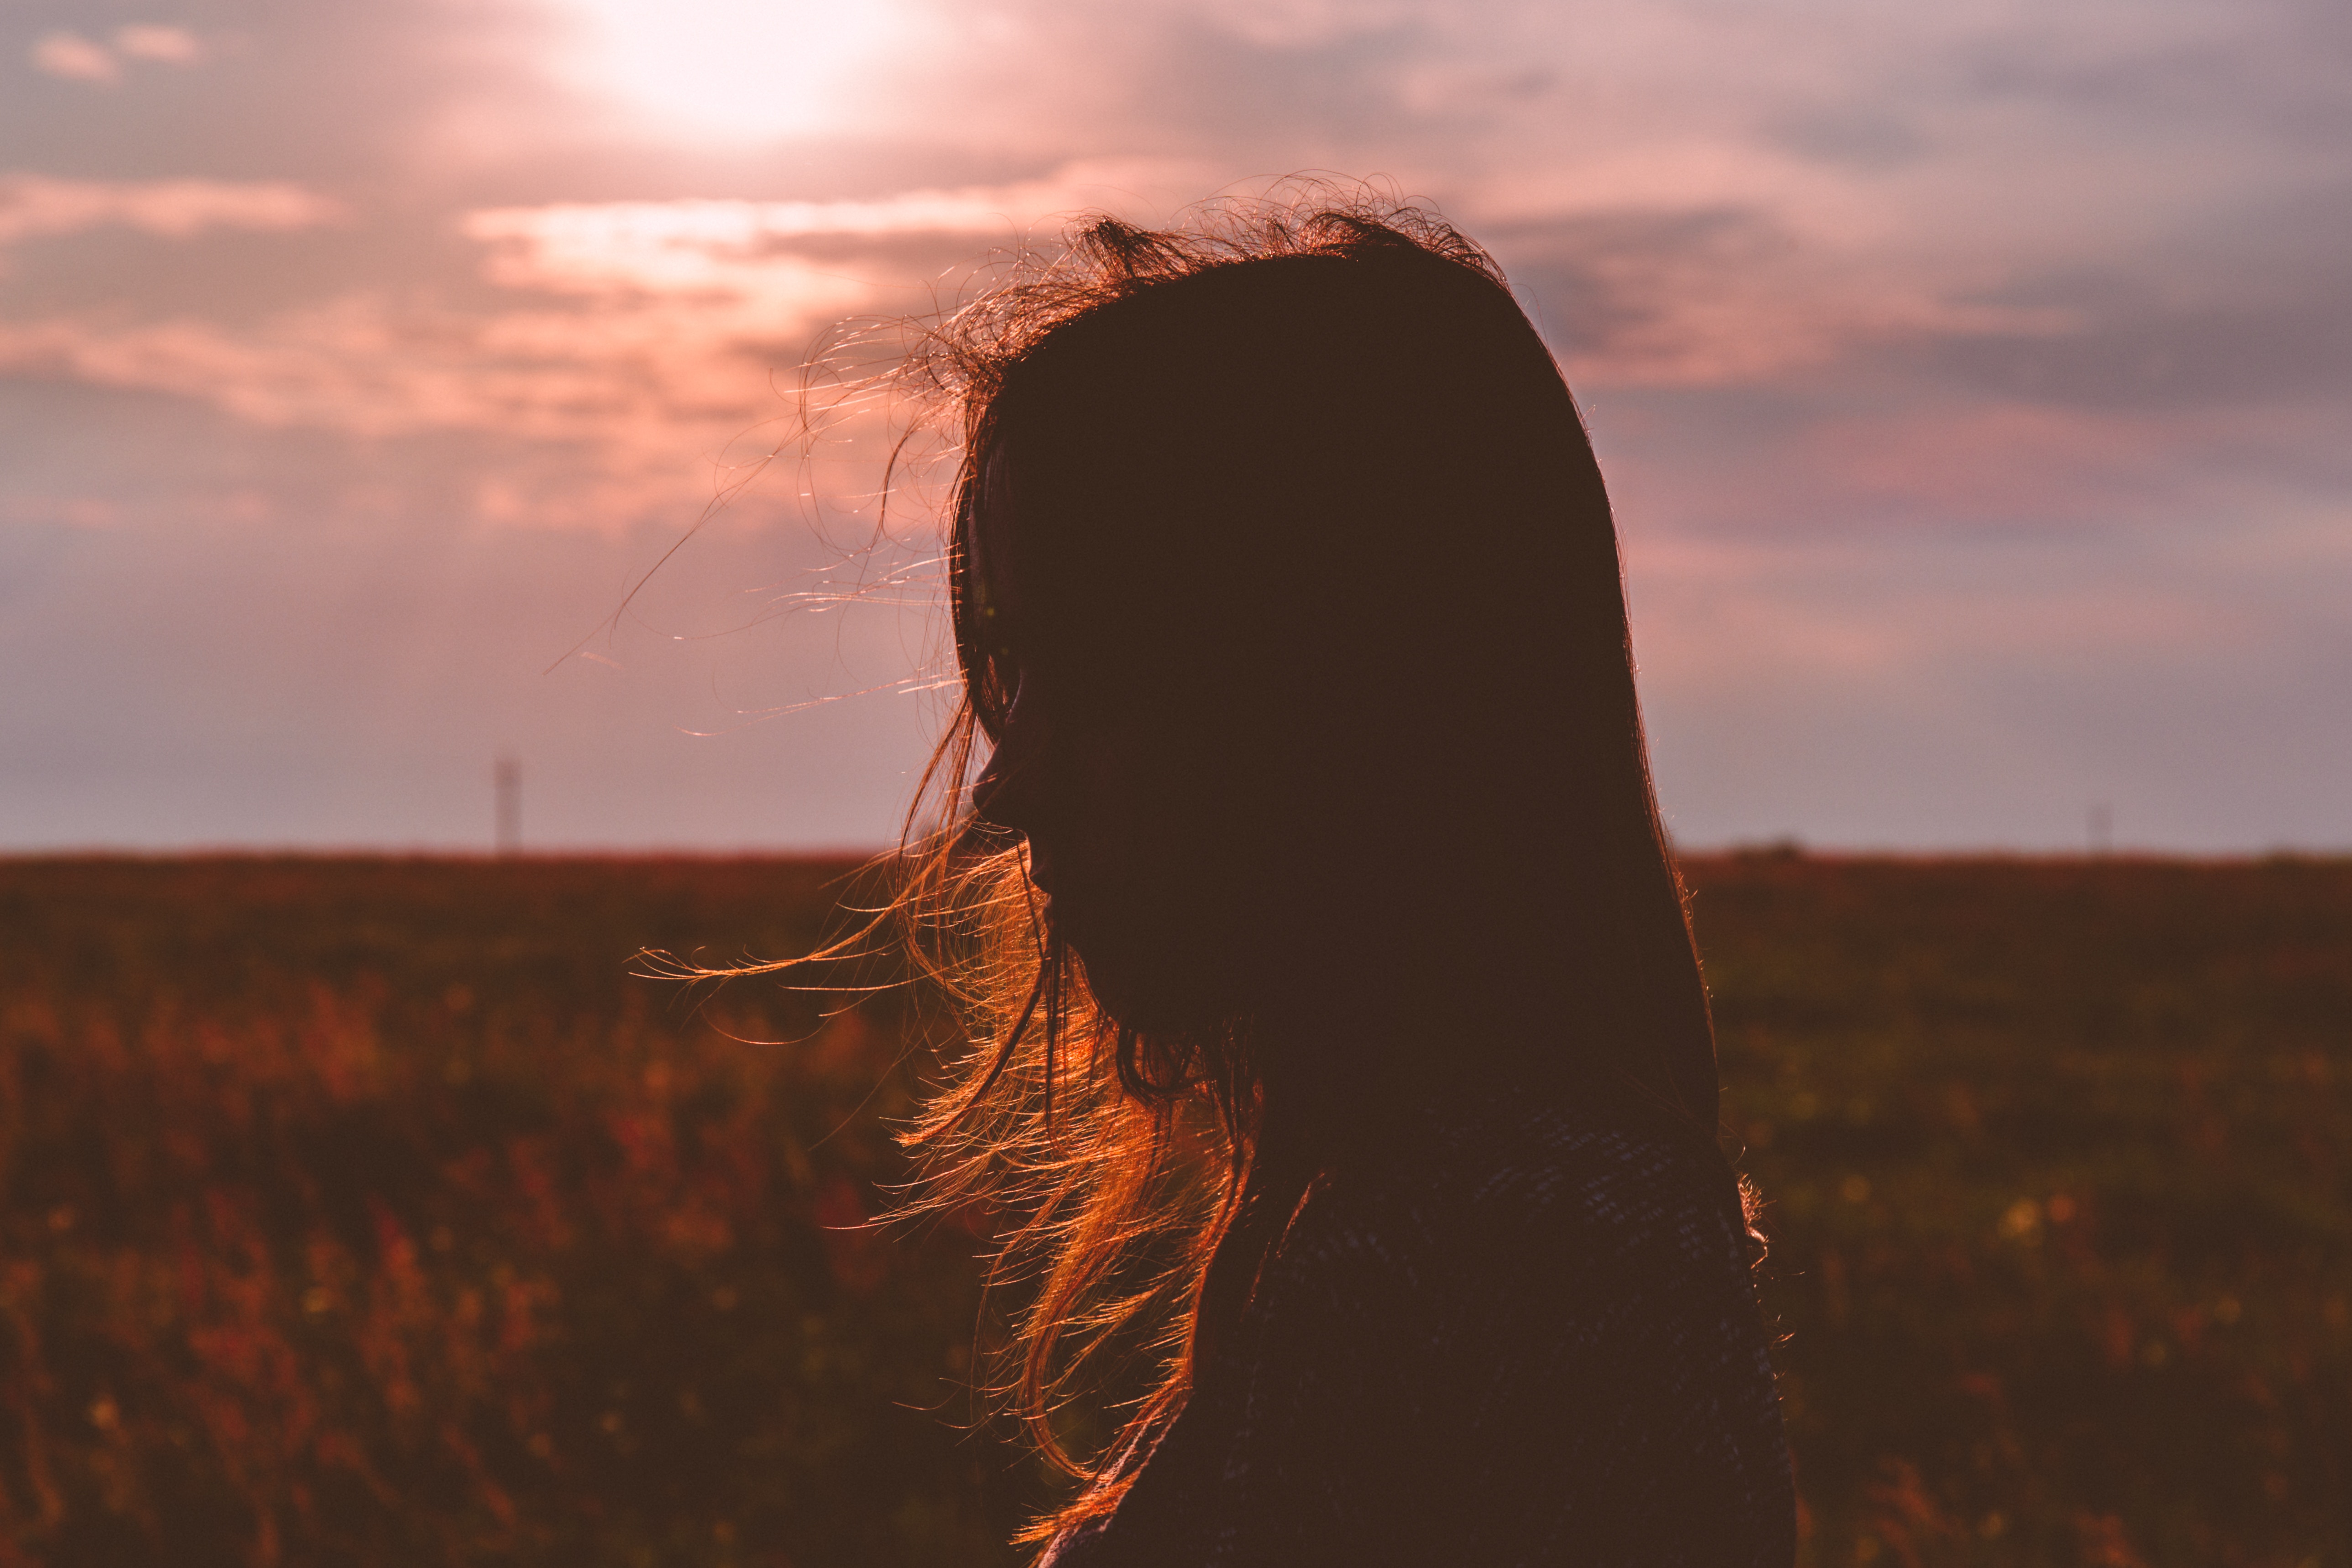
Photo taken from unsplash
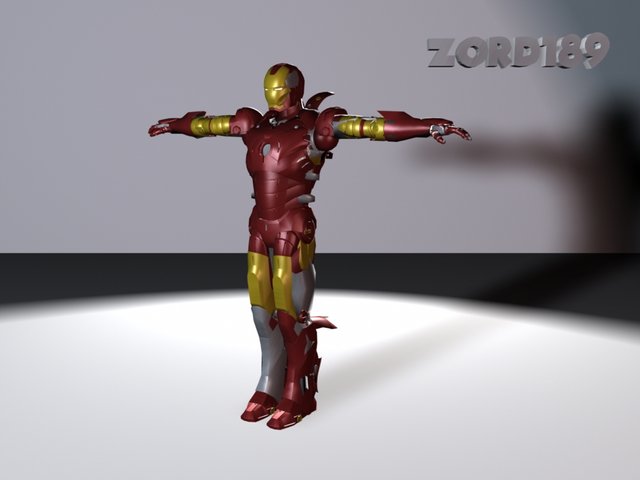
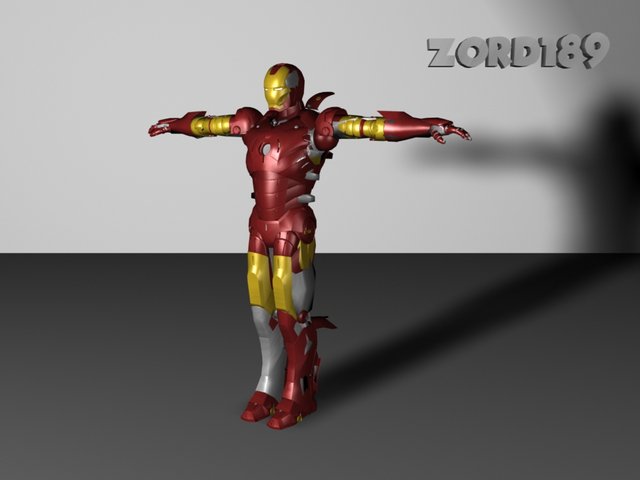
That's about it! Here is the final image with the lightings tweaked a little with orange and blue to represent the sun and sky. I do hope that you've found this simple guide useful. I try to create these images so you can better understand the whole picture. The secret to good lighting is getting the light source to compensate one another.
Whether you're a professional photographer or an Instagrammer, you will need this knowledge wherever you go. Won't take you 30 seconds to set your props and composite your photos before you take them!
PS : This post was posted before on Steemit but would love to share this again as now I have more followers and they may benefit from this.
Thank You
If you like what I do, check out my other posts on meetups, animation, and designs.
Get your Personalized Steemit Profile Banner,Logos & GIFs


Posted from my blog with SteemPress : http://zord189.vornix.blog/2019/04/03/be-a-better-instagrammer-basics-of-a-3-point-lighting-setup/
Always appreciate some good tips for taking better photos! this was very helpful to me in understanding lighting.
Thanks for sharing!
Hello @zord189
Beautiful digital art... i love your art it is amazing...
thanks for share with us..
Thank you :D
Great advice @zord189 ! Thanks for sharing 👊🏼
Posted using Partiko iOS
Ur welcome bro! Missing you already
Great resource information @zord189. Definitely crucial when taking photos. Unfortunately most of us find this out the hard way, lol Moments you think you have captured...but not so much! :)
Thanks @birdsinparadise. It definitely makes a huge difference to have this basic knowledge of photography.
Terima kasih bosss
sama sama.
This is a good advice and beautiful explained how important the light is.
Thanks @ikarus56
Sounds like a great tip for better photo taking indeed. I will definitely gonna try this tip so that I will lessen the usage of photo editing. Lol
Thanks bro.
Posted using Partiko Android
Haha yes yes a good lighting can always save a lot of editing time!
Congratulations @zord189! You have completed the following achievement on the Steem blockchain and have been rewarded with new badge(s) :
You can view your badges on your Steem Board and compare to others on the Steem Ranking
If you no longer want to receive notifications, reply to this comment with the word
STOPTo support your work, I also upvoted your post!
Vote for @Steemitboard as a witness to get one more award and increased upvotes!
Brilliant tips @zord189
I will definitely try to use these rules in my snaps from now on. Hopefully you will see the difference on instagram!! 😁
Gaz
Ohhh yess, can't wait. It takes getting use to but after you're used to it, it comes naturally.
Very useful information) I just think about lighting .. and usually I take pictures just on the windowsill)))