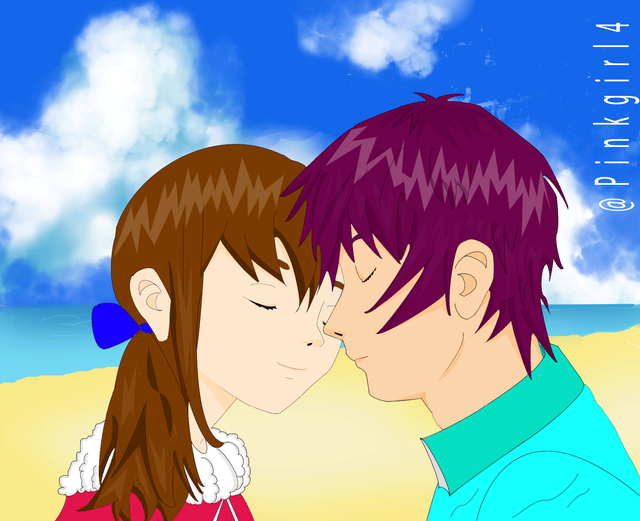
[Drawing] illustration No. 10 love is in the air/ Ilustración No. 10 El amor está en el aire


Hola a Todos
Esta es la ilustración N° 10 publicada. Originalmente iba a ser un dibujo para inktober "El anillo" con ciertas modificaciones preconcebidas, pero lamentablemente leí sobre el concurso muy tarde, ya que en un día solo me da tiempo de terminar un dibujo y no logré realizar los 7 restantes que tendría que haber hecho desde que comenzó octubre. Así que desistí de inktober y publicarlo como la canción de John Paul Young El amor esta en el Aire!.
Traslation
This is the published illustration N° 10. Originally it was going to be a drawing for inktober "The ring" with certain preconceived modifications, but unfortunately I read about the contest very late, since in one day I only have time to finish a drawing and I failed to make the remaining 7 that there should be done since October began. So I gave up inktober and published it as John Paul Young's song Love is in the Air!

Pimer paso:
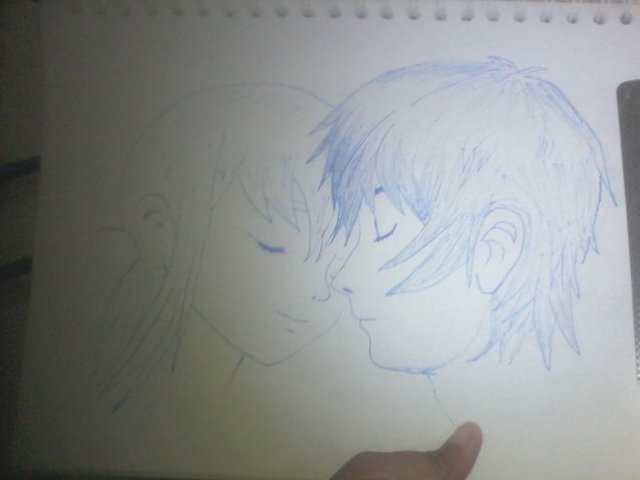
El dibujo fue digitalizado con una foto y luego copiado a photoshop. Con la pluma y el pincel en 1px se va contorneando sobre el dibujo original; es muy importante recordar que cuando presionemos el botón secundario y demos click en contornear trazado, seleccionemos el pincel y no el lápiz sino quedara una linea muy fina y no tendrá el efecto que queremos. Posteriormente, procedemos a dar color a la imagen, utilizado púrpura #6d034b para el cabello del chico, en las sombras púrpura más oscuro #610343 y en la luces usaremos blanco; tanto las sombras como las luces se realizan en una capa aparte a la cual se le bajará la opacidad y el relleno. Una vez terminado el trazado y la asignación de colores, se comienza a dar los toques finales con las sombras donde corresponde, partiendo siempre del color original un poco más oscuro.
The drawing was digitalized with a photo and then copied to photoshop. With the pen and brush in 1px is contouring on the original drawing, it is very important to remember that when we press the right button and click on contour tracing, select the brush and not the pencil or there will be a very fine line and will not have the effect we want. Later, we proceed to give color to the image, used purple #6d034b for the boy's hair, in the darker purple shadows #610343 and in the lights we will use white; both the shadows and the lights are made in a separate layer to which the opacity and the filling will be lowered. Once the layout and color assignment is finished, the final touches are made with the shadows where it corresponds, always starting from the original color a little darker.

Segundo paso:
El fondo se realizó en 3 capas para el agua, el cielo y la arena. Primero para el agua se dibujó una especie de triangulo hacia el lado derecho de la imagen que da la impresión que se va alejando hacia el horizonte, en el lado donde va la arena no tiene que ser recto así que se traza con el pincel a mano alzada y el lado superior lo contorneamos con la pluma para luego rellenar con azul #71d7f2, en otra capa utilizamos azul #41a0cd que es un poco más oscuro y con la brocha del pincel en difuminar añadimos matiz al agua. Para el cielo, abrimos otra capa que estará debajo del agua y rellenamos la mitad con el color azul #1466ea, las nubes fueron dibujadas con una brocha especial cargada al programa, hay muchas brochas disponible en la web que pueden descargar y gratis que les servirán para sus proyectos. En una última capa debajo rellenamos con color beige #f8f0c5 para la arena y damos matiz con beige más oscuro #faeb92.
The bottom was made in 3 layers for water, sky and sand. First for the water we drew a kind of triangle towards the right side of the image that gives the impression that it is moving away towards the horizon, on the side where it goes the sand does not have to be straight so it is traced with the brush by hand raised and the top side we contour it with the pen to then fill with blue #71d7f2, in another layer we use blue #41a0cd that is a little darker and with the brush brush in blurring we add nuance to the water. For the sky, we open another layer that will be under the water and fill half with the blue color #1466ea, the clouds were drawn with a special brush loaded to the program, there are many brushes available on the web that you can download and free that will serve you for your projects. In a last layer underneath we fill with beige #f8f0c5 for the sand and shade with darker beige #faeb92.


Programa: Adobe Photoshop Cs6
Fuente: Myriad Pro, lo pueden conseguir Aquí
Tamaño: 1806x1469 px
Colores: morado, azul, piel, marron, beige rojo, blanco y gris.

Gracias @mayvileros por su apoyo
Congratulations @pinkgirl4! You have completed the following achievement on the Steem blockchain and have been rewarded with new badge(s) :
You can view your badges on your Steem Board and compare to others on the Steem Ranking
If you no longer want to receive notifications, reply to this comment with the word
STOPTo support your work, I also upvoted your post!
Do not miss the last post from @steemitboard:
Vote for @Steemitboard as a witness to get one more award and increased upvotes!
This post was shared in the #spanish-curation channel in the Curation Collective Discord community for curators, and upvoted and resteemed by the @c2-spanish community account after manual review.
@c-squared runs a community witness. Please consider using one of your witness votes on us here
thanks fo you support :)
Este post ha sido votado manualmente por Spanish-Tribe: "Temática Arte"
Gracias @delta.espaco por apoyar mi post
Te quedo muy bonito, felicitaciones amiga.
Gracias amigo por tomarte el tiempo de ver mi post. :)
¡Felicidades! Esta publicación obtuvo upvote y fue compartido por @la-colmena, un proyecto de Curación Manual para la comunidad hispana de Steemit que cuenta con el respaldo de @curie.
Si te gusta el trabajo que hacemos, te invitamos a darle tu voto a este comentario y a votar como testigo por Curie.
Si quieres saber más sobre nuestro proyecto, acompáñanos en Discord: La Colmena.
gracias por su apoyo @lacolmena
Que rayos también dibujáis en tradicional no manches, yo ni si quiera logro hacer asi un cabello lol. UwU
Cada quien tiene su estilo amigo, tu estilo es único, te recomiendo que leas y veas muchos tutoriales para dibujar anime, a mi sirvió mucho debido a que el estilo manga y anime tiene sus reglas, todavía me falta mucho por aprender.
Bueno
thank you darling! :)
Lindo post Adriana, siempre nos sorprendes con tu gran creatividad para elaborar ilustraciones o diseños. Por otra parte, el uso de gifts, le da un toque muy didáctico, original y muy agradable a este tipo de post, te felicito por tu labor y espero que este lindo arte fructifique positivamente para ti, un saludote pinkgirl y tambien para la babypink jeje.
Gracias abneagro, yo espero poder crecer en esta plataforma. también quiero publicar en stem como tu :)