3D Cryptocurrency Coins Part 2 || Substance Painter Tutorial || Texturing
Hello Steemians and Cryptoians!
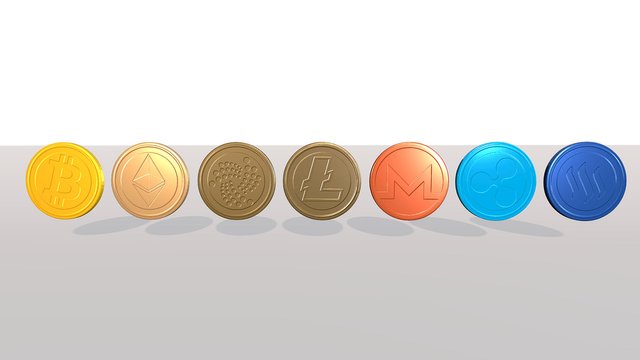
Prequel:
This is the second part: How to model and texture cryptocurrency? Before you start to read this post, I recommend to read the first part. In my first post I explain how I model the coins in Blender. Here I talk about how I use Substance Painter.
If you are not interested in the tutorial rather in downloading and use my coins, please visit my Sketchfab (download them for free) profile.
Side note:
What is Sketchfab?
Sketchfab is a great realtime rendering web based application. I felt in love with the Sketchfab community, the workers and all the nice rendering options. And the cool thing is, everyone can use it. If you are interested in 3D, I really really recommend Sketchfab.
Goal:
My goal is to give you cryptocurrency coins as 3D models for free. I modelled them in Blender and painted the textures in Substance Painter. If you currently working on something about cryptocurrency and you need them for your game, advertisment, YouTube videos or whatever, just follow this link to my Sketchfab profile and get them.
Credit me:
You are allowed to use them for whatever you like. But it would be cool, if you credit me. Use my Sketchfab link.
What do you download?
You get the files .fbx and .pngs (seven normal maps and seven low poly coins)
What software did I use?
I used the software Blender. It is a free software.
The normal maps are made in Substance Painter. Unfortunately this software is not free. But you can download the trial version.
How did I model them (Tutorial)?
Please read the first part. :)
How did I texture them (Tutorial)?
For the ones, who are not interested in how I made them, you don't have to continue reading. Now the little tutorial for beginners follows. :)
Before I start, I will give you some fundamental tips (for beginners):
- ALT + Middle Mouse Button is to move the view.
- ALT + Right Mouse Button or Mousewheel is to zoom in or out
- ALT + Left Mouse Button is for rotating the view
- SHIFT + Right Mouse Button is for rotating the light
- SHIFT + Left Mouse Button is for paint a straight line
- Left Mouse Button is painting
This is Substance Painter:
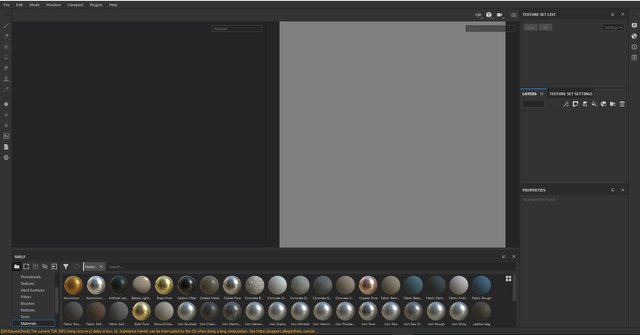
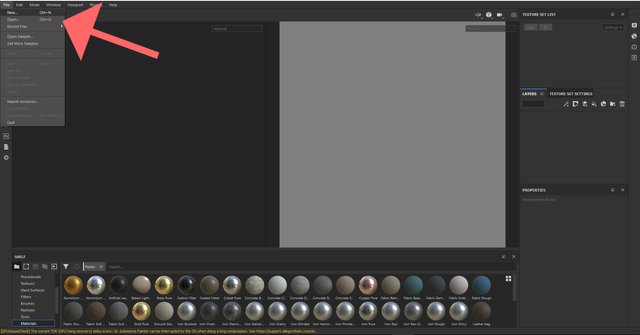
When you want to start with a new project go to File/New... and import your .fbx or .obj. Here you can choose how big your texture should be. You could also import more files like normal maps etc.
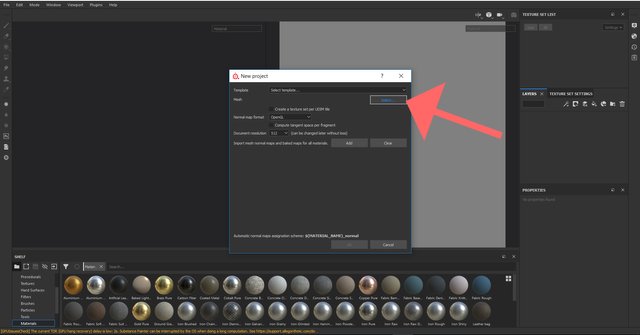
Important:
You need to UV map your objects. Else Substance Painter don't open it. How you can do it, read my first part.
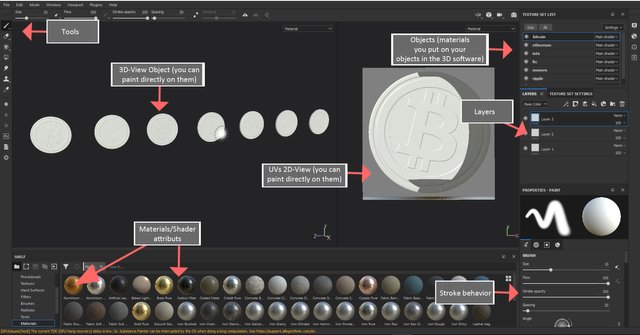
After you imported your objects you will see them in the 3D view. On the right side you see the 2D texture view. You can paint them in both views. Sometimes I prefer the 2D view like in this example here. I explained the most important things in the following screenshot:
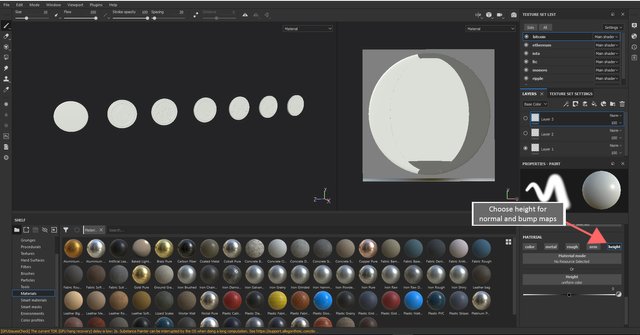
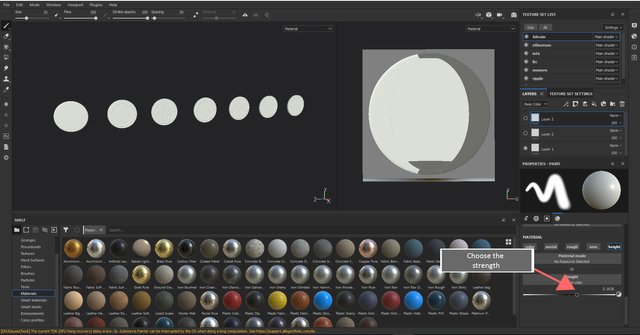
Because I don't need color, rough oder metallic shaders I only choose the height map. This map add more details to your object, but don't change the surface (wireframe). I want to change the colors or shader behavior later in Sketchfab or in my other 3D programs. After you selected only height, choose the strength of your brush.
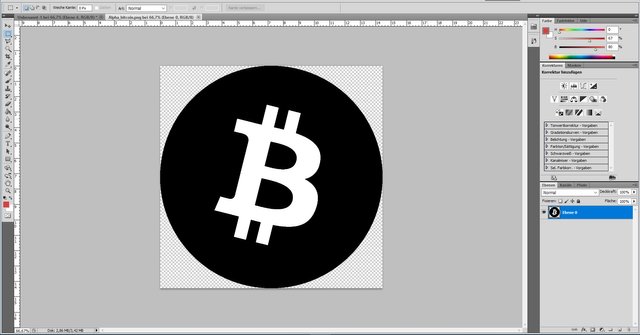
Substance Painter has already a lot of alpha textures to stencil the color or the height maps. But I need a special alpha. That's why I googled for the logo assets guidelines of each crypto and loaded them in Photoshop. You also can use GIMP or the software you prefer. In Photoshop I made this alpha texture:
For importing them: Go in Substance Painter to the top File/Import resources. A new window will open. In this window choose your textures. Press Add resources and search on your computer for your files. Now it's important to say what kind of textures you want to import. In this case I selected alpha. At least say, if you want this textures only for the current session or for your library.
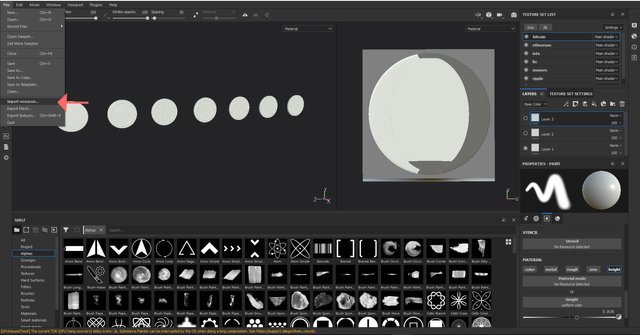
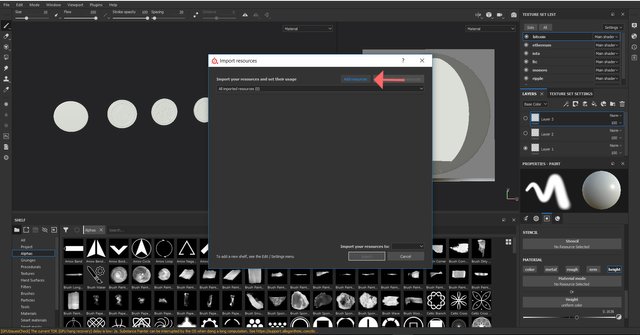
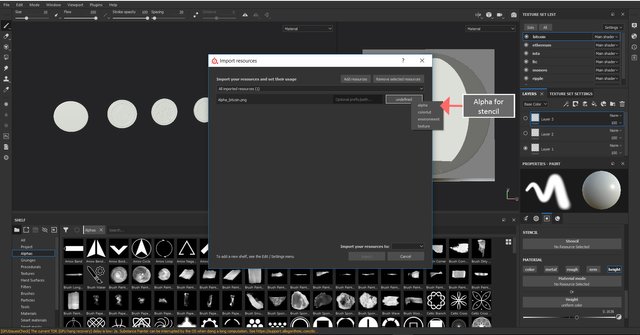
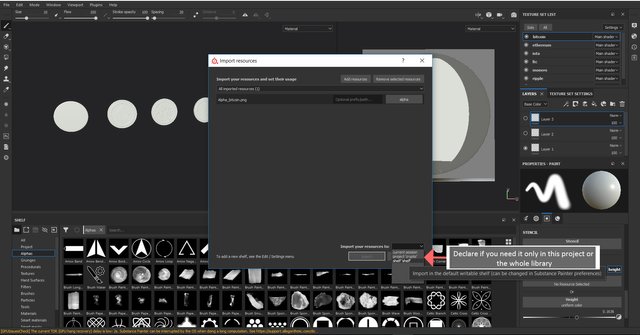
Your textures should be imported now. You can see them at the bottom. If not, maybe first you have to choose Alphas. See bottom left side.
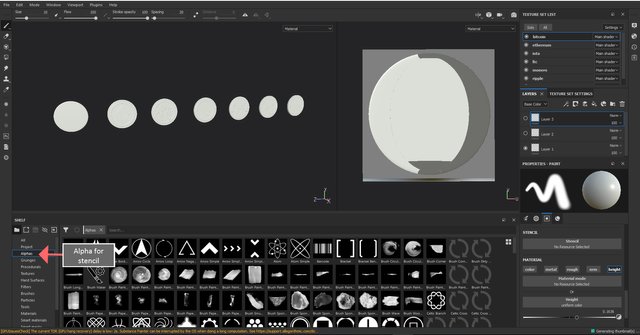
Just drag your alpha in the stencil slot at the bottom right side.
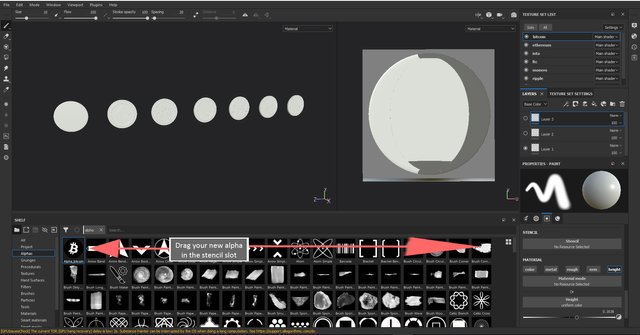
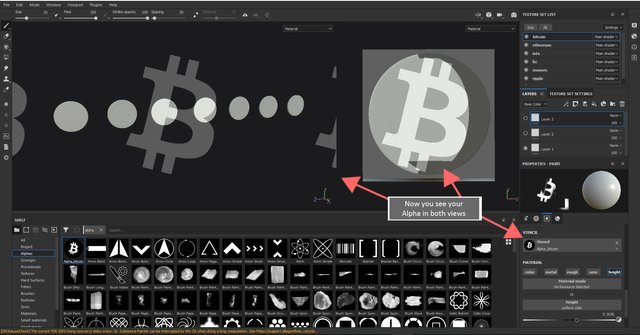
Now you should see your alpha in both viewports:
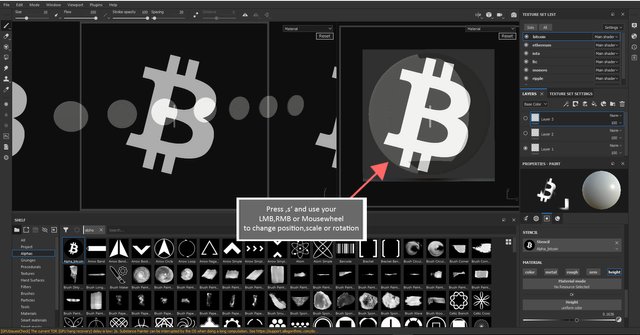
Use 's'+LMB for rotating the stencil
Use 's'+RMB for scaling the stencil
Use 's'+MMB for moving the stencil
Place your stencil how you like it and paint with the brushtool selected.
Done. Congratulation you made the last part for a 3D coin! I really hope you learnt something and it was not that frustrating. :) How I upload it on Sketchfab follows in the next part.
Thanks for reading!
If you like my work check out my blog @chromasie. I am new here, so I don't have so many posts yet. But when you read this, I probably work on my next post.
I don't only model 3D stuff. I also like to paint, photography, photogrammetry, traveling etc. Stay tuned!
You can find me on:
I took all the pictures. I made all the 3D stuff and tutorials by myself. All pictures, tutorials and films belongs to me. Copyright 2018 Chromasie. All rights reserved. Please do not copy or publish them.


hab gesehen, dass du aus kiel kommst. deswegen schreib ich mal auf deutsch :)
danke für dein tutorial, leider sind die bilder hier so klein, dass man die details nicht erkennt :/
Hi oder Moinsen, :)
ja, ich komme aus Kiel. Sorry, dass ich mich nicht eher gemeldet habe. Danke für deinen Hinweis. Ich hatte extra in einer größeren Auflösung die Bilder angelegt. Ich werde in zukünftigen Beiträgen mehr darauf achten und wenn ich Zeit finde, werde ich die alten Bilder erneut bearbeiten. Nochmals danke und netter Blog! :)
Dear friend, you do not appear to be following @artzone. Follow @artzone and get added to our voting list for valuable up-votes!
I'm sorry. I didn't know that. I'm following you now. :)