Button Box Version 2
The main body of this box was made of ABS, and the acrylic, well, it was not acrylic; it was a piece of plastic from a passe-partout that was laser cut and in that process i reached the conclusion that indeed this "acrylic" was a piece of cheap, low low end plastic.
Now, the V2 Button Box, and the materials.
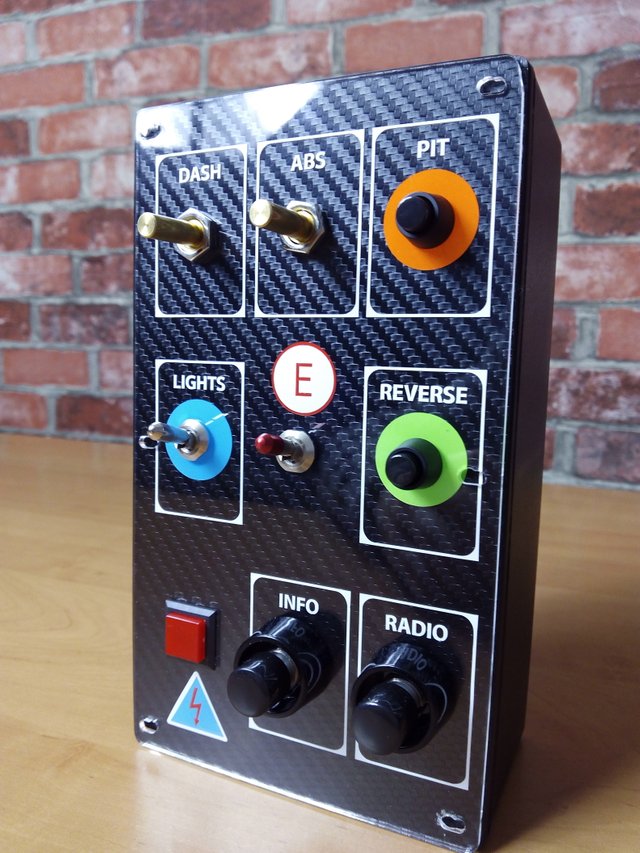
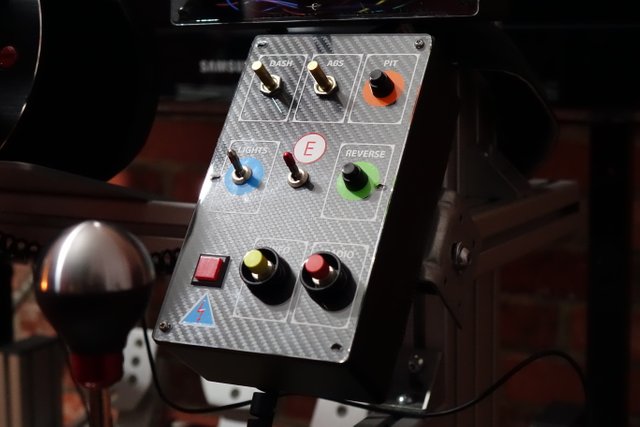
The main theme for this box was the Gt3 racing world and it was inspired in the Audi interior, from 2015.
The box weighs 186g and it´s from Hammond´s. It´s ABS with a nice finish; a bit rugged for better grabbing.
It measures: 193,41mm in Length - 113,41mm in Width and 58,25mm in Height.
Acrylic sheet is 2 mm thick
It was used on this project 5 NKK push buttons, 2 NKK switches and 2 Rotary encoders from Tusonix.
-
Let´s break this:
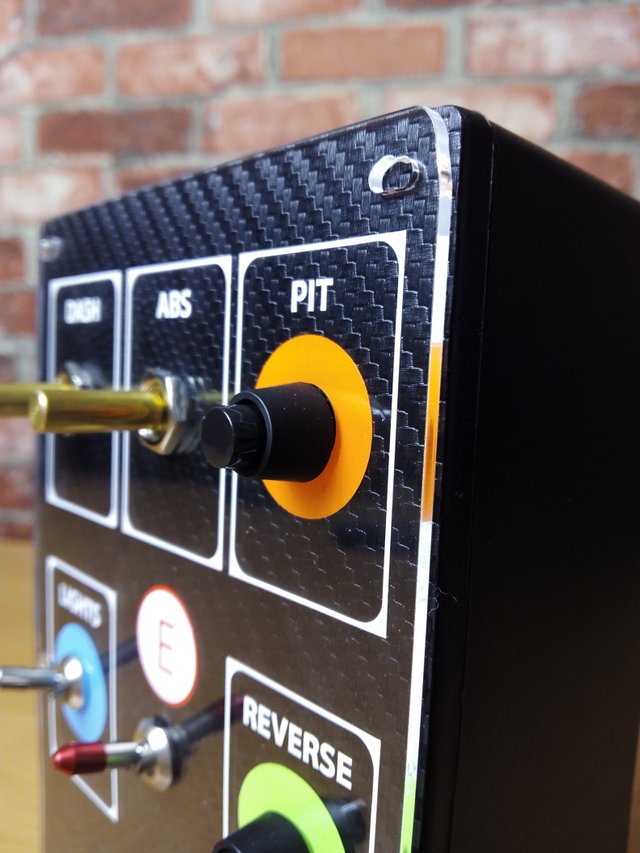
The Radio and Info are fitted with NKK MB2011-SB push buttons. They are ON- (ON) also but these are 12 mm in diameter: a lot bigger! They have a rated life of 50.000 cycles. In use, picture below : 22 mm black shroud with black cap.
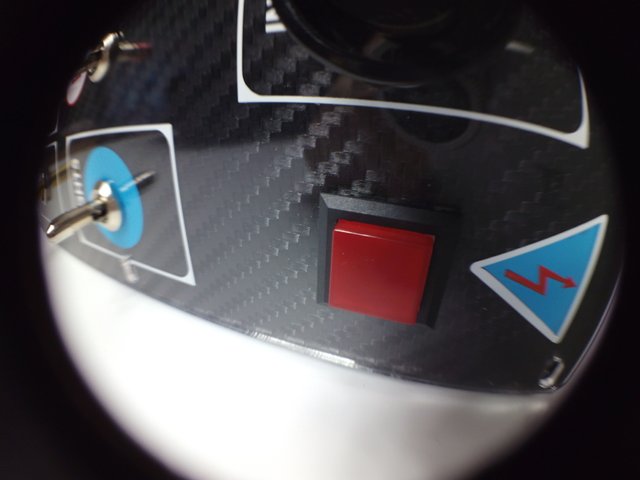
Red Square Button: Illuminated with a rated life of 1 million cycles.
Red square button is NKK also, it has a red bright led and it´s the best tactile feel i have experienced with push buttons. The best!
The model is UB15.
It´s a SPDT contact form with ON-(ON) switch function.
Highly precise with ≅ 3mm press-down-to-actuate.
-
The NKK toggle switches;
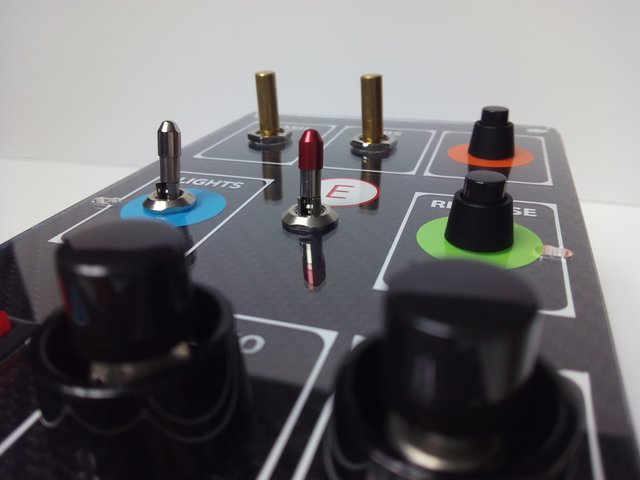
The Emergency and Lights are fitted with NKK M2015 toggle switches with ON-(ON) function.
These have a feature; a locking lever mechanism that prevents accidental push. You need to pull them before pushing them in the direction of actuation.
Like with the other buttons these can be customized and this has a red screw down cap.
They fit through a 6 mm hole.
-
Next the rotary encoders from Tusonix / CTS.
 Rotary Encoders (The Gold Ones)
Dash and Abs using two, 2 bit incremental encoders with momentary switch. They are rotary encoders + a push button.
About the rotary specs:
They have continuous rotation and are available in 16 detents.Shaft measures 18 mm and the body and shaft around 37 mm. They fit through a 10 mm hole.
For the moment this button box features buttons; 9 visible and 2 of them included in the encoders, with a switch travel of 0,5 mm (.020").
Visually the encoders look robust and the feeling of having one in hand corroborates that assertion. They can stand a Push-Pull Strength of Shaft of 8 kg (minimum) for 10 seconds.
-
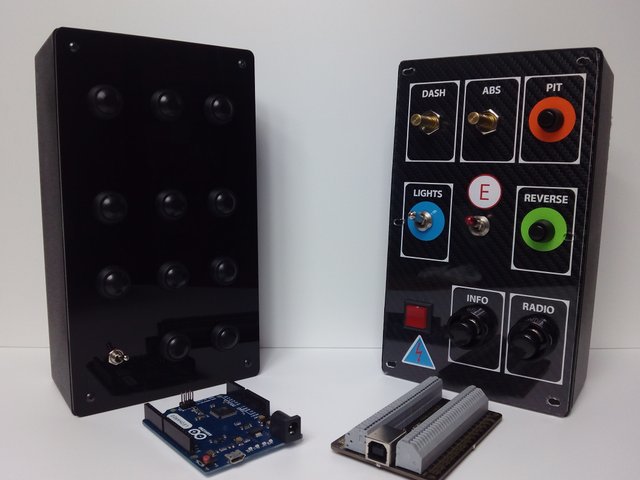
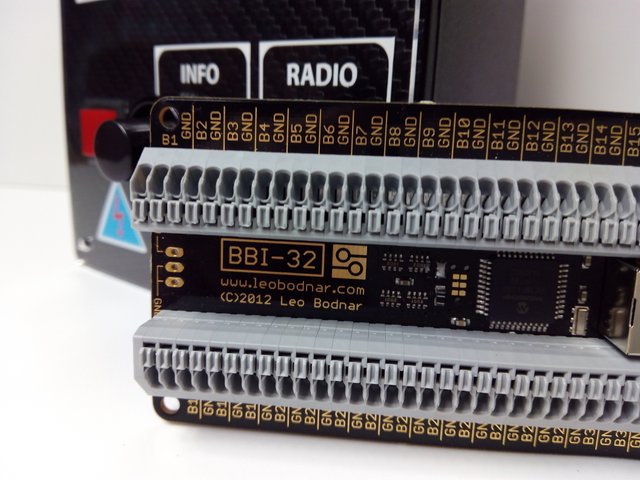
The board that connects it all

The BBI-32 interface is a usb board with push in wire connectors to connect buttons, rotary encoders and switches and it does not require any solder but that´s not all;
-
Push buttons, toggle switches, rotary encoders and rotary switches can be wired to it.
The board has external connectors for the +5v and ground if some component needs it.
It´s immediately recognized by windows; if the buttons are connected we have an instant button box.
-
My input regarding this board is that it´s easy to use, feels high quality and has a clean look.
 I like attention to detail.
This board came in two packages: An outer enclosure or box and a thick Moisture Barrier Bag, RoHs compliant!
-
There is only one thing that you need to mind with this board: The wire you choose! The recommended wire size is 24AWG to 20AWG and it´s advisable to follow these parameters otherwise you can see yourself making trial and error attempts that take more than the recommended time for a task like this one!
Recaping
The board can handle 32 buttons or 16 rotary encoders or 11 BBI-32 rotary switch inputs and its also possible to light LEDs to illuminate panels or push buttons, when the input is switch on. It measures 85.60mm in length x 53.98mm in width x 16.1mm in Height.V2 Button Box
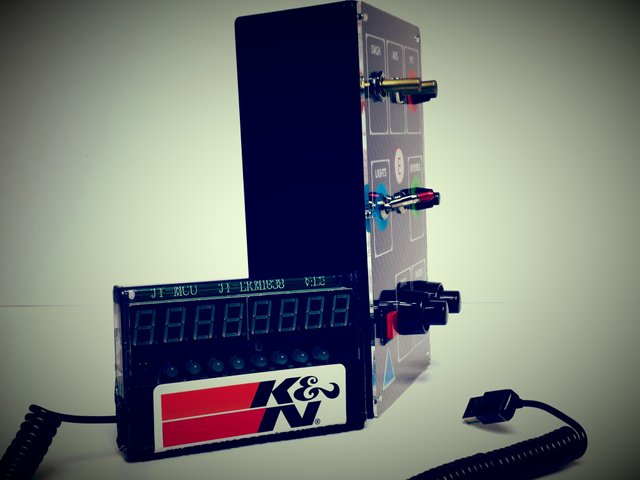
TM 1638 Project with V2 Button Box
With the Mirroring technique: it consists in placing the information on the back side of the acrylic: between the carbon fiber vinyl and the acrylic. This way, the front side of the acrylic keeps smooth with no labels, all the labels on this box are separated from each other, the white line contour of the triangle (power label on the box) is pasted (and made) separately from the blue filling part, and the red is independent from the blue and white forms.
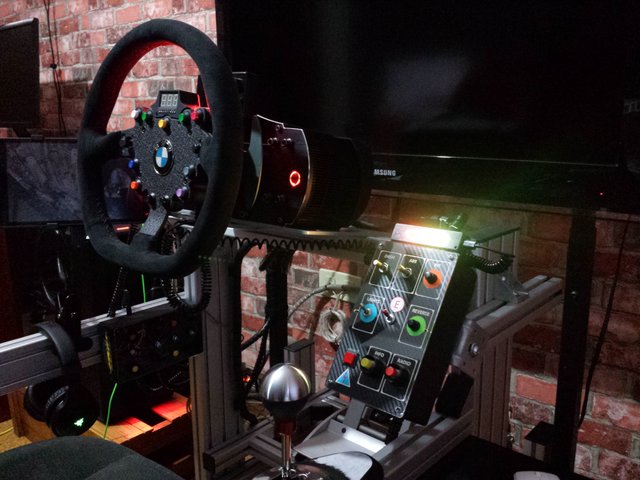
I like this box, its visually appealing and it features high quality components.
OK, so i have to answer some questions initiated in the opening of the post.
"Is it worth it?"
&
"Is there a difference?"
It is worth it just for the fact i make use of it. It´s a solid button box. It´s also unique.
And it´s worth something, let´s see:
-
Cost of buttons including guards and caps: 55€
Custom labels, laser cut, acrylic and box: 30€
BBI-32 board: 55€
Consumables (wire, solder, etc): 8€
There is a difference.
There is visuals and materials and this box is recognized in all the games i tried, just plug and play! Also, some of the buttons have a rated life of 1 million uses and the rotary encoders are very good for adjusting ABS, TC or monitor FOV.
Stay well and keep coming!