SLC S22 Week1 || Getting Started with Java and Eclipse
Greetings to All
Hy guys, I wish you all will be great by the blessings and mercy of Almighty Allah. So today I am going to participate in the learning Challenge of the Steemit Season 22 Week 1.The first Challenge that I am going to start this week is about the introduction to java that course is designed by @kouba1. So let's start by exploring the home tasks and their answers.


Task 1
Write a detailed explanation of the differences between JDK, JRE, and JVM by including their roles, functionalities, and interdependence. Add graphic illustrations which cover this points : |
|---|
- JDK: Development tools, includes JRE and compiler.
- JRE: Execution environment for Java programs.
- JVM: Virtual Machine responsible for running Java bytecode.

Introduction to java |
|---|
Java is a popular programming language that operates through several essential components like JDK , JRE and JVM it helps us to understand How Java work as a programming platform so today we will dive deeper into these concepts.
|
|---|
JDK is a development toolkit that is used to write compile and debug our Java codes and applications it is considered as the primary tool for Java developers. Its core functionality contains the Java compiler to convert source code into byte code include libraries and development tools for Java application creation and also provide the JRE.
Functionalities: |
|---|
- Contain the Java compiler that is used to convert source code into the byte code
- Includes libraries and development tools for Java application creation.
- Provides the JRE to run Java applications.
Key Components: |
|---|
Java Compiler
Debugging Tools
Documentation Generator (javadoc)
Java Runtime Environment (JRE)
Illustration:
+-------------------+
|   Java Programs   |
+-------------------+
         |
+-------------------+
|        JDK        |
|-------------------|
| Compiler, JRE,    |
| Libraries         |
+-------------------+
Java runtime environment or in simple jre needed to execute Java applications it is basically designed for the end users who wants to run their Java programs.
Illustration:
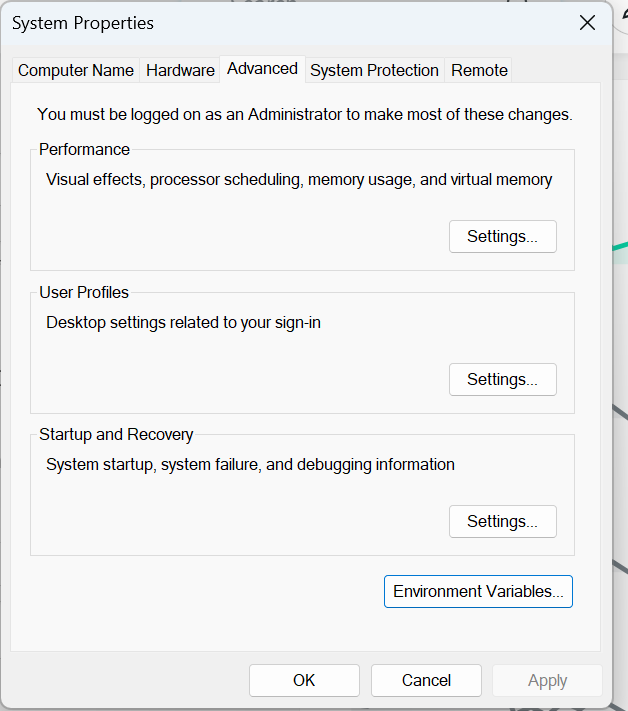
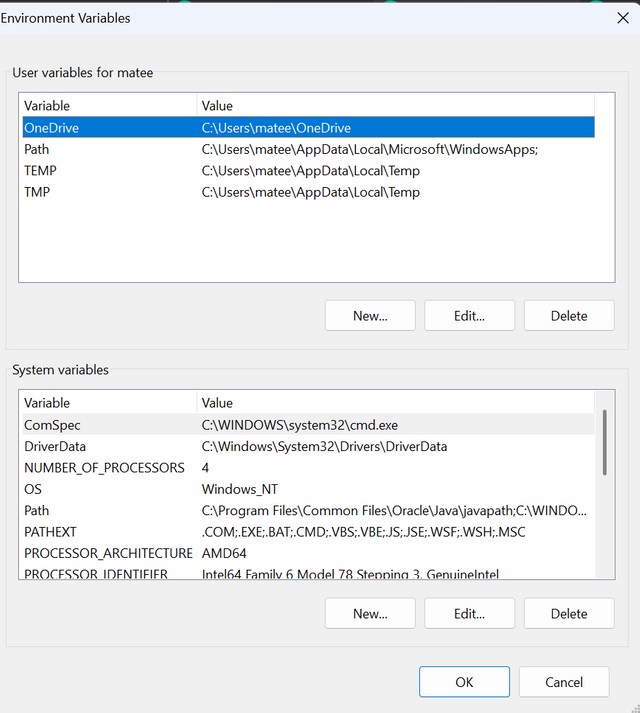
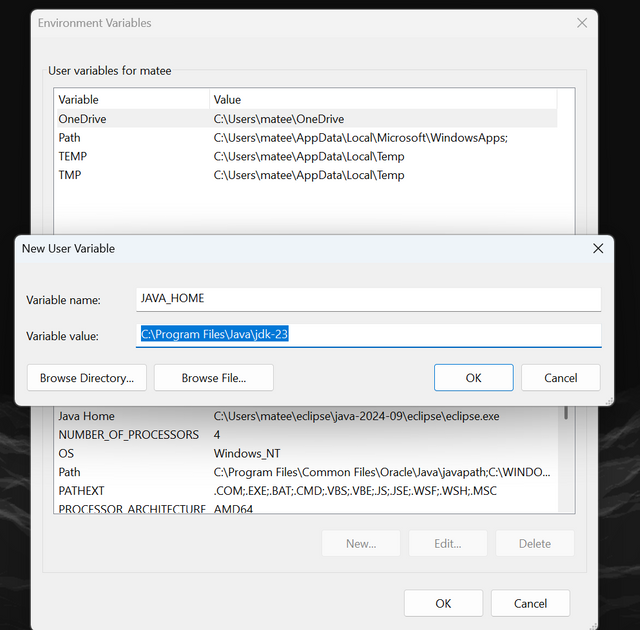
These are the steps that I have followed to install and configure my javas Development environment here we'll see the details by using screenshots and elaborating the process.
And add new system variable that was named as Java home and its value was the path to the installation directory then I click on ok to proceed.
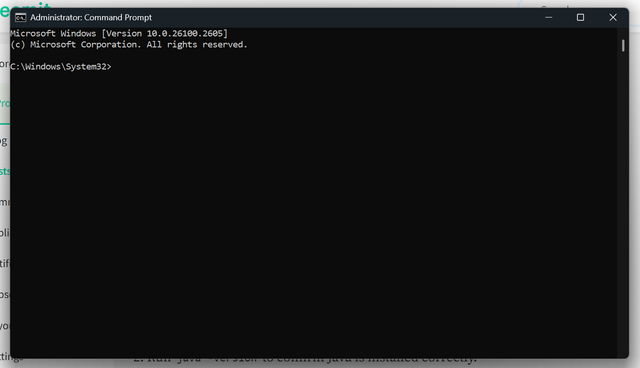
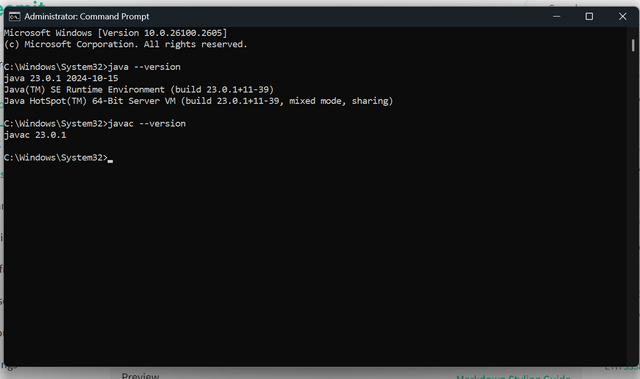
To verify the installation I opened my command prompt and run the command of java--version and then javac--version to check out the variance installed in my PC.
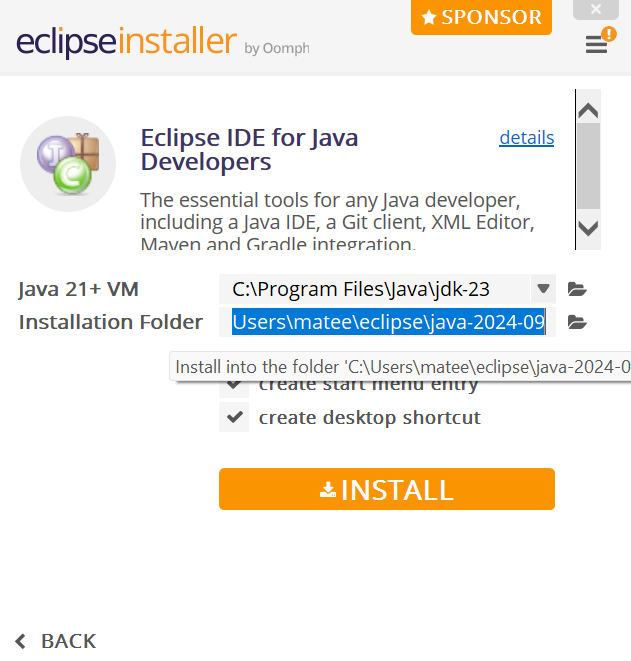
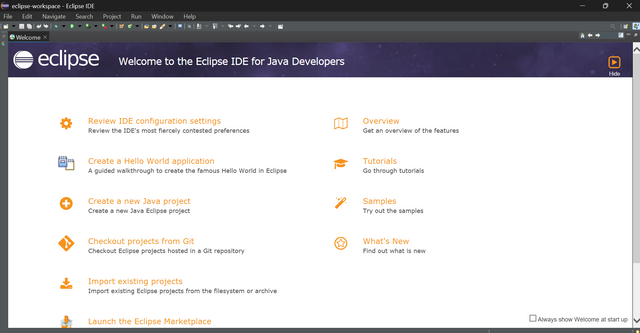
Download the Eclipse IDE for Java Developers. Then I proceed to launch the installer after it was completely installed I set it up.
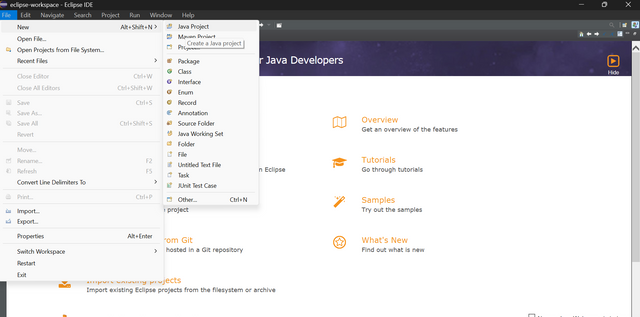
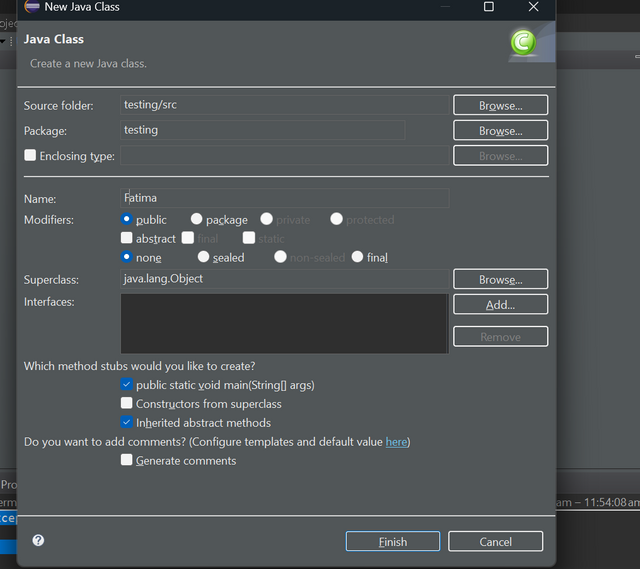
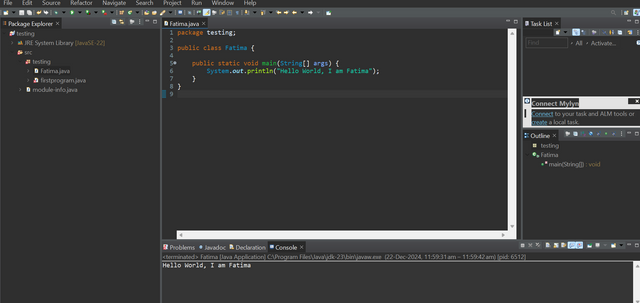
Then I add the new class and and the compiler new class was added as shown in screenshots below.
Then write a simple "Hello, World!" program in a new class.
Run the program and verify the output in the console.
By completing these steps I have a fully functional Java development environment that was ready for writing and done in Java programs so lets proceed with the next tasks. By completing these steps, you will have a fully functional Java development environment ready for writing and running Java programs.
|
|---|
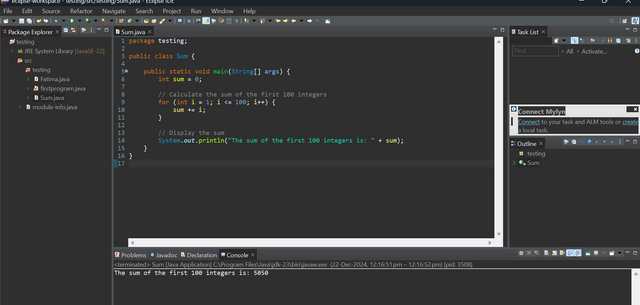
Write a program that calculates and displays the sum of the first 100 integers. Define the main method in a class named Sum to handle the entire calculation.
In this task we will write two paragraphs to calculate the sum of 100 integers using the Java.
Explanation: In this program we will use Firstly I save the code in Sum.java file and run the code by clicking on the run button This will show the following output Output:
Firstly I write the code in Sum2.Java Output:
So we have calculated the sums by using groups and functions in Java.
|
|---|
Explanation of the Tax Calculation: |
|---|
Bracket T1 (≤ 20,000):
- Tax:
20000 * 0.05 = 1000
- Tax:
Bracket T2 (20,001 to 40,000):
- Tax:
(40000 – 20000) * 0.10 = 2000
- Tax:
Bracket T3 (40,001 to 60,000):
- Tax:
(57000 – 40000) * 0.15 = 2550
- Tax:
Total Tax:
- Total tax =
1000 + 2000 + 2550 = 5550
- Total tax =
- The
calculateTaxMethod checks the income against different brackets and applies the appropriate tax rate for each segment of the total tax will be calculated by summing up the tax for each bracket
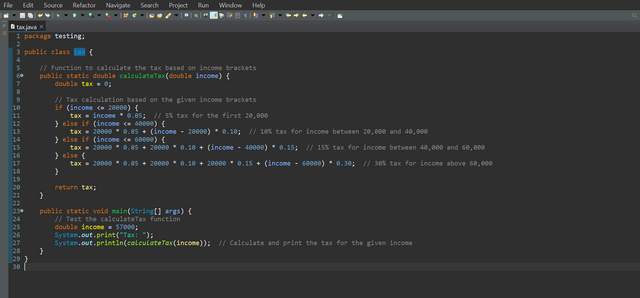
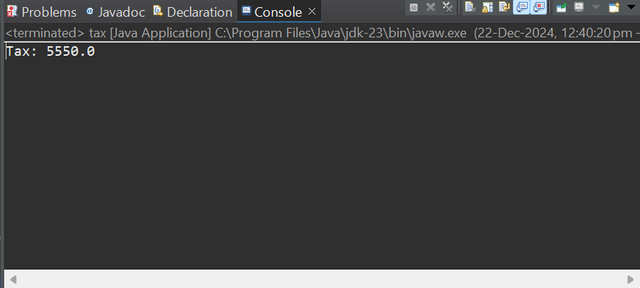
This will output the calculated tax for an income of 57,000 as:
Tax: 5550.0
Output:
Tax: 5550.0
Screenshots you can see below.

Task 5
Using the same program structure as in the previous exercise, write a program named Conversion.java that takes a character c as a parameter and:If the character is lowercase, convert it to uppercase and display the following message:"The uppercase equivalent of c is ..."If the character is uppercase, convert it tolowercase and display the following message:"The lowercase equivalent of c is ..."If the character is not a letter, display the following message:"c is not a letter.". |
|---|

Now we would talk that how programs works it actually takes string of Chracter as input and processes each character It convert lower case letters to upper case and upper case letters to lowercase and also identify a non letter Chracters.
The program uses a scanner object to capture user input in the form of corrector or also input a string the program can handle multiple characters making it flexible for various scenarios scenarios.

To process each character a loop is used this loop iterates through the string and extract the corrector at a time to proceed.
The program will display the result of each character analysis and convergent immediately and provide the real time feedback for the input string.

- Example Workflow
- Input: User enters a string such as
Hello123. - Processing:
- The program processes each character:
H→ Convert to lowercase →he→ Convert to uppercase →El→ Convert to uppercase →Ll→ Convert to uppercase →Lo→ Convert to uppercase →O1→ Not a letter2→ Not a letter3→ Not a letter
- The program processes each character:


Task 4

So in this question we will explore about array operations here the program I have designed that will ask user to input the array size and elements it displays a menu with options to perform different operations based on the user choice. It will find the display largest element compute the sum of the elements and sort the array and displays it if user select exit the program will terminate.


The code you can see in the screen shot the program Itrates through the array To complete each element identify and sorting secondly it will perform the task of calculating the sum of elements where loop is used to add elements of the array to a running total the final sum will be displayed on the screen.
Finally, it will sort the array using bubble sort algorithm and arrange the array in ascending order user can select what operation he wants to perform.
- Output


So that was all from my side about the topic and I hope that you all will like to read the post and support the content
I would like to invite
to participate in the contest
Regards @mateenfatima |
|---|


