photography

Macro photography has definitely become a very broad genre of the art form, thanks to the ability of today’s cameras—from smartphones to professional DSLRs—to make capturing macro shots as easy as clicking a button or two. However, the results may not always be what you desired.
Before learning to take your macro photography to the next level, let’s talk about what macro photography is and how it is achieved.
What is Maitemcro Photography?

Macro photography is a unique form of photography that involves photographing small objects to make them look life-sized or larger in the photo. The usual subjects include flowers and small insects, which we don’t normally get to see up close with the naked eye. This type of photography is also used for bringing out details in jewelry and other inanimate objects. It is a widely used art form that is incorporated in almost every niche of photography, whether for travel, portraiture, action, or even event photography, both in the film and digital age.
A true macro shot depends on the level of magnification. The ideal magnification is at 1:1, where a 1-inch object is also projected at 1-inch on the camera sensor. When projected at half life-size, the same 1-inch object would take up just a half inch of the sensor and would be at 1:2 magnification. However, true macro is anything that has been magnified at a ratio of 1:1 or higher.
Nowadays, both point-and-shoot cameras and DSLRs have a built-in macro mode that helps users capture significantly closer shots of an object from an observable distance. The camera automatically adjusts lens elements and moves them closer to the sensor to best suit close focusing, and without the need for extra lenses or macro tubes. Of course this cannot be considered true macro, because to achieve that you will need a dedicated macro lens (or an accessory that will enable your camera or lens to shoot macro).
There’s also an option to “fake” a macro by cropping your photo to make your subject appear more magnified. However, since the digital output from most cameras (except for those with full-frame sensors) are not as large as on film, resorting to such measures will usually result in reduced image quality, which is why cropping does not yield desirable results.
To achieve true macro photography, there is a wide range of macro lenses available for select digital cameras (mostly DSLRs) that are optimized for achieving as much as 10x magnification for professional macro images. But even with the right gear, pro macro photography can still be hard to execute without knowing how to properly adjust your camera settings to suit your shooting requirements, or without knowing how to create a more favorable shooting situation before clicking the shutter.
Macro shooting may now seem to be more complicated than you thought it would be, but it really isn’t—especially not after using some of our top 10 tips for capturing the best macro photographs.
Top 10 Tips for Macro Photography
Macro Photography Tip #1: Get a good macro lens
While today’s cameras offer a macro mode in the menu or analog settings, they don’t offer as much as 1:1 magnification. If you want magazine or gallery-quality macro pictures, you’ll need to purchase a dedicated macro lens for your camera. There’s a wide array of Canon macro lenses on the market that offers 1:1 magnification and above for your Canon camera. You might be taken aback by some of their price tags, but they’re definitely worth the investment for greater quality macro shots.
Bonus tip: If you plan on shooting flat objects such as coins, stamps, use a “flat-field” macro lens to ensure edge-to-edge sharpness.
Macro Photography Tip #2: Choose a suitable subject
Contrary to popular belief, not everything will make for a good macro subject. There are certain subjects that are indiscernible when viewed close up and without context—and if your viewer can’t understand what they’re looking at when they see your macro shot, how can they appreciate it? But of course, this is all a question of preference and aesthetics. If the subject you photographed appears confusing in macro but is still aesthetically pleasing to the eyes, then it definitely qualifies as a suitable subject.
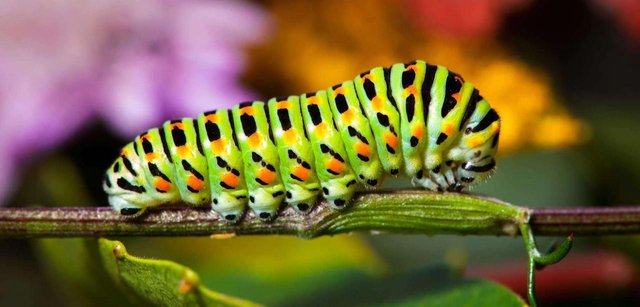
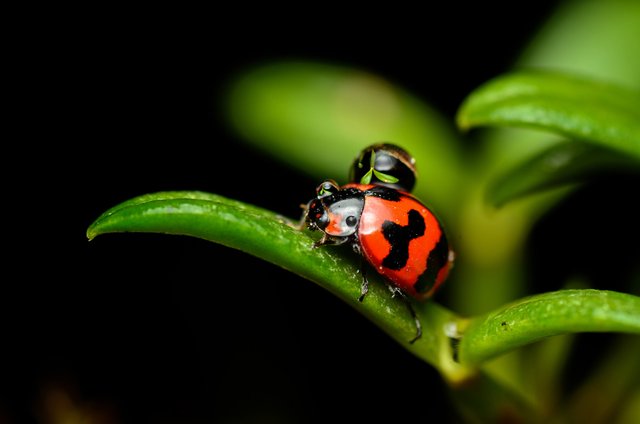
Common subjects include small insects, butterflies, rain drops, and small objects such as miniature dolls, jewelry, and household items. Inanimate objects are fairly easy to photograph as they don’t move, but insects and bugs can be a lot more challenging. One key tip for photographing them is to shoot from a safe distance to avoid scaring them off.
Macro Photography Tip #3: Use a longer focal length for living subjects
Speaking of lenses, you may want to go for those that offer longer focal lengths, depending on your subject of choice. This allows you to “digitally” move in closer (without actually having to move closer) when photographing insects and objects close-up without disturbing them or disrupting their natural environment. The best focal length for these types of situations should be anything above 90mm, such as the Tokina AT-X 100mm f/2.8 PRO D Macro Lens ($399) .
While Nikon macro lenses don’t offer the same maximum magnification as Canon macro lenses yet, there are available connective lens accessories—such as tubes or bellows—for Nikon and other camera brands that help extend the lens for more reach.
Macro Photography Tip #4: Incorporate assistive accessories
Even without a dedicated macro lens, you can achieve good macro shots with assistive accessories that can be incorporated into your macro kit. There’s what they call a diopter , which is also known as the “poor man’s macro lens.” It’s basically close-up filter or magnifying glass that is screwed on to your regular lens or to any bridge or compact camera to achieve macro magnification without having to purchase a true macro lens.
Bellows or tubes are the accordion-like, expandable part of a camera that helps achieve ultra-tight close ups on your subject. You can also get lens adapters that allow you to reverse your lens and manually control the aperture.
Instead of using a tripod, which can be quite restrictive for the photographer, you can use “third hand” devices (anything you can create or devise with the available tools you have to create a literal “third hand”) for holding and supporting your subjects steadily and against your desired background.
Macro Photography Tip #5: Customize your background
Shooting inanimate objects is fairly easy as you can have complete control over the positioning, lighting, and even your background. Simply place it against your desired background, depending on your composition, and make sure they don’t clash with each other. Many photographers prefer to keep it simple by positioning their subject in front of a contrasting background that’s located farther away from the subject, so it comes off as a beautiful background blur.
If you’re spontaneously shooting outdoors, you may not have that much control over your background. However, you can change your perspective or maybe use that “third hand” support for positioning your object, such as a leaf or flower, to face you from another angle.
Macro Photography Tip #6: Pay attention to your depth of field
Most people will advise you to use smaller apertures (a larger f-stop number) as this helps increase your depth of field and ensure that the important parts of your subject are in sharp focus. However, the problem with using a smaller aperture is that the reduced and diffracted light can greatly affect the sharpness of your image. On the other hand, if you use too large of an aperture, you end up with less depth of field, which means that some parts of your subject may end up blurred out as well.
One of the hardest parts in doing macro photography is achieving the right balance between desired sharpness and depth of field. If you are able to shoot from a perspective or angle that allows you to fit the most important or interesting parts of your subject on a single plane of focus, which ensures that your subject remains sharp while still maintaining beautiful background bokeh, then it’s all a matter of finding the largest aperture that will allow you to do that without leaving your subject blurred out in certain parts.
Or if you don’t mind cropping your image, you can also decrease your magnification and use a smaller aperture to ensure that all parts of your subject are sharp, then simply crop the photo to make your subject appear more magnified. However, a challenge in using smaller apertures is that it restricts more light from coming into the lens, which means you’ll often need slower shutter speeds to be able to properly expose your shot. Depending on the photographer, the solution can be using a tripod for a steadier shot or using flash to add more light to the scene.
Another recommended solution to the problem of balancing depth of field and sharpness is focus stacking, which is a built-in feature in a select number of cameras. If you don’t have this feature, it can also be accomplished in Photoshop.
Macro Photography Tip #7: Create better lighting
A key component in photography is light, and macro photographers obviously greatly benefit from having good lighting conditions. Aside from using it to artistically improve your shots, you can add light to support your exposure settings, such as when the subject is still too dark despite having a wide open aperture.
Many macro photographers would advise beginners to use a ring flash to enable the use of smaller apertures, as well as faster shutter speeds for handheld shooting and moving objects.
Ring flashes or twin flashes offer good 3D lighting that is not as flat as built-in pop-up flashes.
Macro Photography Tip #8: Improve your in-camera composition
Whether you’re shooting macro or any other photography style, a photographer should learn how to improve their composition in-camera. This means properly framing your subject before clicking the shutter instead of relying on post-processing to correct your composition. This can be quite crucial for macro photography, as cropping your shots decreases the photo resolution.
Instead of cropping a photo of an insect to make it look larger, increase your subject magnification while shooting so you get to keep your original resolution.
Macro Photography Tip #9: Plan your point of focus
You have your shot ready, and all you’ll need to do is focus on your subject and click the shutter. But before you do, it helps to realize that in macro photography, your point of focus can greatly improve your composition.
One thing that can help you take better macro photos is to learn how to focus on different parts of the frame manually and to try to change your focus to provide different and interesting perspectives.
Macro Photography Tip #10: Be patient
Macro photography can be a very rewarding style of photography, despite it being somewhat complicated for many beginners. While there are a lot of things to remember in order to achieve a good professional macro shot, practice helps make it a habit. Once you get used to it, it becomes a skill and you’d be well on your way to improving your shots with every click of the shutter.
Hi! I am a robot. I just upvoted you! I found similar content that readers might be interested in:
https://www.adorama.com/alc/top-10-macro-photography-tips
This post has received a 1.56 % upvote from @drotto thanks to: @shazzad.