Exploring User Inputs, Gesture Detection, Navigation, and Bottom Sheets in Flutter
Assalamualaikum my fellows I hope you will be fine by the grace of Allah. Today I am going to participate in the steemit engagement challenge season 20 week 3 by @mohammadfaisal under the umbrella of steemit team. It is about flutter mobile application development. Let us start exploring this week's teaching course.
Design a simple form with a TextField where users can enter their name and a Button to submit the form. Use TextEditingController to retrieve the text from the TextField and display it on the screen when the button is pressed.
We can create a simple form in the flutter in easy way but the technical point of this task is to get the value entered the textfield and then display it on the screen.
- First of all we need a text field
- Then we need to create a controller to control the text in the field.
- Intialize a TextEditingController
- Then we will provide this defined TextEditingController to TextField.
- To display it on the screen I will use a Text widget
Here we go to make all this using flutter:


This is all the necessary code. I have added decoration where necessary. The implementation of the Card widget as a parent is making the layout look more beautiful.
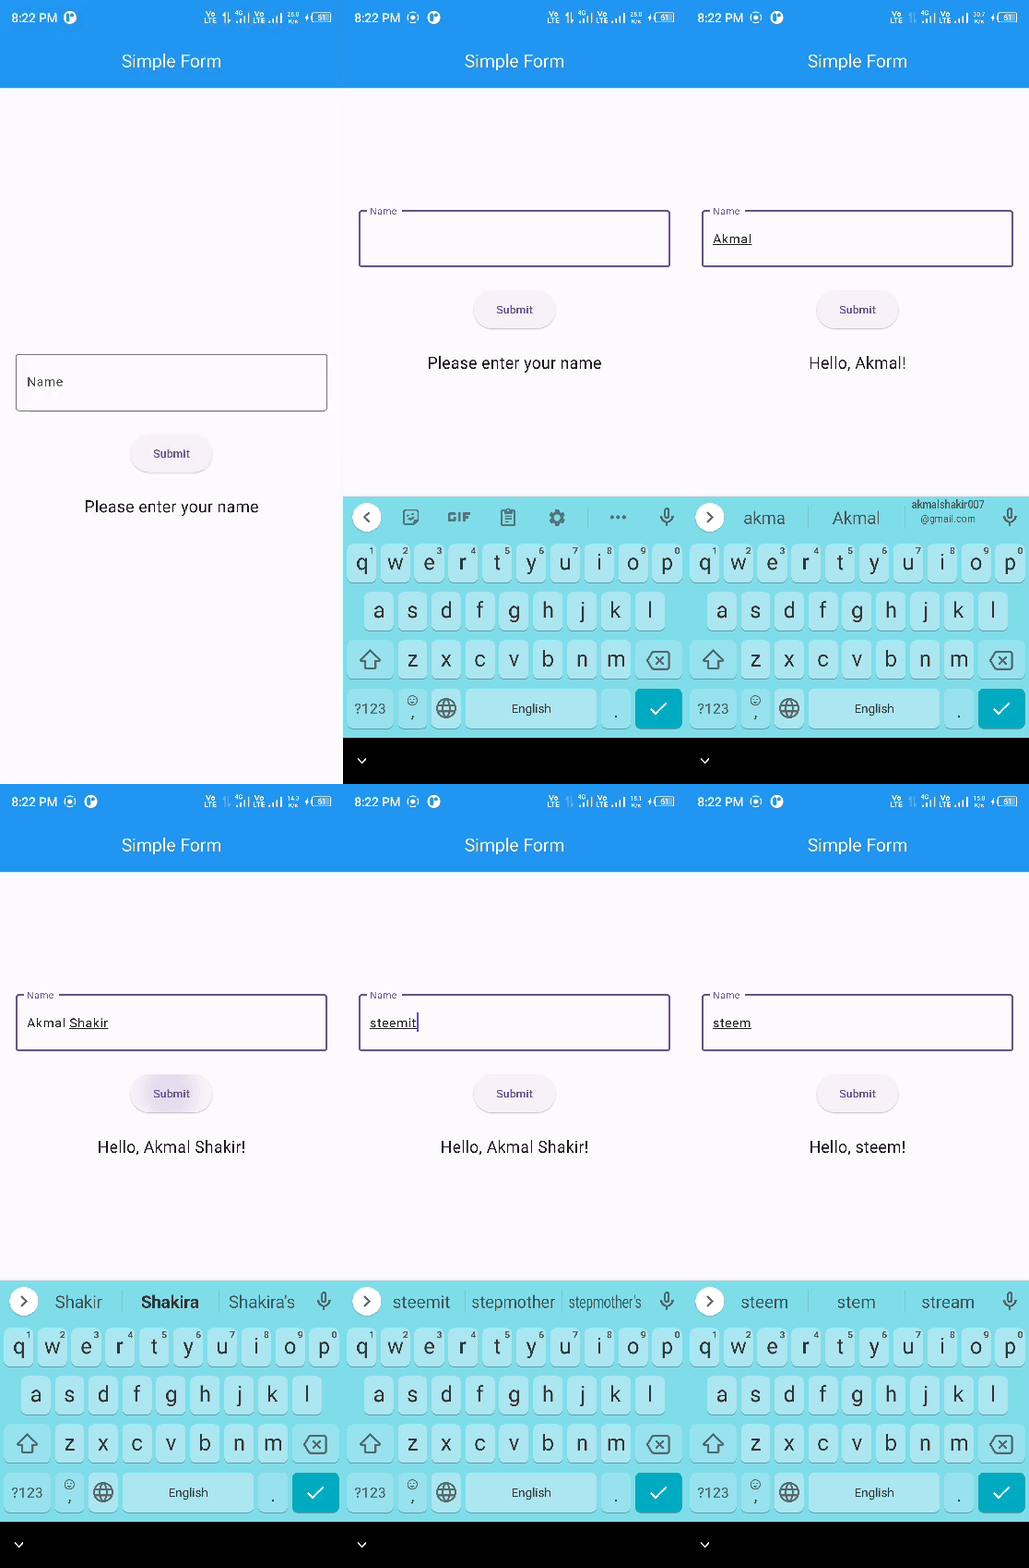
This is the output of the above code. The textfield is accepting a text widget from the user and then the logic to display it on the screen is working and displaying it on the screen.
Create multiple screens and navigate between them. Design two screens—HomeScreen and DetailsScreen. Use Navigator.push() to navigate from the HomeScreen to the DetailsScreen when a button is pressed.
Navigation is important in any application. We can move from one screen to another screen using this navigation logic and concept. Navigator.push() is widely used to push one screen on other and similarly we can move back to last screen.
To complete the above task I will follow these steps:
- I will create first screen as HomeScreen()
- I will create second screen as DetailScreen()
- I will use navigator.push to move from home screen to detail screen.
- I will use navigator.pop to come back to the hoke screen from the detail screen.


The code I have used first directly opens the homescreen. The elevated button is used for detection of the click and to perform an action on the click. When I will click on the button Go to Details screen. This next screen which is details screen will be pushed into the stack and that screen will appear on the screen.
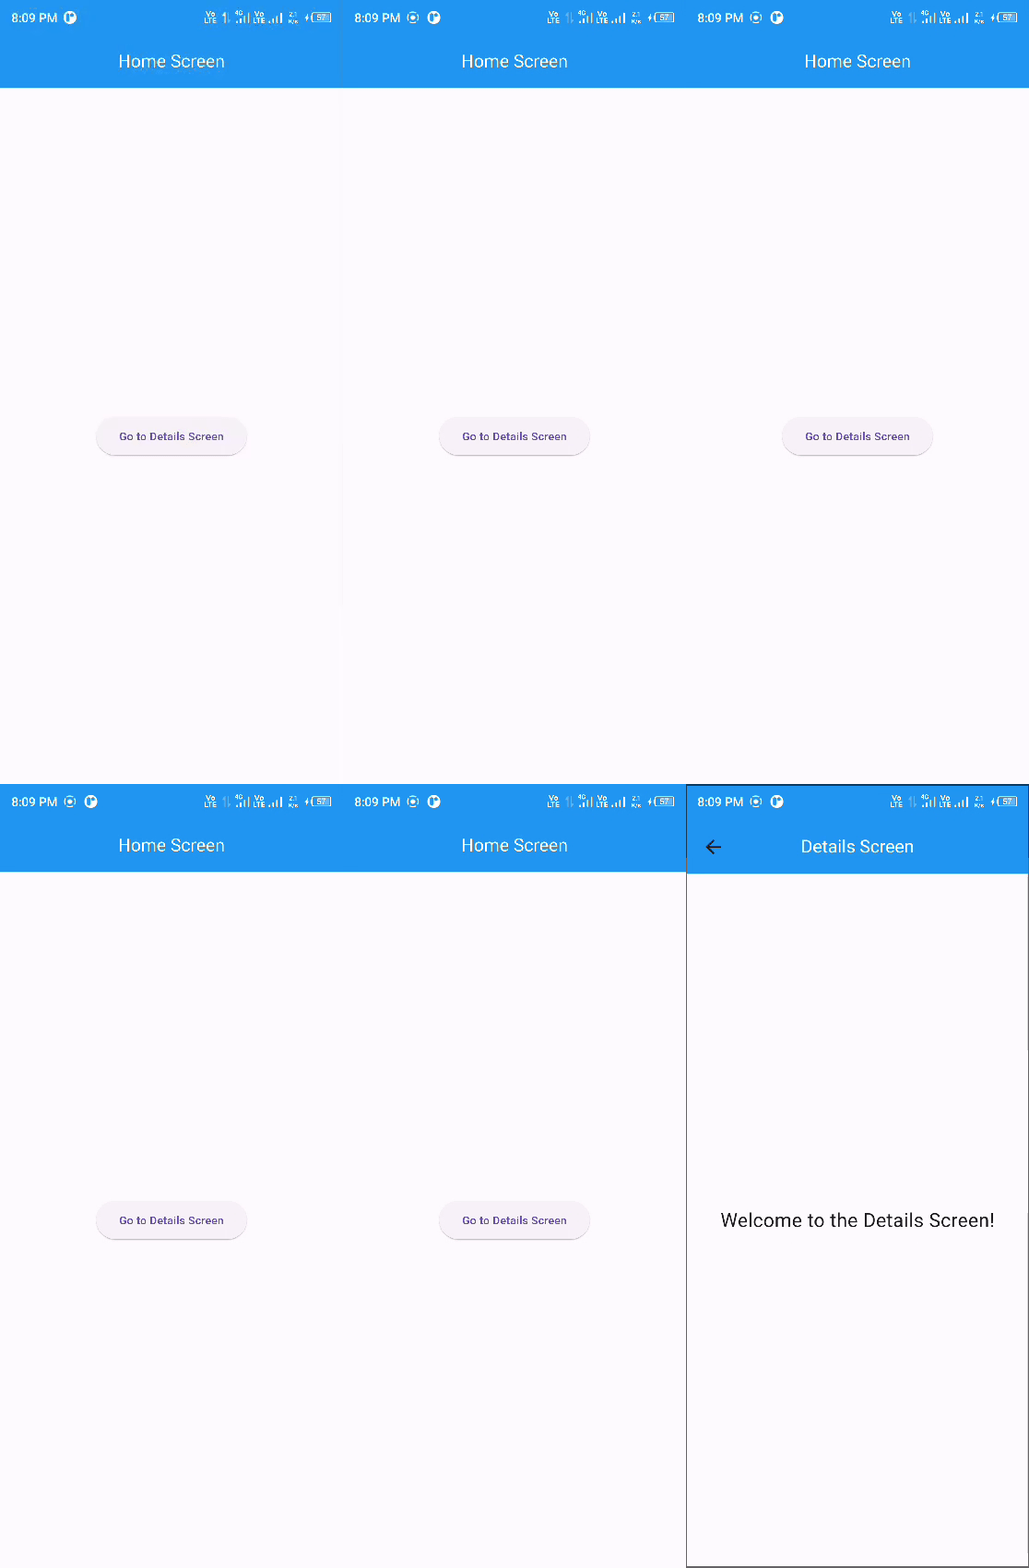
And when I am clicking on the button located on the details screens it is exiting the current screen and displaying the home screen. The output is working fine and you can see how the screens are changing. In this way we can navigate from one screen to another and also we can exit the current screen to move to the previous screen.
Implement a bottom sheet pop up. On the screen add a button to navigate from that screen to bottom sheet. And add some data to display on the bottom sheet such as name, country, age, gender, etc.
I will follow these steps to complete this task to prepare a screen. And navigating from screen to bottomm sheet and bottom sheet will display the data.
- I will prepare a screen.
- I will add a button.
- I will implement navigator.push() to travel from current screen to bottom sheet.
- I will add a container in bottom sheet
- All the data will be added in to that container as required in the task.
- I will use a column in the container as parent and then I will use row widgets to display the data separately in every row.


According to this code first my home screen will he opened. And when I will click on the button the bottom sheet will appear. And in the bottom sheet all the data will will be displayed such as name, country, age and gender.
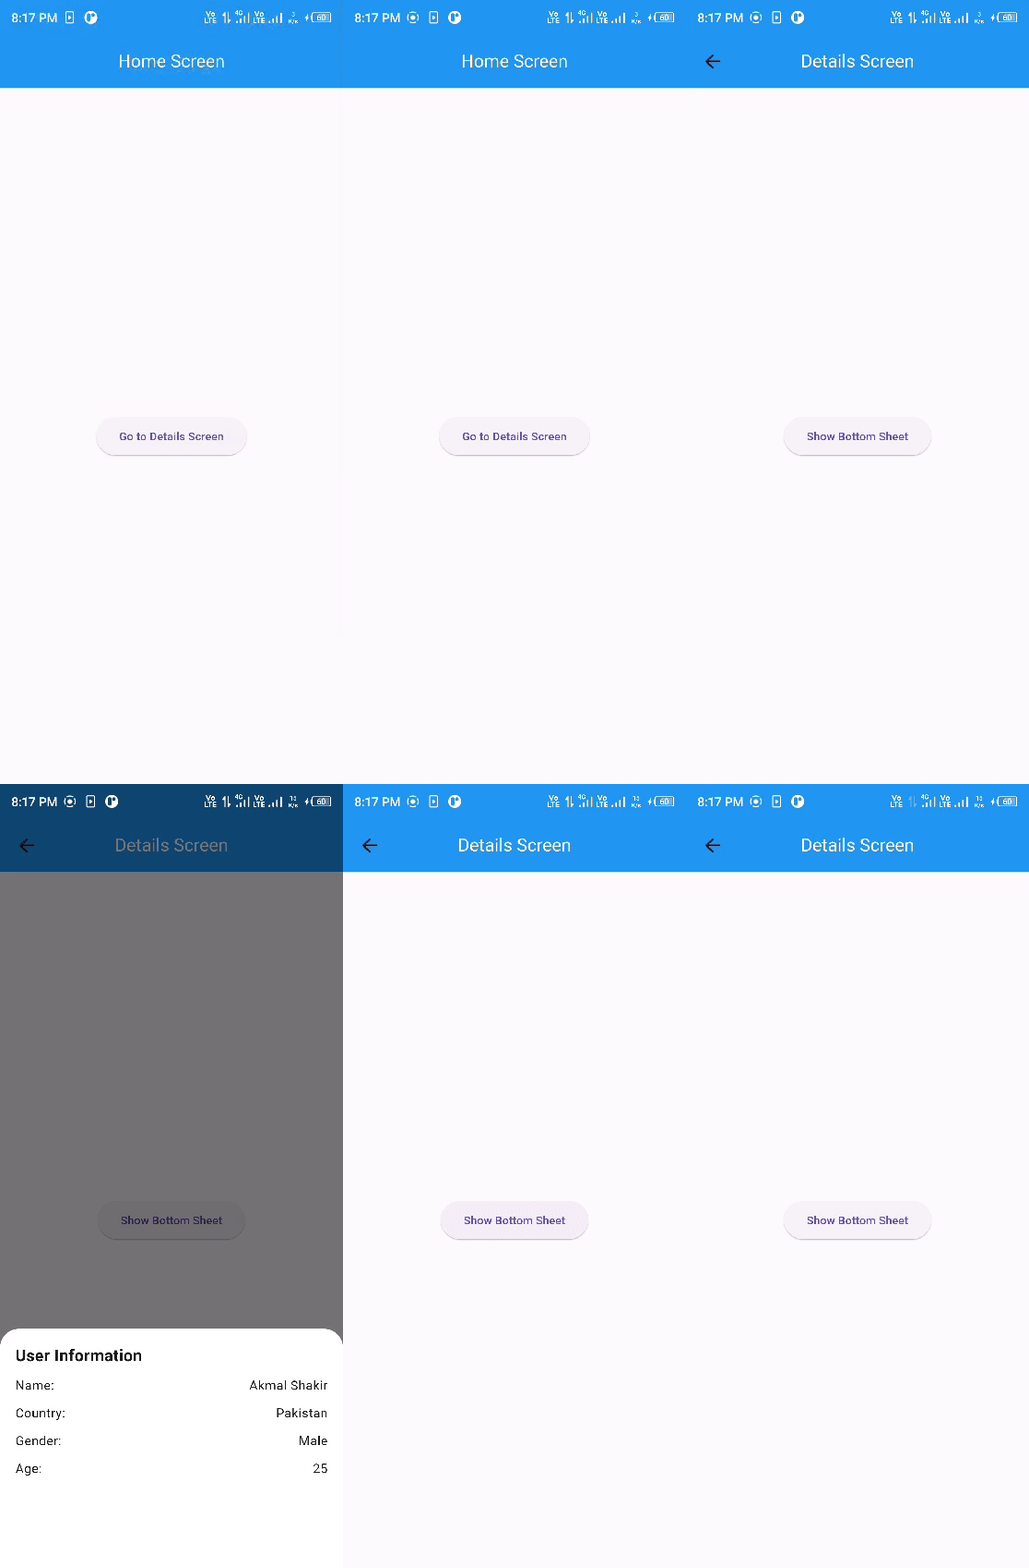
This is the output of the above code. You can check when I am clicking the button the application is showing a bottom sheet which is coming from base. And the bottom sheet is showing all data which was entered during code.
Car Loan Calculator App: Develop a simple car loan calculator app where users can input loan details (like the loan amount, interest rate, and loan term) and view the calculated monthly payment on a bottom sheet. The bottom sheet should include the loan amount, interest rate, loan term, and the calculated monthly payment.
It is great that the teacher has has given a car loan calculator app for the project. Many people buy cars and take on instalments and they need to calculate their total interest as well as monthly and the instalment per month to pay. It is will be a handy and useful calculator for everyone.
It is complex and there is need to design a lot of components and widget so I will try to follow these steps. I have divided the project in 3 parts:
- User interface
- Logic
- Bottom Sheet


Here I have designed the user interface of the calculator application. It has an app bar as usual. Then I have added 3 TextFields according to their use case. One field is for the loan amount, second is for interest rate and last is for the loan term or period. At the end there is a button to perform the action.
I have created these TextEditingControllers:
 final TextEditingController _loanAmountController = TextEditingController();

final TextEditingController _interestRateController = TextEditingController();

final TextEditingController _loanTermController = TextEditingController();
And you can see I have assigned these controllers to the TextFields according to their name and work. I have assigned name related to the textfield to avoid error.


Then I have designed the bottom sheet because I have to display the data on the bottom sheet. I have given it a container and then I added a column widget to use multiple child widgets in the vertical alignment. I used 5 text widgets to display the data. At the end there is a button to close the bottom sheet. I added all the values in the text widgets from the variables.
Then I started to develop the logic for the calculation actually now it was the work of the programming logic to implement a function which will calculate the interest and loan.

First of all I used the formula to calculate the monthly payment. I used data type double because the values may be in decimal because of percentage and division operators.
Then I need to display the values in the text widget so I converted the values to text using tryparse. And there was a check function as well to check all the fields are filled by the user otherwise it will not perform the action. And it will shows the message to fill the fields using the snackbar.
After validating the text fields and calculating the required values the values will be parsed as parameter to bottom sheet and then from those the values will be used to display on the bottom sheet screen.
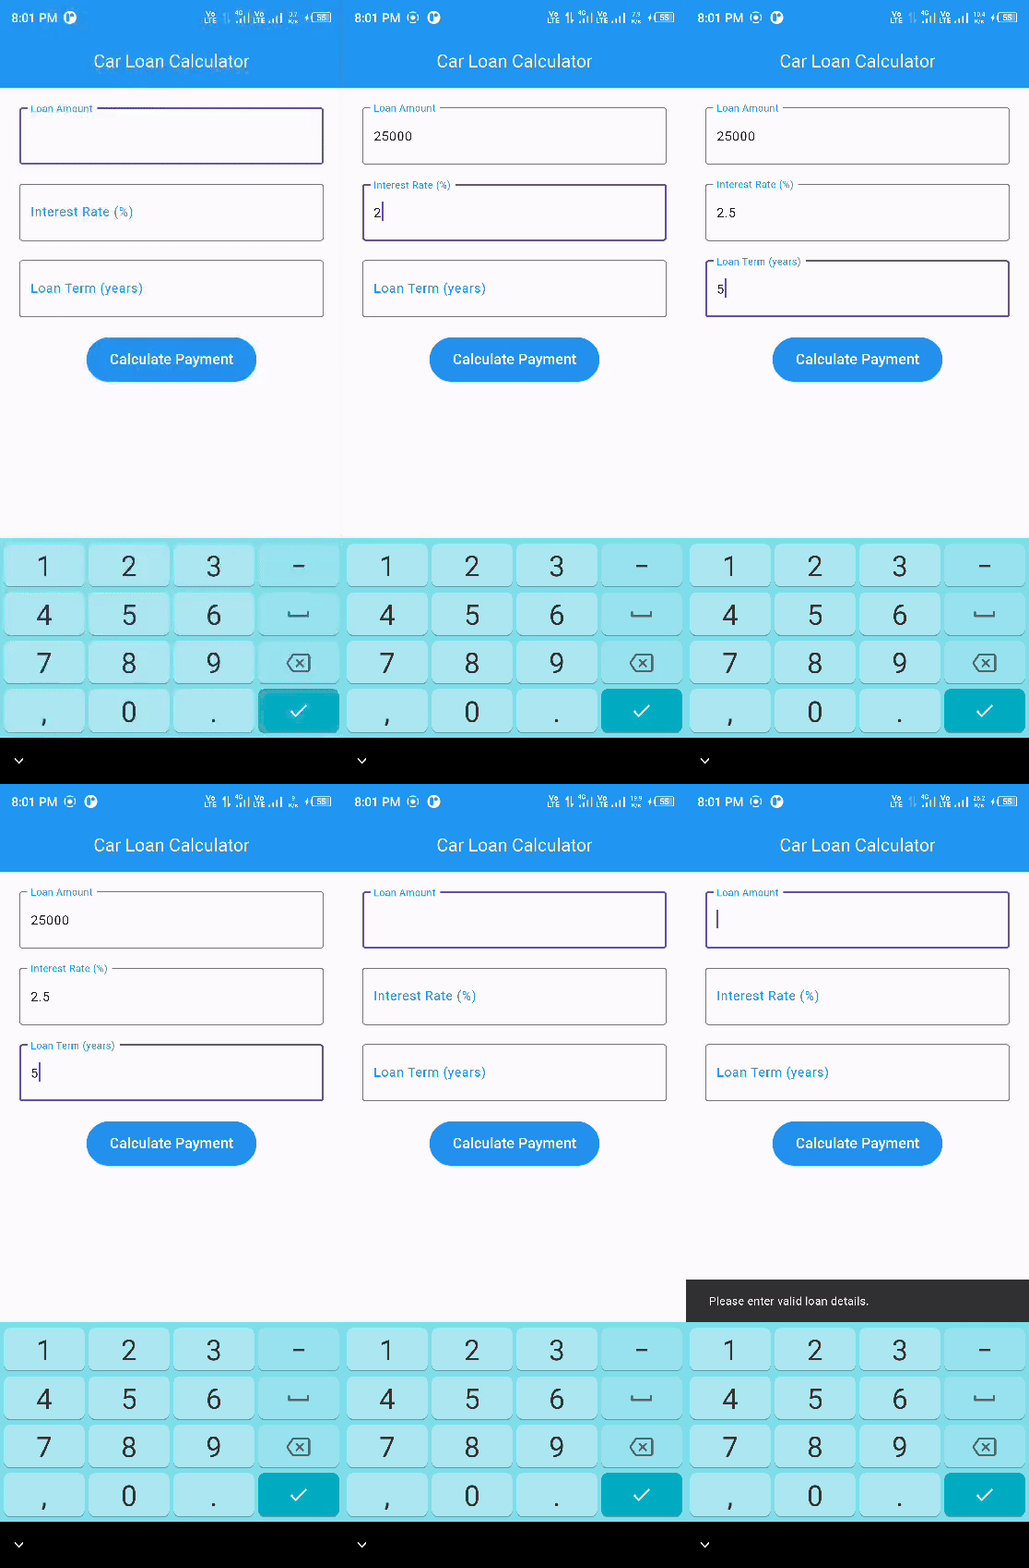
My loan calculator application is working fine and it is calculating the correct monthly payment according to the interest rate and loan term. And when the fields are empty the application is showing an alert to fill the fields. Indeed it was difficult for me but I enjoyed developing this mobile calculator.
Upvoted! Thank you for supporting witness @jswit.
TEAM 4
Congratulations! Your post has been upvoted through steemcurator06. Good post here should be..Thank you @jyoti-thelight