SEC S20W5 - Flutter Toolkit – Managing Packages, Custom Application Icons, and Streamlining Navigation
Assalamualaikum my fellows I hope you will be fine by the grace of Allah. Today I am going to participate in the steemit engagement challenge season 20 week 5 by @mohammadfaisal under the umbrella of steemit team. It is about flutter mobile application development. Let us start exploring this week's teaching course.
.png)
What do you understand by pub.dev? How it helps in flutter development? If you are a developer then how can you publish your own package in pub.dev
Pub.dev is a repository where Dart and Flutter developers can find and publish packages. It hosts thousands of packages contributed by developers. These can be reused for various projects. These packages can provide additional functionality such as state management libraries, user interface components, APIs or tools for integrating third party services.

How Pub.dev Helps in Flutter Development
Access to Packages: Pub.dev simplifies development by allowing developers to integrate existing solutions into their Flutter apps. It speeds up the development process. Developers can find packages for features like HTTP requests, animations, UI components, etc.
Community Support: Developers can benefit from community contributed packages, learning from others implementations and contributing their own improvements.
Version Management: Pub.dev provides versioning for packages, allowing developers to specify which versions they want to use, ensuring compatibility across different projects.
Easy Integration: Packages hosted on Pub.dev are easily integrated into Flutter projects by simply adding them to the
pubspec.yamlfile.
Steps to Publish Your Own Package on Pub.dev
As a developer, you can follow these steps to publish your package on Pub.dev:
Create a New Dart/Flutter Package:
- Start by creating a new Dart or Flutter package using the following command:
flutter create --template=package my_package_name - This will set up a basic package structure with the necessary files.
- Start by creating a new Dart or Flutter package using the following command:
Write Your Package Code:
- Develop your package, including any necessary code, documentation, and example usage. Ensure your package solves a problem or provides a useful tool for others.
Add Metadata in
pubspec.yaml:- Fill out the required fields in the
pubspec.yamlfile like package name, version, description, author, and other relevant metadata.
Example:
name: my_package_name description: A description of what your package does. version: 1.0.0 author: Your Name <[email protected]> homepage: https://github.com/your_github_repo- Fill out the required fields in the
Check for Compliance:
- Ensure your package complies with Pub.dev guidelines by running:
dart pub publish --dry-run - This will help you check if everything is set up correctly and warn you about any missing fields or issues.
- Ensure your package complies with Pub.dev guidelines by running:
Add Documentation:
- Add a
README.mdandCHANGELOG.mdto your package to provide clear documentation and track updates.
- Add a
Publish the Package:
- When you're ready, publish your package to Pub.dev with the following command:
dart pub publish - You’ll need to log in to your Pub.dev account if it's your first time publishing a package.
- When you're ready, publish your package to Pub.dev with the following command:
Maintain and Update:
- After publishing the we can update the package. We can manage the version number in
pubspec.yaml. Then while repeating the publishing process it will be updated on the pub.dev.
- After publishing the we can update the package. We can manage the version number in
So these are the simple steps to upload and publish any new package to pub.dev.
What is pubspec.yaml file? How we use it and explain its components with examples
The pubspec.yaml file is very useful file in the flutter development. It is a key configuration file in each flutter and dart project. It has metadata about the project. It has the name of the project. It shows the version dependencies as well as assets of the project.
This is crucial to manage the dependencies for the project. It uses YAML language. It stands for Yet Another Markup Language. It is simple and human readable.
Components of Pubspec.yaml
Project Metadata: This section of pubspec.yaml file contains basic information about the project. In this section name and description of the project is defined. It has the information of the author and version number of the project.

Environment: This section has information about sdk. It specifies the Dart SDK and Flutter SDK. The project depends upon these versions. It ensures the project will be compatible on different Dart and Flutter versions.

Dependencies: This section has the list of external packages and libraries. The project requires these packages to run on it. These added external packages are fetched from pub.dev.

This is the section where we can add any external packages. While adding packages we need to take care of the spacing.
Dev Dependencies: This section have all the packages which are used in the development process. These are also used in testing phase and these are not required in the production.
Assets: This section is used to add external assets in the project. We can add images, fonts and other resources.

Here you can see how we can add images. In the picture we can see some by default asset images in it.
Fonts: In this section we can add new fonts which are not available in flutter by default. We can add the package and the flutter will load and install them in the project. And we can use custom fonts in this section.

In the picture by default and as a sample fonts have been added. We can define the font family in this sections. For the fonts we add ttf file as it access this type of file.
Describe different ways to add Application Icon. Develop an application and add Icon to the application and represent it visually.
There are a few ways to add an application icon to a Flutter app. Flutter applies a built-in icon to the application. And for adding a custom icon we need to follow different ways. There are several ways of adding flutter application icons. Here are some common methods to add app icon:
1.Manually Adding App Icons:
You can manually set app icons for both Android and iOS platforms. For this purpose you have to replace the default Flutter icons with your own images in the respective directories.
For Android:
- Navigate to
android/app/src/main/res/. - Under this directory you'll find multiple drawable folders (
mipmap-hdpi,mipmap-mdpi,mipmap-xhdpi, etc.). Here you can place different sizes of your icon images. - Replace the default icon which is
ic_launcher.pngin each folder with your custom icon. It ensure that the image sizes match the requirements for each resolution. It will run on each size of device without lagging.
For iOS:
- Navigate to
ios/Runner/Assets.xcassets/AppIcon.appiconset/. - Replace the images with your custom icon. It ensure that the sizes match the required resolutions.
2. Using Flutter Launcher Icons Package:
This is the easiest way to replace the app icon. As I have understood from the lecture. It looks very easy. In this you need to change the icon path and it will automatically apply it on android and iOS. You can add an app icon in Flutter by using the flutter_launcher_icons package. This package helps to generate the necessary icons for both Android and iOS with a single command.
Steps to Use flutter_launcher_icons:
- Add the
flutter_launcher_iconspackage to your pubspec.yaml file:
 dev_dependencies:
   flutter_launcher_icons: ^0.13.1
 flutter_icons:
   android: true
   ios: true
   image_path: "assets/images/app_icon.png"
image_path: This is the path to your app icon image.- Set
android: trueandios: trueto enable the generation of icons for both platforms.
Run the following command in your terminal:
flutter pub get
flutter pub run flutter_launcher_icons:main
This will automatically generate the necessary app icons for both Android and iOS.
3. Manually Editing pubspec.yaml:
If you choose not to use a package, you can manually reference your icon in pubspec.yaml and replace the default app icons as shown in the manual method above.
Example Application with an App Icon:
Firstly I added the package into oubspec.yaml file.

I added the path of the icon to the pubspec.yaml file where flutter icon launcher package was installed.

The I run all the comands to generate the icons automatically according to the size of the different devices for the android and ios. All commands were executed successfully.

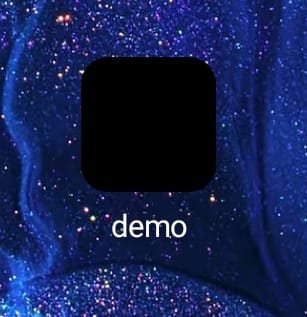
I run the project again to see the change in the icon. The default icon was removed already. And it was looking a dark and black icon. I do not know why it was showing like this. But I am happy I became able to remove the default and showed a new one as dark.
Develop a "Recipe Book App" browse different categories of recipes (e.g., Breakfast, Lunch, Dinner), view specific recipes. Implement TabBar for navigating between recipe categories, a BottomNavigationBar for quick access to Home, Favourites, and Profile sections and add a custom app icon to represent the app
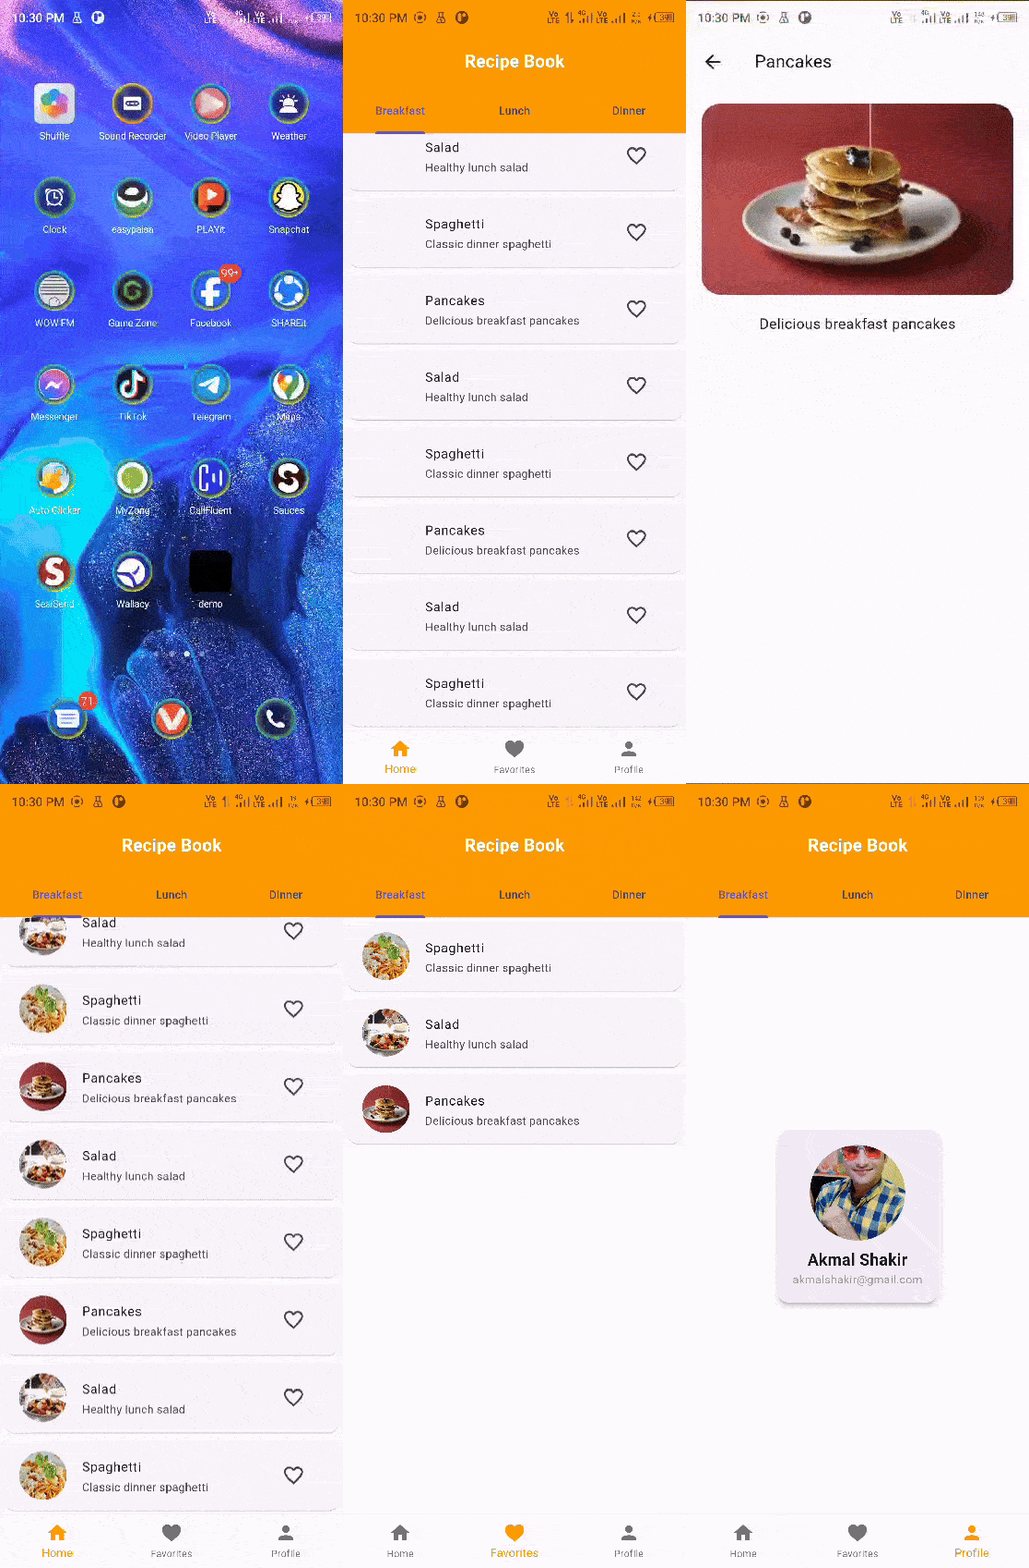
Recipe book app is looking very interesting. I will create a tab bar with the help of the tab bar view to navigate from one tab to another tab.
Then I will design all the screens to show data under the tabs. Moreover I will use the bottomnavgationbar to show other details such as favorite items and at the end theer will be a user profile.
I will use network images to set them as the leading of the recipe. Then I will give a title and and a subtitle that will show the recipe name and a light information of the recipe.
I will create all the recipes clickable on the home screen. It will give a bigger view to the picture of the recipe and it will show more details. I will add an icon at the trailing of the list. It will be a clickable icon and when I will click on the favorite icon the recipe will be added to the favorite screen.

In this screen recording you can see how the application is working. It is getting time to display the images on the screen. The reason of this late loading or time taking loading is the use of the network images. But they images were looking beautiful. The sue of to view the recipe bigger when clicked is also looking good and working greatly.
