SEC S20W6 - Custom Fonts, Stacks and UI Widgets
Assalamualaikum my fellows I hope you will be fine by the grace of Allah. Today I am going to participate in the steemit engagement challenge season 20 week 6 by @mohammadfaisal under the umbrella of steemit team. It is about flutter mobile application development. Let us start exploring this week's teaching course.
.png)
Create a simple app that displays the title of your app and a welcome message using a custom font.
It is creative experience for me to use custom fonts in the flutter mobile application. In the previous lectures I thought about it and finally it is here. Now we can change the fonts of the application to custom fonts. I do not have any custom fonts file. I will use custom fonts package by google. I have added google_fonts: ^6.2.1 package in the pubspec.yaml file and no any issued appeared there.
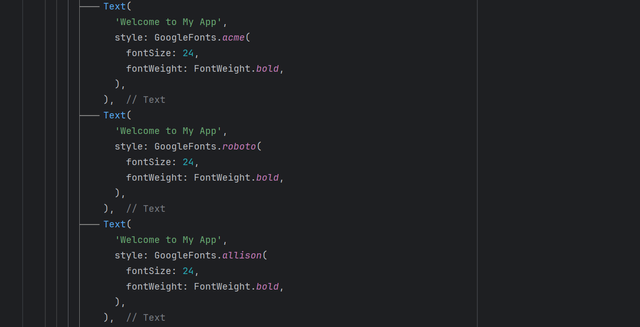
I have used 4 different font styles which are visible in the code. All these fonts are used from that google font package. I saw there were numerous font styles and I chose some random styles and they are looking different from each other.
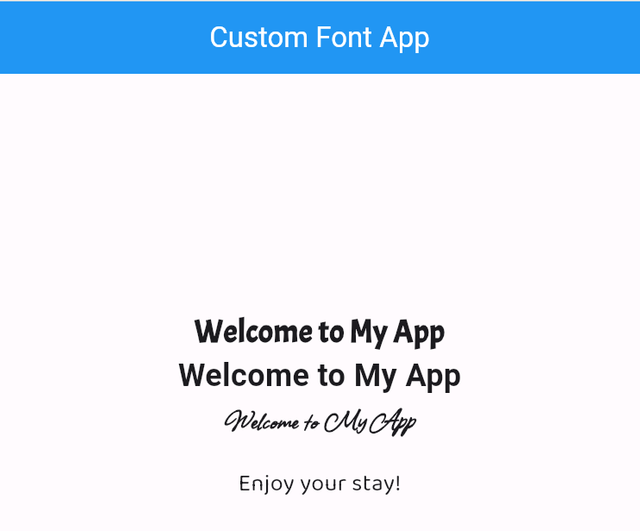
The result is showing the integration of the custom fonts.
Create a profile screen, place a circular avatar on top of a background image using Stack. Add a name and a badge icon to this layout using Positioned.
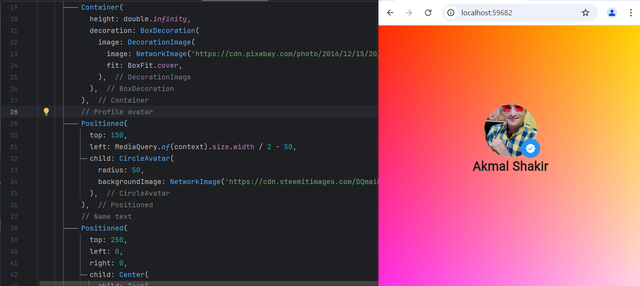
I have combined the code and the output of the code about the Stack. As I have learnt from the lecture of the teacher that we can place widgets on each other with the help of Stack. I used to think about it often when I see anything like that. But today I have learnt it and now I can implement it anywhere. It has made the complex interface simple. I used a background image. Then I placed my profile picture on the screen. After the profile picture there is the badge icon which is standing on the profile picture and CircleAvatar. Now I have come to know how the big platforms achieve this functionality such as facebook, twitter and whatsapp. I am feeling like a pro.
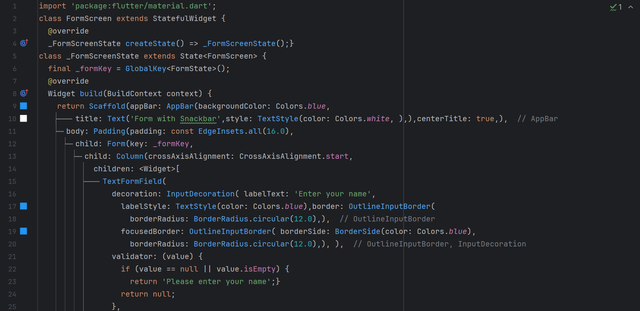
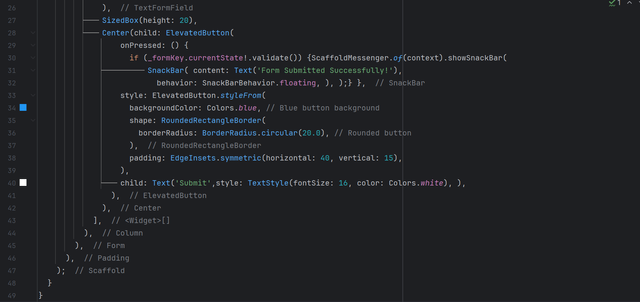
Create a form with a button. When the button is pressed, display a Snackbar with a confirmation message
 |  |
|---|
I have created a simple and single field form just to check the functionality of the Snackbar. First of all I have define a form key as GlobalKey to validate the field if it is empty or filled. The form checks the filed and return accordingly. I have used an ElevatedButton and in its onPressed function I have called SnackBar. When the user press the button after filling the input field then the it shows an alert popping from the bottom in the form of the SnackBar.

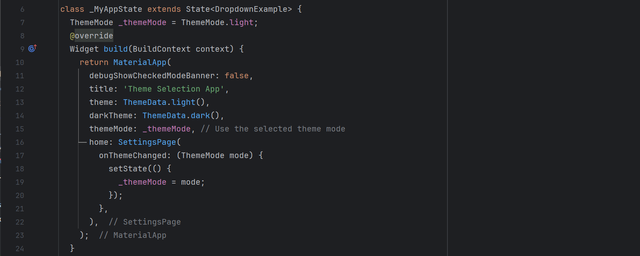
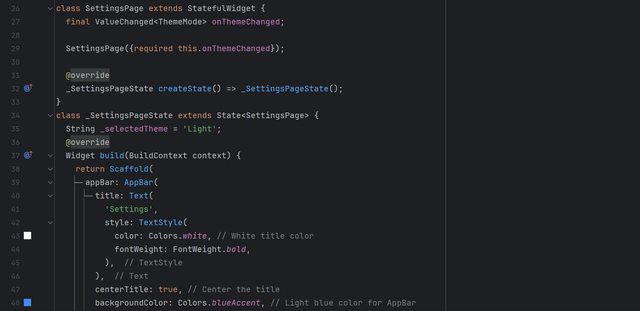
Create a settings page where users can select a theme for the app (e.g., light or dark mode) from a dropdown menu
 |  |
|---|---|
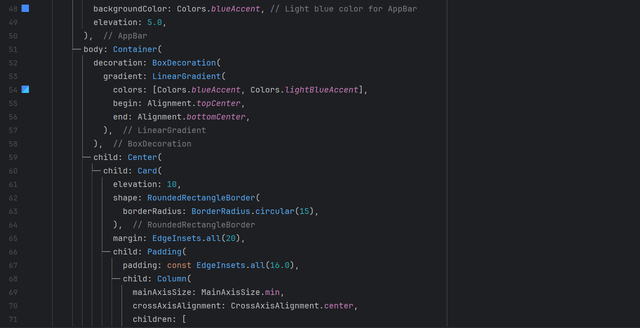 |  |
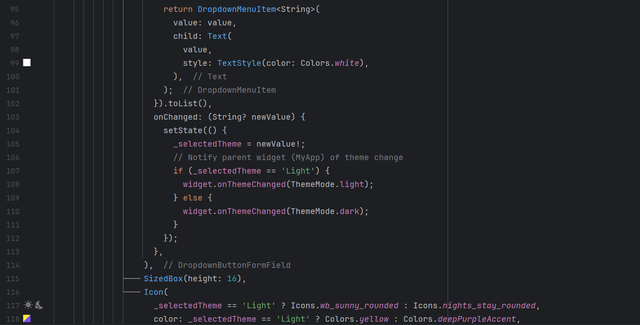
I have designed the complete screen for the settings. In this settings page we can change the theme. I have used gradient background colour. There is a dropdown menu to select the theme. I have defined thememode and I have stored the value of theme as light by default. The dropdown menu is linked with the value of the theme. When the light theme is selected the screen shows light theme with different icon. Similarly when the dark mode is selected the screen shows dark theme and dark icon.
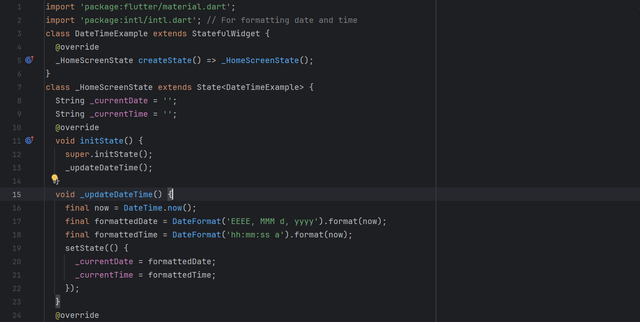
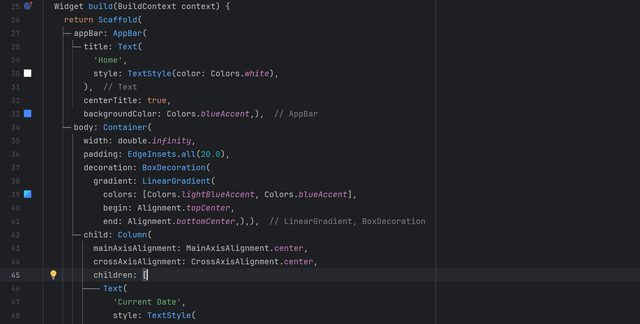
Create a home screen that shows the current date and time. Add a refresh button to update the displayed date and time when pressed.
 |  |
|---|
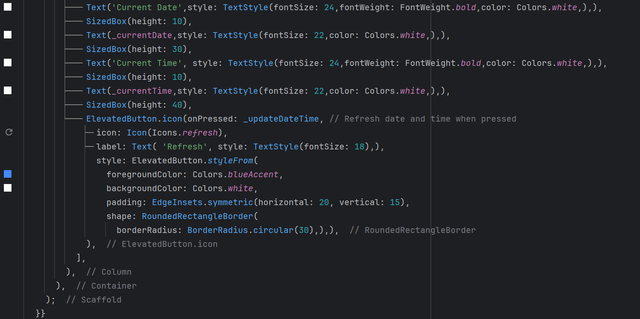
I have called the current date and time of the system. By default when the screen is loaded the screen shows the current date and time. I have used setState() to update the screen and the current date and time. We can notice that when I am clicking the button to refresh the screen the time is changing actually the seconds because I am refreshed the page after some seconds.
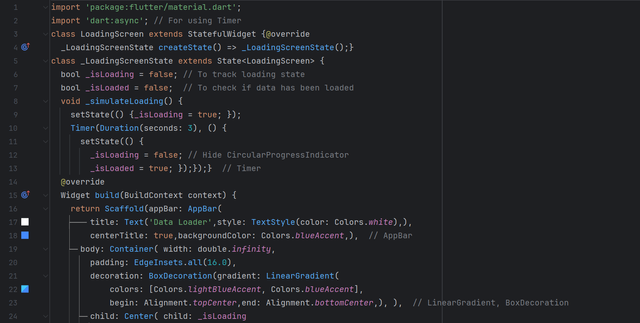
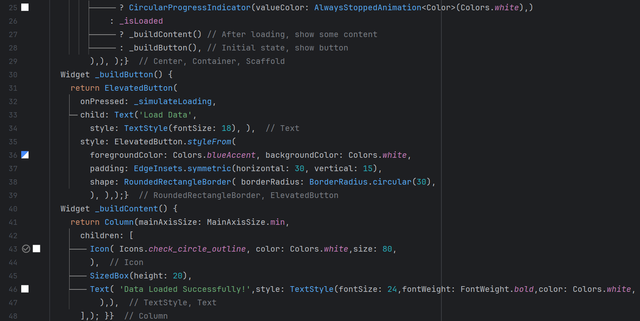
Create a button that, when pressed, shows a CircularProgressIndicator for a few seconds (simulating data loading), then hides it and shows some content on the screen.
 |  |
|---|
As according to the direction of the task I have implemented CircularProgressIndicator. When I am clicking the button the indicator is loading and after the loading the data has loaded is showing.
Create a Weather Application which includes Custom Font, Stack, Snackbar, Dropdown, Current Date and Time and CircularProgressIndicator.
 |  |
|---|---|
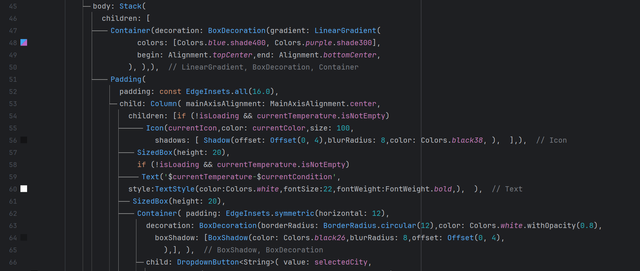 |  |
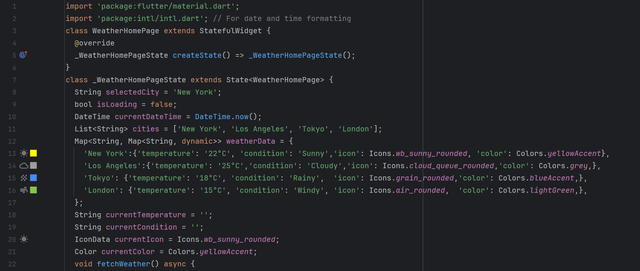
I have created separate variables to store and load weather data. I have created currentTemperature, currentCondition, currentIcon, and currentColor variables to store different kinds of data. These variables will show the data of the selected city in the application.
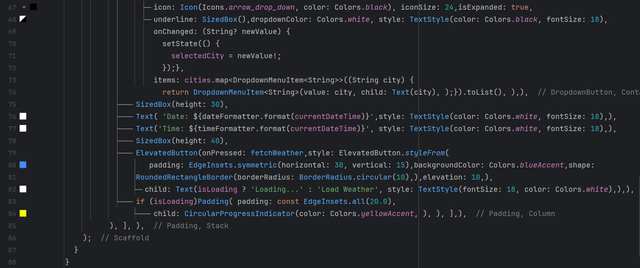
I have created a method to fetch the weather data based on the location. For this I have created this method fetchWeather(). I have defined all the logic that how the data will be loaded and used from the variables in this method. I have defined the type of the DateTime() method which is available by default to fetch the current date and time of the system. When the city will selected then the function will add current date and time on the screen.
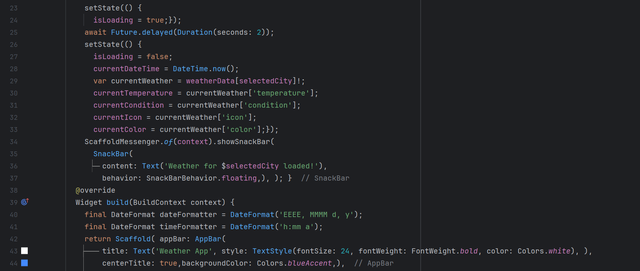
I have defined conditions for the loading of the data. According to the conditions only the data will be loaded at that time when the button for load weather is pressed and otherwise it will not load data.
I have used CircularProgressIndicator while the data loading when the user will press the button it will take loading for some seconds and after that time it will show weather of the selected location.
I have attached SnackBar in this application to notify the user that the weather data has loaded of the selected location.
I have used Stack to place the body and to add gradient color in the background to make the user interface beautiful and attractive.
At the end I want to give my some remarks about this course offered by Steemit Team. It was really helpful course and confidential course in which the product is always in front of me. What I learnt and implement is in my hand. And it motivates me more to learn this course. Indeed it was not possible without the teacher @mohammadfaisal who prepared all the lectures and presented to students with dedication. I really appreciate this course by the Steemit Team.
I invite my course mates to attend this class @fombae, @alejos7ven, @kouba01.
Upvoted! Thank you for supporting witness @jswit.
Thank you @chant
https://x.com/Shaki70Akmal/status/1847831173076021560