SEC S20W6 - Custom Fonts, Stacks and UI Widgets
Hello steemians,
Hello everyone!
I am happy to participate in the 6th week of the Steemit Engagement Challenge Season 20. For my tests, I will be using the web version instead of my smartphone for more flexibility. This week, I will explore concepts like custom fonts with the google_fonts package, using the Stack widget, Snackbars, dropdowns, date and time management, and the CircularProgressIndicator.
Looking forward to sharing my solutions and seeing your feedback. Happy challenging everyone!
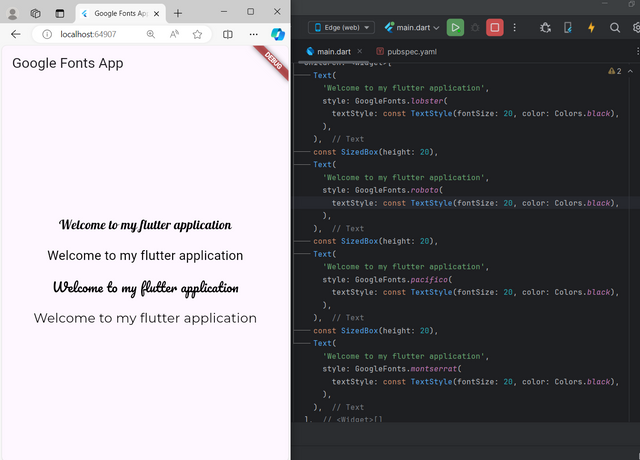
Create a simple app that displays the title of your app and a welcome message using a custom font.
We can personalize the application’s typography, so while I don’t have any font files of my own, I’m planning to leverage the Google Fonts package. I've included the google_fonts: ^6.2.1 dependency in the pubspec.yaml file, and everything is running smoothly.


In my implementation, I've selected four unique font styles all from the Google Fonts library. The vast array of options available allowed me to pick a few styles that stand out from one another adding a fresh look to the application.
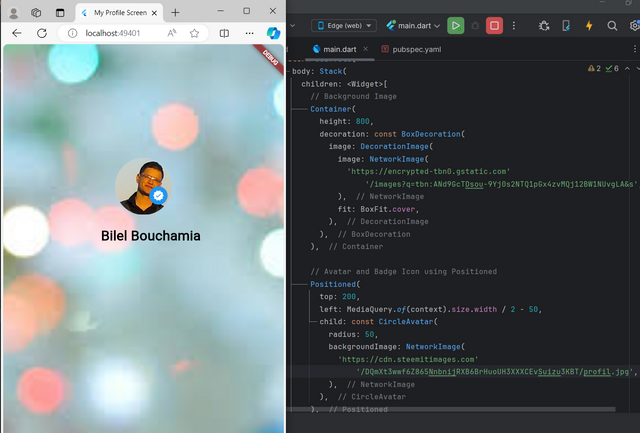
Create a profile screen, place a circular avatar on top of a background image using Stack. Add a name and a badge icon to this layout using Positioned.
I'm creating an attractive profile screen using Flutter including several carefully arranged visual elements, I'm starting by the use of a Container with a BoxDecoration to set a background image. This image is loaded using the NetworkImage() widget which allows me to embed an image from an online URL.
Next I embed a profile image using the CircleAvatar widget which is particularly suited to displaying a circular image and givesus a neat and professional presentation, so I position the avatar in the center of the screen using the Positioned widget allows me clearly to precisely control its placement and ensure a good visual balance in the interface.
Below the avatar I am wanting to display the user s name so I use a Text widget that I also place below the avatar using Positioned what ensures that the text is optimally aligned with the avatar creating a clear visual hierarchy.
To add a touch of originality and importance I introduce a badge that represents the user's achievements or status in which I use another CircleAvatar widget but this time it contains an icon such as a star or a medal. I position this badge in the upper right corner of the profile picture by making it easily visible while still being aesthetically pleasing.
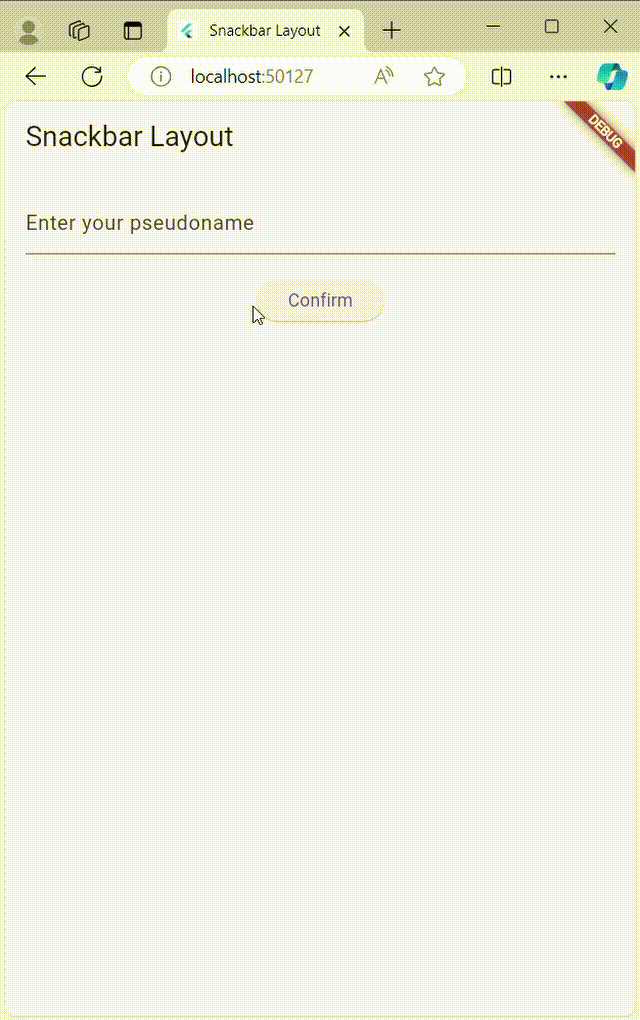
Create a form with a button. When the button is pressed, display a Snackbar with a confirmation message
To create a form in my Flutter app, I start by using the Form widget setting a global key (GlobalKey<FormState>) to track the form's state then I add a TextFormField that allows the me to enter my pseudo name while setting up validation to ensure the field is not empty.
Also I place an ElevatedButton to let the user submit the form so when I press this button the form is validated, and If everything is correct I display a Snackbar to confirm that the form was successfully submitted.
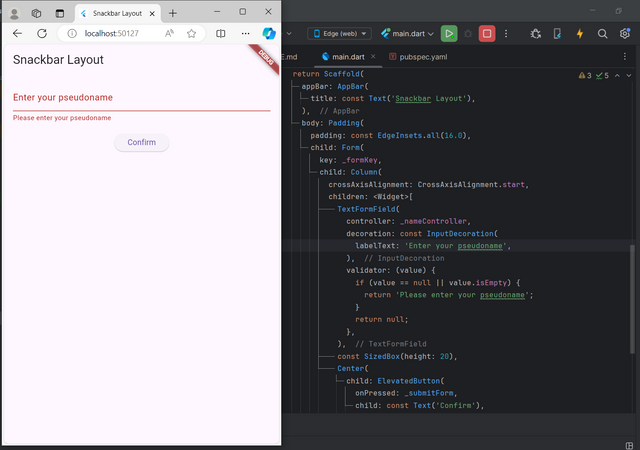
I launch the application with the command flutter run when I type my pseudo name and press the "Confirm" button I can see the Snackbar appear by indicating that the submission was successful.
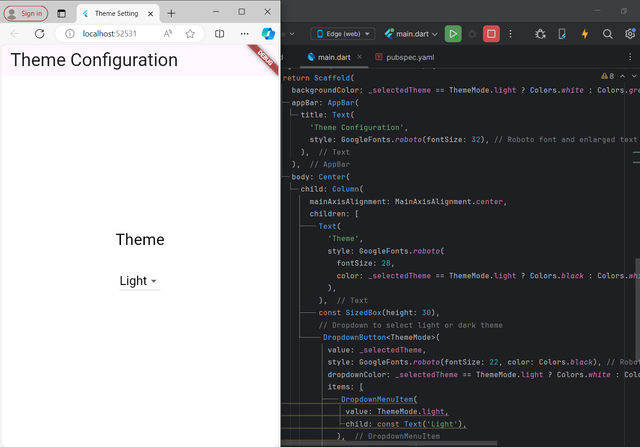
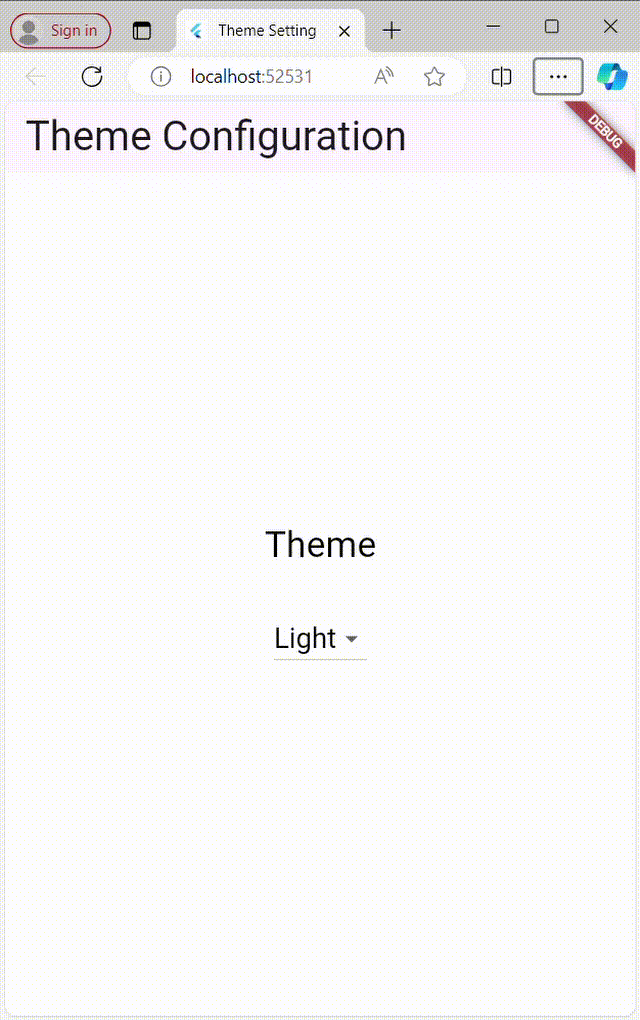
Create a settings page where users can select a theme for the app (e.g., light or dark mode) from a dropdown menu
In my MyApp class I can manage the current state of the theme using a variable called _themeMode that specifies whether the app should be displayed in light or dark mode so depending on the user's choice we can implement either ThemeData.light() for the light theme or ThemeData.dark() for the dark theme ensuring that the appearance of the app adapts to the user's preferences and thus provides a pleasant and personalized visual experience.
The SettingsScreen class is also responsible for displaying the drop-down menu that allows users to choose between light and dark mode, i.e. if the user selects a theme from the list, the class calls the onThemeChanged callback to call back the MyApp class. of any changes in the theme which will update the user interface accordingly, ensuring that the entire application reacts dynamically to the user's choice, resulting in a smooth and intuitive interaction.
So when I runned the application I create a settings page with a drop-down menu that lets users choose between light mode and dark mode, We see here when the user selects a theme the entire application changes dynamically to adapt to the chosen theme, we can say that this feature improves accessibility and convenience for users because it allows them to personalize their experience based on their visual preferences.
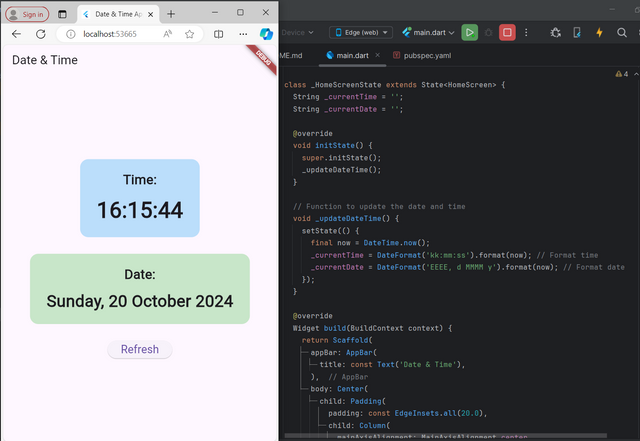
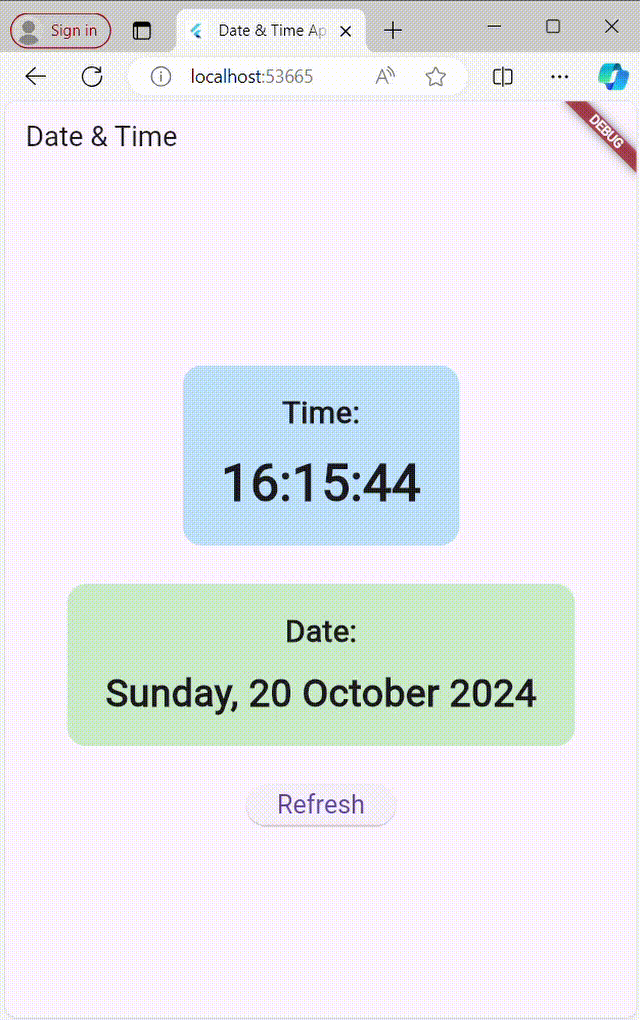
Create a home screen that shows the current date and time. Add a refresh button to update the displayed date and time when pressed.
First I used the intl package to format the date and time in the application so I made sure to add this dependency in the pubspec.yaml file to efficiently handle date and time formats, ensuring that the display is both clear and understandable for users. Here is how it looks in the file:

Here I use a Column widget to arrange the items vertically which allows me to display the current date and time in the center of the screen, also I put a Text widget to display the formatted date and time making it easy and immediate for the user to read, below this I add a button (an ElevatedButton) below this text which allows the user to refresh the time by tapping on it which makes the interface interactive and engaging by encouraging users to interact with the application.
We noticed here that the _updateDateTime function plays a crucial role to change the _currentDateTime variable with the latest date and time every time the user taps the refresh button.
In the initState method I ensure that the current date and time are displayed as soon as the application is opened. This provides a seamless first user experience where users can immediately see the current time without having to take any prior action.
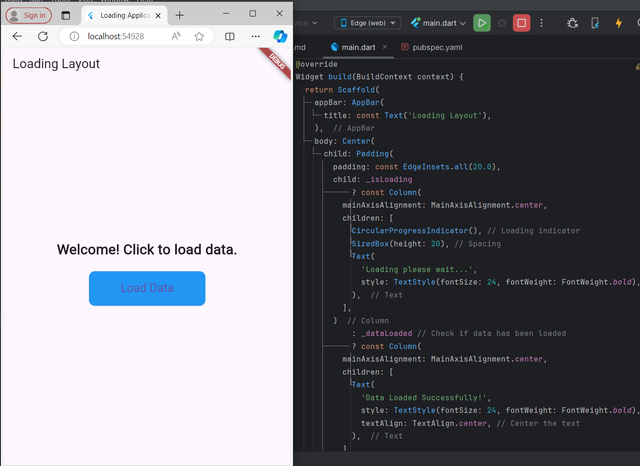
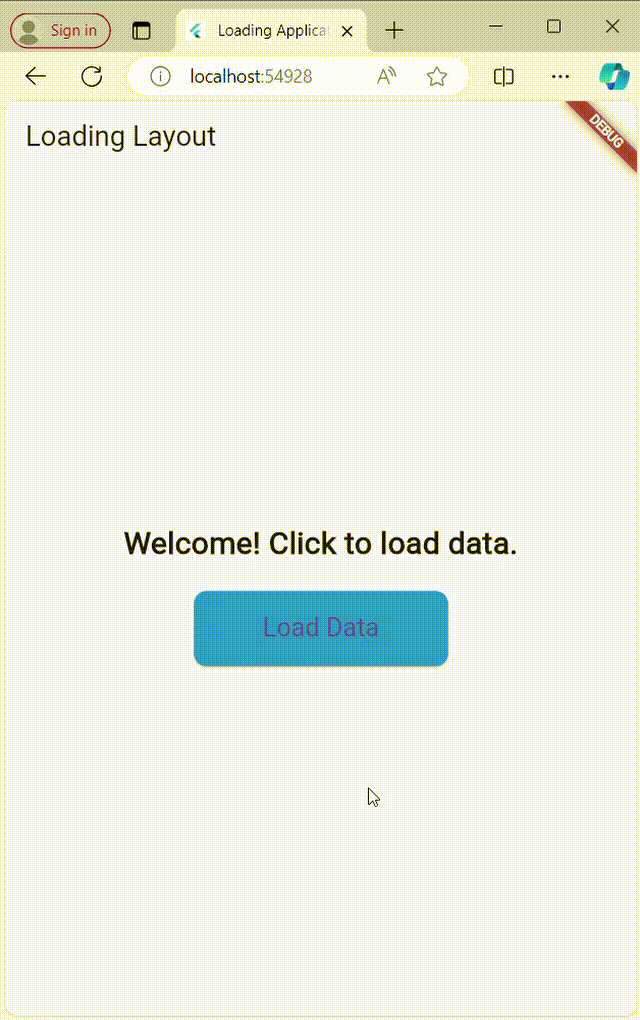
Create a button that, when pressed, shows a CircularProgressIndicator for a few seconds (simulating data loading), then hides it and shows some content on the screen.
In this application I manage the display of the content and the loading indicator using a boolean variable _isLoading. This variable determines whether the interface should display a loading indicator (spinner) or the content once loading is complete. When _isLoading is true the loading indicator is displayed and when it is false the content of the application is shown to the user.
When the user presses the 'Load Data' button, the '_loadData' function is called, which sets '_isLoading' to 'true', which triggers the display of the loading indicator (CircularProgressIndicator) , so the “Future.delayed” function simulates a 3-second wait to mimic a data load and After the 3 seconds elapse, "_isLoading" is reset to "false", which hides the loading indicator and shows the content to the user.
The user interface is built around a “Center” widget which, depending on the state of “_isLoading”, displays either the loading indicator or the application content. This content consists of a text label that reads “Data loaded successfully!” and a button, both arranged vertically using a “Column” widget, which ensures the interface is simple and intuitive with elements centered on the screen.
When the user presses the “Load Data” button, the application displays a loading indicator for 3 seconds to simulate a data loading operation, after this time the indicator disappears and a “data loaded successfully!” message appears.
To test the application I can run it with the flutter run command. After launching the app I press the "Load Data" button to see the loading indicator in action and see the content display after the loading simulation period.
Thank you very much for reading, it's time to invite my friends @khursheedanwar, @stream4u, @fombae to participate in this contest.
Best Regards,
@kouba01

Upvoted. Thank You for sending some of your rewards to @null. It will make Steem stronger.
You've got a free upvote from witness fuli.
Peace & Love!