A Classy Handbag and Stiletto
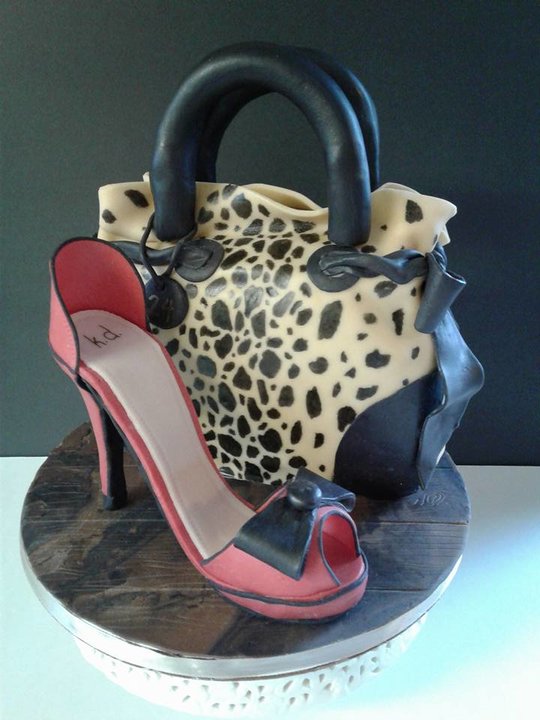
Hi there! I absolutely love how this week's cake order turned out. It was for a young lady's 24th birthday and she is a chic, modern woman with a distinct sense of style. I think this cake suited her style to a tee!

The cake was a surprise from her mom, who contacted me a couple months ago and asked for a small cake with cougar print. I searched the internet and found a handbag cake that I used for my inspiration. I made it smaller and simplified the handles on the bag and added the red stiletto.
I used a simple 9x13 cake cut in half and placed the pieces together with some buttercream icing, placed cut side down on the cake board. This gave me the basic shape for the hand bag; wider at the bottom and narrow at the top. I used a serrated knife to shape the top and sides of the hand bag, then crumb coated it in dark chocolate ganache after I was satisfied with the shaping.
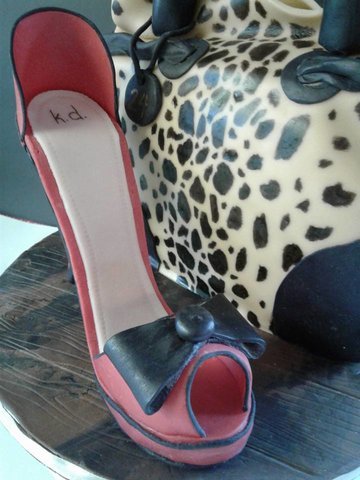
The cake was covered in golden tan colored fondant and the cougar print was added with my edible marker. I let the fondant set for a few hours so it was firm enough to color without the marker tip making dents in it. I was careful to use the side of the marker, and not the tip, as much as possible to reduce any chance of the tip breaking into the fondant.
The black trim and stiletto were made of modelling chocolate. The black was very soft and sticky when I handled it so I had to use extra corn starch when I rolled and cut it. In the end, this is what gave it the leathery look. This was a happy accident! I love it when my 3D cakes turn out looking realistic.
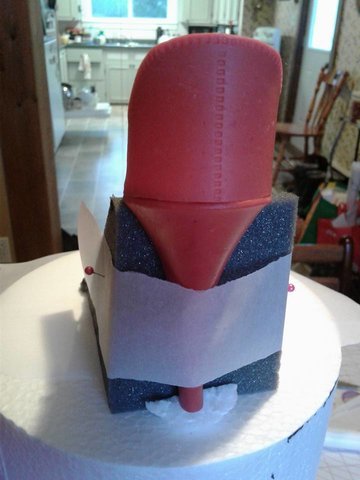
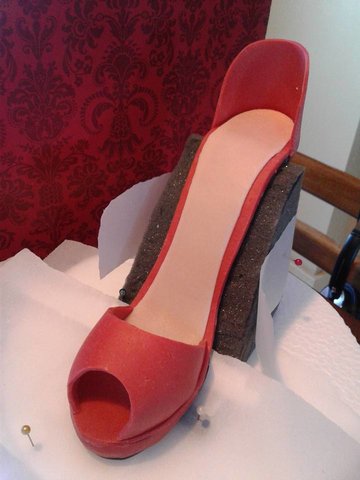
I have a stiletto heel mold that I love! Without it, I couldn't get the look I wanted when making the stiletto for this cake. I made sure the modelling chocolate was smoothed into a cone shape and pushed it into the mold. Once I was sure the mold was completely filled, I trimmed off the excess modelling chocolate with a knife and used my fingers to smooth out the finish. The part of the heel that was showing would be covered with a thin layer of black anyway, but you always get a better finish when the base is smooth. I placed it on a foam former with a strip of parchment paper pinned around it to hold it upright. This takes at least 24 hours to firm up enough to be able to add the shoe sole, toe and heel back. I used some templates I found online to cut these pieces out. They were "glued" on with a mixture of corn syrup dissolved in hot water. I used a small clean artist paint brush to apply a very thin layer of the glue just to the section I needed it. On the finished shoe, I added her initials on the sole lining.


For the cake board, I used up the rest of my black modelling chocolate and a small bit of dark brown that was getting to dried out to work with anymore. I kneaded the two colors together just enough to get the marbled look. I rolled it out to a very thin circle and gave it a wood grain look with an impression mat. I used a modelling tool and ruler to mark the deeper plank lines so it would look like a hardwood floor. I think a decorated cake board really adds to the look of the finished product.
The birthday girl was very surprised by her hand bag and stiletto cake. (Her mom thought the stiletto looked like a shoe she actually wears!) I really loved decorating this cake. Hope you enjoy my photos!!

Congratulations @karenmakescakes! You have received a personal award!
Click on the badge to view your Board of Honor.
Do not miss the last post from @steemitboard!
Participate in the SteemitBoard World Cup Contest!
Collect World Cup badges and win free SBD
Support the Gold Sponsors of the contest: @good-karma and @lukestokes
Congratulations @karenmakescakes! You received a personal award!
You can view your badges on your Steem Board and compare to others on the Steem Ranking
Vote for @Steemitboard as a witness to get one more award and increased upvotes!