How to Harvest Sweet Potatoes
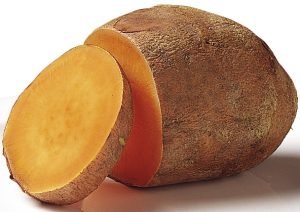
Regardless of how you enjoy sweet potatoes, candied, mashed, or baked, there’s very little that can compare to the amazing flavor of a properly harvested sweet potato. To savor the flavor of sweet potato recipes you will need to do more than just growing and harvesting these tubers. In the grand scheme of all things gardening, it is common knowledge that sweet potatoes retain the nicest texture and greatest flavor if they are cured shortly after harvest and properly stored under the right conditions for a period of no less than 6 weeks. It is the combination of storage times, and heat treatments, which stimulates the natural process of converting starch into maltose; the sweet syrupy substance that occurs during cooking.
The texture and flavor of sweet potatoes varies depending on variety; however, sweet potatoes that are cured, then stored for 6 weeks first, will be much more flavorful and sweeter than if you cooked them directly after harvesting them fresh from the ground. Here is how to get the best and sweetest flavor from your tubers.
Timing is of the Utmost Importance:
Upon reaching the desired size, sweet potatoes can be harvested. Having said that, the longer you allow the tubers to remain in the ground, the sweeter they will be when harvested, but be sure to remove them from the ground before the first frost of the season arrives.
Traditionally, sweet potatoes are harvested when they are between 6”-8” in length, or directly after the first frost arrives. Tubers that are permitted to exceed this length tend to get “woody,” or hard. In the event frost arrives before you have harvested your tubers, and the leaves of the plants are dark and discolored, clip them off at ground level immediately. This will ensure that rot doesn’t spread from the dying vines into the sweet potatoes themselves. The tubers can now be left in the ground for a few more days before harvesting them, unless of course the ground itself is freezing, in which case the tubers need to be dug up and harvested immediately.
Harvest Time Has Arrived:
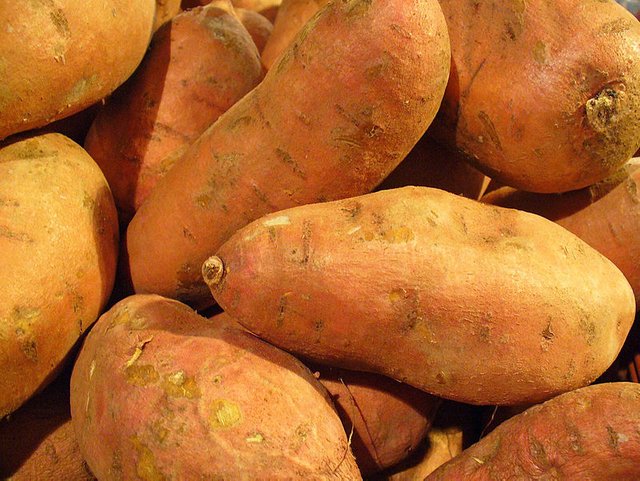
Remove the tubers from the garden with a pitchfork. Start digging up soil approximately 18” from the main stem of the plant, work the fork in and lift the sweet potatoes out of the soil gently. Normally the tuber will be directly below the main stem on the plant; however, it is not unheard of to find additional tubers growing deeper, further away from the main stem, and in areas where vines rested on the ground long enough to establish roots of their own.
As you harvest the tubers, shake off excess dirt, but do not wash the tubers or wipe them off with a cloth as doing so may encourage premature rot. Once all the tubers have been successfully harvested, spread them out in an area away from direct sunlight, but where the temperature remains above 45°F. Leave the tubers there for a few hours allowing them to dry. Handle the tubers with care as tossing them around will result in bruising. After setting them out to dry for a few hours, select the smaller ones and/or damaged ones; these can be consumed first. They may not be as flavorful, but they can still be used in recipes that call for things like Irish potatoes. Using caution and care, place the remainder of the tubers in baskets, or cardboard boxes, for storage and curing.

Create Your Own Curing Chamber at Home:
Sweet potatoes like it HOT! The best curing climate for these tubers involves a dimly lit area with a steady temperature range of 80°F-85°F, and extremely humid. Curing permits the sweet potatoes to heal from the damage of being unearthed. Curing also initiates the development of maltose, which is the enzyme that puts the “sweet,” in sweet potatoes, and it helps prevent sprouting.
You can create your own curing chamber out of anything that can be enclosed. If you’re not going to be using your oven for the next week or so, that can serve the purpose of a curing chamber. Take a pan of water and place it on the bottom of the enclosure, in this case the lower rack of your oven. Place a 40-watt incandescent bulb in the chamber near the top. The bulb must be incandescent to produce the heat required for proper curing. Next, place a thermometer on the middle rack situated so that you can read it through the window of the oven. Close the chamber and flip on the light. Allow the temperature to rise for at least an hour, then check it. If the temperature is below 80°F, then leave the chamber closed for another half hour to hour before checking again. If the temperature is above 85°F, then crack the chamber open and find a small spacer to place in the door which will allow it to remain slightly ajar. It may take a few hours to get the temperature range just right, but once the temp has reached the recommended range, start placing the tubers in the chamber, careful not to bruise them, and close the door of the chamber, leaving it cracked openly slightly, if necessary to maintain internal temperatures. Check temperatures at least twice daily, make any necessary adjustments, and allow the tubers to cure for 7 days.
Proper Storage Results in Plentiful Sweet Potatoes:
If properly cured and stored under optimum conditions, your sweet potatoes can last for up to a year. Once cured, place the tubers in a cool but not cold, area for storage. This area should be very well-ventilated and maintain an internal temperature range of 55°F-60°F, and relative humidity in the range of 75-80%. The tubers should be stored for at least 6-8 weeks before consumption if you want to obtain the sweetest and most flavorful flesh. Temps below 55°F can cause severe, irreparable damage to the tubers, making them inedible, or at the very least unpleasant to eat.
Sweet potatoes will bruise very easily, even if they have been properly cured. Bruised tubers will begin to rot very quickly. It is for this reason we recommend taking what you want from the top of the storage chamber, rather than digging through the crop looking for the best. As you remove tubers, inspect those just below and remove any that show signs of premature rot, leaving the remainder of them in place.
Final Thoughts:
You can do the same thing with sweet potatoes purchased from a Farmer’s Market. When doing so, inquire about when they were harvested, and if they have been cured. A “doe in the headlight” expression is a sure sign that the tubers have yet to be cured properly. Purchase with caution.
Sweet potatoes are a staple Garden item at our house.
Great stuff, love me some sweet potatoes :]
Followed.
I have two big sweet potatoes lying around in my kitchen. Infact your post just reminded me to go and do justice on them asap before they get spoilt 😁
great post , i upvoted
Great info! If my lady wasn't allergic to sweet potatoes, I'd probably be more proactive on growing them. Glad to have found your channel so I could follow you either way. Onward and upward from an aspiring homesteader.
Ooohhh i love sweet potatoes :D Thanks for the tip. It makes me consider to plant my own!
Good tips.
We tried two different years to grow them but the first year a groundhog ate the leaves. The second year they were few and very small as I think the growing season and temperatures around here were not conducive to good sized potatoes. We did enjoy the few that we got though. So much better than store bought.
I found this information extremely useful. Thanks for taking the time to write it up. I upvoted and followed.
This is most useful - thanks. I've just started growing sweet potatoes for the first time this year. But with the climate here in Wales in the UK I'm not sure how they will do.