"SLC21/WK1: Introduction to Gradients and Application"
I am super excited to resume graphics design class for this season. It's really interesting playing around Canva and learning about GRADIENT, its types and how to apply and combine different colors to produce a beautiful design.
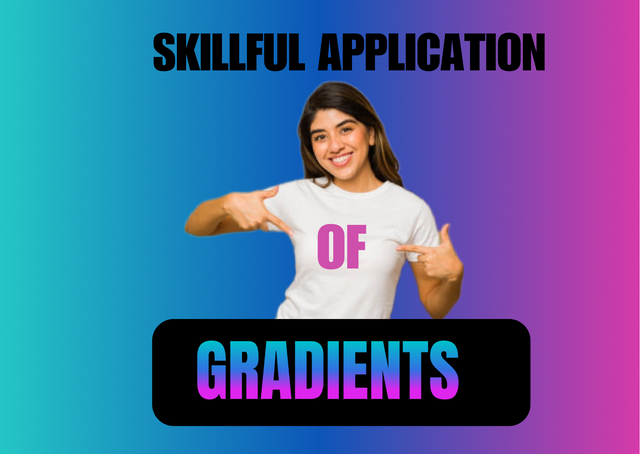 Designed with Canva
Understanding Gradient
Gradient is simply a versatile tools used to produce visual effect that is created by blending color (s) together which result in gradual transition of colors. This adds to the beauty of the design and makes it more attractive to the eyes. Gradients can be applied in text, backgrounds and elements.
Types of Gradient
Diamond gradient: this is similar to radial gradient that was mentioned in class but diamond gradient spread colors out from a centre point of the design.
Mesh gradient: this type of gradient works with multiple colors that consists of grid.
Noise gradient: this type of gradient makes the background busy with textured look and not a smooth transition.
The First Gradient: One Color Gradient Having Different Complementary Shades
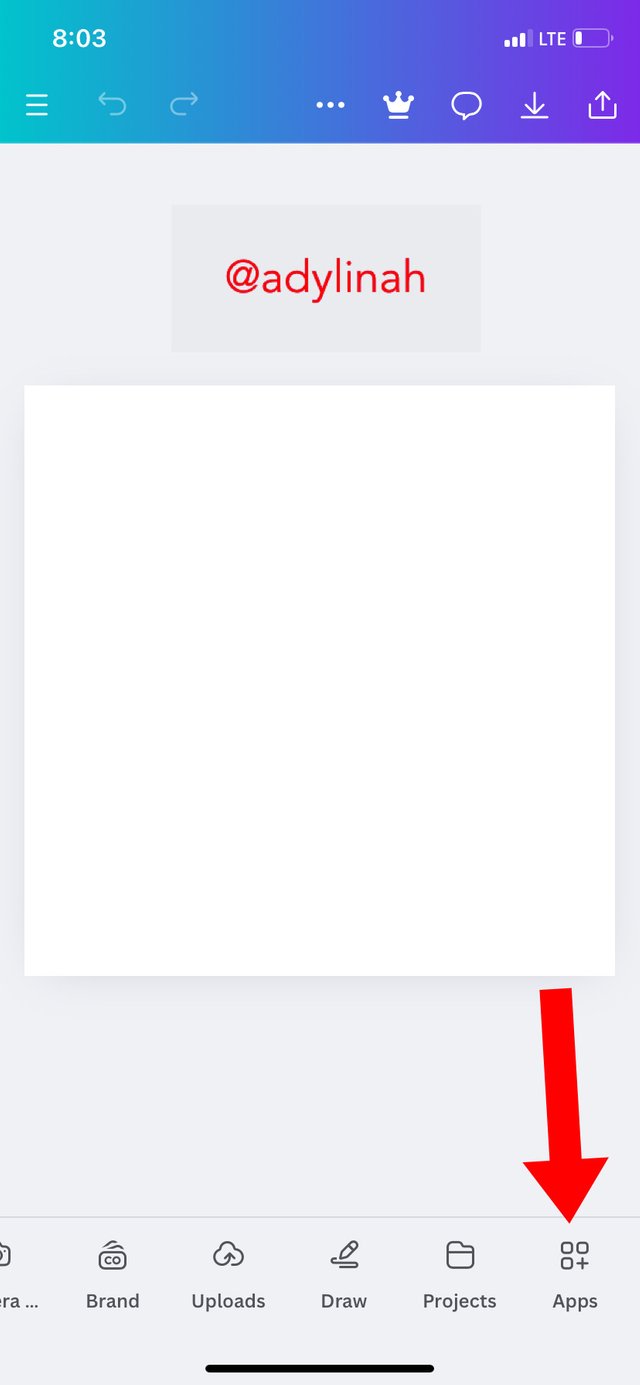
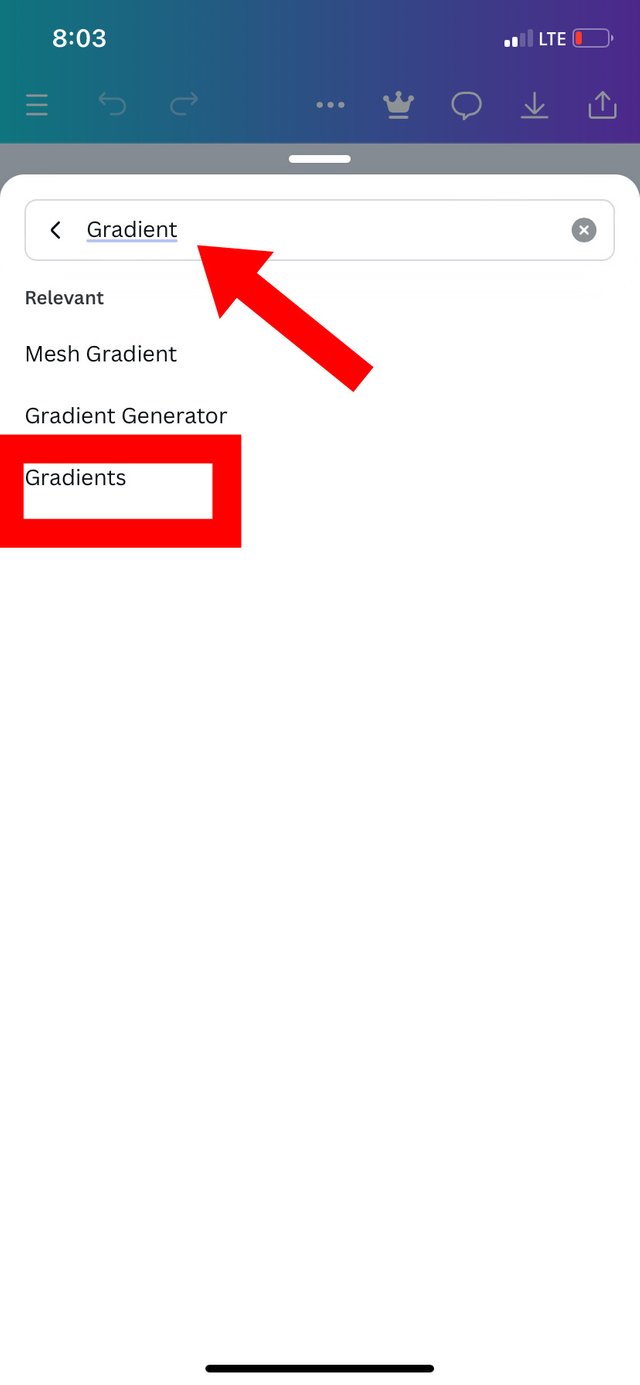
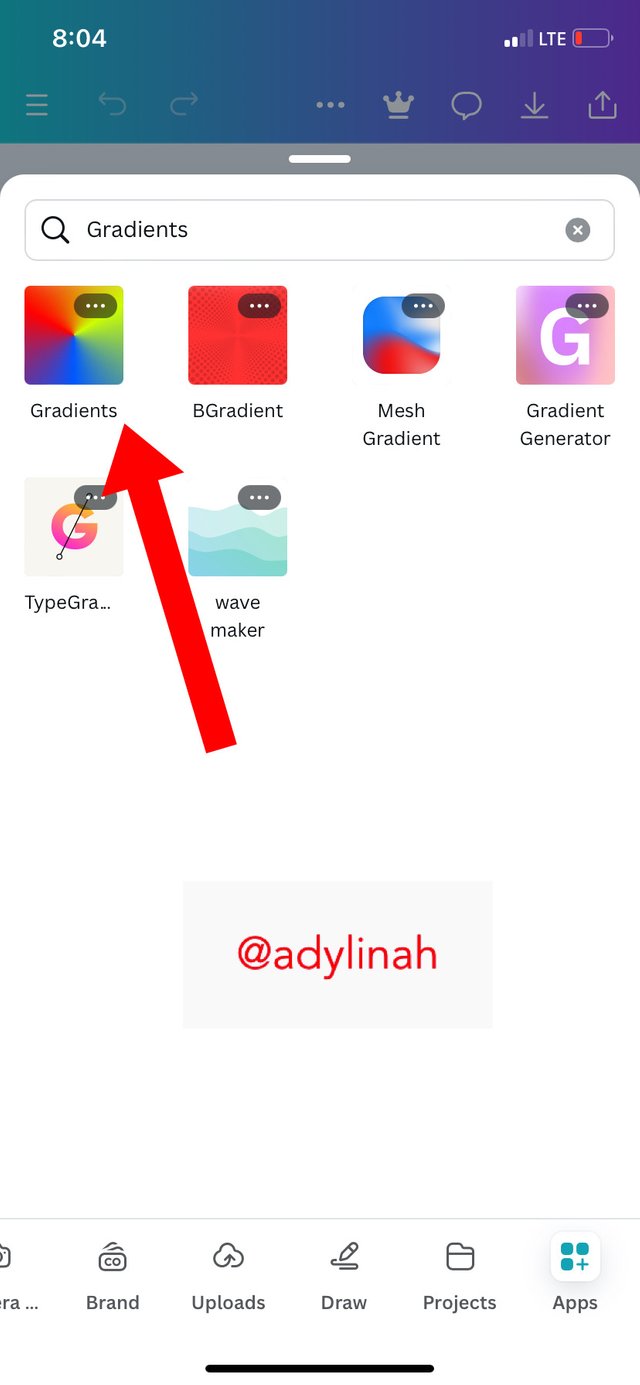
Step 1: using the 1080×1080, I was able to set up my workspace after which I clicked on "Apps" icon on the menu. I typed in "gradient" on the search box and then clicked on "gradient" option provided.
 |  |  |
|---|
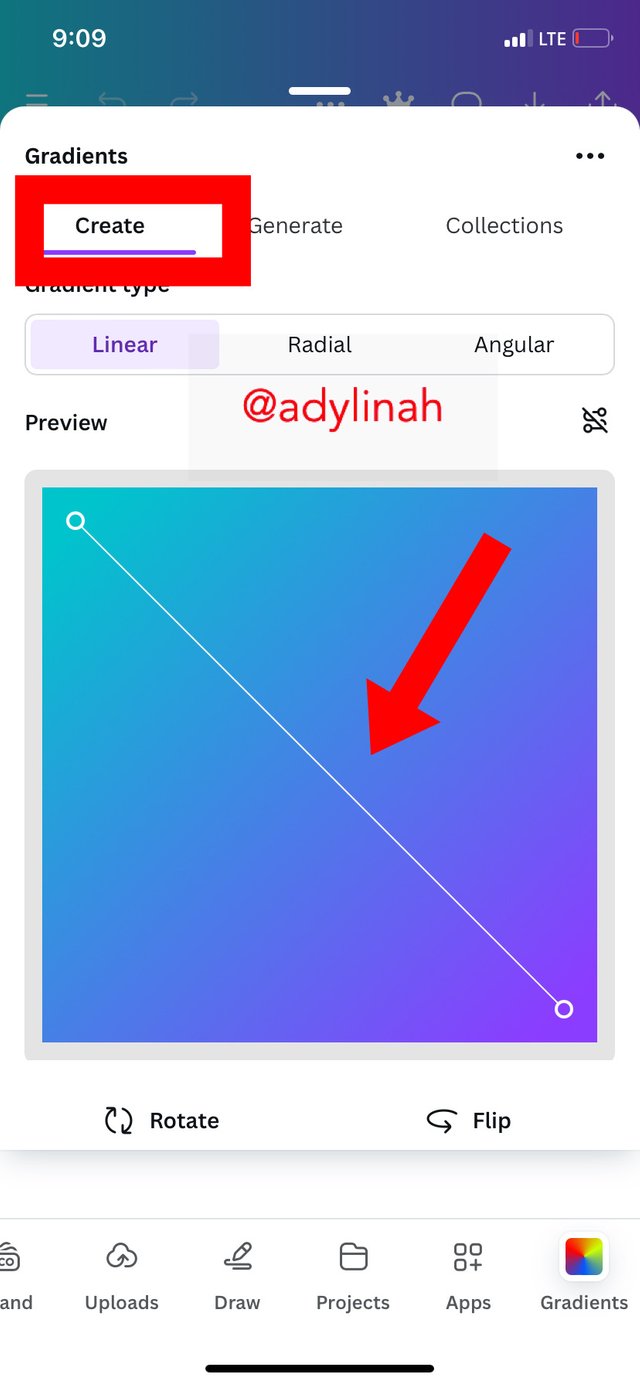
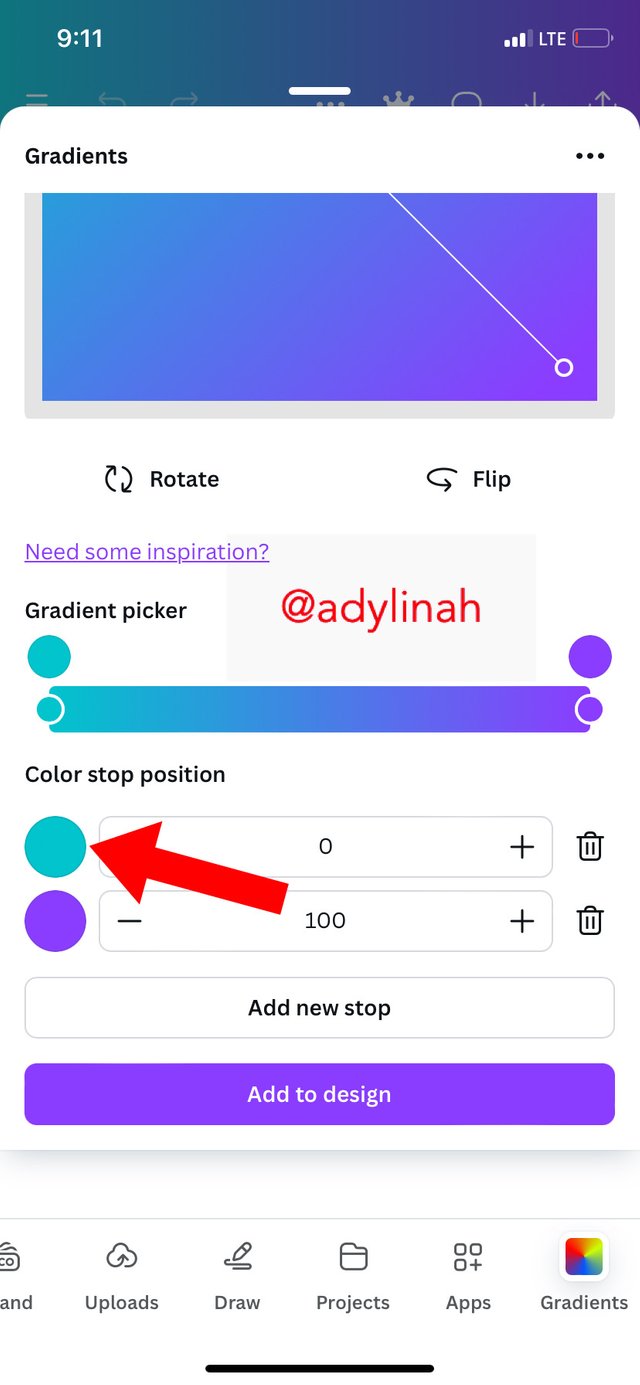
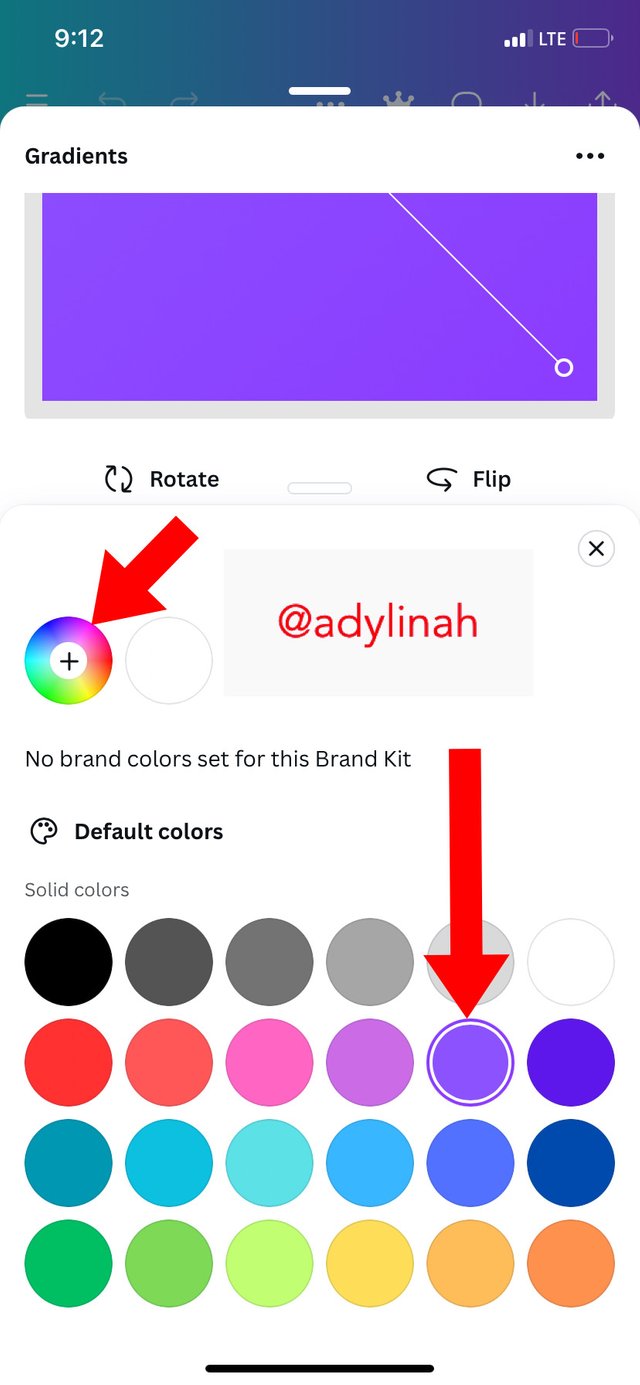
Step 2: It took me to "create" where I was able to create color gradient. I did not like the default color combination so I changed the upper color to purple.
 |  |  |
|---|
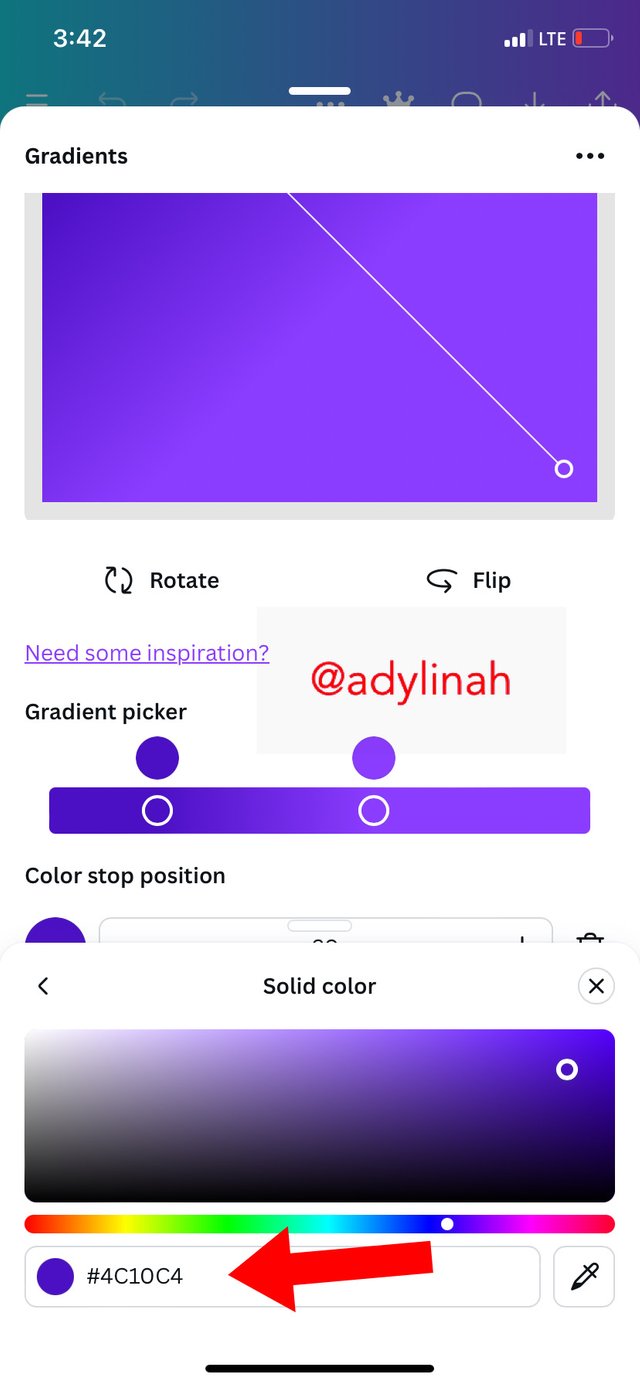
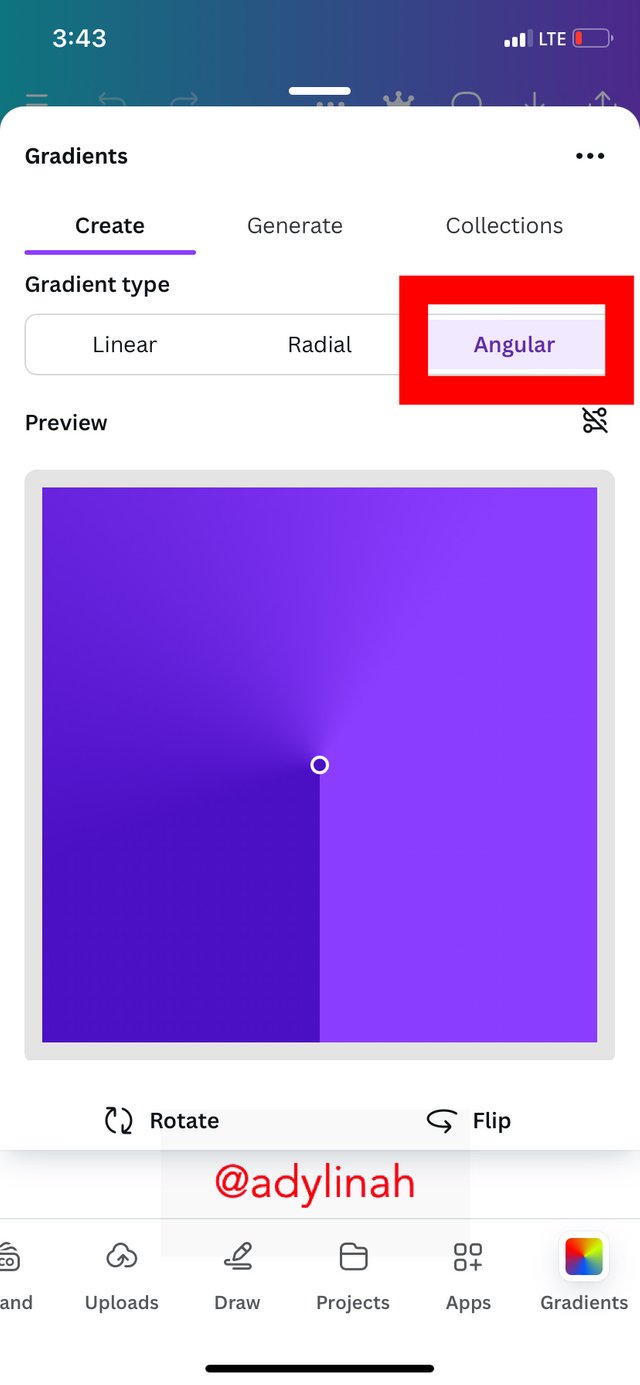
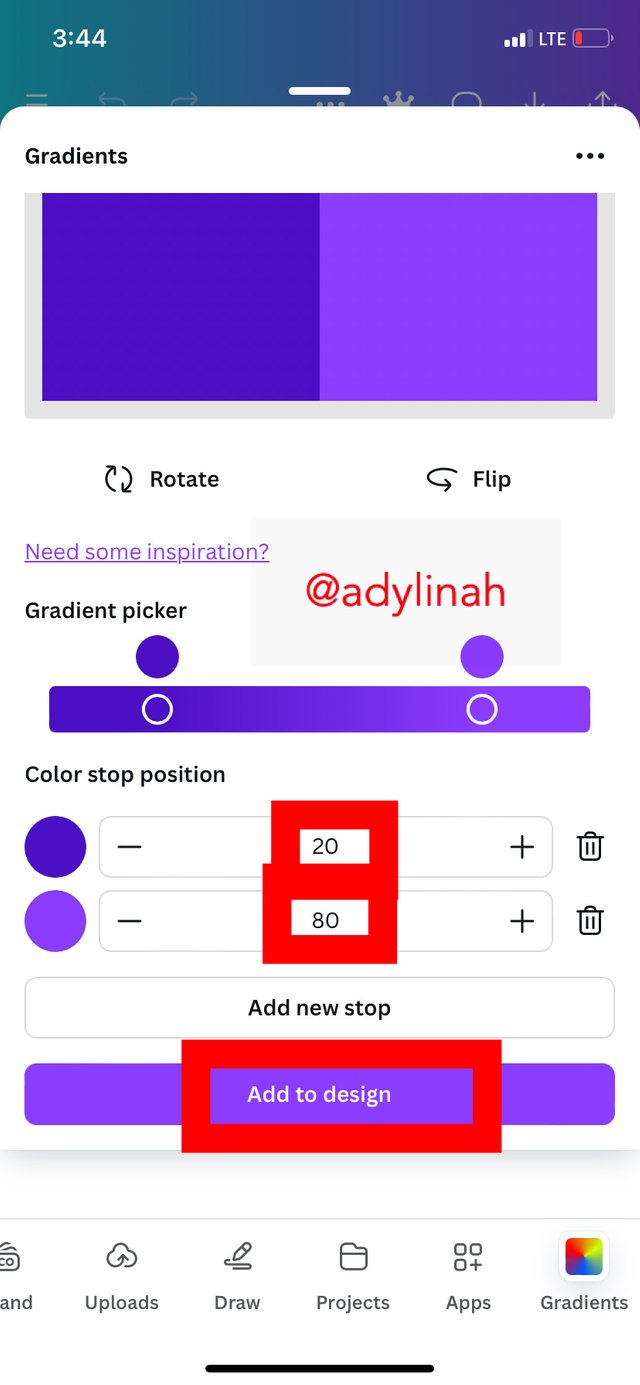
Step 3: with the help of the color wheel, I used the hex code of #4C10C4. My gradient was on linear so I changed it to Angular. I also adjusted the color stop position; the first one I used 20 while the second one was 80. I added to design and saved it.
 |  |  |
|---|
Below is my result;
 First gradient
The Second Gradient: Two Different Colors (Hex Codes) that Blends so Well
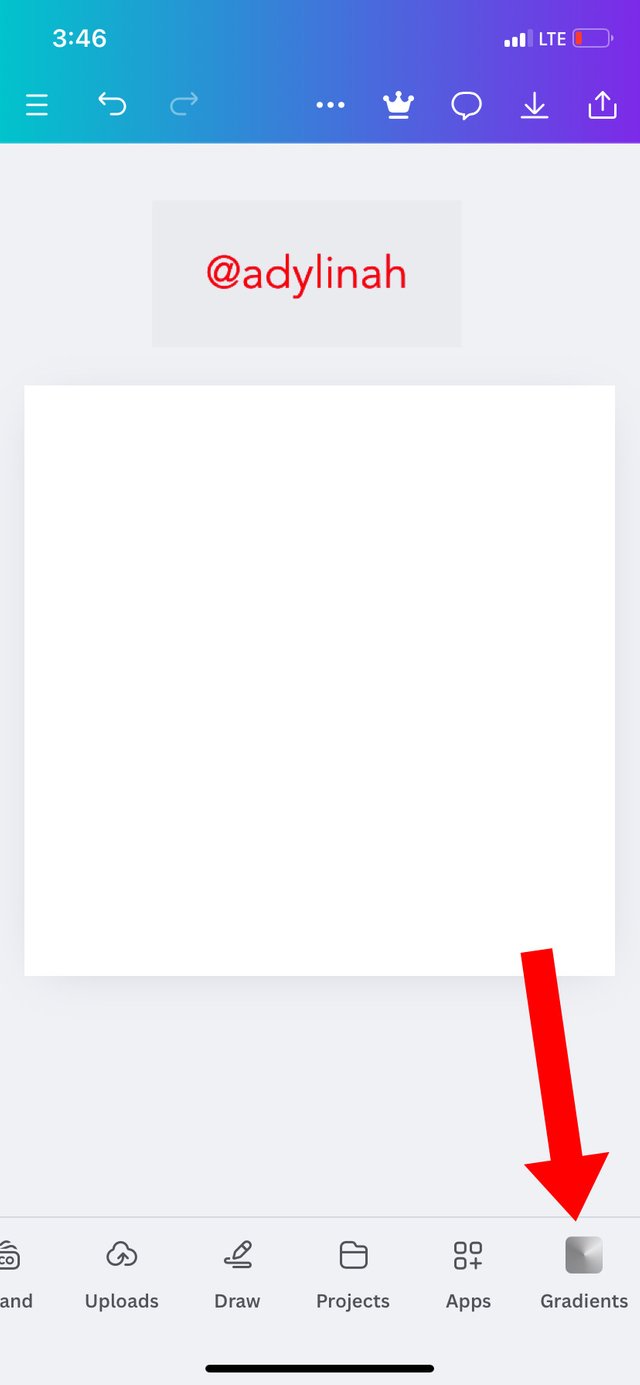
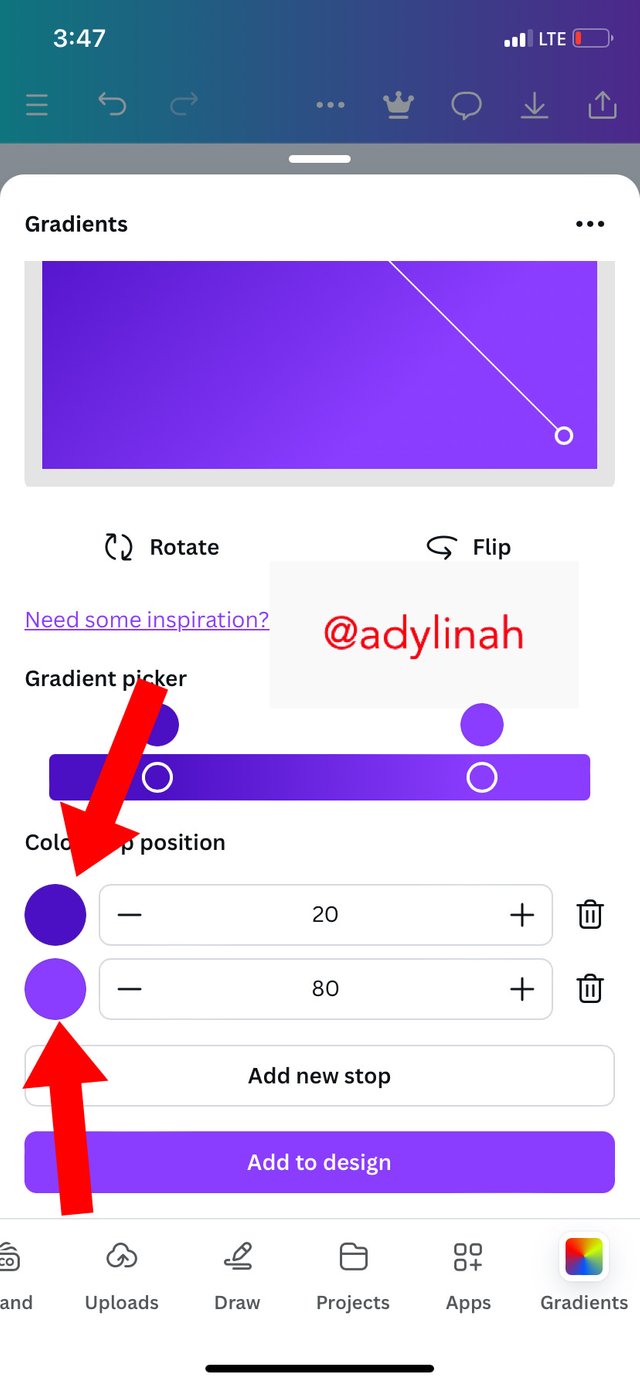
Step 1: In order to create the second gradient, I created a new workspace, clicked on "gradient" and it took me to the previous one I created. I changed the first color to sea green and the second to pink.
 |  |
|---|
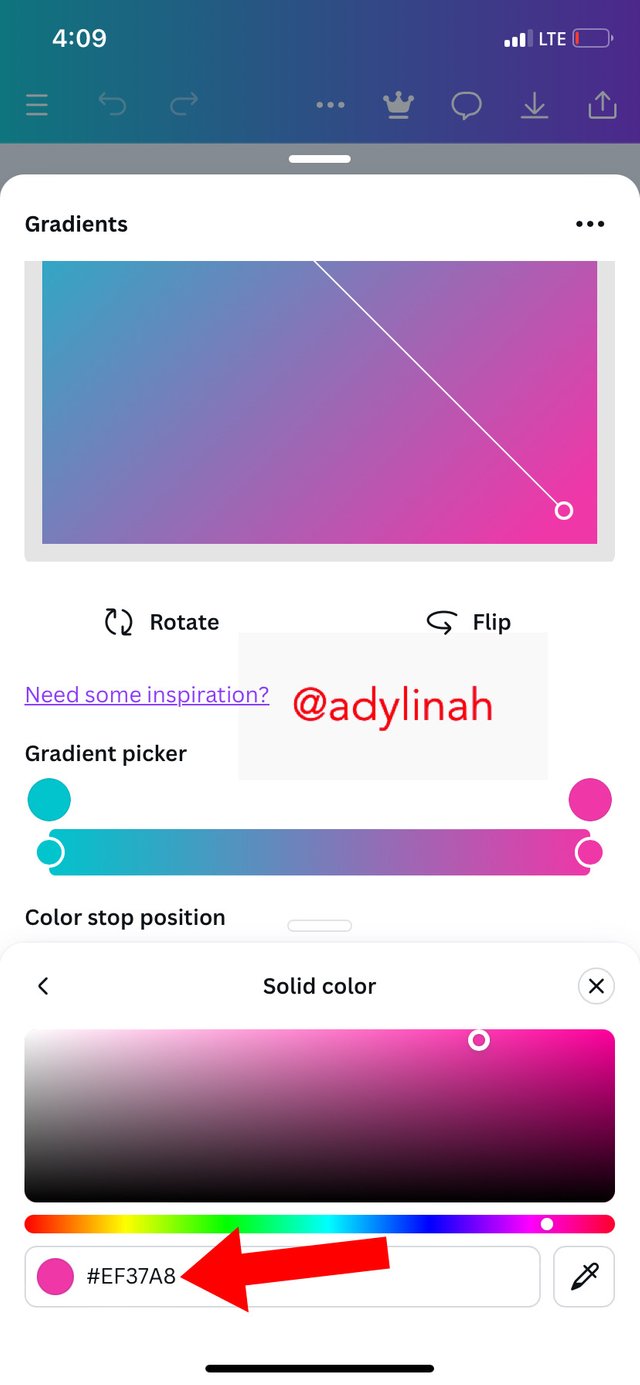
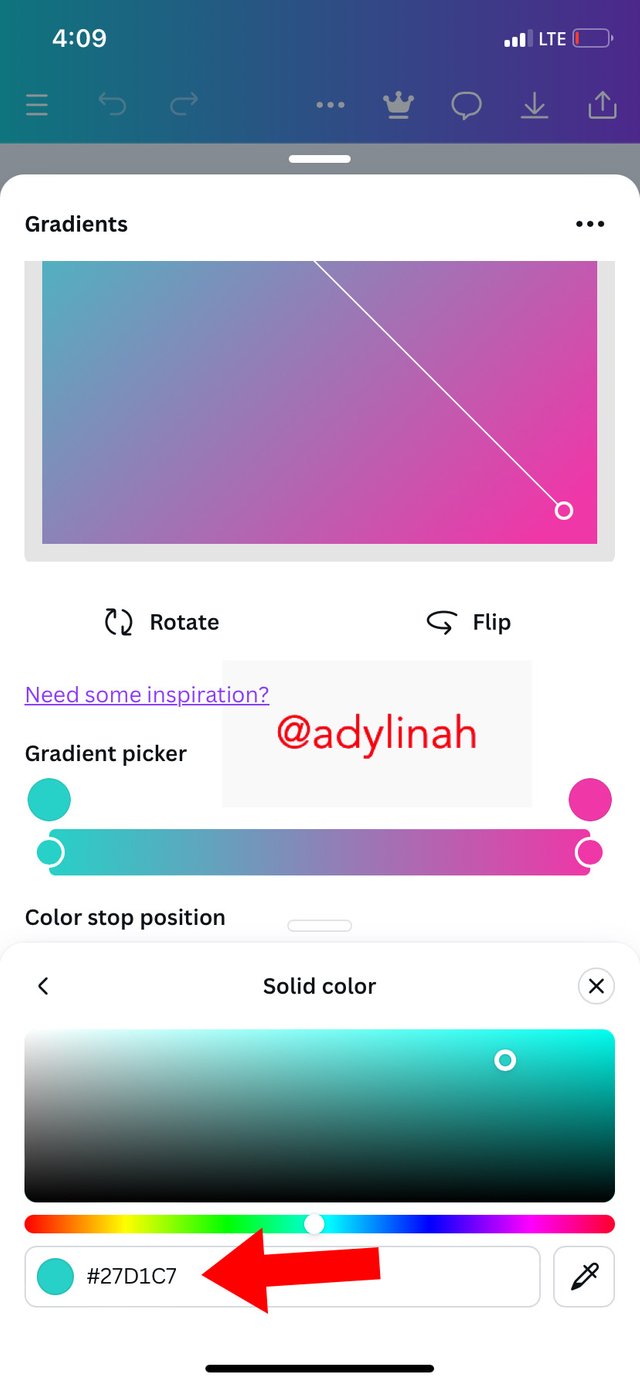
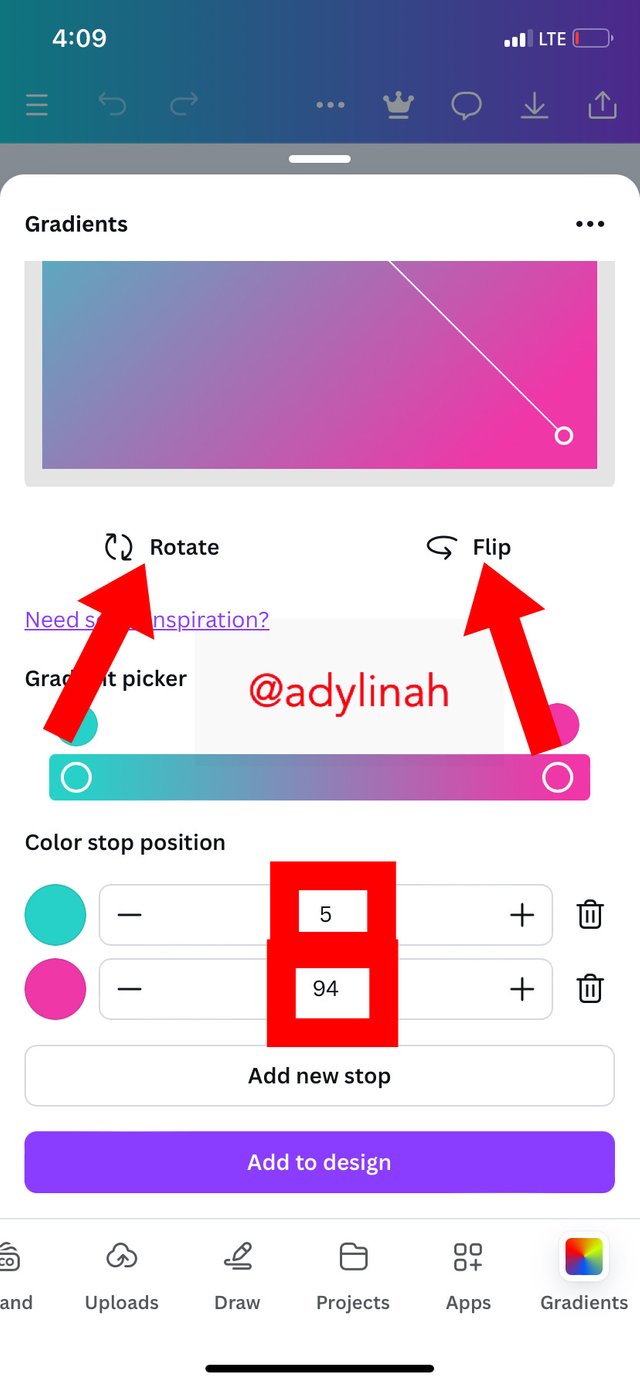
Step 2: I used hex code of #27D1C7 for sea green color and #EF37A8 for pink color. I also adjusted the color stop position, rotated it and flipped it.
 |  |  |
|---|
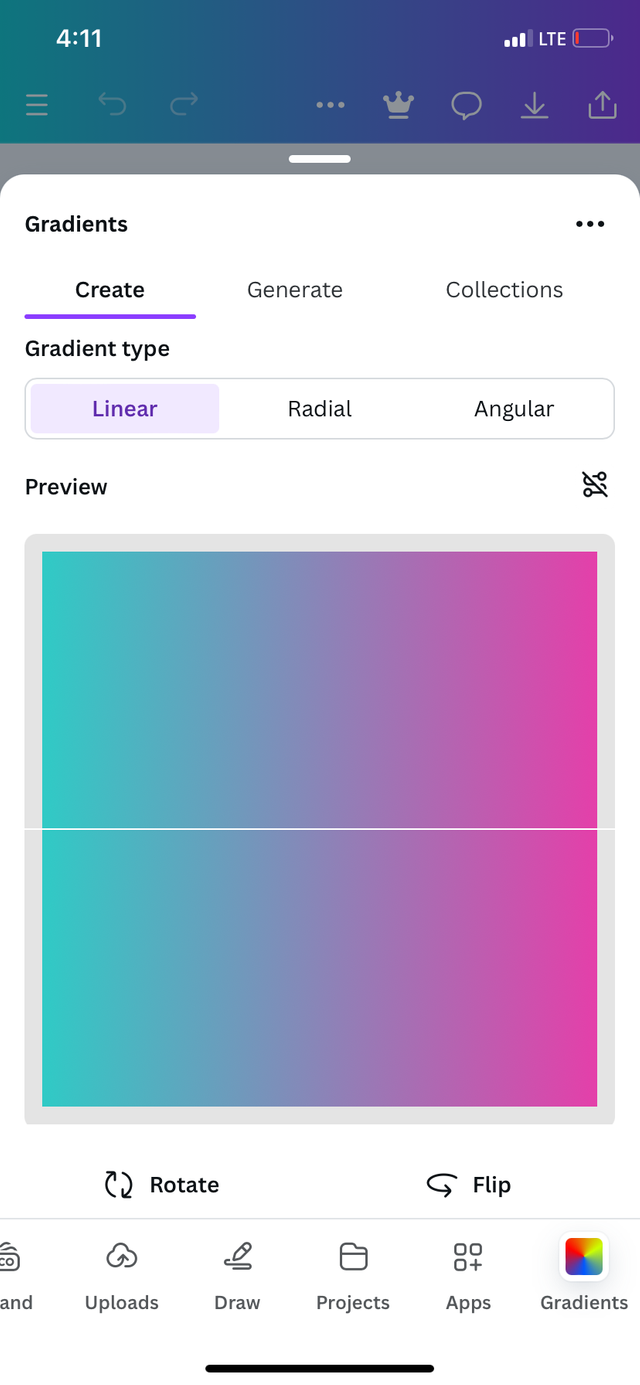
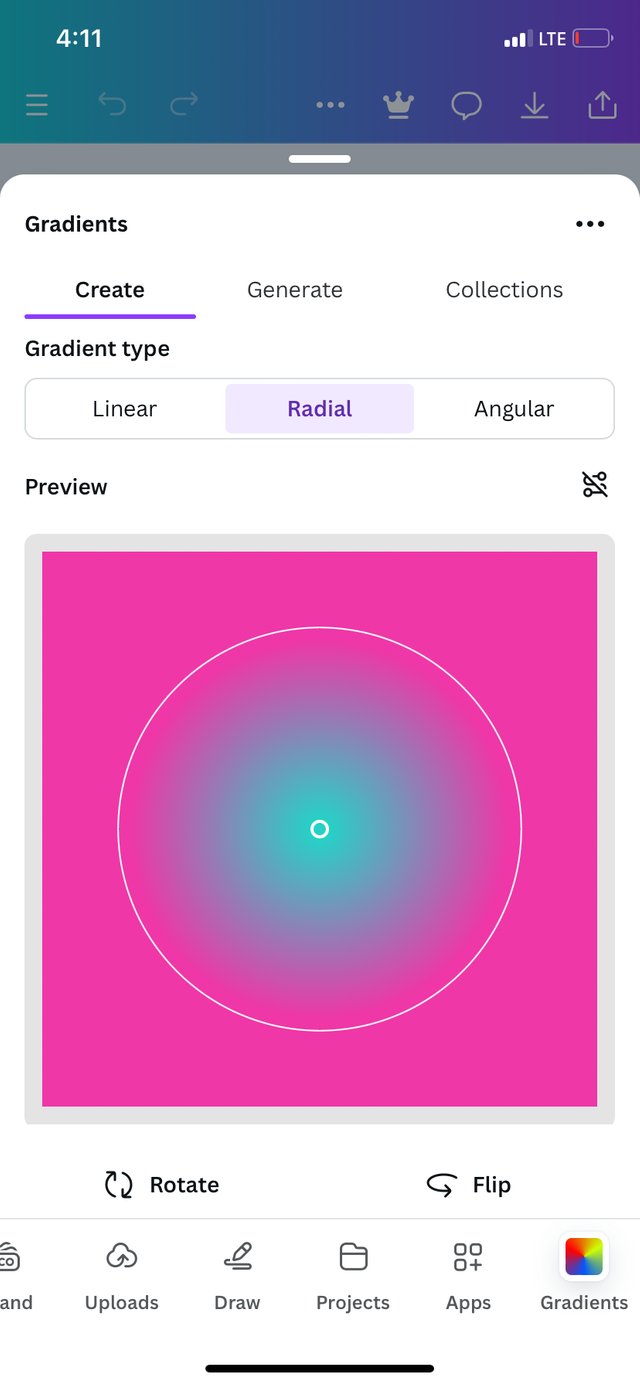
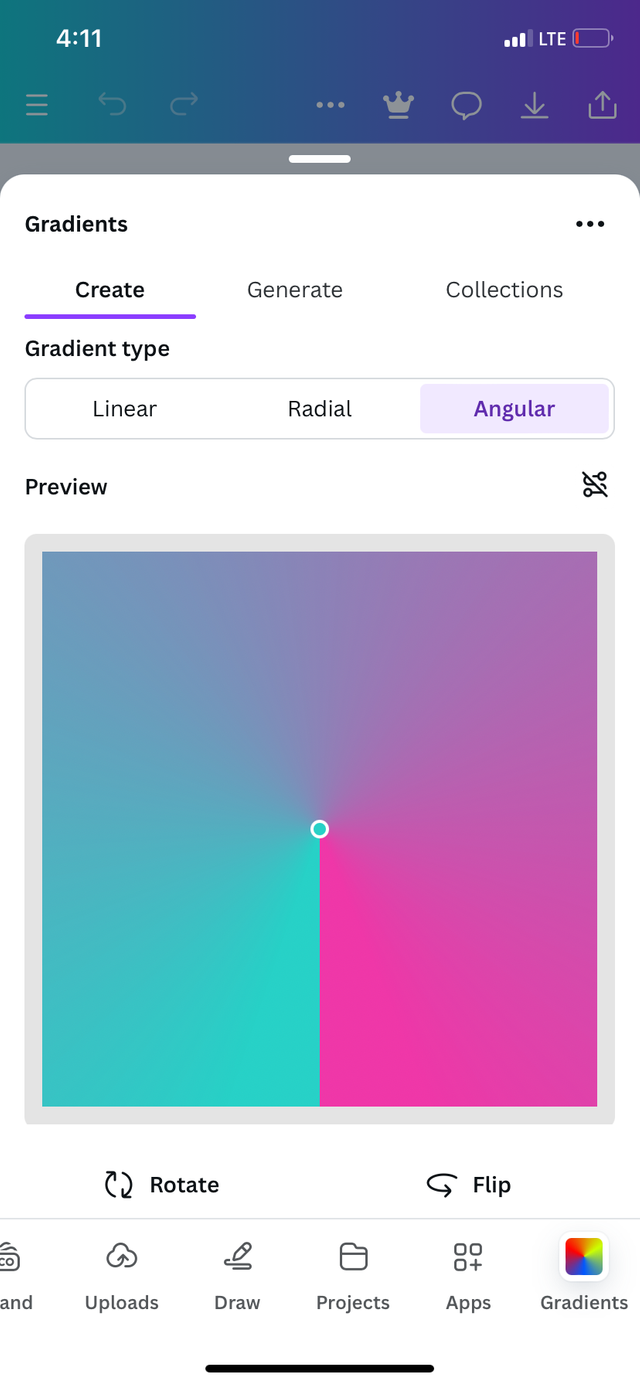
Step 3: I compared different types of gradient (linear, radial and angular) before settling for just one which is linear.
 |  |  |
|---|
Below is the result;
 Second gradient
Third Gradient: Three Colors (Hex Codes) that Blends Perfectly
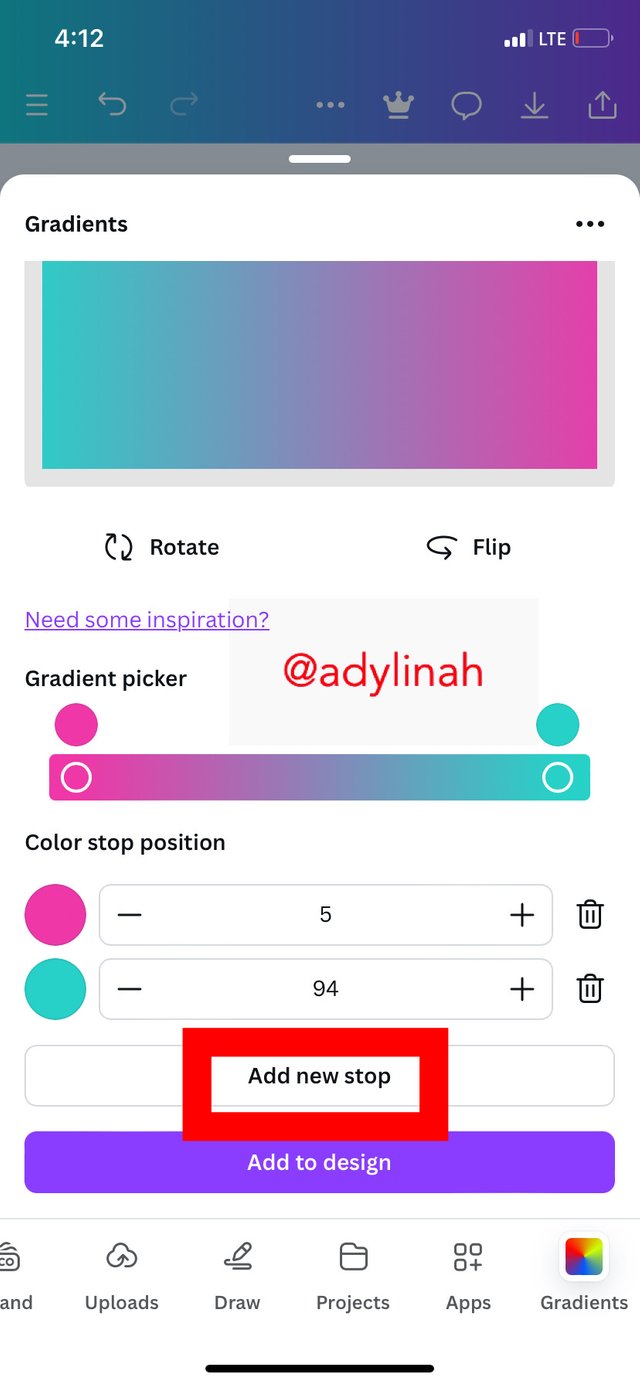
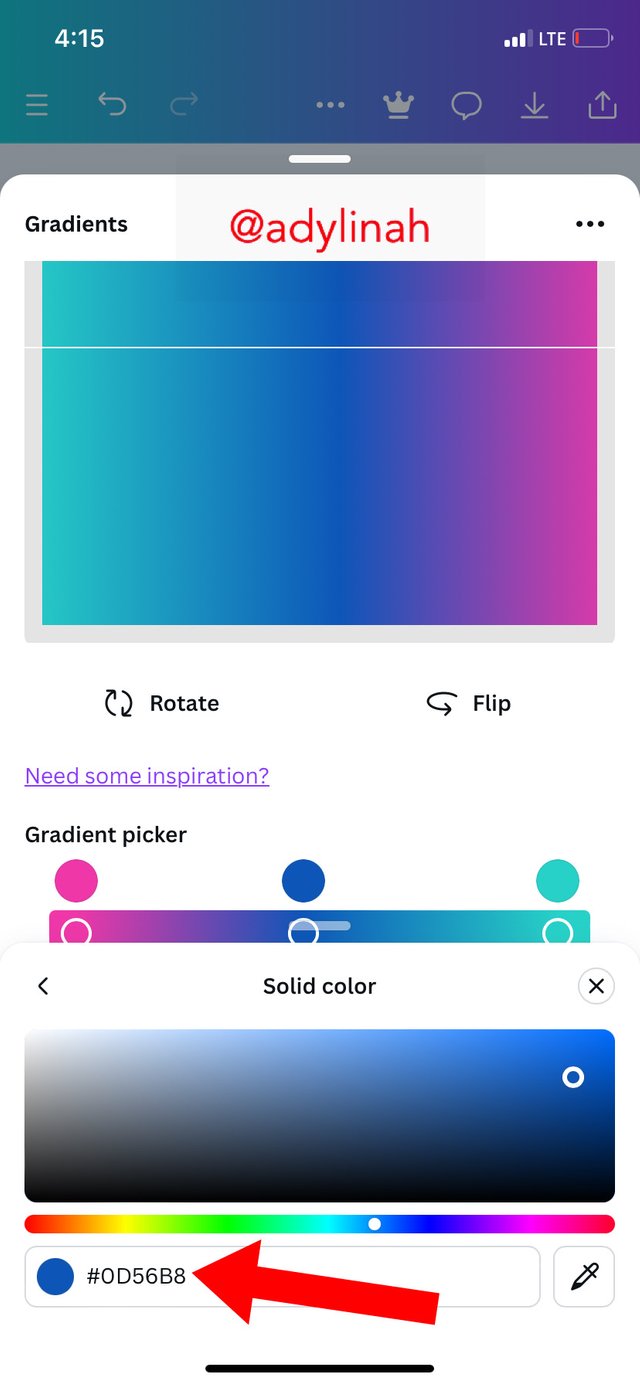
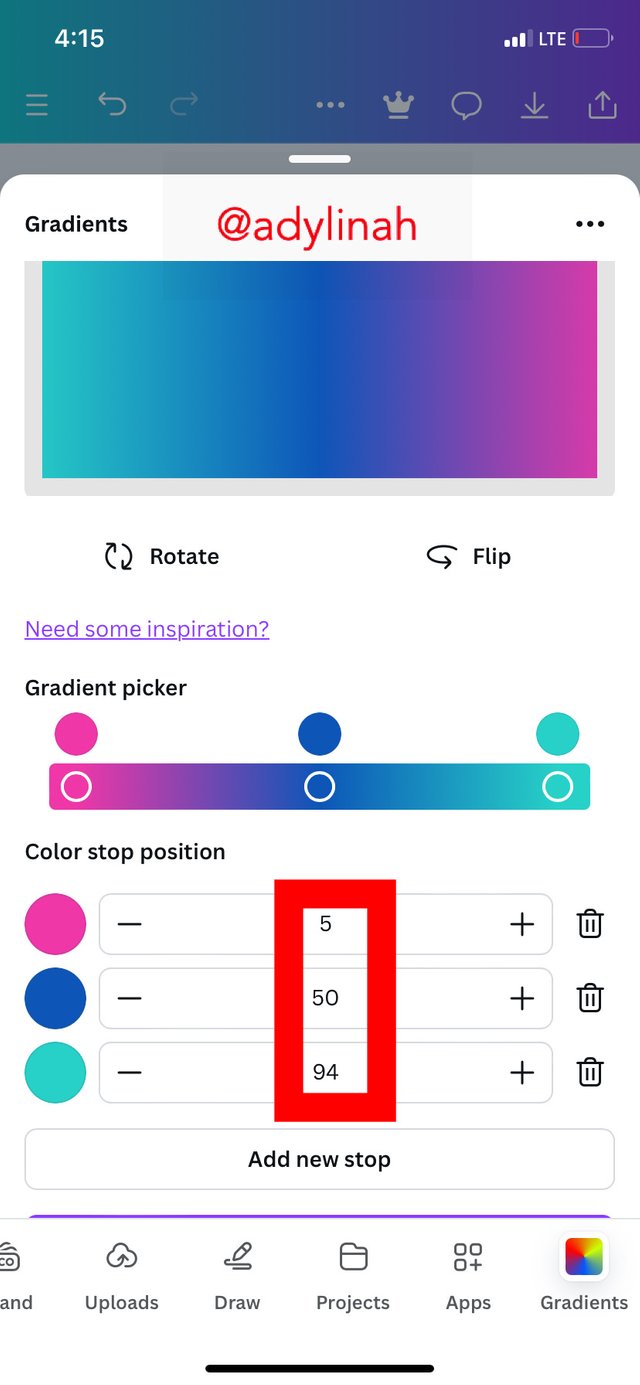
Step 1: from the continuation of the previous gradient, I clicked on "add new stop", I added blue color using hex code of #OD56B8. I also adjusted all the three color stop position to my preferred points.
 |  |  |
|---|
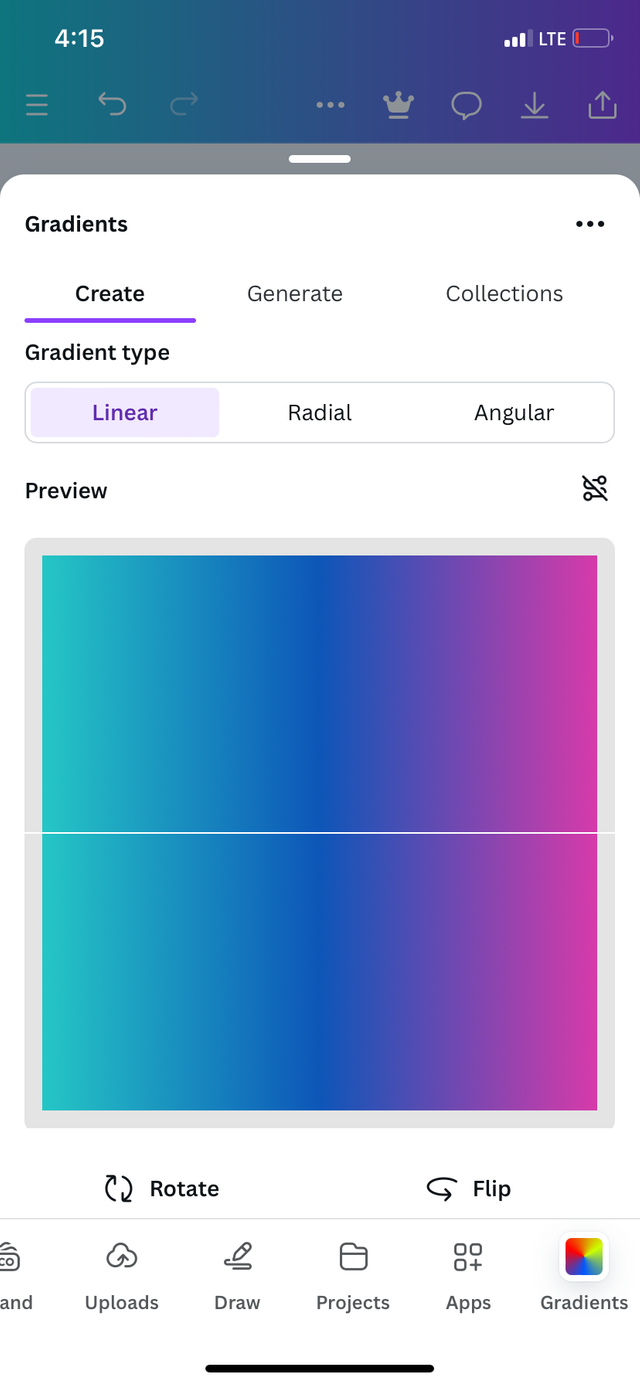
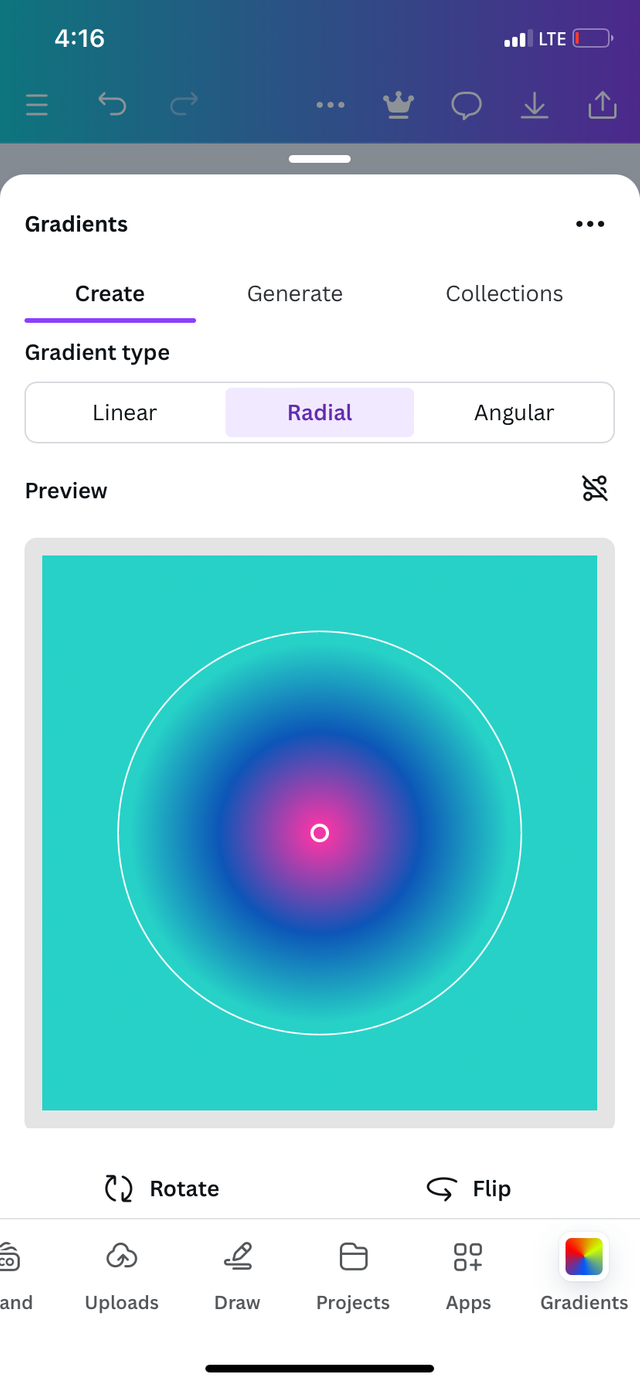
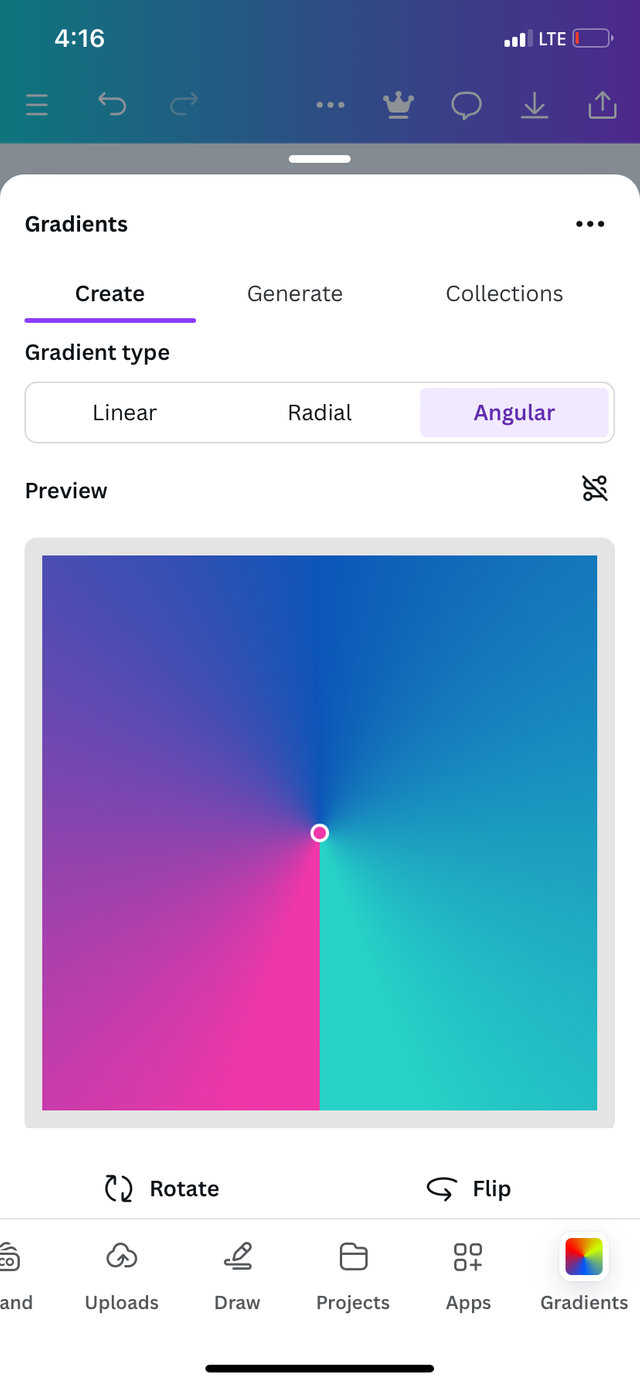
Step 2: I compared all the different types of gradient before saving one out of them.
 |  |  |
|---|
Below is the result;
 Third gradient
Text Gradient
Part 1
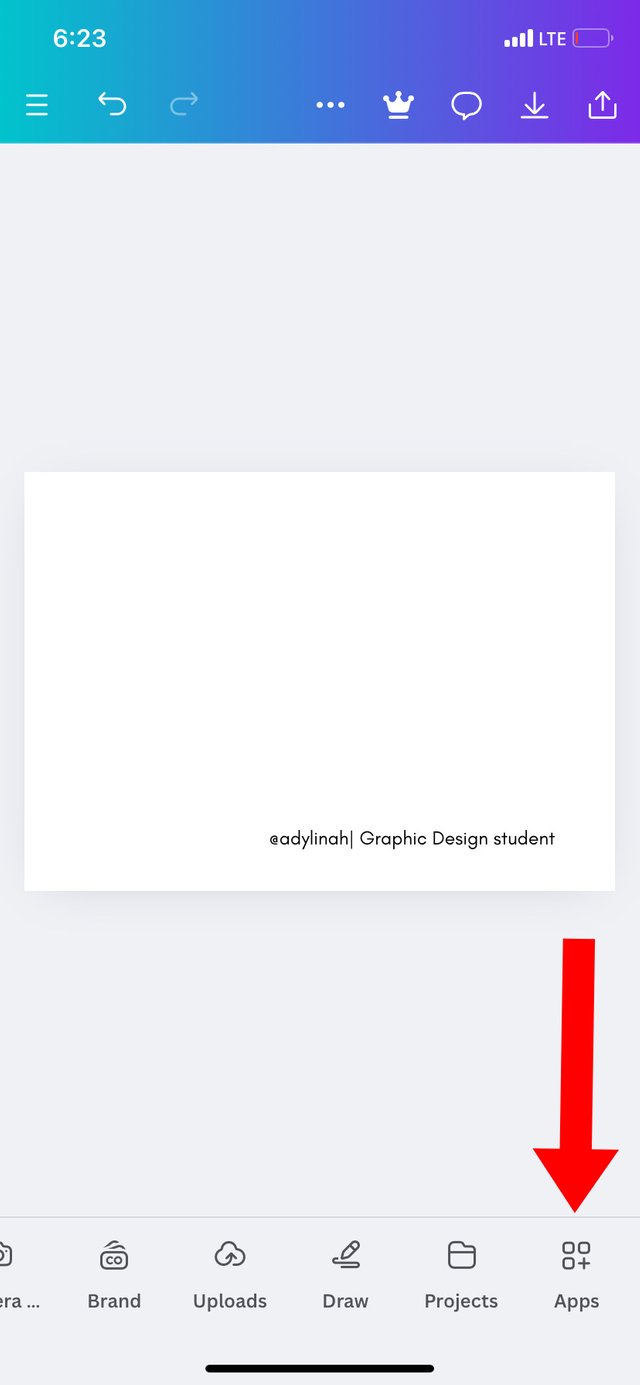
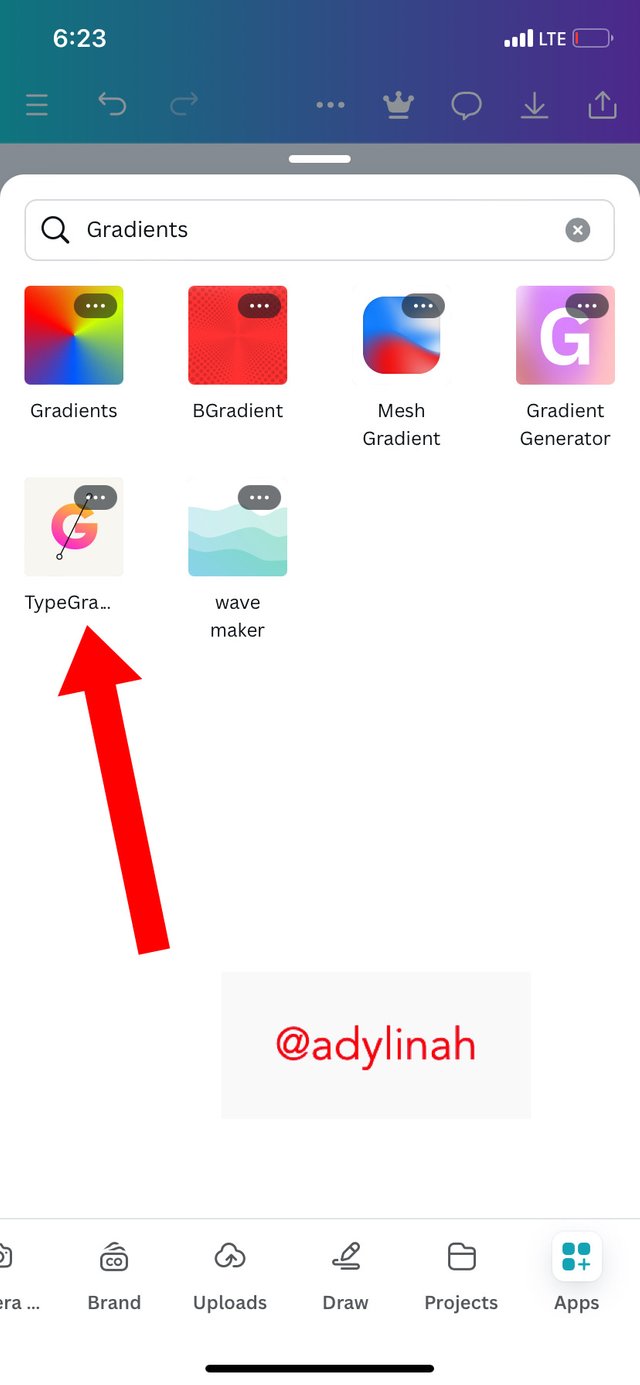
Step 1: I created another workspace, clicked on "Apps", selected "type gradient" and type in "GRAPHIC DESIGN" on the space provided.
 |  |
|---|
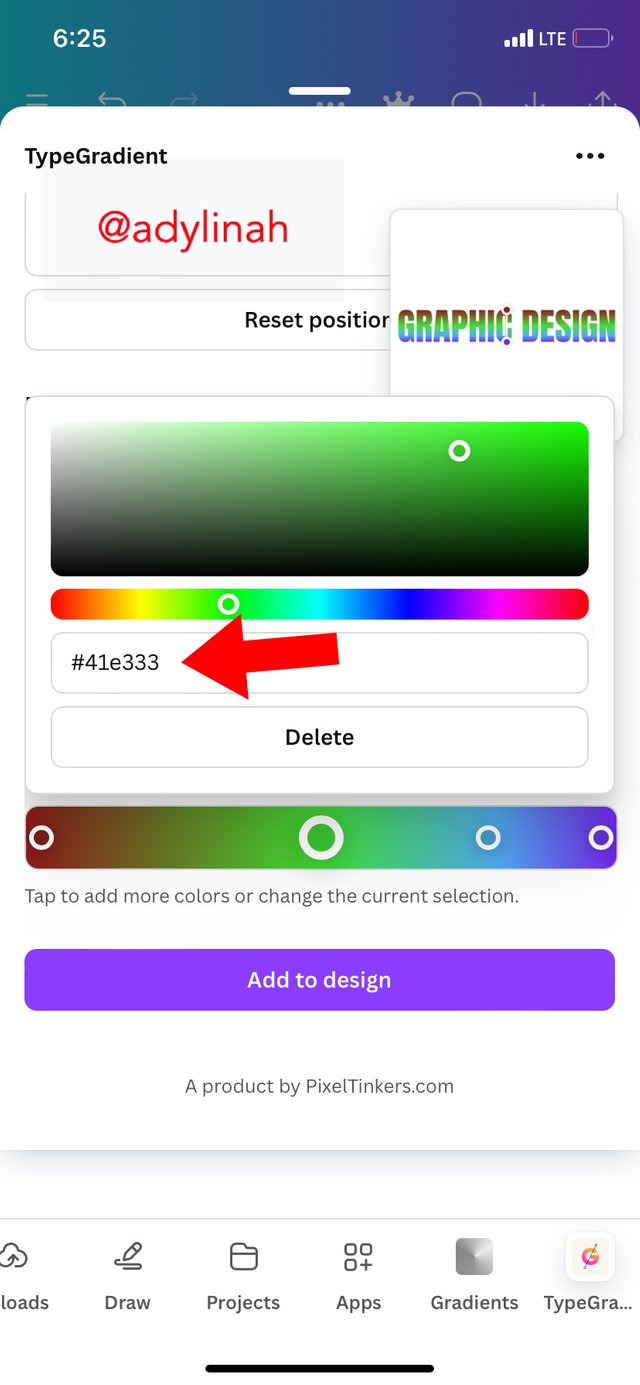
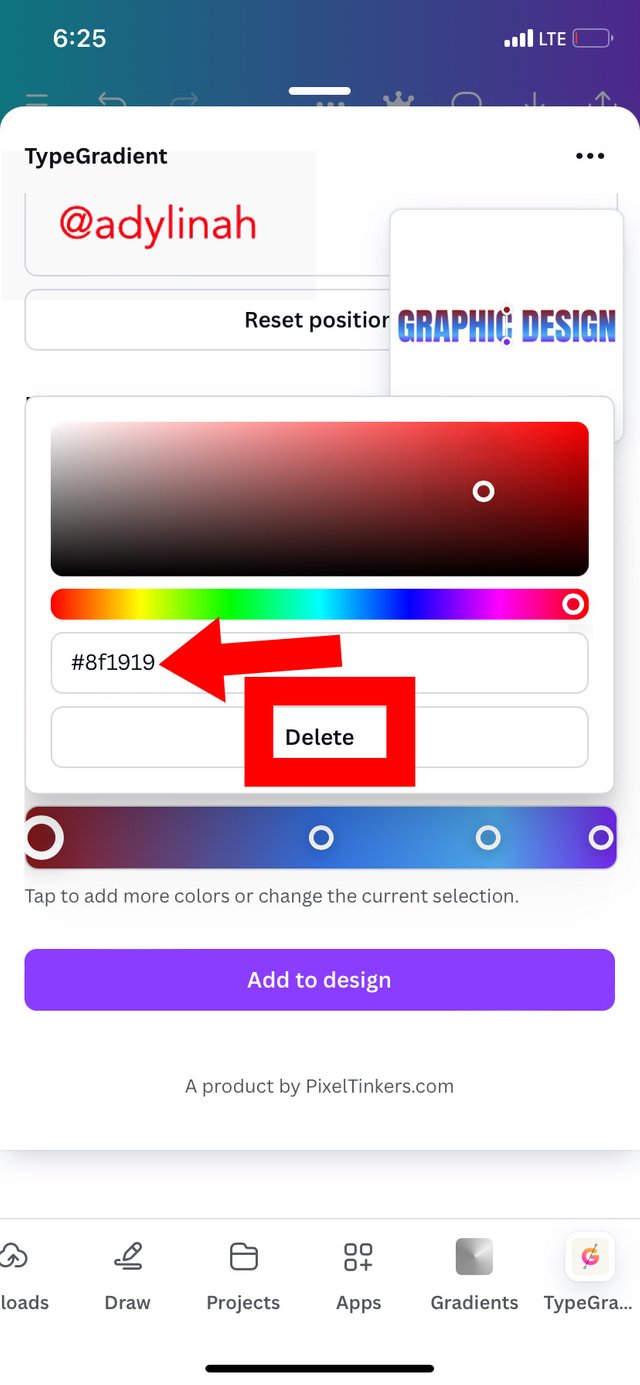
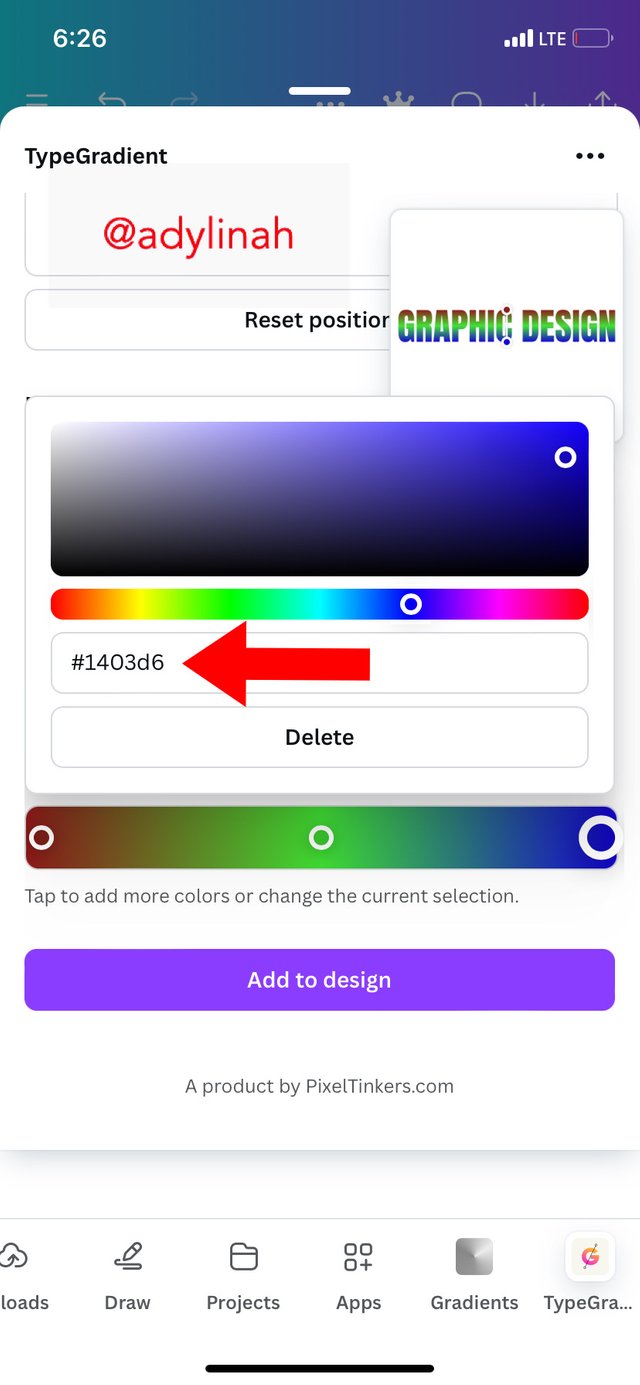
Step 2: I selected lemon color then used the hex code of #41e333, selected red using the hex code of #8f1919 before deleting the extra color because I wanted to work with just three colors. Lastly, I used the hex code of #1403d6 for blue.
 |  |  |
|---|
Below is the result gotten;
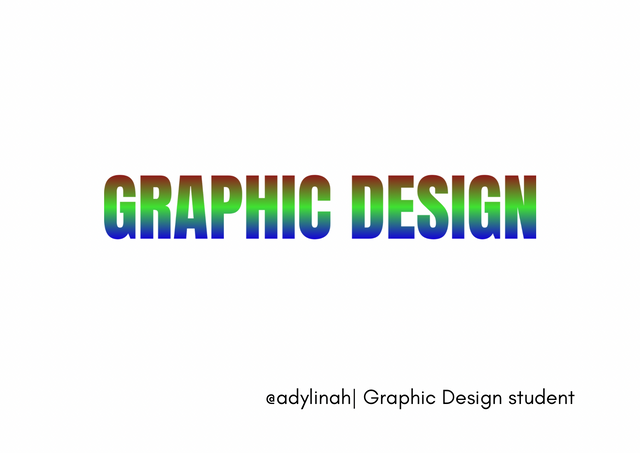 Text gradient with three different colors
Part 2
Step 1:
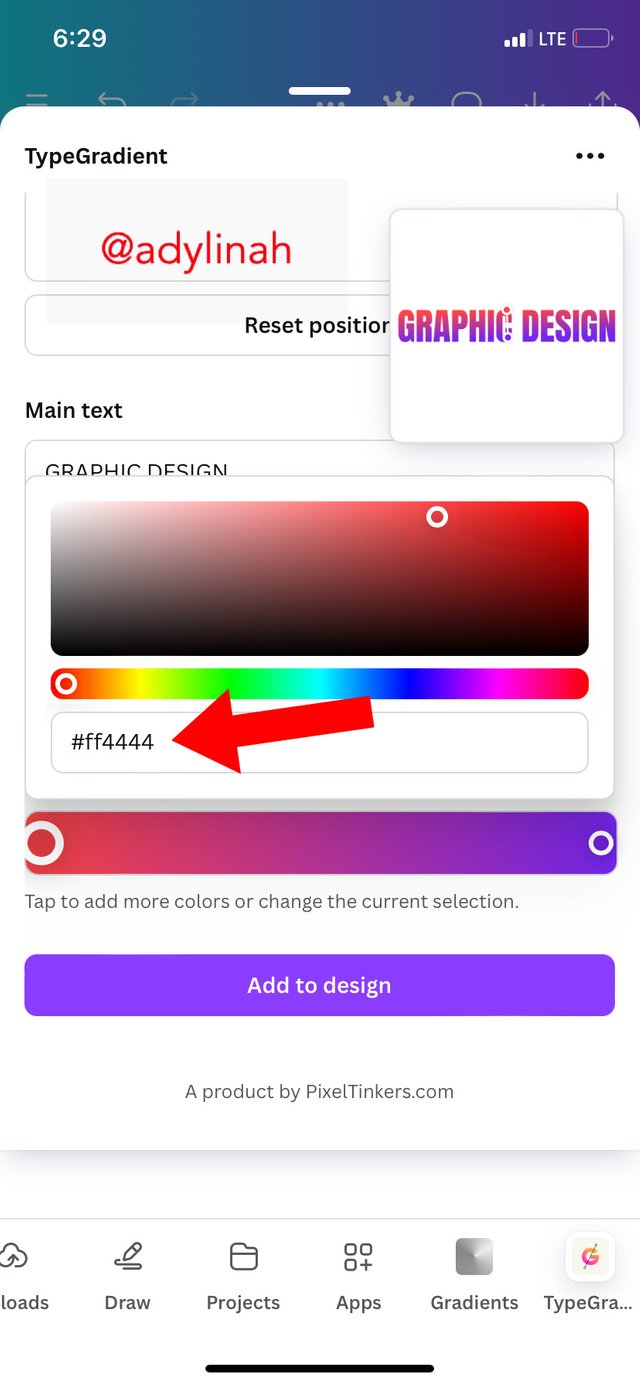
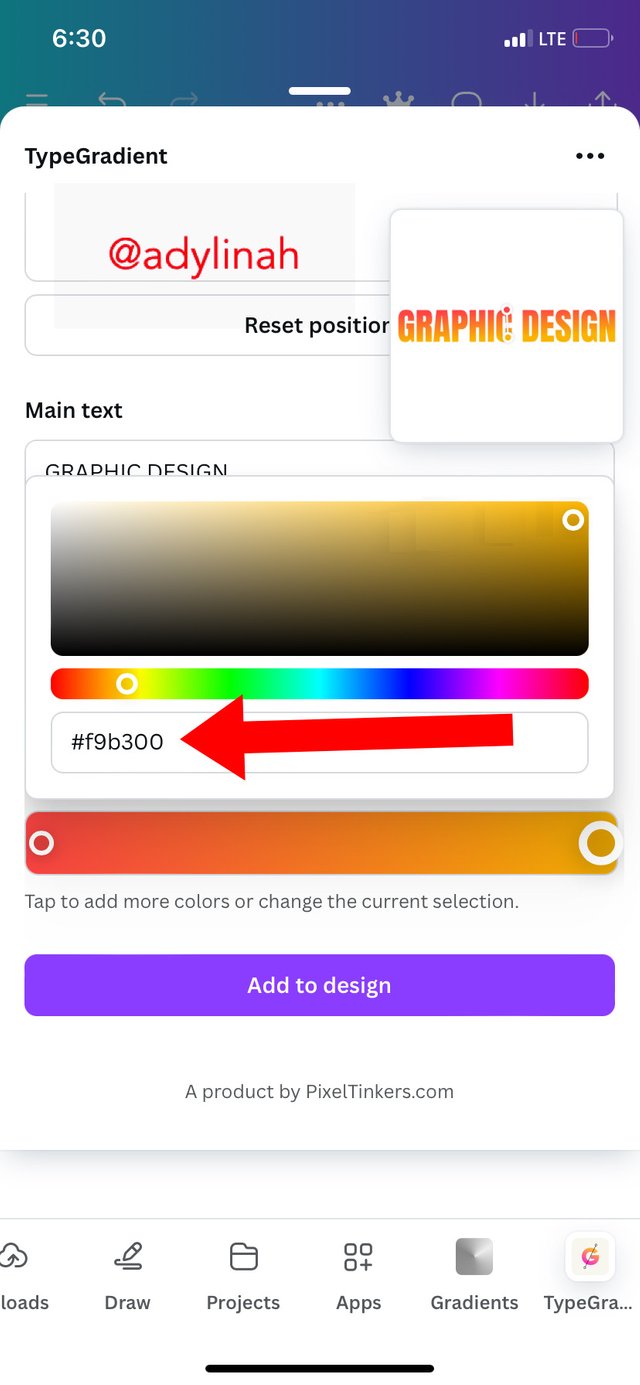
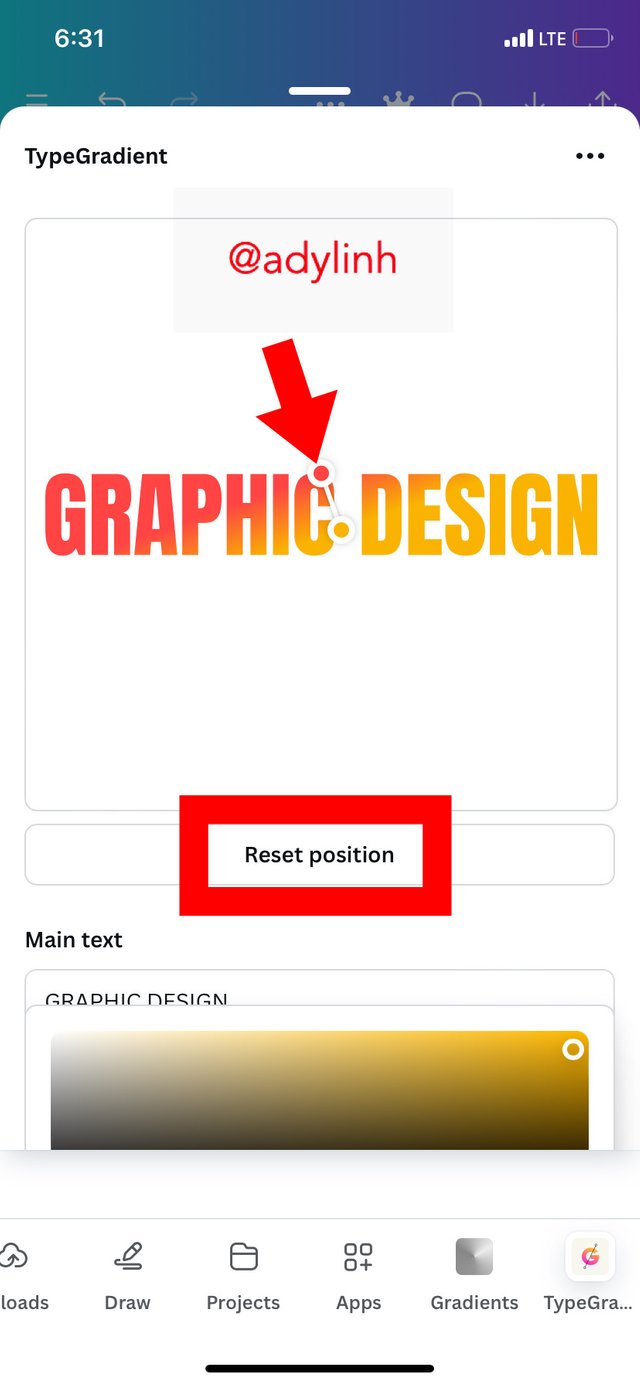
I followed the same process as the previous one but used just two colors for my text; red ( #ff4444 of hex code) and yellow ( #f9b3OO of hex code). I clicked on "reset position" to blend these colors.
 |  |  |
|---|
Below is the result;
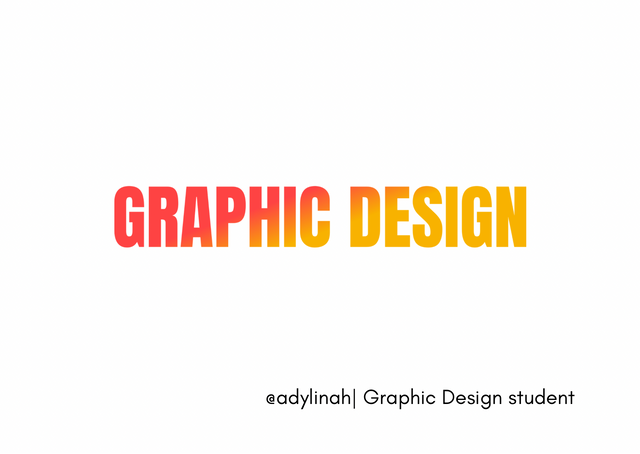 Text gradient with two colors
Using One Background Gradient Made to Create a Beautiful Flyer Design
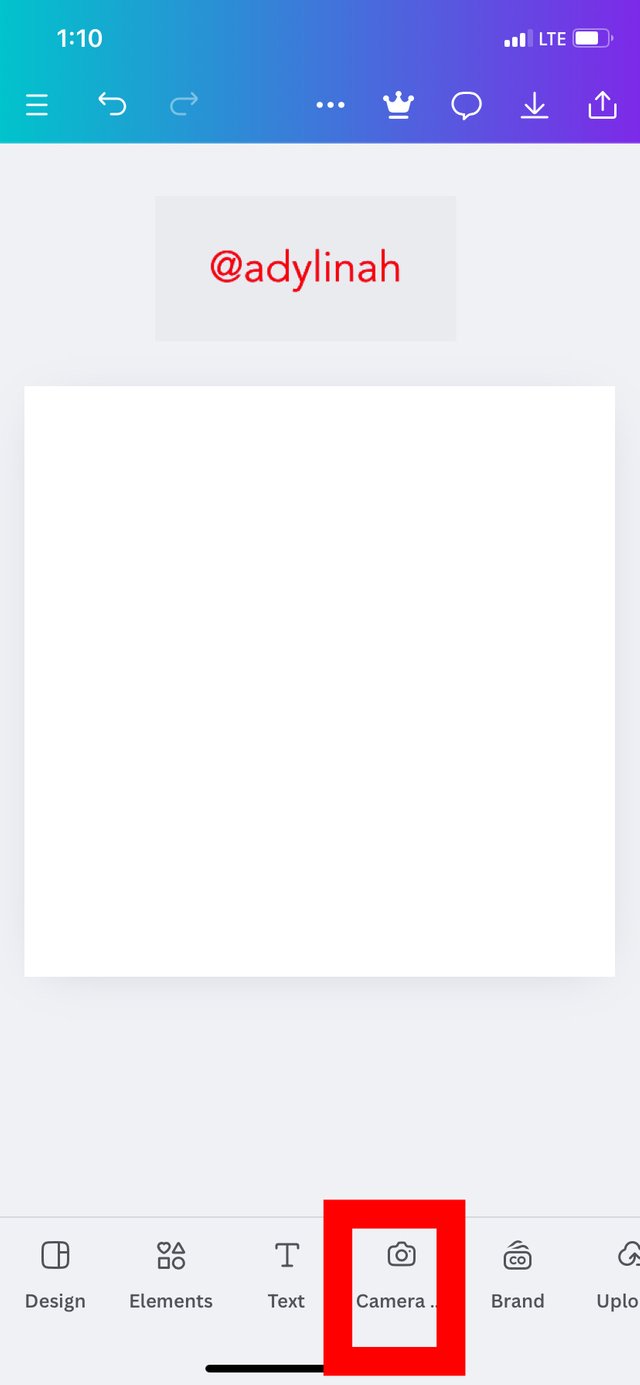
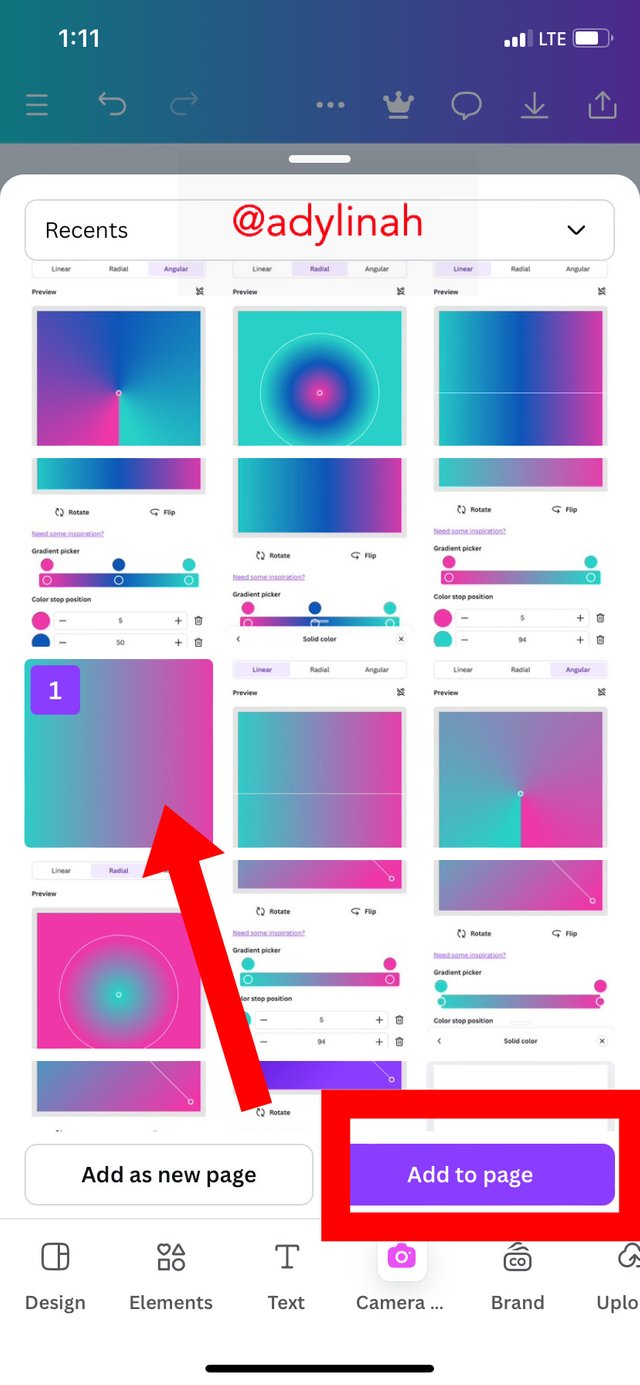
Step 1: after creating my workspace, I clicked on camera, selected one of the gradient.
 |  |
|---|
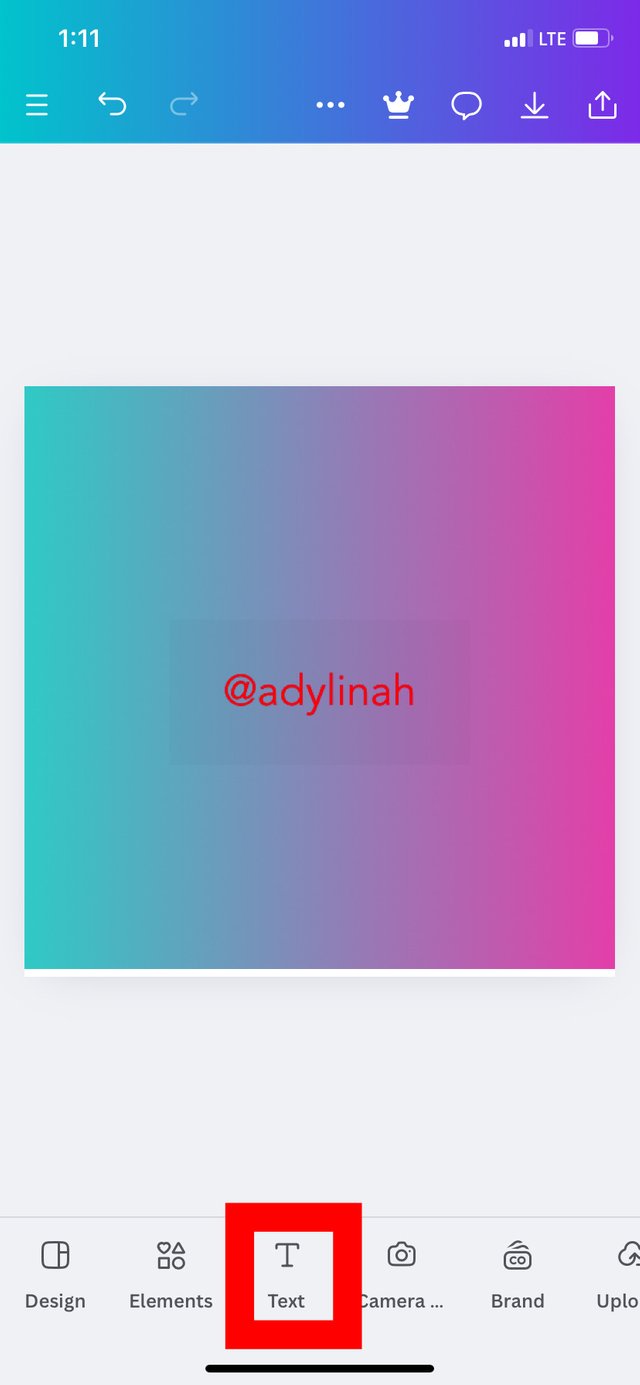
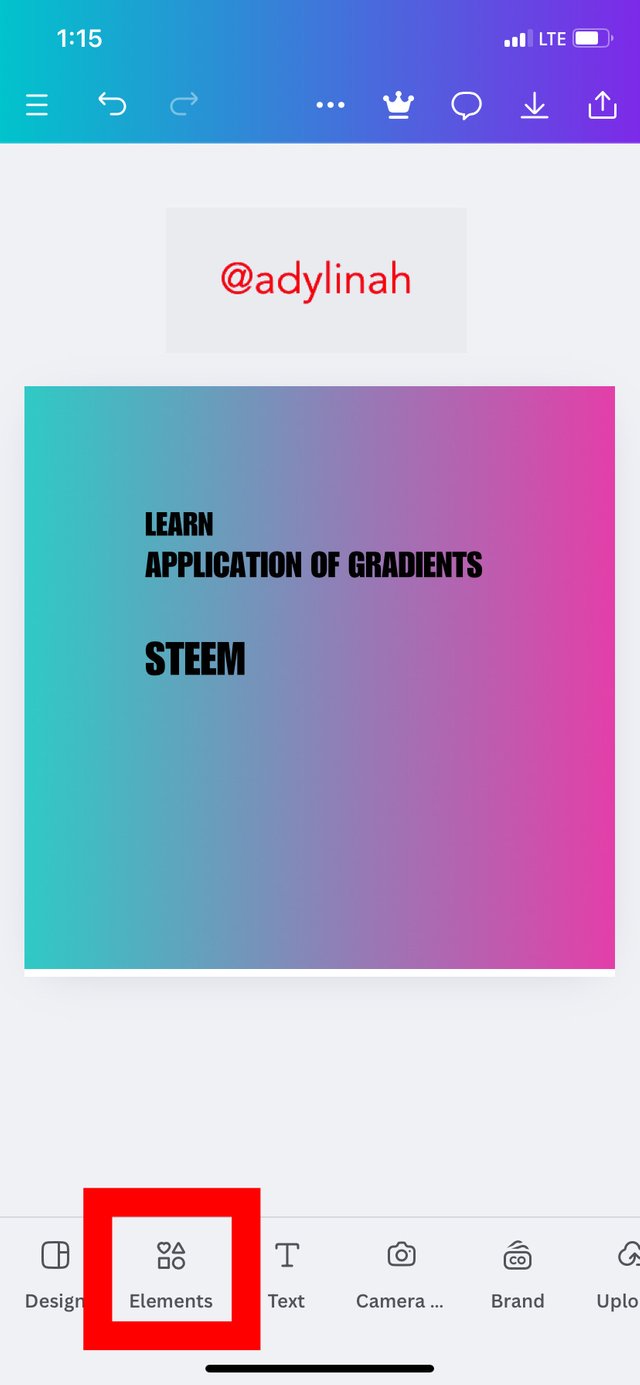
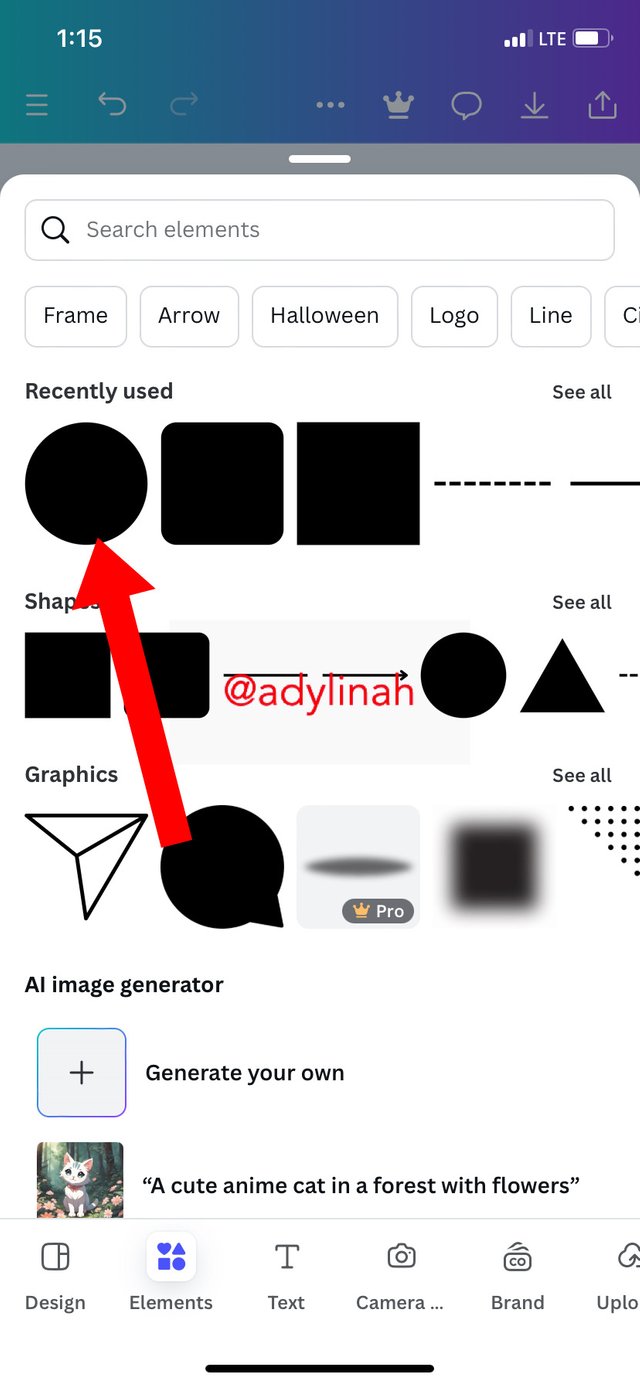
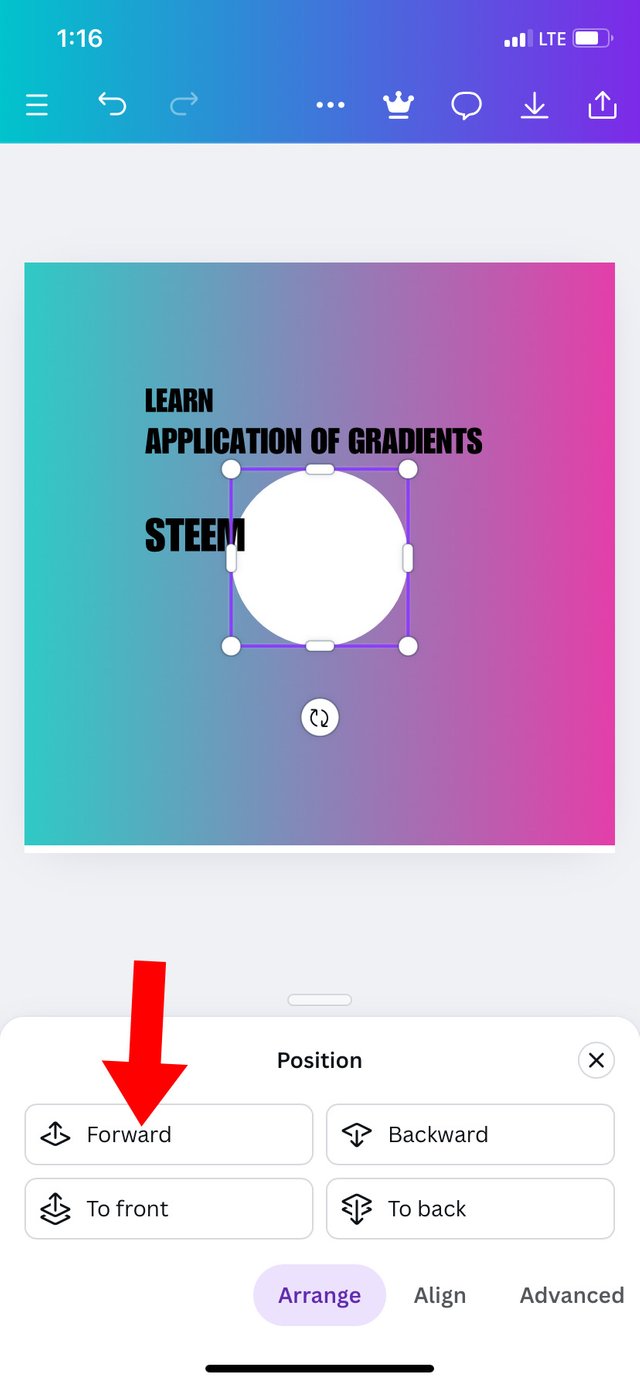
Step 2: I clicked on text, typed in " LEARN, APPLICATION OF GRADIENTS then STEEM". I clicked on elements and selected circle, clicked on position and sent it forward.
 |  |  |  |
|---|
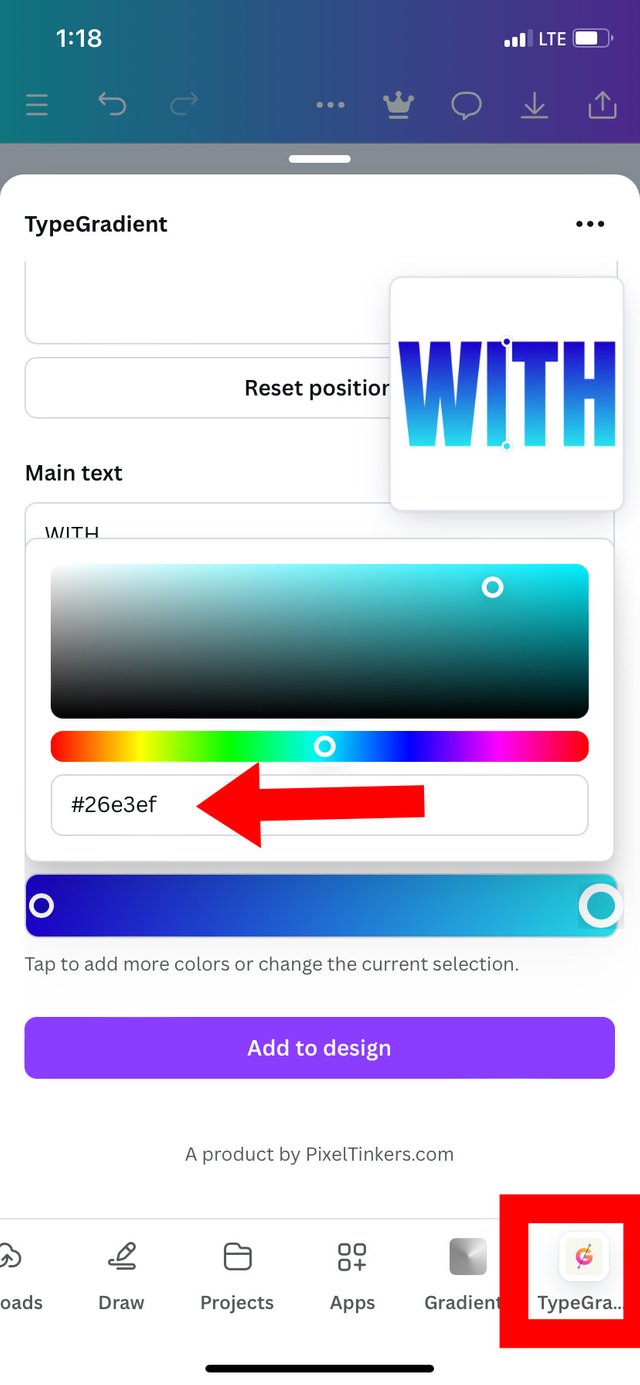
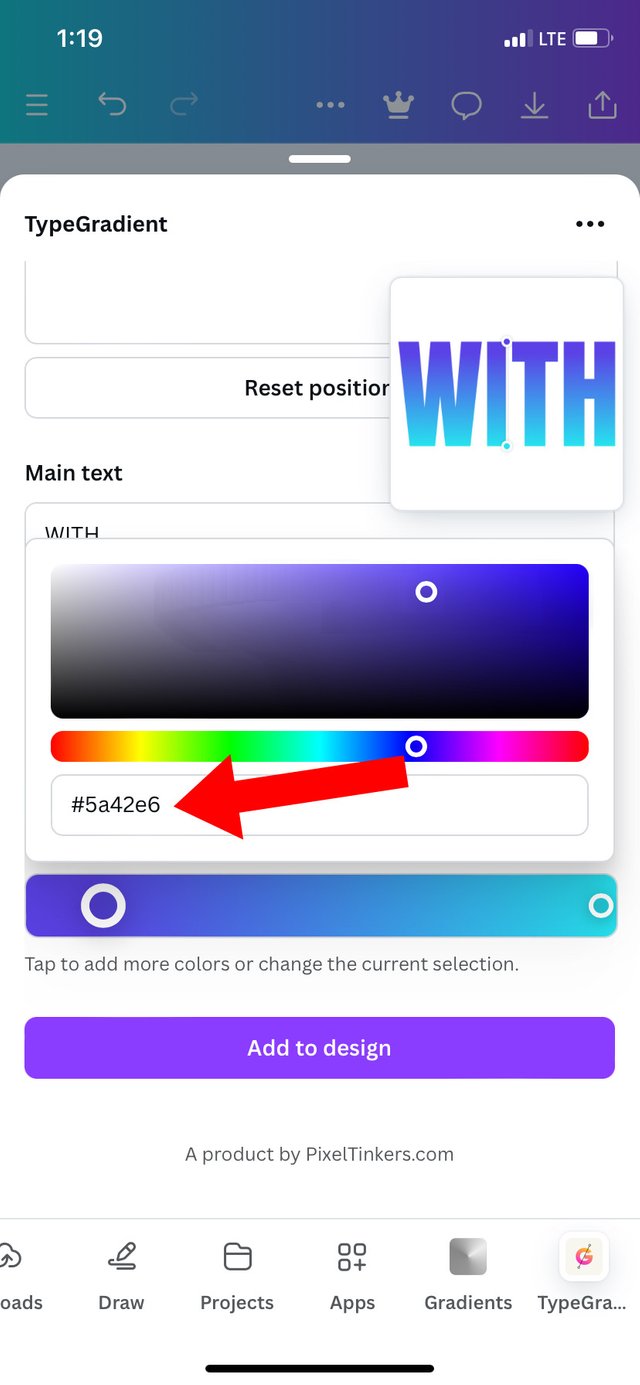
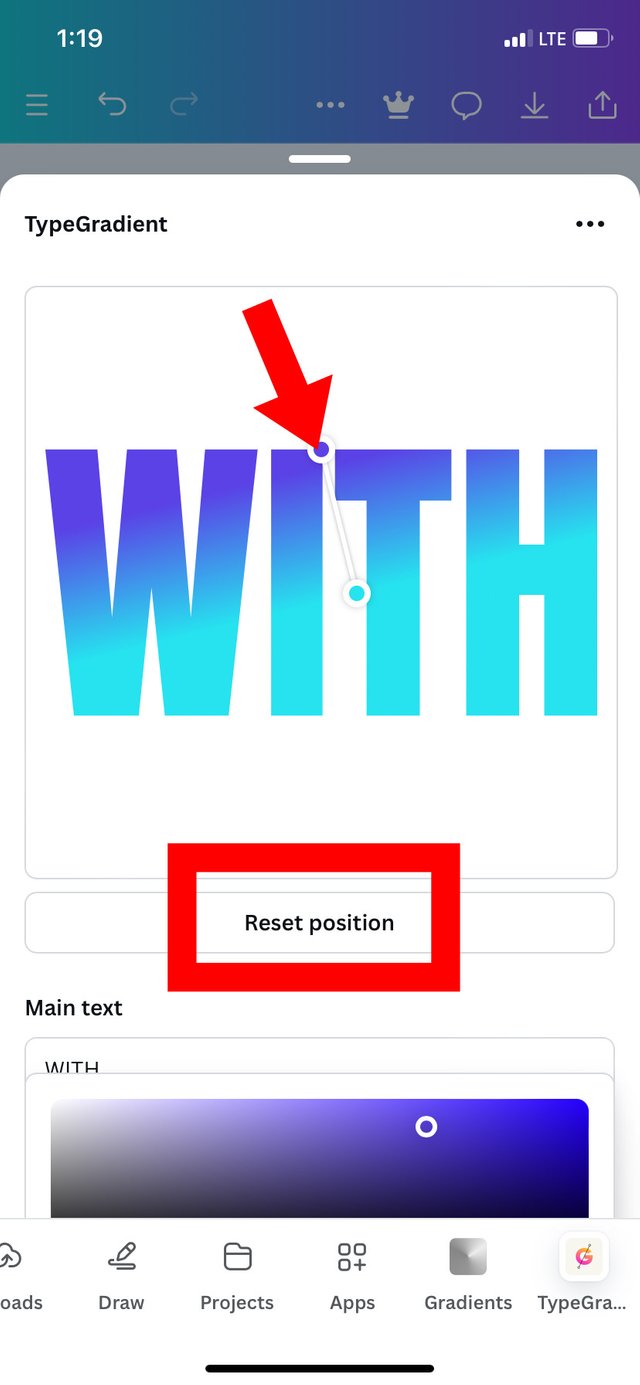
Step 2: I used text gradient to type "WITH" using hex code of #26e3ef for sea green color and #5a42e6 for purple color. I went ahead to reset its position then placed on my circle shape.
 |  |  |
|---|
I changed the circle to black, added picture and steemit logo to the t-shirt and that was how I produced this beautiful flyer design.
 Final look of my flyer
Thank you graphic design teacher for this interesting introductory class to the world of gradient in design.
I will invite @dequeen, @mvchacin and @lovinah to join the class.
I carefully follow your illustration i understood it well because it was well detailed you didn't miss out a single step, weldone dear.
I wish you the best with the contest.
Thank you friend for your kind words!