Understanding CSS Grid Layout
Introduction to CSS Grid Layout 🎉
This is the first chapter of a series of articles that I will be publishing to understand and start using this new layout model for the web, called CSS Grid Layout.
First of all, these are the first three fundamental things you should know about this new layout model:
Does not replace Flexbox. It is complemented in a spectacular way.
Unlike Flexbox, which uses only one dimension; Grid is a two-dimensional model. (We'll see this in detail)
It is widely compatible with browsers. It can be used today, there are no excuses. And if you do not believe me, look at caniuse.
( )
)
Using this new system, you can stop using Bootstrap or any other CSS Framework to generate grids. Meaning fewer lines of code! and that implies an easy maintenance of our codebase.
In addition, it is very simple to use, but like everything else, we must adapt and understand its logic. Let us begin!
Grid is another option that we have available in the display property, therefore to generate a grid, the first thing we must do is:
div {
    display: grid;
}
With just this line of code, we are telling the browser two important things:
We want that div to behave like a grid.
As it happens in Flexbox, your direct children to that div, will behave like items in the grid.
Let's suppose the following HTML structure:
<div class="container">

  <div class="item">01</div>
  <div class="item">02</div>
  <div class="item">03</div>
  <div class="item">04</div>
  <div class="item">05</div>
  <div class="item">06</div>
  <div class="item">07</div>
  <div class="item">08</div>
  <div class="item">09</div>

</div>
Here we see a container div (.container) and its direct children (.item). When we apply the property / value display: grid to our container, the items will automatically be Grid Items.
.container {
  display: grid;
}
If we see the first CodePen of this example, we can see that at first glance nothing changes. Things happen internally.
Generate the template of our Grid
Now that we understand the parent-child relationship, we must explicitly define our grid so that the browser knows how to distribute our child elements. For this, we present two new properties called 'grid-template-columns' and 'grid-template-rows'. As you can imagine, one defines the columns, and the other defines the rows. Here we see the difference with Flexbox, Grid is 2D ... let's see an example:
.container {
  display: grid;
  grid-template-columns: 100px 100px 100px;
  grid-template-rows: 100px 100px 100px;
}
Here are two important things to mention:
The unit of measurement can be used whichever we want; px, em, rem, etc. Percentages can also be used, but it is not recommended and we will see later why given the inclusion of a new unit of measure called
fr(fraction) that works very similar to using percentages but more efficient. This is ideal for responsive design.The amount of values that are written is the number of columns or rows that we want.
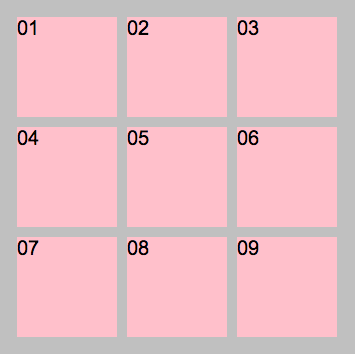
In the example, we see that a grid of 3x3 is generated and each module is of 100x100px.

To finish this chapter, I want to show you another simple property called grid-gap:
.container {
  display: grid;
  grid-template-columns: 100px 100px 100px;
  grid-template-rows: 100px 100px 100px;
  grid-gap: 10px;
}
What does do? Separate our columns and rows by 10px!
To recap, these are the new properties that you should start experimenting with:
display: grid
grid-template-columns: value
grid-template-rows: value
grid-gap: value
As a note, you can see that all these properties apply to the parent (.container).
This is all for this chapter, the idea here is that you have a general overview about CSS Grid, so that you can already try it. In the following chapters, we will dive deeper and see new properties.
This is the CodePen with the complete example so you can experiment. 🤓
See you next time!
Congratulations @shermanshaman! You received a personal award!
Click here to view your Board
Congratulations @shermanshaman! You received a personal award!
You can view your badges on your Steem Board and compare to others on the Steem Ranking
Vote for @Steemitboard as a witness to get one more award and increased upvotes!