Sniffing passwords from same network(Lan) using Cain and Abel tool
Here I will show you that how simple HTTP and FTP passwords can be sniffed across LAN network. Just follow the steps and you are done.
First install the tool Cain And Able form here.
About the tool Cain And Abel:
Cain & Abel is a password recovery tool for Microsoft Operating Systems. It allows easy recovery of various kind of passwords by sniffing the network, cracking encrypted passwords using Dictionary, Brute-Force and Cryptanalysis attacks, recording VoIP conversations, decoding scrambled passwords, recovering wireless network keys, revealing password boxes, uncovering cached passwords and analyzing routing protocols. The program does not exploit any software vulnerabilities or bugs that could not be fixed with little effort. It covers some security aspects/weakness present in protocol’s standards, authentication methods and caching mechanisms; its main purpose is the simplified recovery of passwords and credentials from various sources, however it also ships some “non standard” utilities for Microsoft Windows users. Read more..
Just follow the steps:
Step 1:
Please turn off the windows firewall or any other third party firewall so that all the packets are captured efficiently.
Step 2:
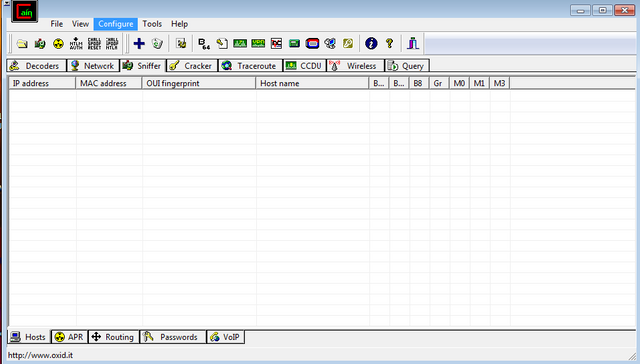
Open Cain and Abel tool
Step 3:
Goto -> Sniffer Tab and click Configure in the main menu to configure your packet listening adapter. 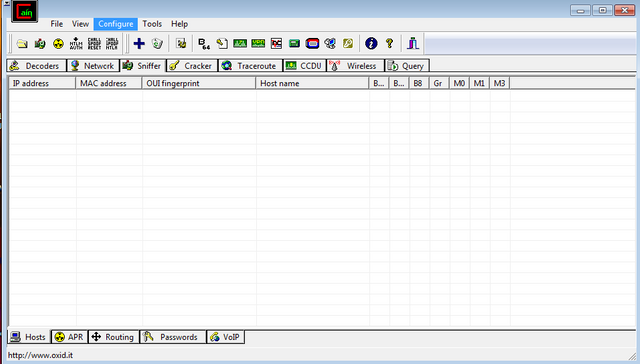
Step 4:
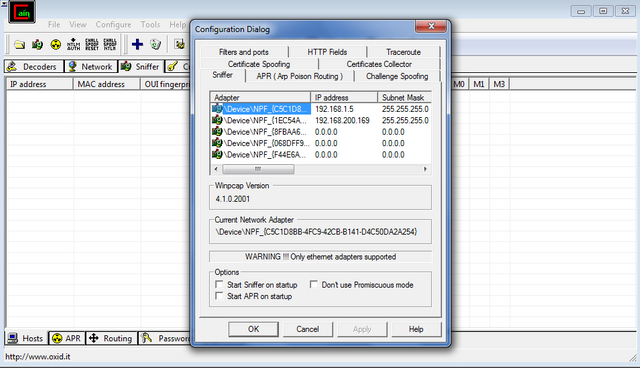
Select the appropriate network adapter for your network that you want to sniff the packets for plain-text passwords. And Click Ok.
Step 5:
Click the Green Adapter icon as shown below. This means that you just configured the adapter and now you are turning it ON.
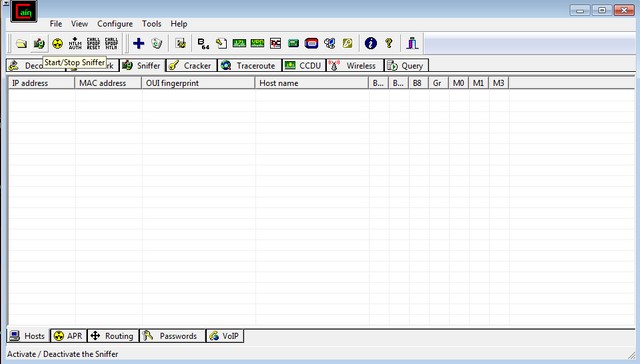
Step 6:
Now select the APR tab below as shown and now first click on the right side upper pane area. When you click that area the blue plus (“+”) icon will get enabled. Press that blue plus (“+”) icon.
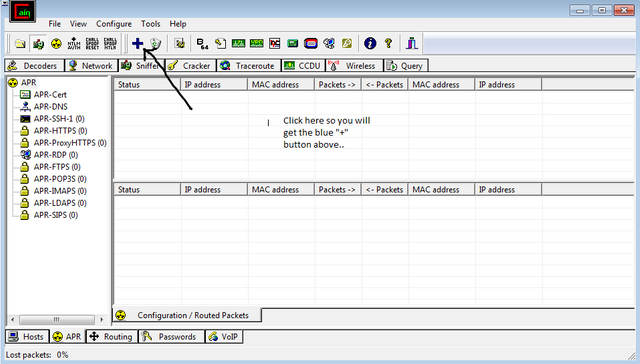
Step 7:
This is very interesting step. Now we need to select the router`s IP address and click ok. This means that we want to listen to every packet that is sent to router. If we select any other IP address in our LAN network then we can listen to only that particular HOST on the network. Since the router responds to all the request of HOSTS connected in a LAN. Thus we can listen to all the HOSTs.
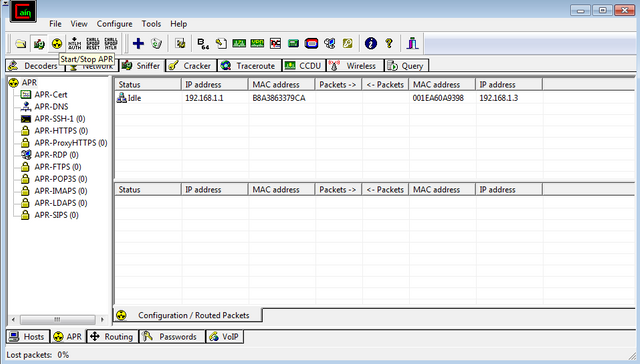
Step 8:
Now click the Yellow Circle icon as shown. This means that we are starting ARP poisoning.
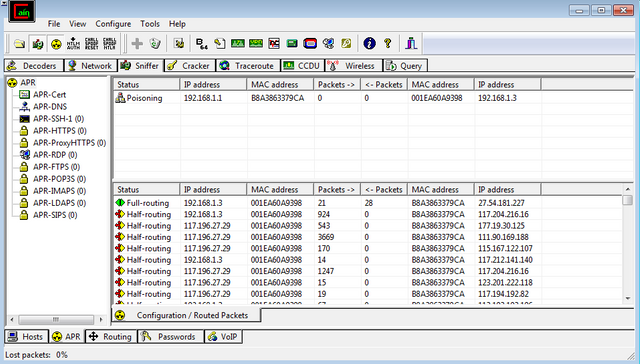
Step 9:
We can see that in the upper right panel there is an IP address of our router and when we press that Yellow Circle icon (button), it performs ARP poisoning.
Step 10:
Now click the password tab which is at the bottom. We can see that we are getting passwords of HTTP i.e. plain text session in our LAN network.
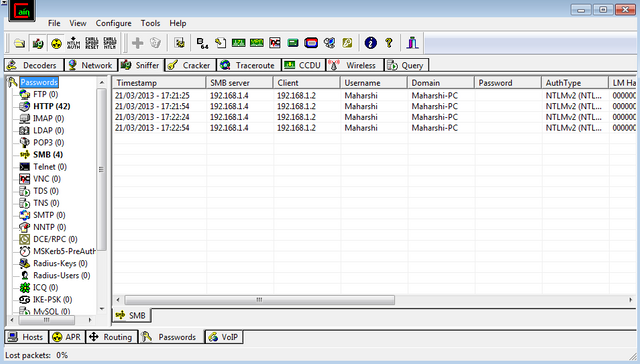
Note: While performing this practical you will notice that there is significant reduction in he network speed. This is due to the fact that ARP spoofing on the LAN network creates many fake packets advertising other`s host identity.This can also create DoS Attak on the LAN network as it creates many fake packets for processing thereby making unable for other HOST to make a request on the network.
Hack Into A Computer Which Is Connect On same network(Lan)
If you are working in Office / Colleges and want to hack your friends & college mate PC then here is a trick.What do we need ?
- Windows Os
- Cain And Abel
Step 1:- Finding the target
So first off we need to find a computer or the computer to hack into. So if your
plugged in to the LAN, or connected to the WAN, you can begin. Open up Cain and
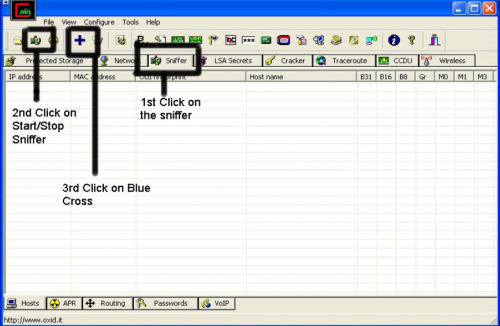
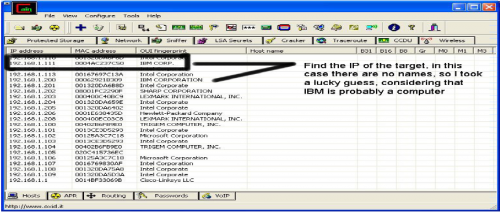
Abel. This program has a built in sniffer feature. A sniffer looks for all IP addresses in the local sub net. Once you have opened up the program click on the sniffer tab, click the Start/Stop sniffer, and then click the blue cross.
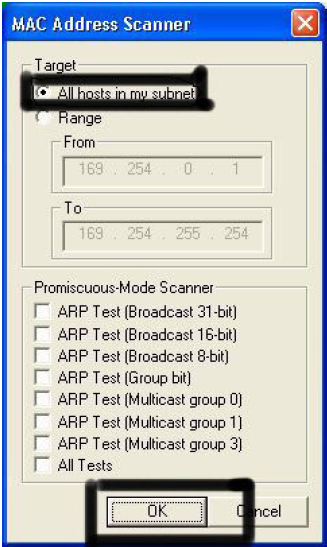
Another window will pop up, make sure “All host in my subnet” is selected, and then click ok.
It should begin to scan.
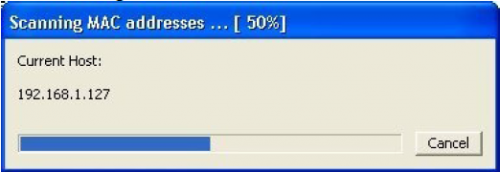
Then IP’s, computer names, and mac addresses will show up
Now remember the IP address of the computer you are going to be breaking into.
If you can’t tell whether the IP address is a computer, router, modem, etc, that’s ok.
During the next step we will begin our trial and error.
Step 2:-Trial and error
Now, we don’t know if we have our designated target, or if we have a computer or
printer, or whatever else is on the LAN or WAN.
If you did get the IP of the target though, I still recommend reading through this
section, for it could be helpful later on.
Click on the start menu and go to run, type in cmd, and click ok.
This should bring up the command prompt.
From here we will do most of the hacking.
Now I will be referring to certain commands that need to be inputted into the
command prompt.
I will put these commands in quotes, but do not put the quotes in the code when you
type it into the prompt.
I am only doing this to avoid confusion.
Let’s get back to the hacking.
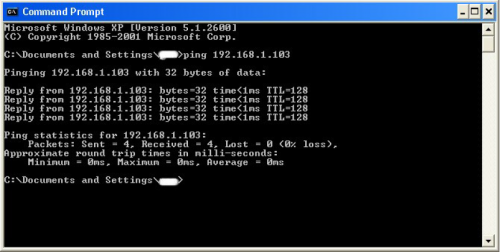
Type in “ping (IP address of the target).” For example in this tutorial, “ping
192.168.1.103.”
This will tell us if the target is online.
If it worked, it will look something like this (note, I have colored out private
information):
IF it didn’t work, meaning that the target is not online, it will look something like this:
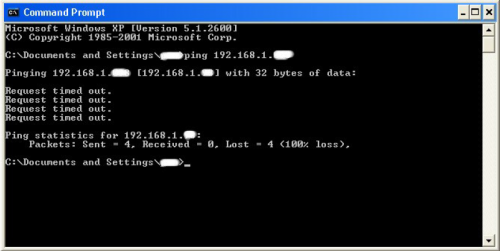
If the target is not online, either switch to a different target, or try another time.
If the target is online, then we can proceed.
Step 4:– Gathering the information
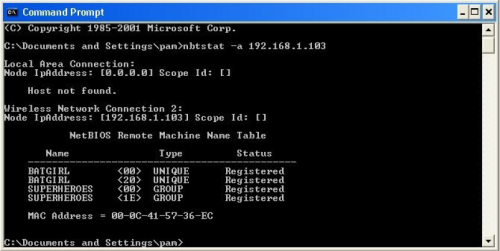
Now, input this command “nbtstat –a (IP address of target).” An example would be
“nbtstat –a 192.168.1.103.”
This will show us if there is file sharing enabled, and if there is, it will give us the:
currently logged on user, workgroup, and computer name.
Step 5:- Getting In
Finally it’s time.
By now we know: that our target is online, our target has file sharing, and our target’s
computer name.
So it’s time to break in.
We will now locate the shared drives, folders, files, or printers. Type in “net view
(IP Address of Target)”
An example for this tutorial would be: “net view 192.168.1.103”

We have our just found our share name. In this case, under the share name is “C,”
meaning that the only shared thing on the computer is C. Then to the right, under
Type, it says “Disk.” This means that it is the actual C DISK of the computer. The C
DISK can sometimes be an entire person’s hard drive.
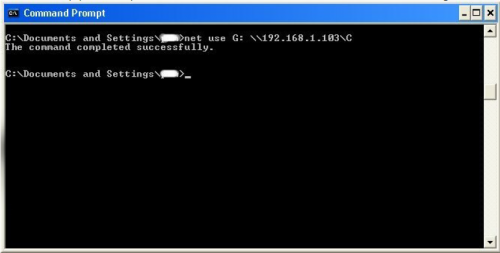
As you can see, for my hack I have already used “K,” so I used “G” instead.
You may also do the same for multiple hacks.
If it worked, it will say “The command completed successfully.”
If not, you will have to go retrace you steps.
Now open up “my computer” under the start menu, and your newly created network
drive should be there.
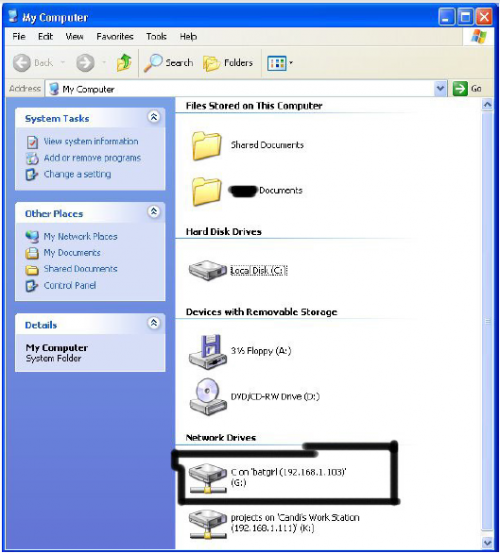
Now, if you disconnect from the WAN or LAN, you will not be able to access this
drive, hence the name Network Drive.
The drive will not be deleted after you disconnect though, but you won’t be able to
access it until you reconnect to the network.
So if you are doing this for the content of the drive, I recommend dragging the files
and folders inside of the drive onto your computer,
because you never know if the target changes the sharing setting.
Congratulations! You’re DONE!
-Commands used in this tutorial:
PING
NBTSTAT -a (IP Address of Target)
NET VIEW (IP Address of Target)
NET USE K: (IP Address of Target)(SHARENAME)
-Program used in this tutorial:
Cain and Abel.
Congratulations @hackingtips! You have completed some achievement on Steemit and have been rewarded with new badge(s) :
Click on any badge to view your own Board of Honor on SteemitBoard.
For more information about SteemitBoard, click here
If you no longer want to receive notifications, reply to this comment with the word
STOPCongratulations @hackingtips! You have received a personal award!
Click on the badge to view your Board of Honor.
Do not miss the last post from @steemitboard:
Congratulations @hackingtips! You received a personal award!
You can view your badges on your Steem Board and compare to others on the Steem Ranking
Vote for @Steemitboard as a witness to get one more award and increased upvotes!