SLC-S21W2: Creating an Amazon Affiliate Account & Adding Affiliate Links
Hello Everyone
I'm AhsanSharif From Pakistan
Greetings you all, hope you all are well and enjoying a happy moment of life with steem. I'm also good Alhamdulillah. |
|---|

Design On PosterMyWall Online
Create Your Amazon Affiliate Account |
|---|
Search & Signup Amazon Affliate
There are a few steps we need to take to create our Amazon Fleet account. The first step we need to take is to open our Google Chrome. There's a search for the Amazon Affiliate Program, as soon as we search for it, we'll have a second website open. As Amazon.com Associates Central.
We have to open this website as soon as we open the website then we will have a new interface open on top of which you will see a signup button in yellow color. You have to create your first account by clicking on this signup button. Yes, if you already have an account, you don't need to sign up. You simply sign in.
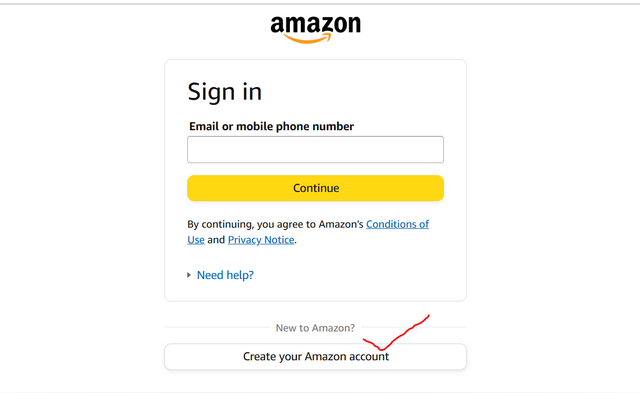
I don't have an account so I'll create one here first. As soon as I click on sign up a new interface will open asking us to sign in. But at the bottom of the same sign-in, you will see an option there, create a new Amazon account, we have to click on it.
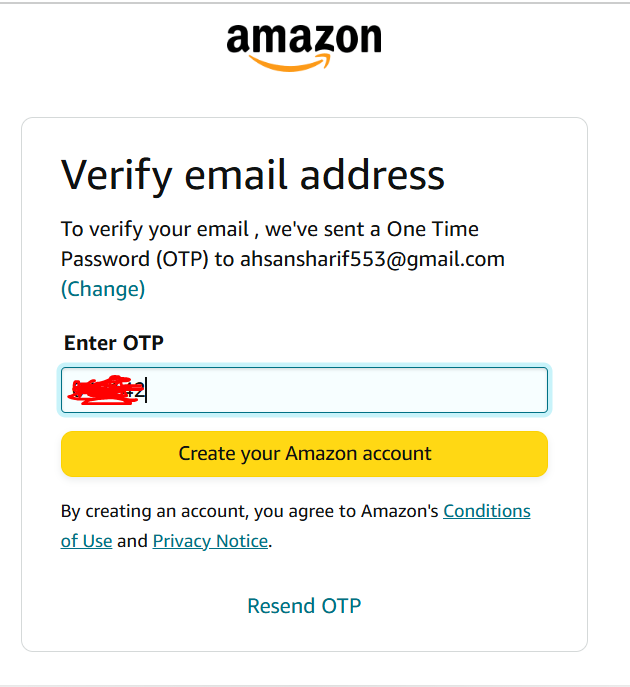
When we click on it, it will ask us for our name, ask for email address, and ask us for password confirmation. We have to fill in all the details on it and click on Create your account. Then we will receive an OTP on the email, we have to enter the same here, thanks to which our account will be ready.
 |  |  |
|---|
Fill Account Information
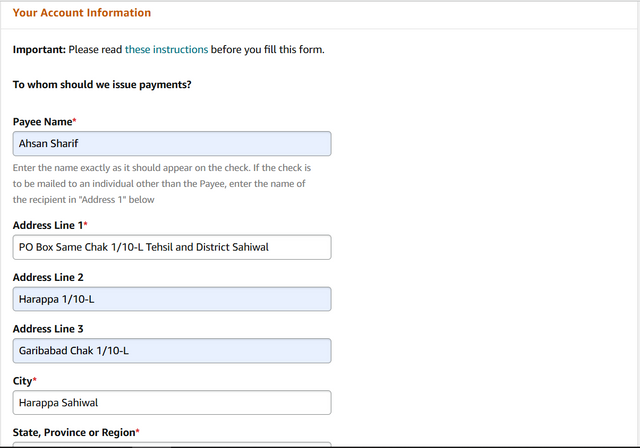
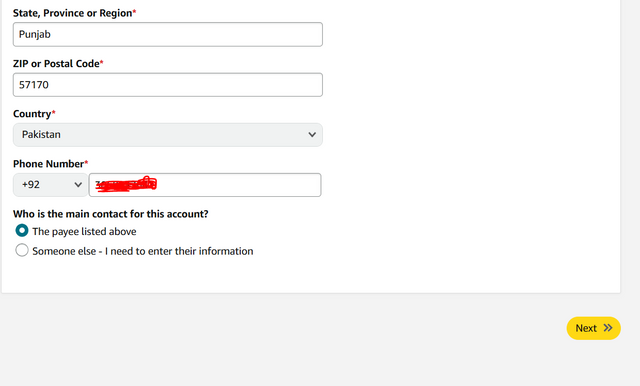
To create your account completely we have some main steps that must be solved, thanks to which our account will be ready. The first of these options is our account information which will ask for our name and address. The city will be asked, our province will be asked and also the postal code will be asked. And also here we have to enter our phone number. After filling in all the relevant fields then we have to click on the Next button.
 |  |
|---|
Enter Website
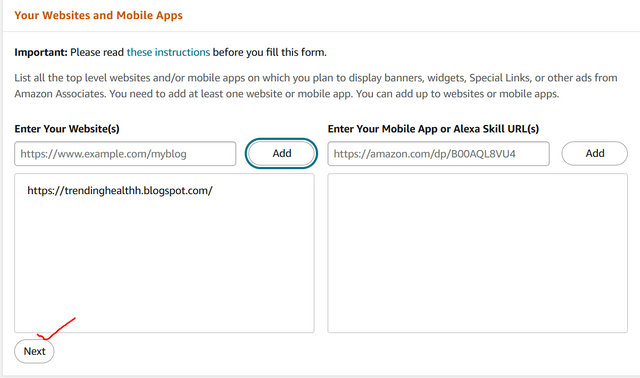
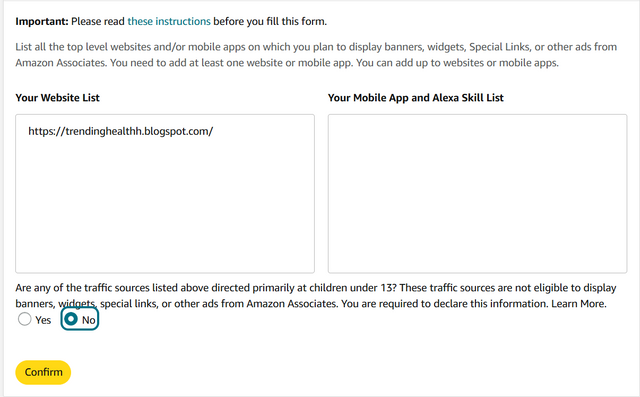
Then the next phase will open in which we have to verify our website. On one hand, we have to write our website which we have created on top of our blogger which we call our blog. We have to paste its link here if you share your post on any other social media. If you want to share, you can also give its link in the box next to it. After pasting your link, add it. After adding, select their terms. And then confirm, this way our step will also be completed.
 |  |
|---|
Make Profile
After that we will have a next profile step open in this first we have to write our store ID with which we will be identified. And then we have to write such wording here that appreciates our work and promotes our work. We have written the things that we will share the post about here. And then we have to complete and finish the verification here.
 |  |
|---|
Finally Done
By following these steps we can easily create our profile. As you can see we have received the message of congratulations and our account according to this ID has been processed. Amazon will now verify us with our account and see if we are compliant with their policies and then approve us.
Sign In Affliate Account
This way our account will be completely created. Now we have to sign in to our account to see if our account is created or not. For this first, we will again open the same option from where we created our account. Here we will click on the Sign-in option and log in with our email and password. After that, there will be a captcha verification, complete it and our account will be successfully logged in. You can also see the procedure in the screenshots below.
 |  |  |
|---|
List Products on Your Blog |
|---|
Get Product Link
To list products in our blog the products we want to promote first we will open amazon.com. This requires that you are logged in to your Amazon affiliate account. As soon as you log in to it, then on another site you have to open amazon.com.
According to your niche, you have to search for the product here for my fitness niche I will search for their related products here. The first product I searched for was a jump rope.
When you open your product, you will see a get link option in yellow color in the top corner on the right side of this product, you have to click on it.
When you click on it, a small interface will open under your Get Link option, inside which you will see a link. Below this link, there are two options a short link and a full link we will only pick up the short link because the purpose of the full link is the same and the same as the short link. We have to copy this short link from here. Here's how we copy any product link and paste it into our blog.
Paste Product Link
Now we have copied this link, where to paste it, the procedure is that first we have to open our blog and there we have to open New Post. As soon as we open the new post we will have a blank template showing where we have to add our description title image etc. In its left corner, you have to first make it in HTML view.
The purpose of doing this in the HTML view is so that we can paste our copied affiliate link in the right place. We have already added the template here so we will add this link in this template itself.
First, we have to add our title to this blank template. After adding the title, we have to add the related description of our product. And we have to design it according to our design, then we will add the image in our last. After adding the image we will paste this link in our code template which is already present here. Its location is mentioned below.
Following these methods, I have listed my three products here. All three products are listed below and their links are also provided so you can access them easily.
01

Source
02

Source
03

Source
Final Blog Access
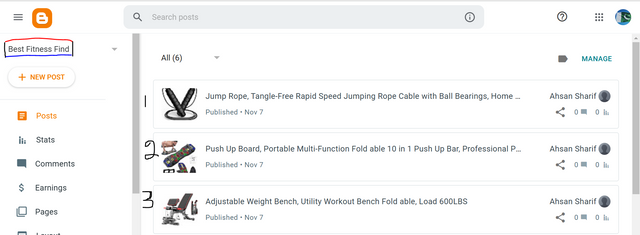
This is my final blog in which I have uploaded my three products and its access is also given below, you can check it from there.
Source
Define Your Niche |
|---|
I have named my blog Best Fitness Find in it I am using the health and wellness niche. So that I can promote any fitness-related products or protein that is good for our health here.
According to my niche, I will create interest in my audience to improve themselves and keep fit by using these products and proteins.
My target will be people who want to improve themselves in this field. Which will be the beginners who have to start their journey here. I will create such an interest in them that they can keep themselves physically fit.
I will promote and recommend honest and insightful products here. These products will include workout equipment, supplements, and fitness accessories.
My main aim will be to inform my readers about these things so that they can choose a good design. They will find my suggestions very useful as I focus more on the quality and affordability of my products. I want them to be aligned with their fitness goals, which will make their health journey more efficient and enjoyable.
Register Your Blog on Google Search Console |
|---|
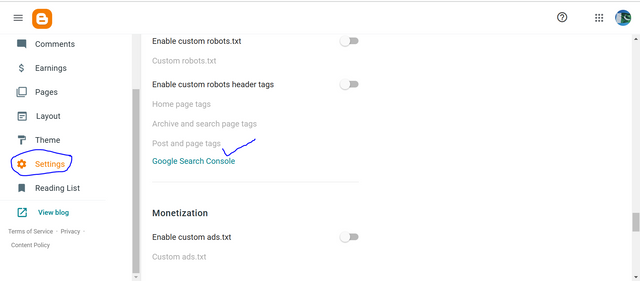
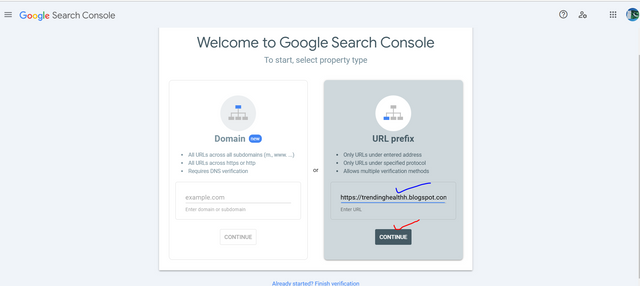
To register our blog on Google Search Console, first, we need to open our blog settings. As soon as we open the setting, at the end, we will see a Google search console option, we have to open it.
Here, as soon as we open this option, it will open a new window on a new page. Where we will see two types of things one will be the domain and one will be our URL link we have to paste the link here.
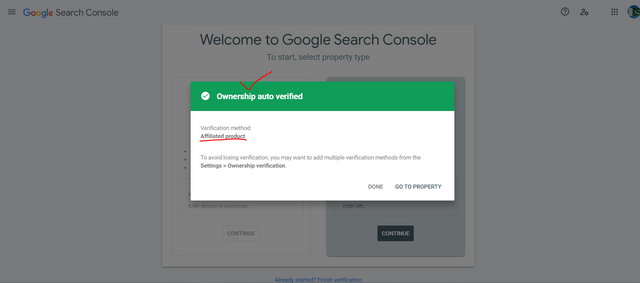
We have to copy the link of our blog and after pasting that link here we have to click on continue so our ownership will be auto-verified.
URL Inspection
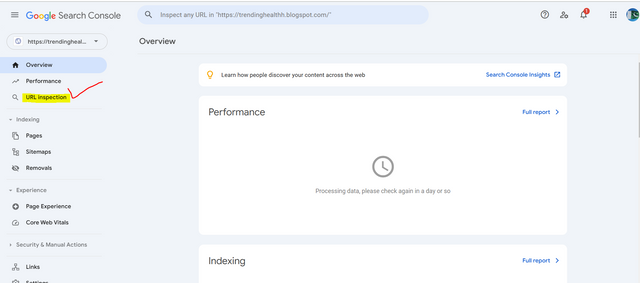
When this verification is done, we have to open our main home page by clicking on the Go to Property option. Here we have an overview so first we have to go to our URL Inspection option. So that we can get our post on Google or get our blog on Google. For this first, we have to open URL Inspection.
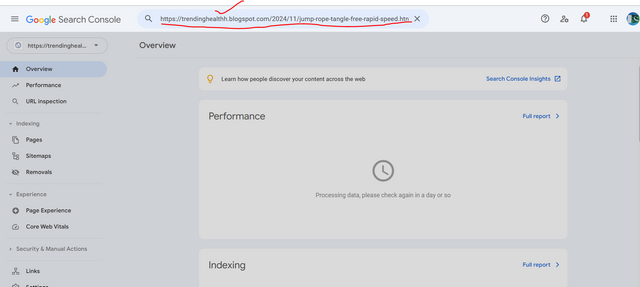
As soon as we click on it, we have a search bar on the top side, in this search bar, we have to share the link of our post. We have to copy the link of the post which we have already uploaded here in the blog and paste it here and press enter.
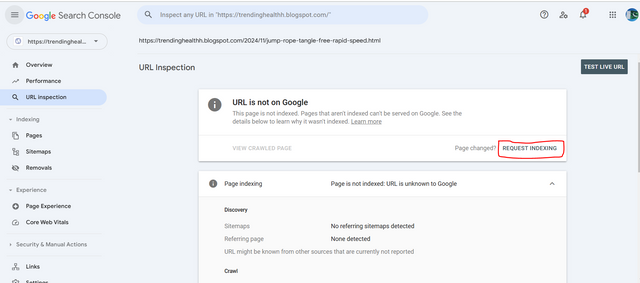
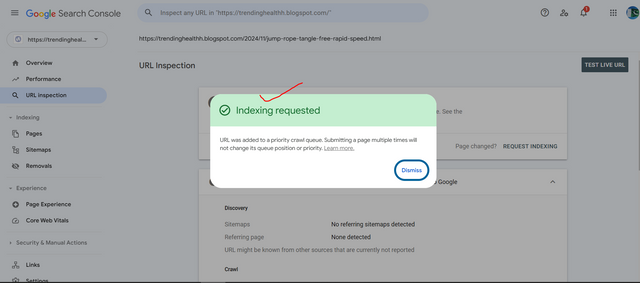
When we enter it here, it will be written that our link is not valid on Google. We'll click on Request Indexing here to bring it up to Google. As soon as we click on it, our indexing will be submitted. But still, our link will not show on Google.
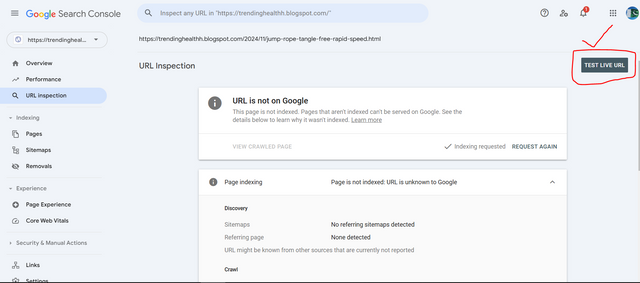
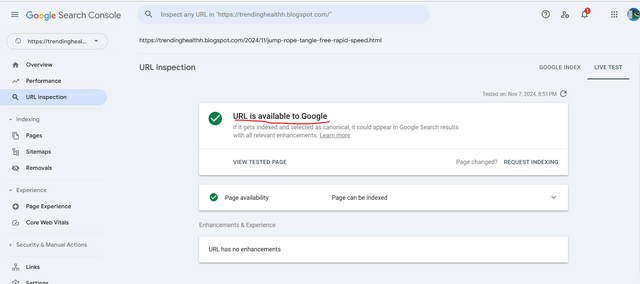
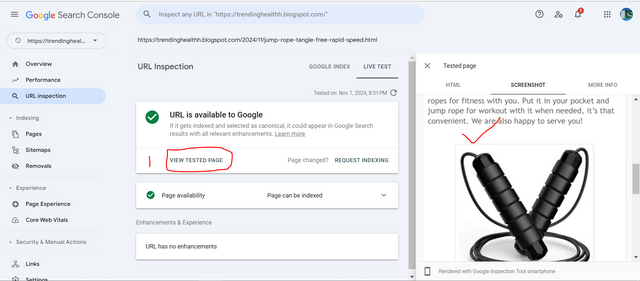
To show it on Google, on the top right side we see an option Test Live URL above it we have to click on it. So that our post is available on Google as soon as we click on it, it will test. After testing our post will go live successfully and the URL will be written as available to Google. And there is a green color tick mark from which we know that our post is available on Google.
Test Page
But still, we will test our page here for our satisfaction that it is indeed our post that has appeared on Google. For this, we will click on the view tested page here. As soon as we open it, our post which is our blog will open right next to it. From this, we will know that our post has been successfully found on Google.
Adding Sitemap
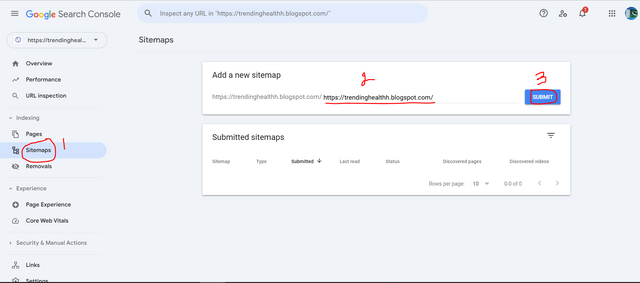
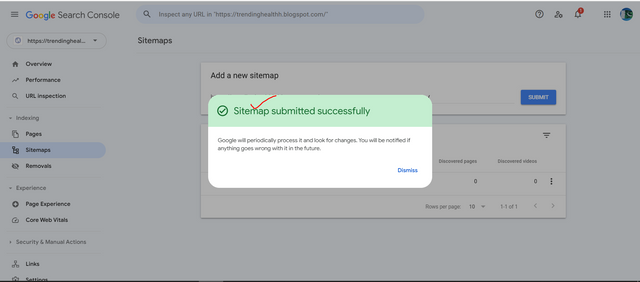
We will add one more option in Google Console Search called Sitemaps. There we will link to our blog and it will show us how many posts we have uploaded here and whether they are going to be successful or not. For this, we have to click on the sitemap add our link here, and submit it. This way our sitemap will be successfully submitted.
This was our task today in which first I created my account. The account is an Amazon affiliate account and then I have listed my three products in my blog. And after that, I have defined my niche which you can see in the post. After that, I successfully registered my blog on the Google search console. I have completed this task well so hope my professors will like this work. Thank you all friends for stopping by Allah Hafiz.
Invitation:
@josepha, @bossj23, @rumaisha, @kouba01, @abdullahw2
Cc:


Thank you very much for sharing your assignment task with us! We truly appreciate the time, effort, and creativity you have put into completing this assignment. Your dedication to following the guidelines and your commitment to learning are evident, and it’s a pleasure to see your progress.
Below are the evaluation results, highlighting the strengths of your post and any areas of focus for improvement:
Teacher Recommendation and Feedback!
You successfully created your Amazon Affiliate account and showed each step clearly—well done!
I see you added a jumping rope and exercise product to your blog and I checked to confirm the affiliate links are working properly. For even better results try using unique titles and descriptions for each product to make them more appealing.
Your chosen niche "Best Fitness Products " is excellent and has great earning potential. With consistent work and targeted content you can attract a strong audience in this field.
You also added your blog to Google Search Console—nicely done! Keep up the great work and with a few small adjustments you’ll be well on your way to success!
Total | 8.7/10
Thank you so much for the verification and the valuable feedback. I try my best to perform next Insha'Allah ❤️.