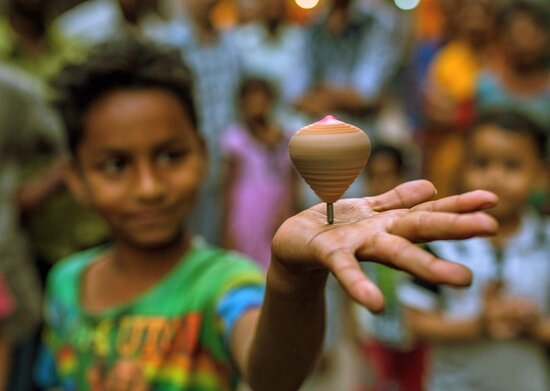
How to understand a picture if you take a picture from Google?

If a person downloads and posts a picture directly from Google, then today I will show you how to understand it. Hopefully most people know this process. I will show this process to those who do not know about this. I first downloaded a picture from the net. If something goes wrong, you will see it in a forgiving way. Now I will show the step by step process below.
যদি কোনো ব্যাক্তি গুগল থেকে সরাসরি কোনো পিকচার ডাউনলোড করে পোস্ট করে , তাহলে সেটা কিভাবে বুজবো সেটা আজকে আমি দেখাবো। আশা করি করি বেশির ভাগ মানুষ এই প্রসেস তা জানে। আমি এই প্রসেসটা দেখাবো তাদের জন্য যারা এই সম্পর্কে জানে না। আমি প্রথমে যেকেনো একটি পিকচার ডাওনলোড করেছিলাম নেট থেকে। যদি কিছু ভুল হয়ে যায় তবে আপনি এটি ক্ষমার পথে দেখবেন। এখন আমি নিচে স্টেপ বাই স্টেপ প্রসেসটা দেখাবো।
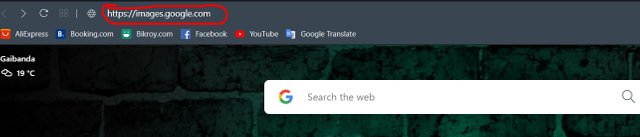
Step : 1
I opened my browser. After opening the browser, I went to the search option and wrote the text shown in the picture below. When I finished writing the link, I did a search or directly click here
আমি আমার ব্রাউজার ওপেন করেছিলাম। ব্রাউজার ওপেন হওয়ার পর আমি সার্চ অপসন এর গিয়ে নিচের পিকচার এ দেখানো লেখাটি লিখেছিলাম। লিংটি লেখা শেষ হলে আমি সার্চ দিয়েছিলাম অথবা ডাইরেক্টলি ক্লিক করো এখানে
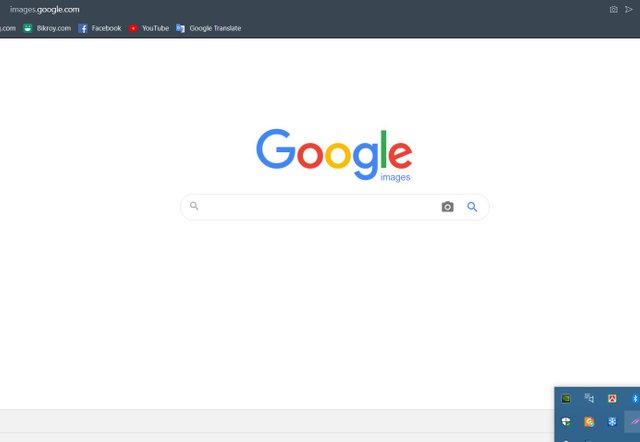
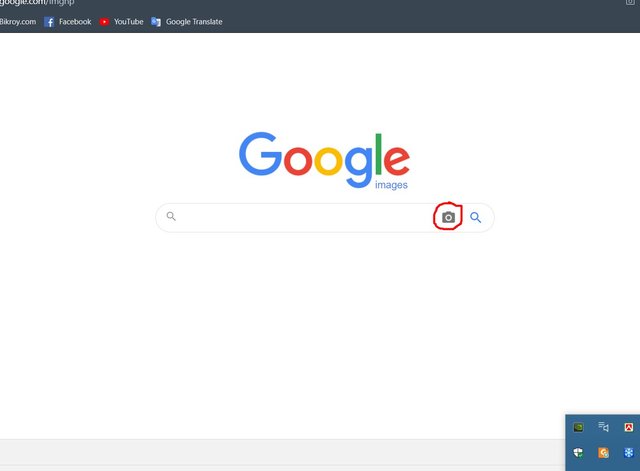
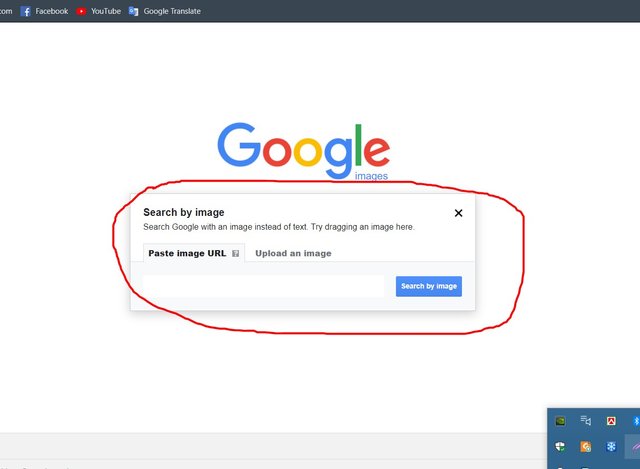
Step : 2
If you search, you will see a new screen. There is an icon like a camera. I clicked on that icon. In the picture below I have shown all the colors in red.
সার্চ দেওয়া হলে দেখা যাবে নতুন একটা স্ক্রিন আসবে। সেখানে ক্যামেরার মতো একটা আইকন আছে। আমি ওই আইকন টাতে ক্লিক করেছিলাম। নিচের পিকচার এ আমি সব লাল রঙের কালার দিয়ে দেখিয়ে দিয়েছি।
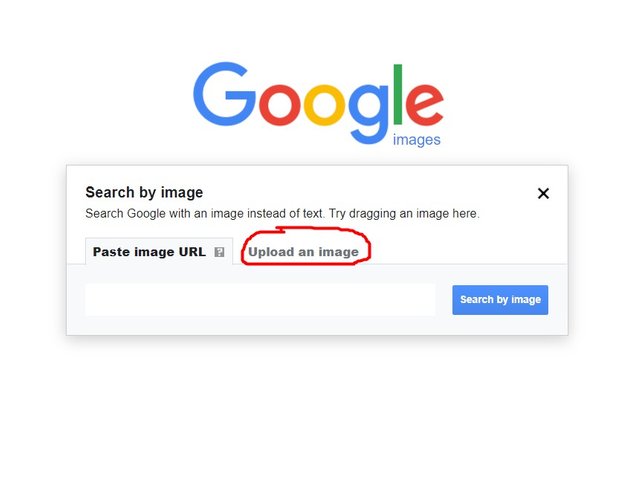
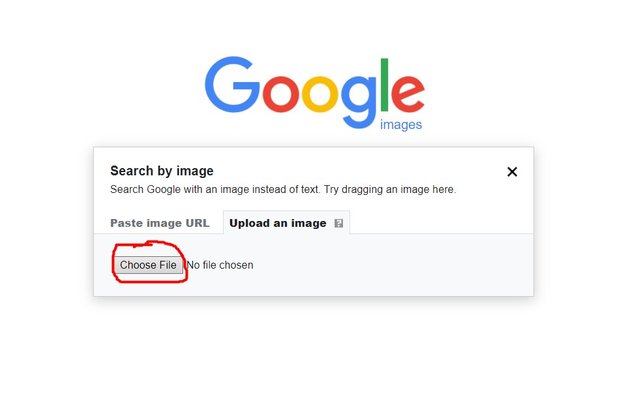
Step : 3
Then I clicked on upload an image. Then I clicked on the choose file and immediately a box will appear in front to select the picture.
তারপর আপলোড এন ইমেজ এ ক্লিক করেছিলাম। তারপর আমি চুজ ফাইল এ ক্লিক করেছিলাম এন্ড সাথে সাথেই একটি বক্স সামনে আসবে পিকচার সিলেক্ট করার করার জন্য।
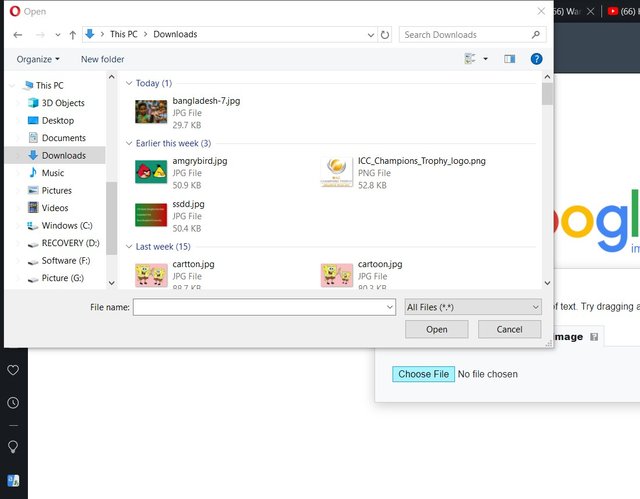
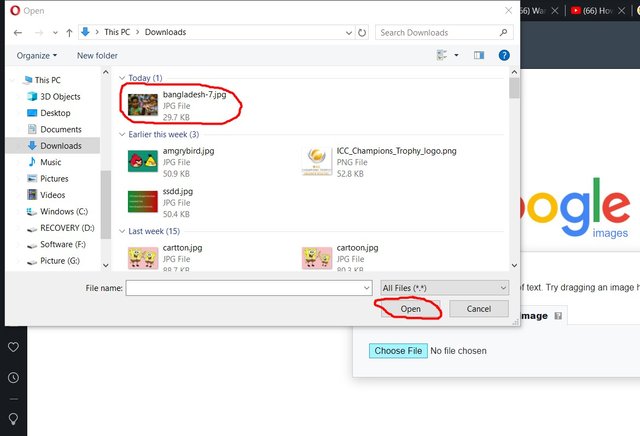
Step : 4
After selecting the picture that I will search for, I clicked on Open.
আমি যে পিকচারটি সার্চ করবো সেই পিকচারটি সিলেক্ট করার পর ওপেন এ ক্লিক করেছিলাম
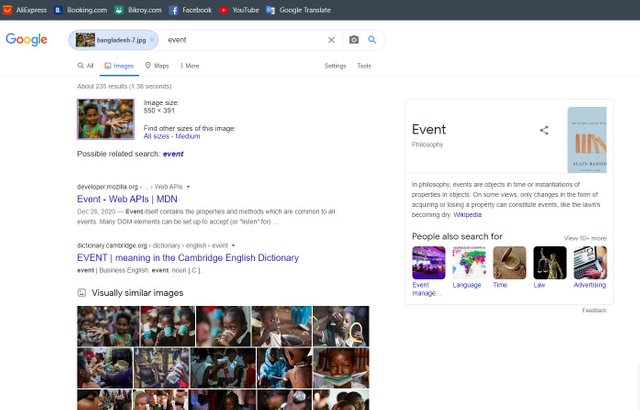
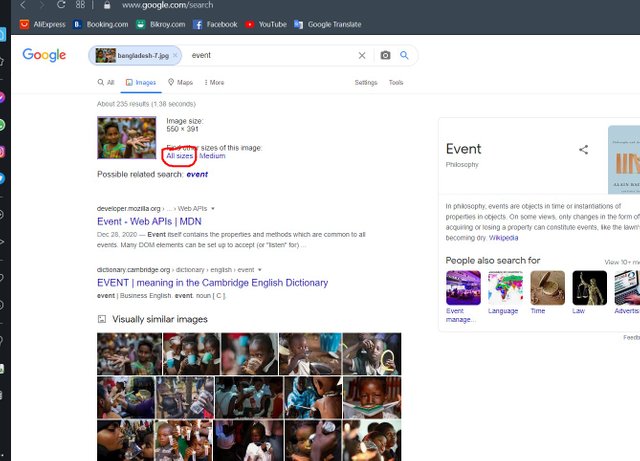
Step : 5
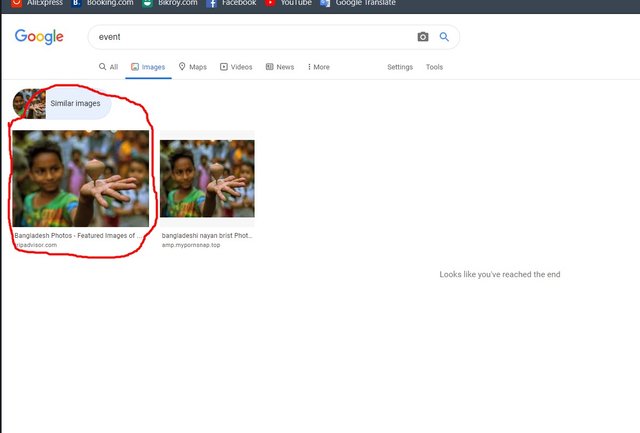
After searching for some time, another screen will appear. If you click on All sizes , you will see all similar pictures.
কিছু সময় সার্চে হওয়ার পর আরেকটি স্ক্রিন আসবে। সেখানে অল সাইজেস এ ক্লিক করলে সিমিলার সব পিকচার দেখা যাবে।
Finally I can say that no picture can be taken directly from Google. If you want to take a picture from Google, then you must add the source of that picture in the form of link.
পরিশেষে আমি বলতে পারি কোনো পিকচার সরাসরি গুগল থেকে নেওয়া যাবে না । যদি গুগল থেকে কোনো পিকচার নিতে হয়ে তাহলে অবশ্যই ওই পিকচার এর সোর্স অ্যাড করতে হবে লিংক আকারে।
That's all for today.
Thank you
আজকের জন্য এতো টুকুই।
ধন্যবাদ
অসংখ্য ধন্যবাদ @steemcurator01,@steemcurator02, @steemitblog সাপোর্ট করার জন্য
Twitter:
https://twitter.com/sandipan13oct/status/1362495216272384003?s=20
You have been upvoted by @tarpan A Country Representative from BANGLADESH we are voting with the Steemit Community Curator @steemcurator07 account to support the newcomers coming into steemit.
Follow @steemitblog for the latest update. You can also check out this link which provides the name of the existing community according to specialized subject
There are also various contest is going on in steemit, You just have to enter in this link and then you will find all the contest link, I hope you will also get some interest,
For general information about what is happening on Steem follow @steemitblog.
Thank you for the info
You are most welcome