Achievement 4 by @david17 || Task : Applying Markdown Styles

Hello guys,
I'm so glad to have completed my Achievement 1 - 3 post so far and now am in Achievement 4 which talks about the application of markdown styles used in steemit. Let's check it out.

MARKDOWN STYLES

In other to make your post look very arranged, matured and easy to read in this platform, there are some method of writing that should be taken into consideration which is known as the markdown styles. Below are some of the normally used markdown styles in steemit.

APPLYING MARKDOWN STYLES

1.) Heading
Heading works in steemit using the hash method (#). When you place the (#) in front of a text or word then give a space, your desired size appears. Note, the more (#) you put at the front of a text determines the size you will get. For example;
INPUT:

OUTPUT:
Markdown styles
Markdown styles
Markdown styles
Markdown styles
Markdown styles

2.) Bold, italics, strike
▪Bold: input two asterisks, then write your desired word and close with two asterisks (** ...... **)
▪Italics: input one asterisks, then write your desired word and close with one asterisk (* ...... * )
▪Strike : input use two tildes, then write your desired word and close with two tildes ( ~~ ...... ~~ ). For example;
INPUT:

OUTPUT:
david17
david17
david17

3.) Text Justify
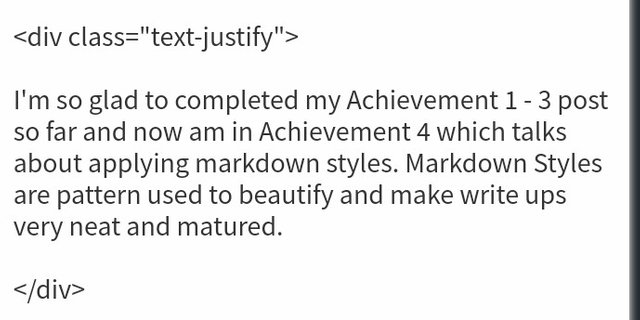
To justify a text i.e to make it look well arranged from beginning to the end, use < and then write div give space and write class then use = "text-justify" and close with> which will be at the beginning of your write up and after your write up, you close with </ write div and close with> which ends your write up. For example;
INPUT:

OUTPUT:
I'm so glad to completed my Achievement 1 - 3 post so far and now am in Achievement 4 which talks about applying markdown styles. Markdown Styles are pattern used to beautify and make write ups very neat and matured.

4.) To Center a text
To centralize, you'll use < then write center and close with>, then write your desired word and then use < / write center and close with >. For example;
INPUT:

OUTPUT:

5.) Adding images and sourcing images:
If you want to add your image, all you have to is click the place you wish to put the image, then click on selecting them.
It will lead you to your gallery, choose the image and upload.
If the image isn't yours, repeat the above procedure, then below the image use [ and write image source and close with ], then use ( paste the link where you got the image from and close with).
For example;
INPUT:

OUTPUT:

6.) Table
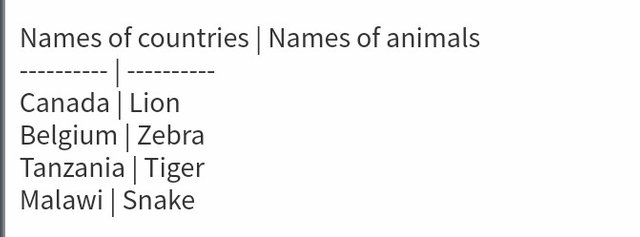
To create a table, firstly you write the thing you want to write in the first column, then use | and then write something in the second column.
Under it, use ------ | ------, if you write on the first column, use | before writing on the second column. For example;
INPUT:

OUTPUT:
| Names of countries | Names of animals |
|---|---|
| Canada | Lion |
| Belgium | Zebra |
| Tanzania | Tiger |
| Malawi | Snake |

7.) Applying Numbers and Bullet
To number a text, you just have to add the desired number where needed. But in the case of adding a bullet, use the asterisk symbol where needed or at the beginning of the text then give a space. For example;
INPUT:

OUTPUT:
- Steemit
- Steemit

8.) Alignment of text/ images into two cells
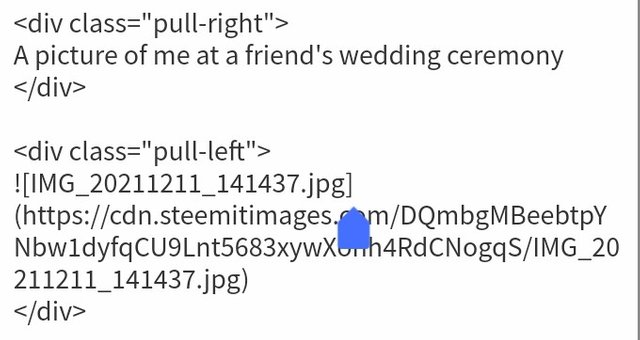
First, use < write div, class then use =, ", write pull-right" then close with > then write the text you wish to write, and close with <, /, write div and >.
Repeat the process above but this time use pull-left not pull right. For example;
INPUT:

OUTPUT:


9.) Subscript
To write subscript, firstly use < then write sub close it with > write your desired text in subscript, then use < / write sub and close with >. For example;
INPUT:

OUTPUT:
A smile is a curve that sets everything straight

10.) To write in grey color
To write in grey, you'll first use < write code then close with> write the word you intend to write in grey, and use <, / write code and close with>. For example;
INPUT:

OUTPUT:
My name is David Jonah

There are actually more markdown styles but these are the ones am conversant with this achievement. Thanks you'll for reading my achievement 4.
Regards to:
@cryptokannon
@bright-obias
Written by @david17

Congratulations !
You have successfully completed achievment 4 task on "Applying Markdown Styles". You can now proceed to Achivement 5 task 1 : Review Of Steemworld.org
Curation Rate - 3
Keep following @steemitblog for the latest updates and news on steemit platfrom and follow @steemingcurators to find more information about new contests and events.
Hi, @david17,
Your post has been supported by @bright-obias from the Steem Greeter Team.
Thanks you for your support and caring I really appreciate