The making of a fractal, step-by-step.

Good morning from a rainy city in lock-down, where everything looks & feels moody! Heh, I do not let this to get my spirits down, so I'll share with you the process of creating a fractal in JWildFire. Thinking of anything better to drive away melancholy??? I don't have a specific target in my mind, so I'm gonna document it step by step as I go, and see what fractalous wonders we will discover... (!)
STEP 1
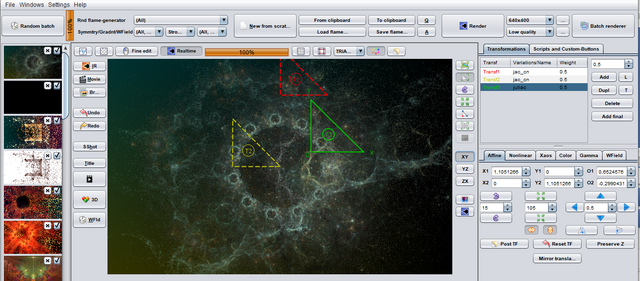
In a blank fractal in JWildFire, I add three Transformations with one formula each: 2x "jac_cn" & 1x "juliac". Transformations are groups of mathematic formulas that are iterated until a condition is met and the color of a pixel is decided. I use the default values for each formula, and I move their triangles as seen in the picture. The triangle controls how the transformation affects the area of the picture.I also selected a random bluish pallete and slightly altered the backgound gradient.

STEP 2
The circular pattern at the center is created by the "juliac" formula, but I want to break it, so that the picture becomes less symmetrical. I add a 2nd formula to the 1st transformation, named "spherical" (with a weight of ~0.5) and I zoom in the camera to get a better look at the intricate details of the fractal.
Here, you can see the area of effect of the 1st transformation ("jac_cn" + "spherical"); it controls in a way how the circle pattern dissolves at its right side.

As the fractal begins to take life, it reminds me of a planetary network swirling inside space nebula. Let's keep that in mind and see how it goes...
STEP 3
The circles in the center are still bothering me, they feel out-of-place and rather... fractaly; you know, that feeling when you see yet-another-fractal-with-random-settings in an internet gallery. Since the circle is the result of the "juliac" formula, I will try to modify the third transformation and see how it works out. After trying several formulas, I decided to add "epispiral" and play around with its settings a bit. After a while I got this:
No more little circles there, that's for sure! Now, the picture is going away from the space nebula concept and turning into something more abstract; I'll try to make it more interesting.
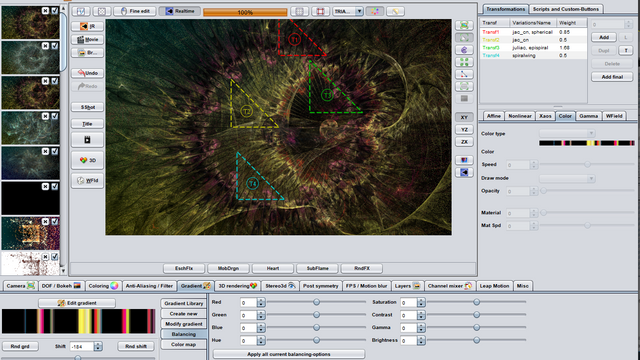
Some formulas have a wide effect on the whole fractal, others on just a part of the picture and some just add shapes without messing with the rest; furthermore, you can control how a transformation interacts with each other transformation to get the results you desire. I added one more transformation with the "spiralwing" formula, forming that purple shape in the middle; had to tweak the settings so that the fractal I had so far remained intact. I also inreased the "strength" of the 3rd transformation to make it more prominent.

STEP 4
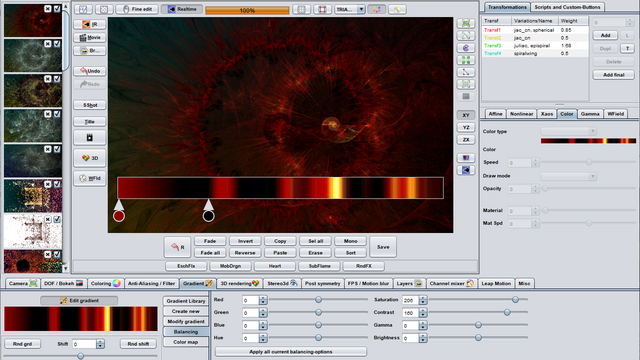
Yeah, I could go on forever altering and tweaking and experimenting... it is important to know when to stop, though! I decided to go on with the finishing touches, and this means slightly adjusting the colors of each transformation as well as the pallete of the whole picture. I tried some other palletes as you can see below:

But, I finally stuck with the original. After the finishing touches I made a test render:

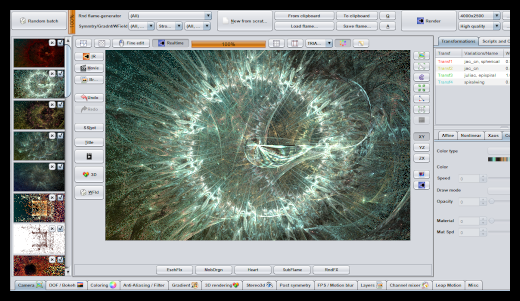
That seemed ok, so I went on with the final rendering, at high quality and size. The final result will be posted soon in a different post (it takes some hours to render!), as it is connected to an amazing MMO game!
I hope you enjoyed this process blog and got some kind of insight into the fractal mumbo jumbo!
The Stars are -almost- Right!
Being the kind of guy who watches the 3d rendering and makes 150 ornamental variations when I find a mirroring tool in a graphic program or looses a day examining paper cut, I have been careful not to try Wildfire, but... maybe I will have to some cold winterday in the 2023 continued quarantine.