SIZ Approved Course | Tutorial 01 | Jumbo Rope Twist
Hello amazing members of SIZ community. I trust you all are doing great and staying safe. As for me, I'm doing just fine.
I am so much delighted to start my tutorials today. As you all know, this week's tutorial is about how to install a hair style called Jumbo Rope Twist.

You may wonder why small rubber bands? Rubber band method is perfect for learners who struggle with gripping the root of braids or twists. And for expert hairstylists, it helps to make the root of the hair neat and seamless.
Materials used include:
- I pack of braiding hair
- Hair cream
- Small black rubber bands
- Eco styling gel
- Edge control
- Combs
- Scissors
The first thing to do is to wash the hair if it is a relaxed hair. If it's a coiled texture hair, it needs to be stretched out. When the natural hair is neat and set, and easy to work on, then apply hair cream so that the hair can be moisturized so as to avoid breakage.
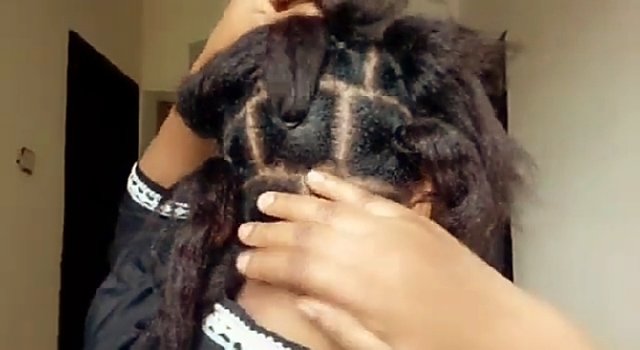
Next is to part the hair and keep them in sections, the parts need to be pretty large, just as the name implies Jumbo Twist. Here, we will have 20 sections or parts. To achieve even parts that look professional, you have to divide your hair into two big sections using the ear as a line mark. What do I mean? Section your hair from one side of the ear to the other side of the ear with a straight line. Now, you have two big sections, then keep the front section away, and work with the back first.
At the back section, you need to make 3 rows, then the rows at the back just immediately after the neck is usually smaller, and as you move to the front, it keeps enlarging, well that's the shape of the head for most people. So because of that, the back rows will have fewer sections compared to the rows at the front.
However, at the end, we achieve even part that looks professional. That being said, the first row at the back will have two sections, the second row three sections and the third row four sections. At back section, we have a total of nine small sections.
At the front section, we will have just two rows. The first row will have 5 sections, and the second row 6 sections, that is 11 small sections.
In all, both back and front sections, we have 20 small sections and we use rubber band to put them in ponytails.

Here, we will be using 1 pack of braiding hair also known as attachment. Then cut the braiding hair into three equal parts and fade out the blunt ends. Fading the blunt ends help to prevent the hair from unraveling and also in increasing the length.
In installing the hair, you need to work one ponytail at a time.
- So first, remove the rubber band, divide the hair into two.
- Put the hair extension in the middle of the natural hair.
- Then clap the natural hair together. Use elastic band to secure it.
- Smooth the natural hair with gel.
- Split the natural hair across each side of the hair extension and then twist the entire length.

That's basically all you need to do in each of the ponytails, until you are done with your hair.
This method we used, that's the locking of natural hair on top of hair extension is actually the same thing, if you are going to use a crochet hook. The only difference is that, if one try to crochet this hair extension through her natural hair ponytail, it will be painful, since the hair extension is big and chunky. This method is actually perfect, no tension, no pain.
After twisting the entire hair, then go ahead and trim off the excess hair. You also need to put the ends of the hair extension in hot water, so that everything will be nice and secured. At this point of using water, you need to be extremely careful, and if you feel you need help, please call for help.
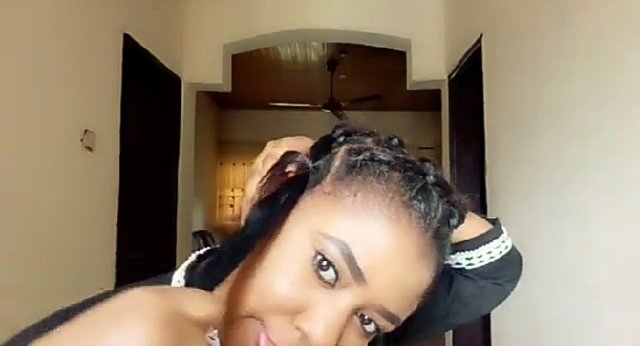
Then use edge control to lay down your edges. Below is the final look and it's easy to style in different ways.

Thanks for reading, I hope you find this tutorial helpful and easy to follow.
Special regards:
Steem Infinity Zone Team
@cryptokraze | @vvarishayy | @suboohi | @arie.steem | @qasimwaqar
You explained the installation in an easy way. Your first picture hair style look is awesome. Great job dear👍
Thank you!
Amazing dear friend you make a very good post.
My best wishes for you.
Thank you!
Is friend @happy01 you set the benicfiary reward
Yes or not.
Please clear.
No, but i will set it in my next posts
Please set 20% beneficiary rewards to @siz-official in your next posts.
Thank You
Okay i have noted, i will do exactly that in my next post.
amazing dear good post and you look very pretty in this hair style.best wishes for you
Thank you!
It's so lovely, and it looks good on you! Welcome to one of the best community in this platform!
Thank you!
You're welcome ☺️
Please Read Guidelines to Receive Booming Support. You need to set 20% beneficiary rewards to @siz-official in your next posts.
Read Full Guidelines here
https://steemit.com/hive-181430/@siz-official/september-guidelines-to-receive-booming-voting-support-in-siz-community
sure, i will do that in my next posts
Your really great at this @happy01 . You made it very easy to understand even for people who know little or nothing about plating hair..
Your post pictures and content wete really amazing. Keep up the good job.
Thank you! I'm glad it was helpful.