SEC20/WK6: Graphic Design Hands-On Practical 3.
Hello dear friends how are you all? I hope everyone is well by God's grace. I am also very well by the grace of Allah. Today I am here with a contest entry post. The contests running in the last week of the Steemit Engagement Challenge Season Twenty are great. The Graphics Teaching Contest organized by @lhorgic is excellent. The contest is, SEC20/WK6: Graphic Design Hands-On Practical 3. I am ready to participate in this competition with pleasure. Let's get started.
Design by @solaymann
I am ready to create an interesting design. Because I've been trying to learn graphic design for about six weeks. I wanted to develop myself as a better graphic designer by increasing my precise focus. I'm learning pretty well in six weeks. I am happy to complete the courses at this time. I created my graphic design by canva. I will try to present my graphic designs with great care and clarity.
Designing moments I carefully crafted from start to finish. Mentioned consistent screenshots and clear descriptions. I invite you to read the post to enjoy the graphic design I create. I hope you find my faults and appreciate the good points. I will be grateful for your comments. So let's start my graphic design program. I have tried to present my design in 16 steps. I have added details so that the design can be presented clearly and simply.
 |  |  |
|---|
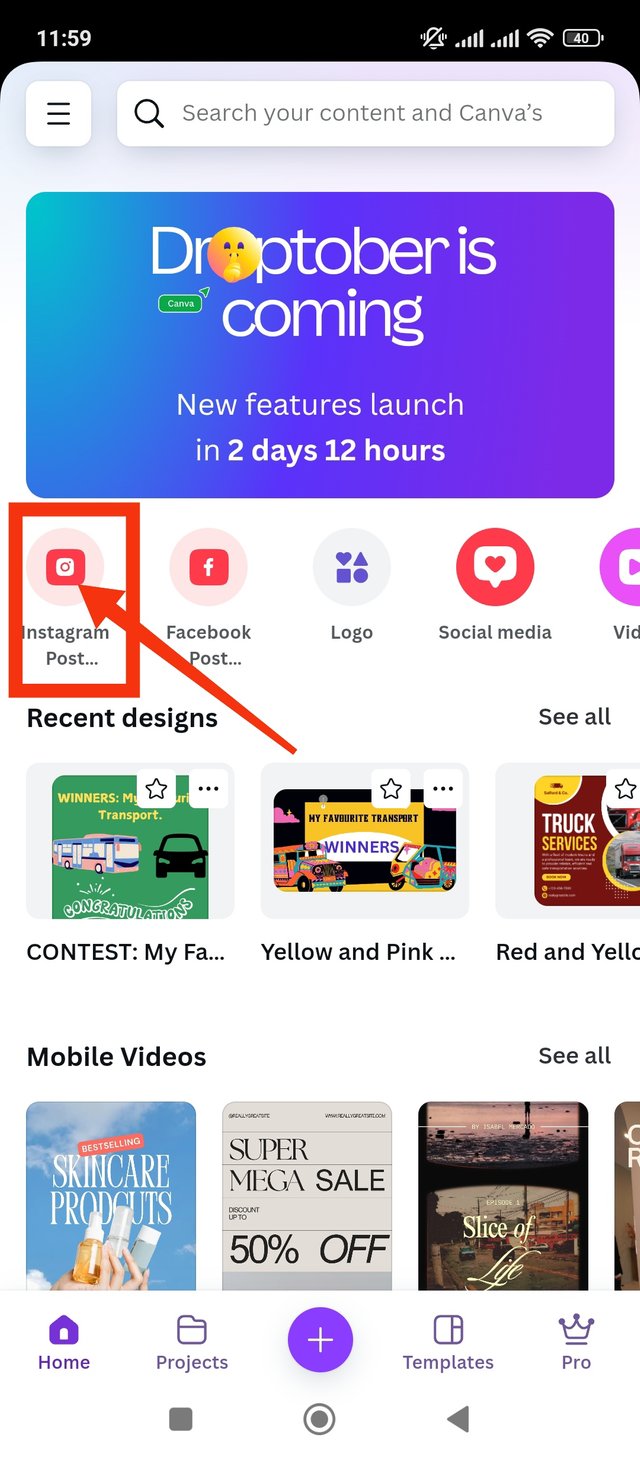
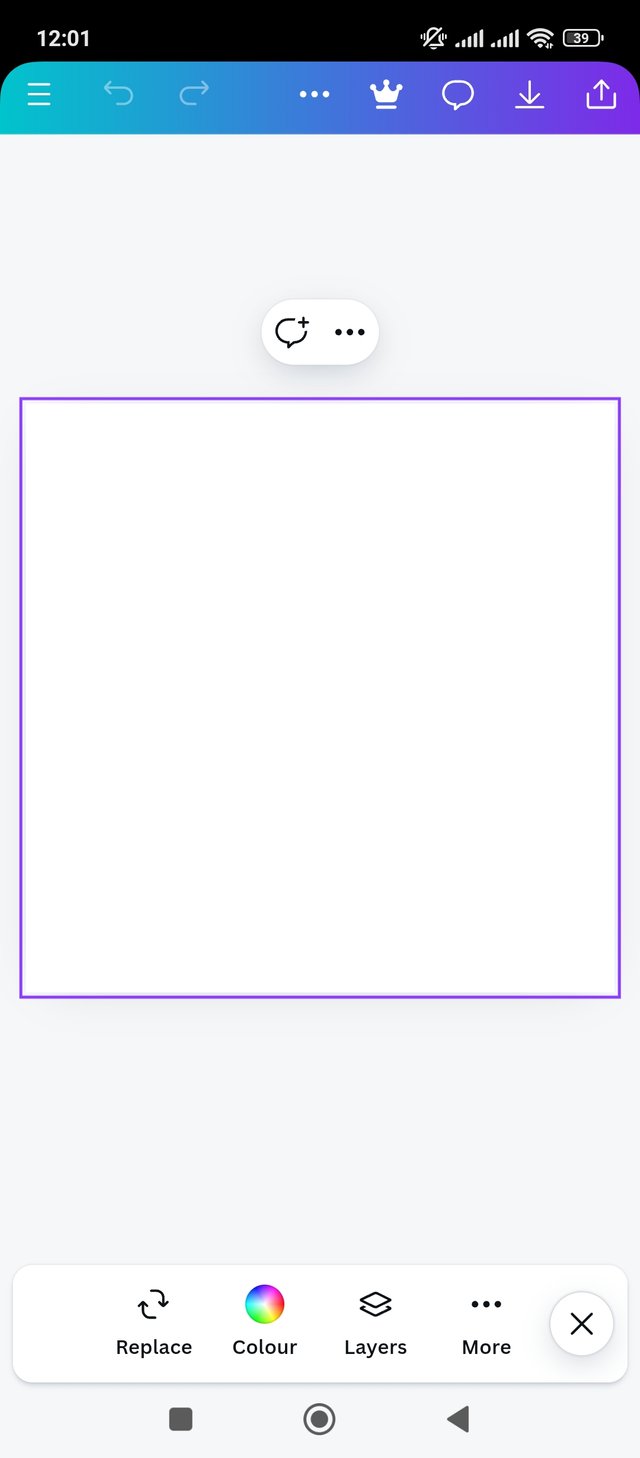
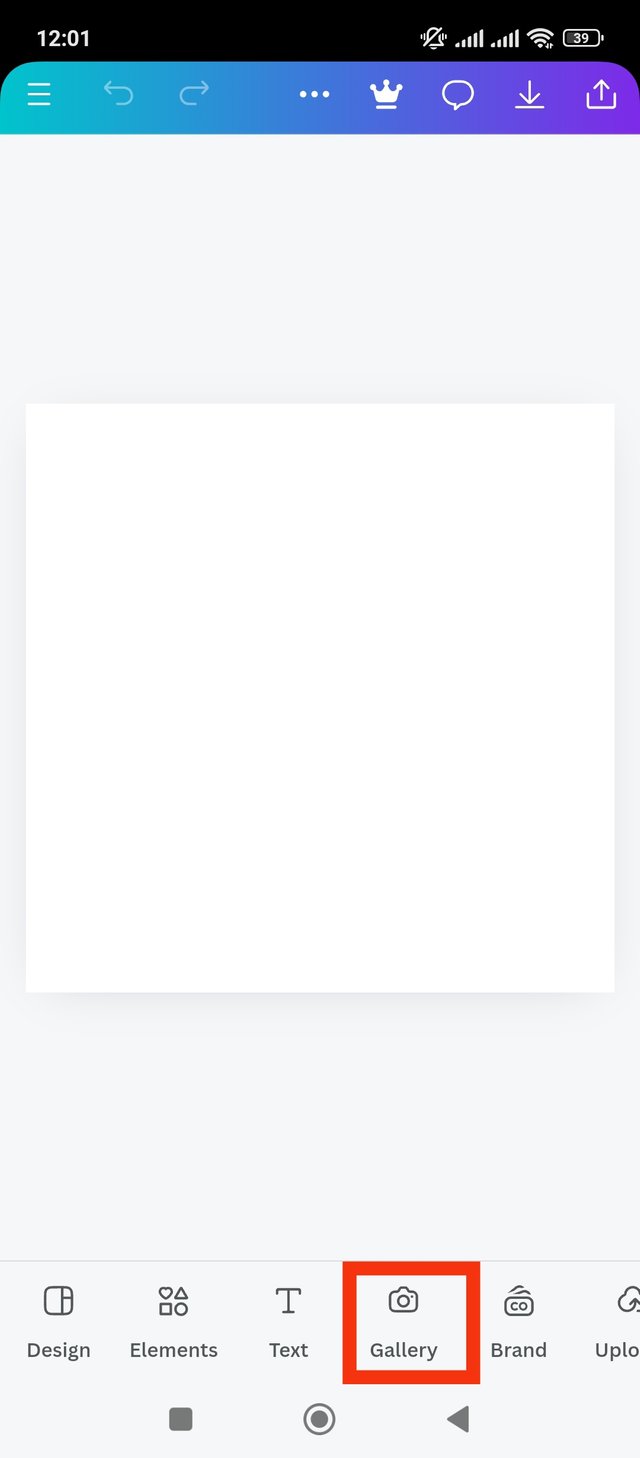
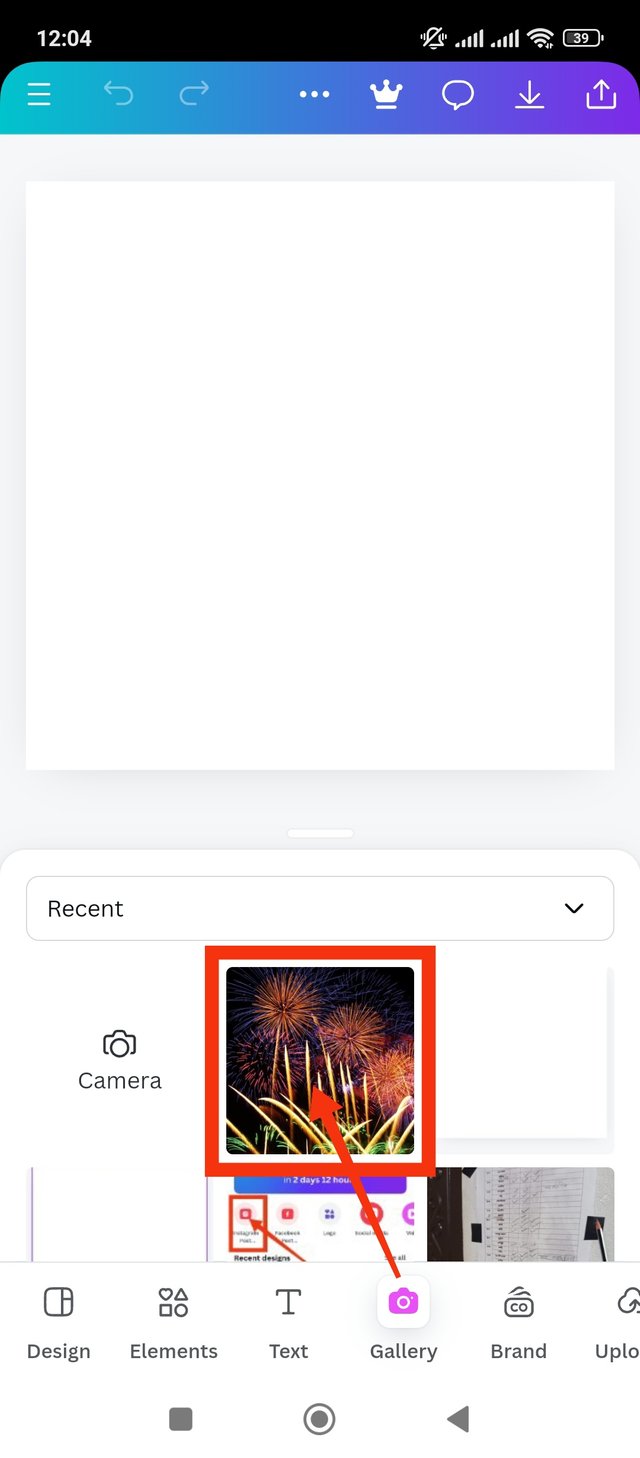
First I opened my mobile application canva. I like to keep my design square. And that's why I selected the Instagram post theme. It will give a square page. I will add an interesting picture to the white page. Which will serve as the background of my design. I clicked on the gallery option for that. Where marked by red color. After clicking on the gallery I went to the next step.
 |  |  |
|---|
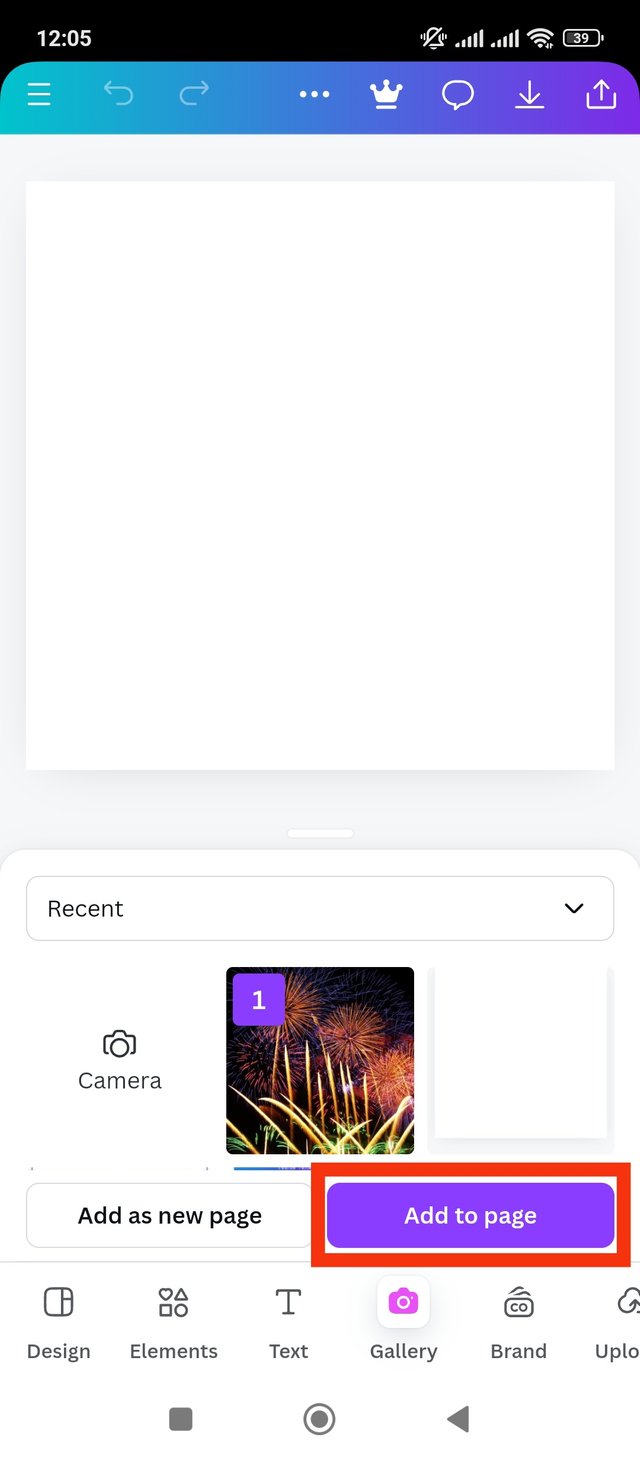
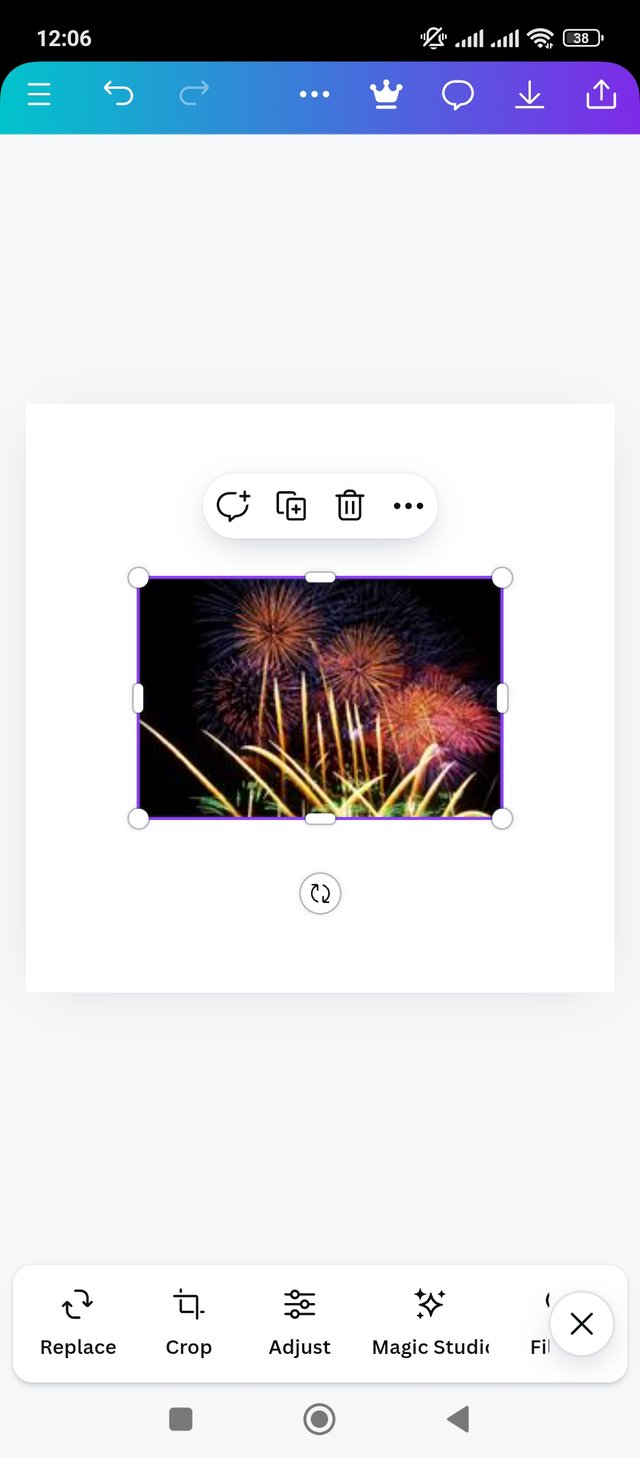
After clicking gallery I can see the images in my gallery. I am adding my favorite downloaded image from here. I had to select the image to add it to the page. Then I clicked on the add to page button below. After clicking the Add to page button, the image is added to the page. I will customize it to completely fill the white page. See the next step for that.
 |  |  |
|---|
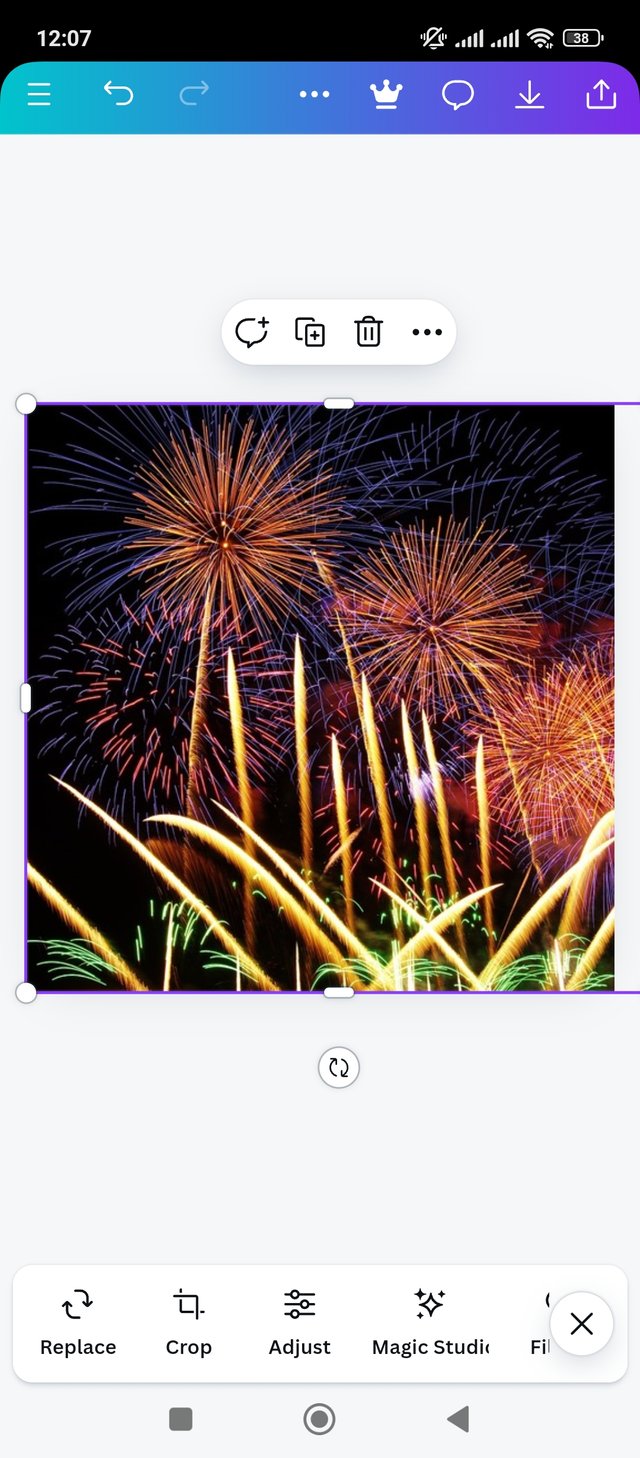
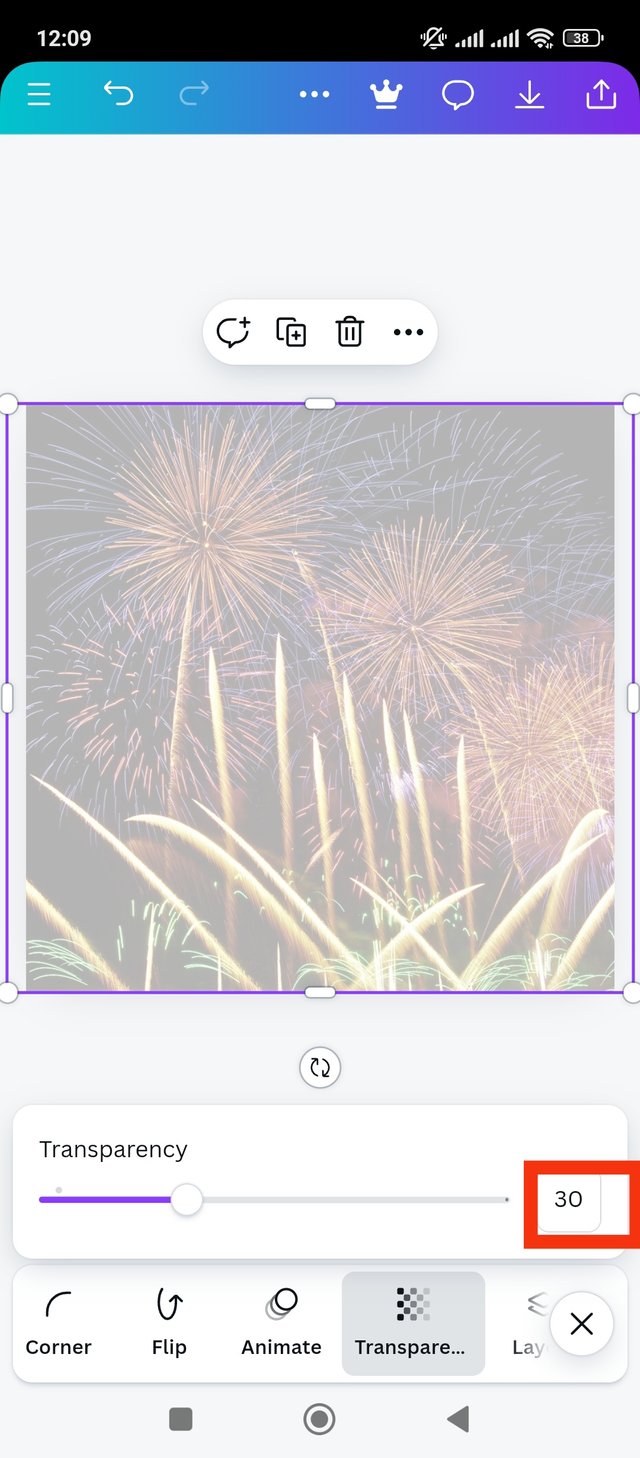
I adapted the image to the white page. I covered the entire page with new images. But I want to keep the background light. So that the text above the design can be displayed in an attractive way. Anyway now click on the transparency option to lighten the background. I clicked on the transparency option. Then I put it at 30% now it looks pretty light. It sounds pretty good to me. Let's move on to the next step.
 |  |  |
|---|
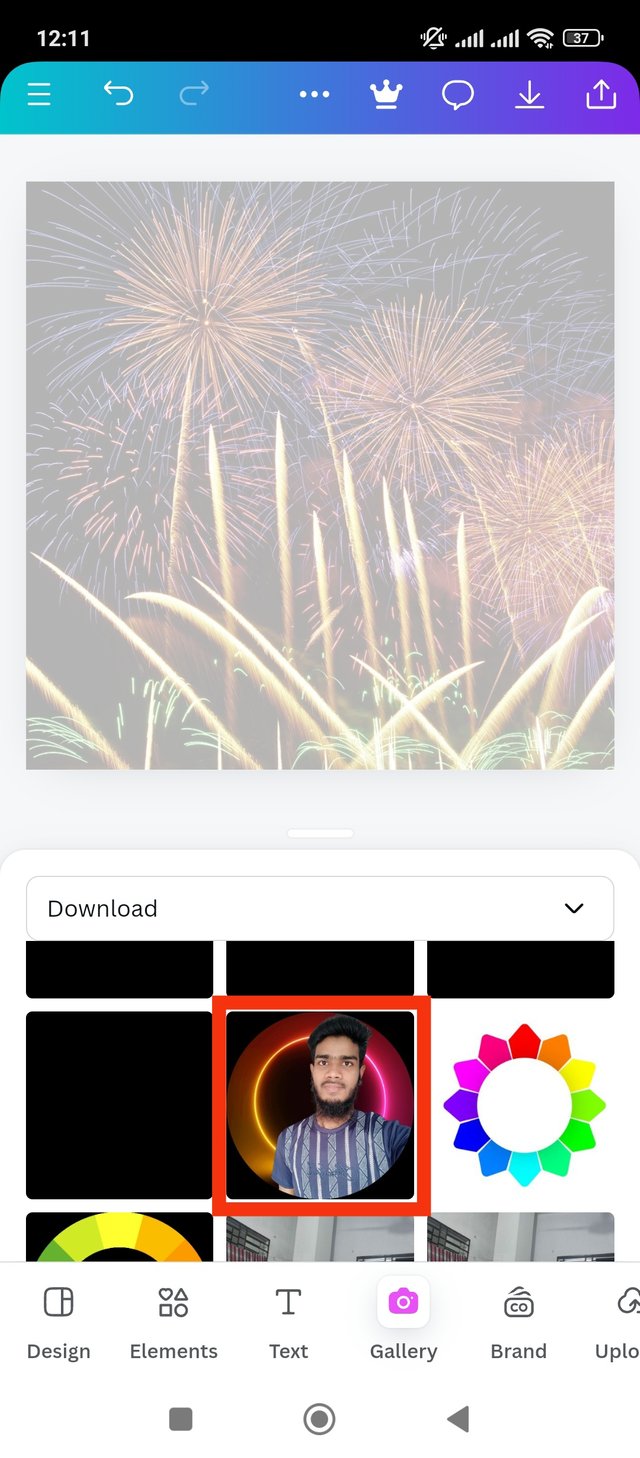
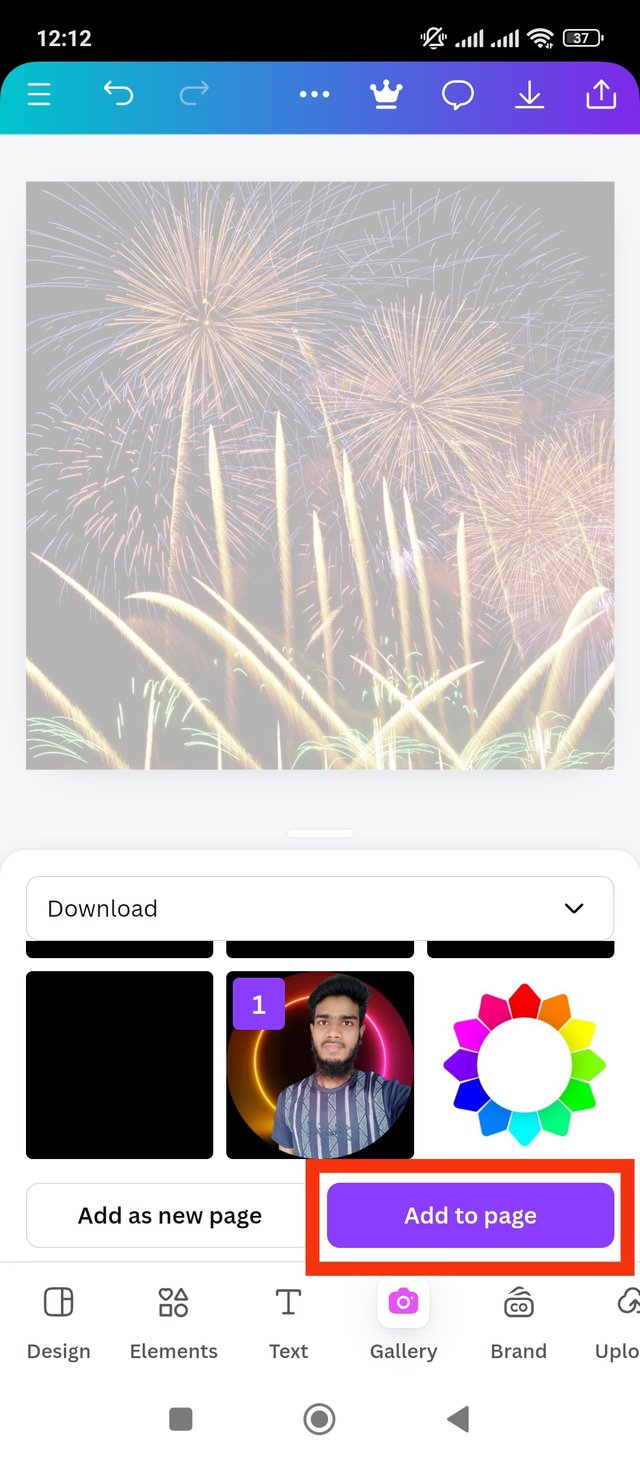
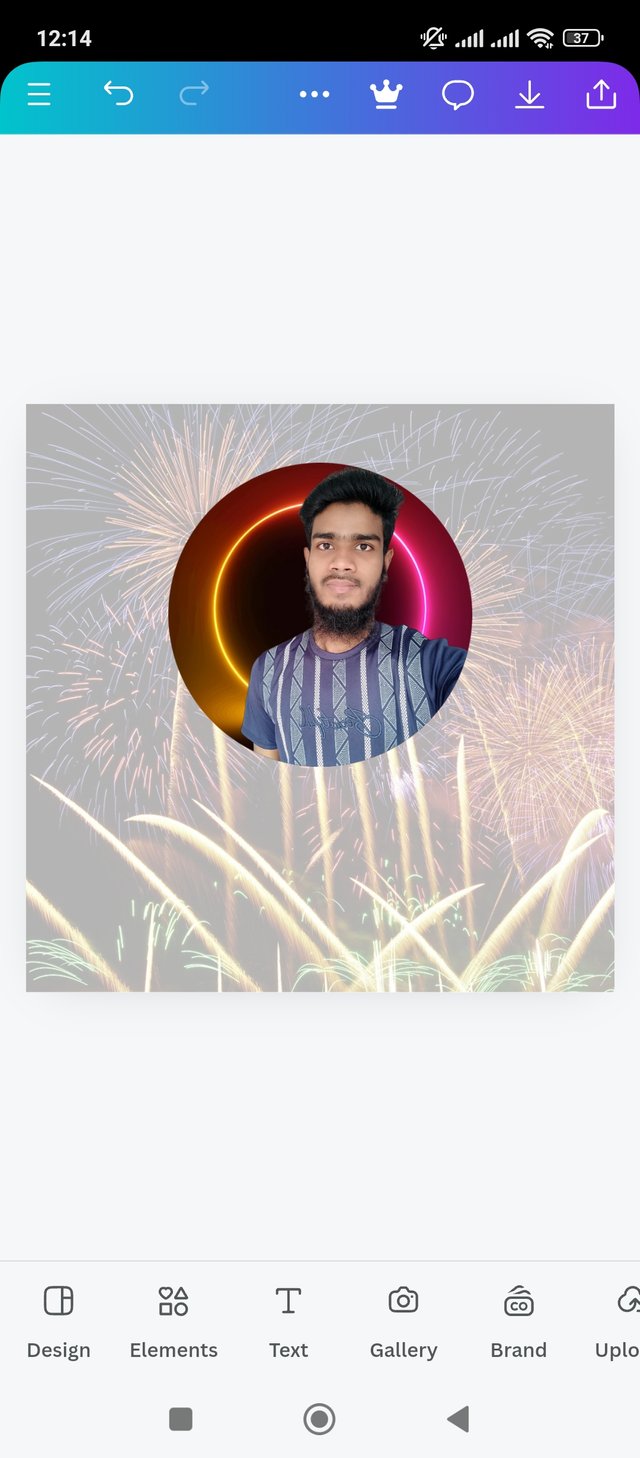
After setting the background I want to add my profile picture to the design. That's why I clicked on the gallery option again. Then I clicked on my profile picture from the gallery. Then I found add to page button below. Now I click on add to page button. Let's move on to the next step.
 |  |  |
|---|
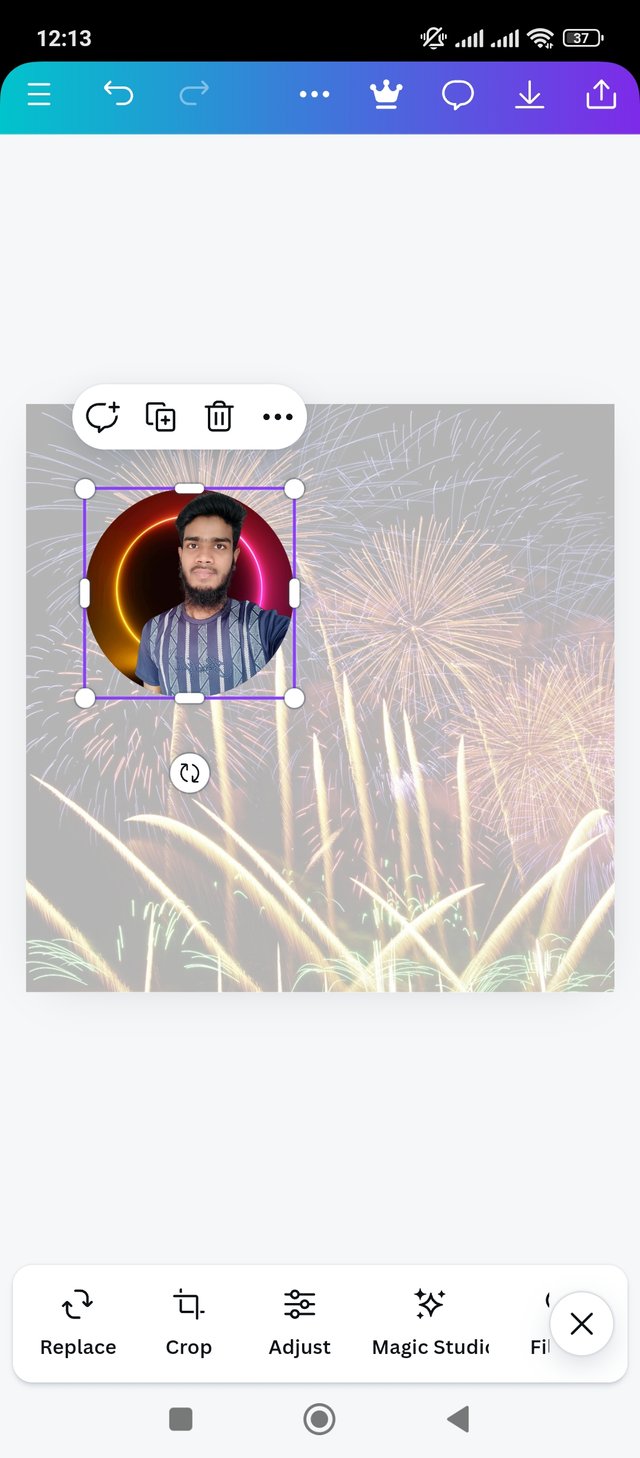
See, the image is added to the page correctly but it's messed up. I want the image to be somewhat upper and center in the design. So that my design looks more attractive. Anyway, I manually placed the image above and in the middle of the design. I made my profile picture a little bigger so it would pop.
 |  |  |
|---|
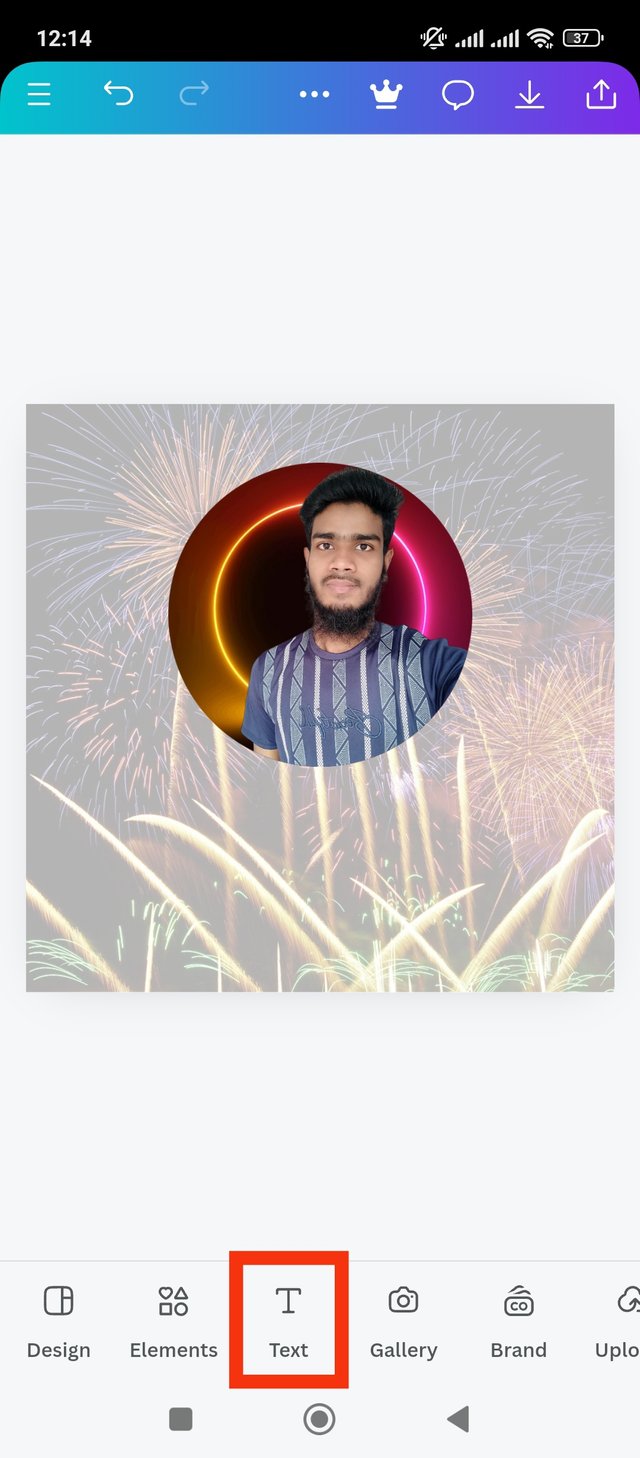
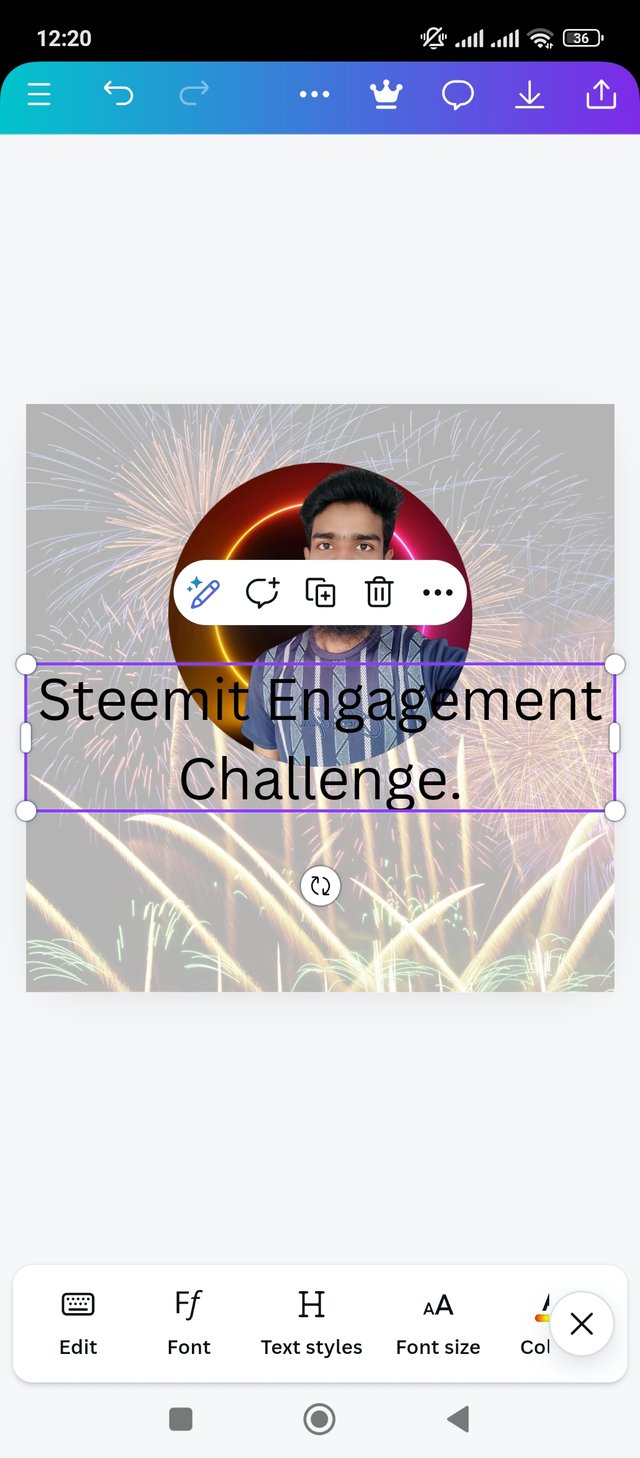
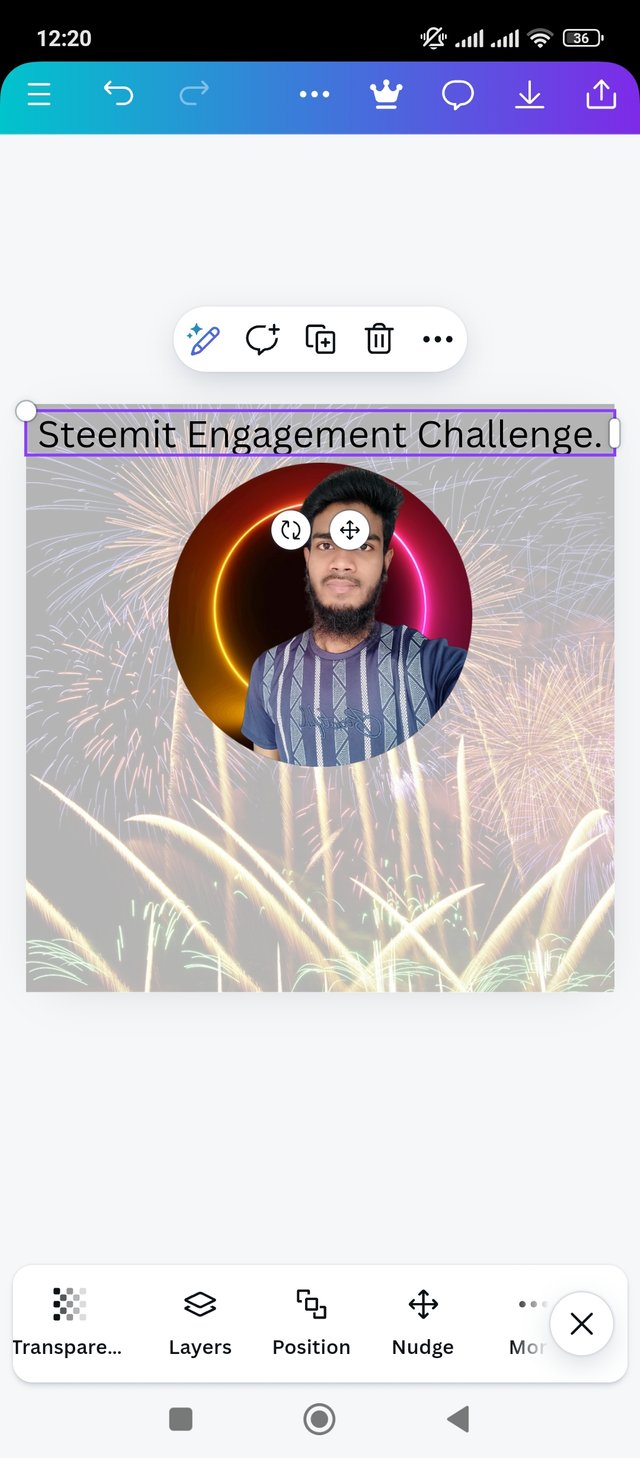
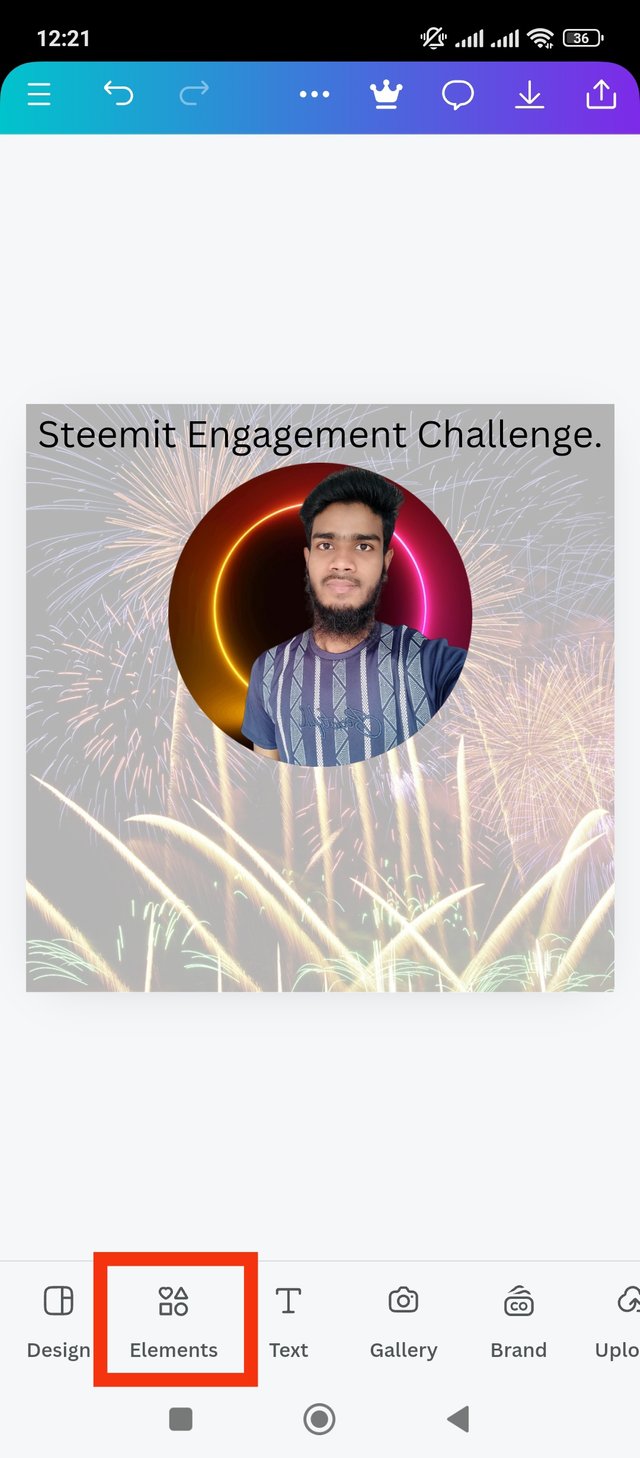
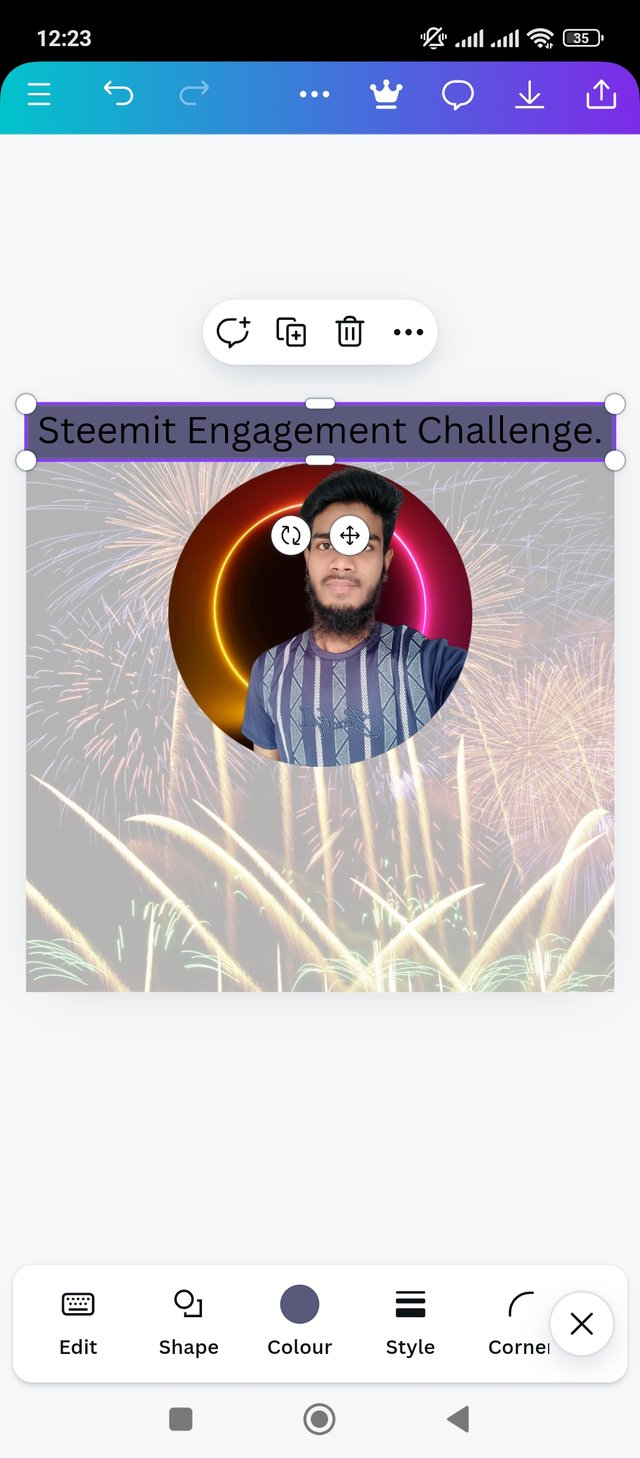
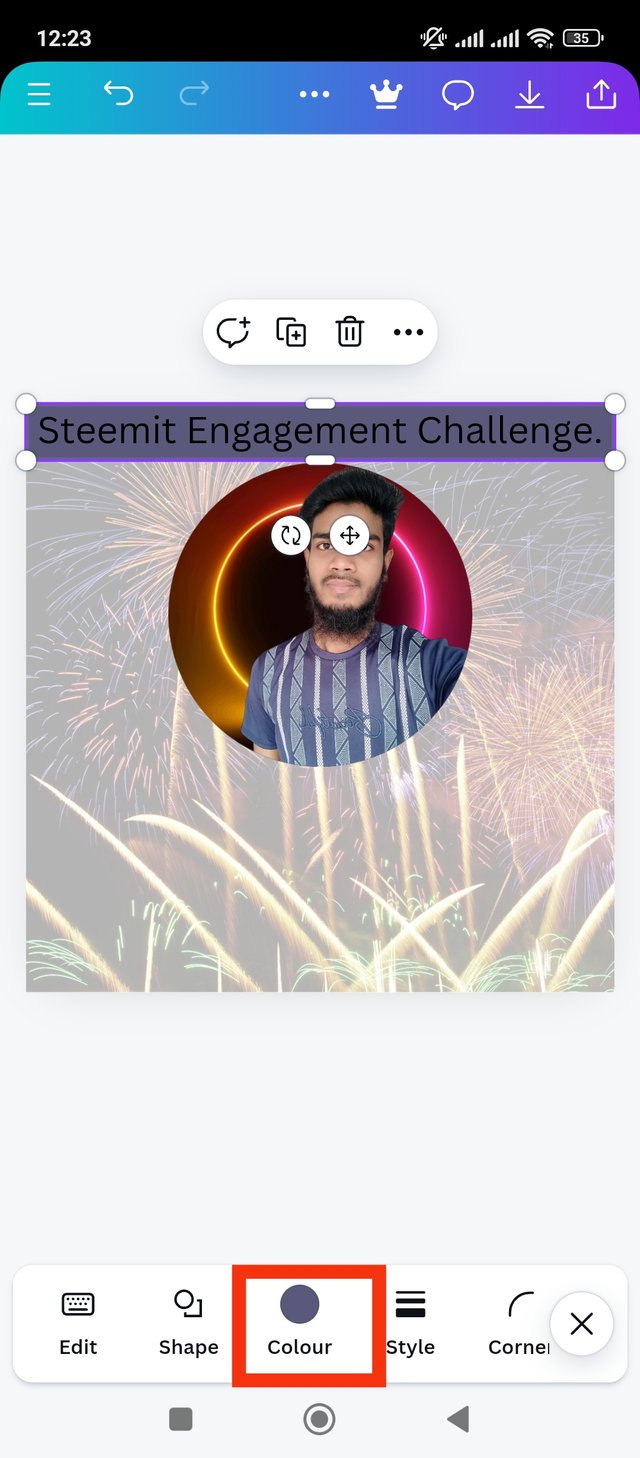
Now I want to add some text to my design page. So that my design looks good with the reader. Anyway I added the title above the design first. The title is, Steemit Engagement Challenge. I will place this line above the profile picture in the design. So I set it manually after adding text. The line is set, but I want to add a sep at the bottom to make the text pop. That's why I clicked on the Elements option.
 |  |  |
|---|
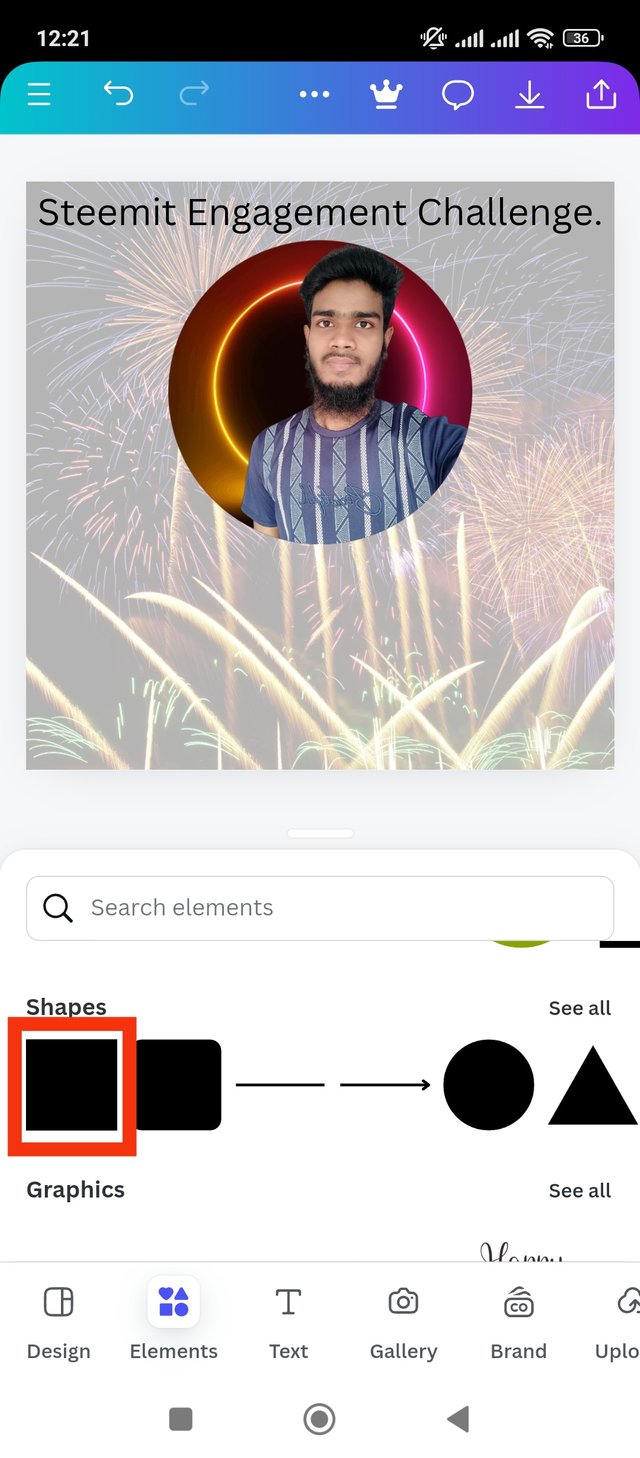
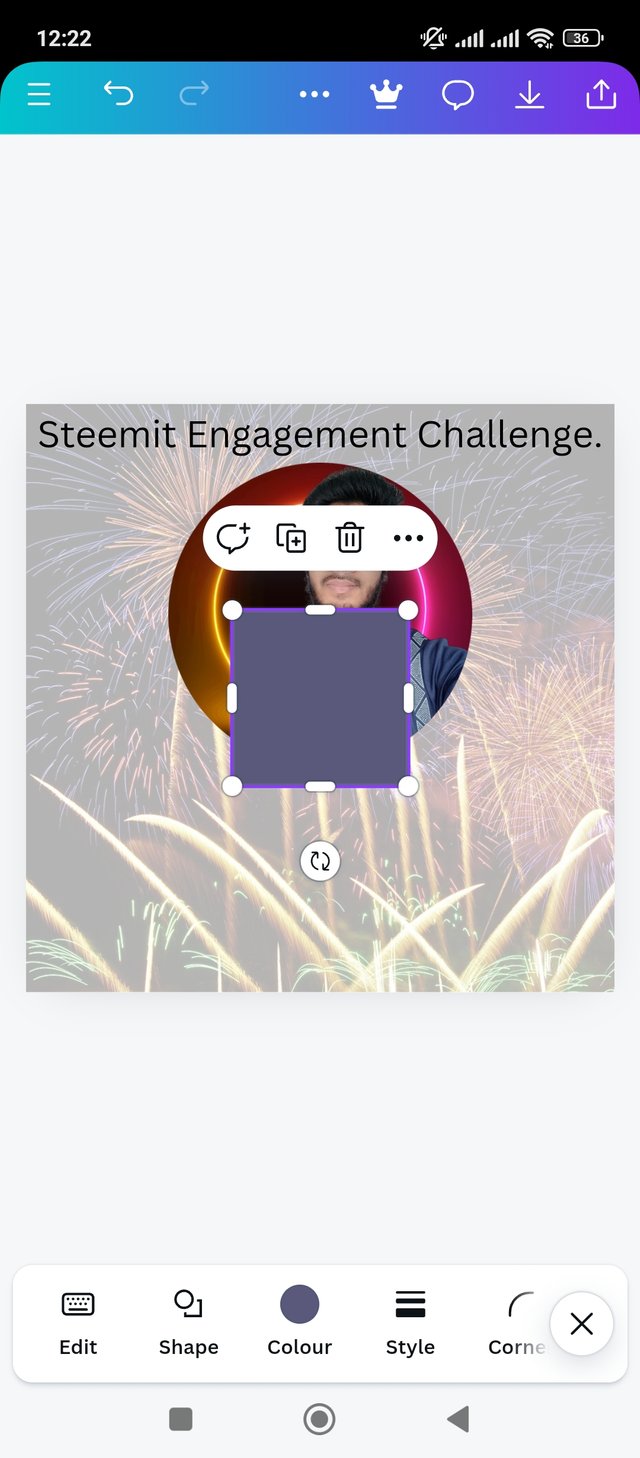
After clicking on the elements option I noticed different types of shape. I chose the rectangular shape.After selecting the shape it is added to the page. At first the shape looked square and big. Now I manually made it longer and narrower horizontally. Then I aligned the shape below the line. But I want to change the color of the shape to make the text stand out more. Let's move on to the next step.
 |  |  |
|---|
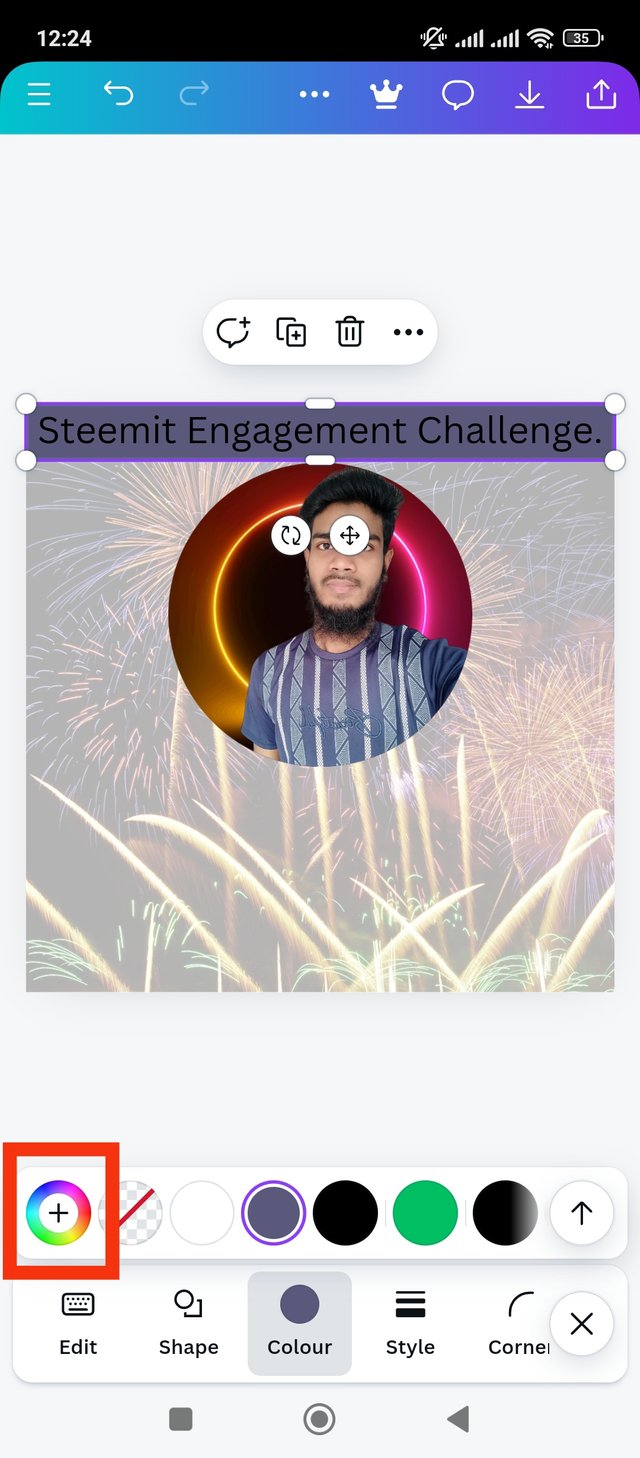
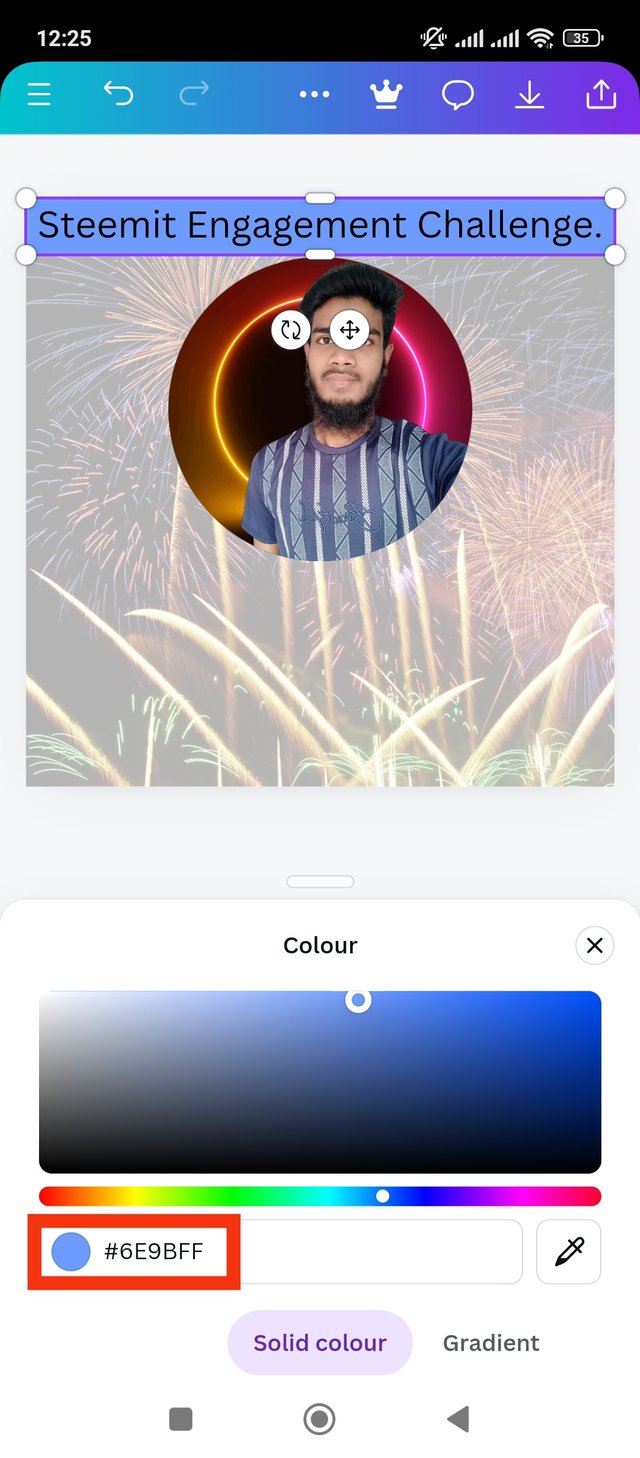
Now I will select the color of the shape. That's why I clicked on the color option first. Where is marked in red. Anyway I clicked on the error color wheel. After clicking here I selected the color according to my choice. I changed the color of the shape to sky blue so that the black text pops out. I got its color hex code, #6E9BFF. Then focus on the next step.
 |  |  |
|---|
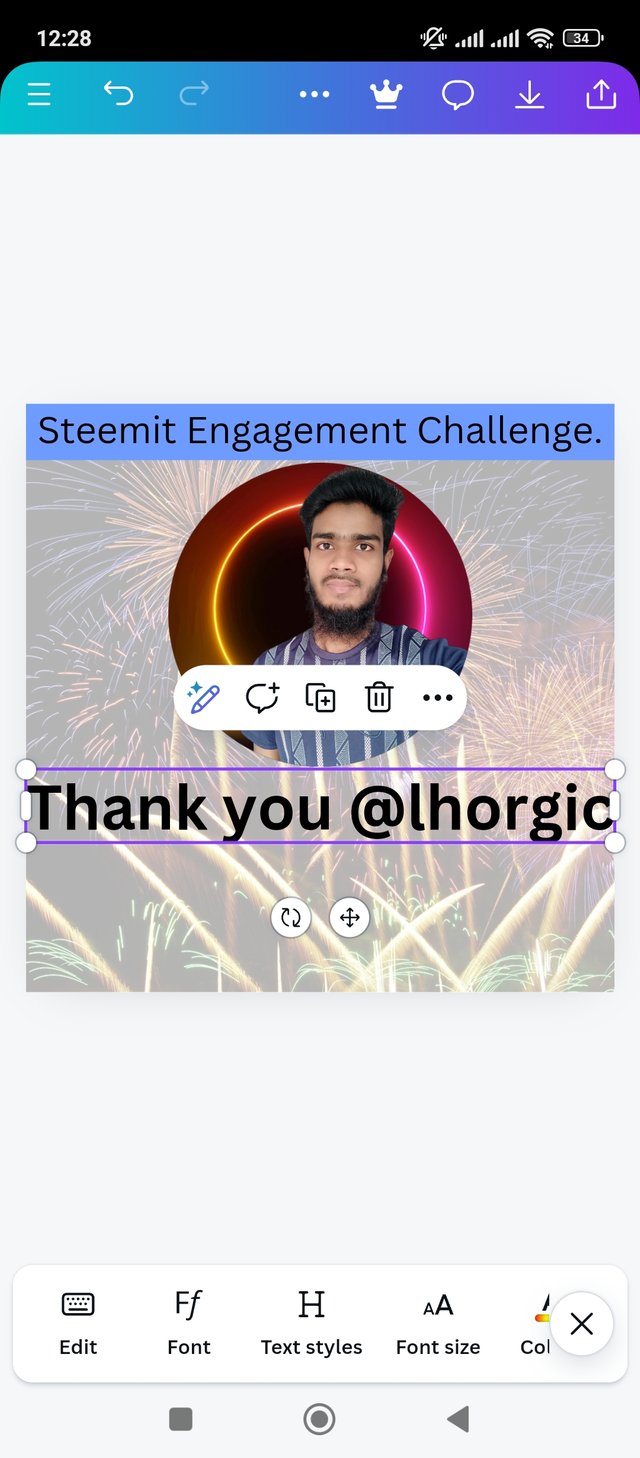
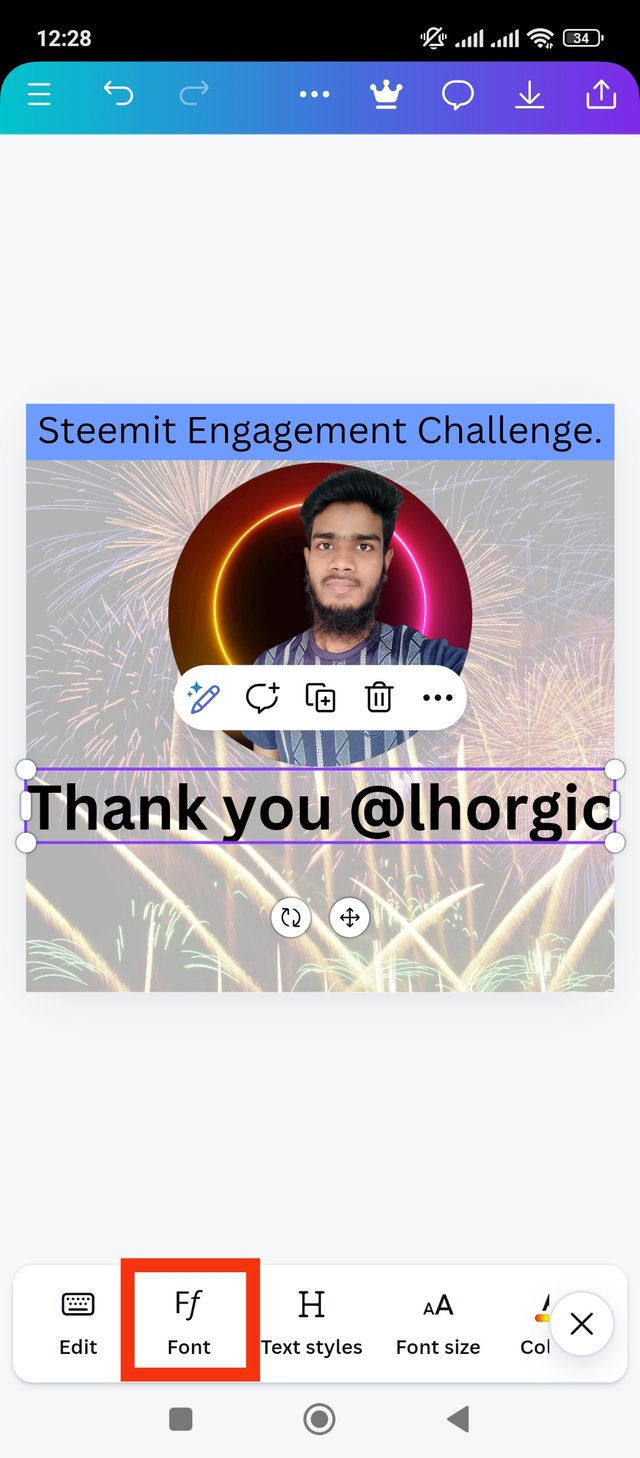
This line is for my teacher lhrogic.Thank you lhrogic, because through him I achieved this. Anyway, I added Thank you lhorgic text to the page. I will use the font of this line, so I clicked on the font option. Then I noticed multiple font types. I liked the ample display font. I used Ample Display font type. Which I have marked in red.
 |  |  |
|---|
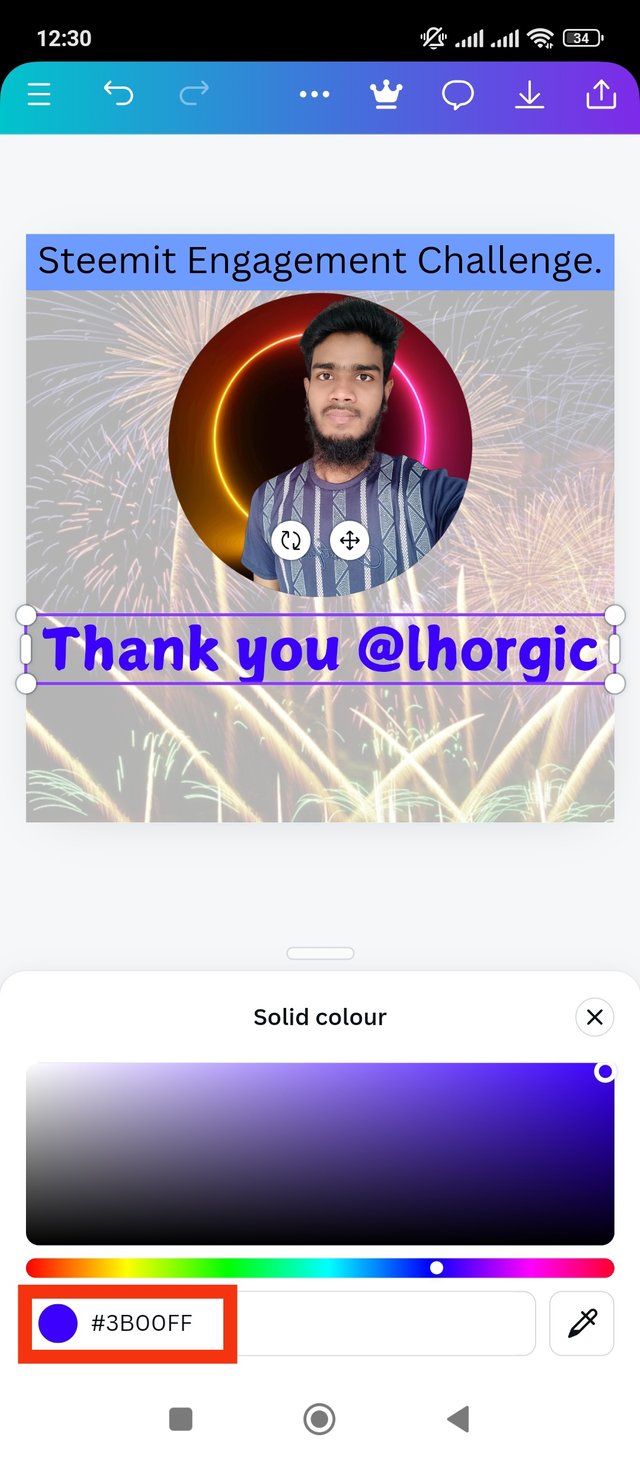
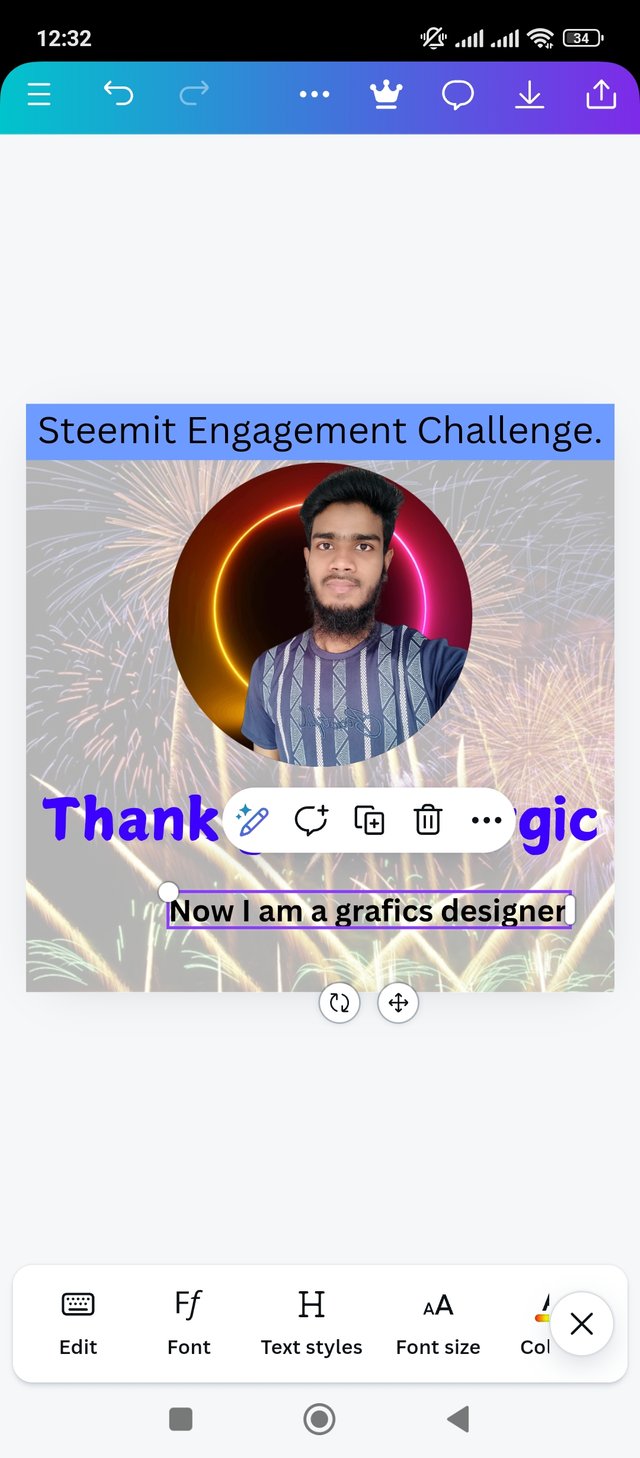
Now I will add the color of the line written for the teacher. I click on the color wheel to get the same color as before and add the line blue. I got the color hexa code here, #3BOOFF. Next I'll add the third line to the page. This is my happy line. That is, Now I am a graphics designer. Then I scaled the line to fit the page. Then I put the line in an eye-catching place.
 |  |  |
|---|
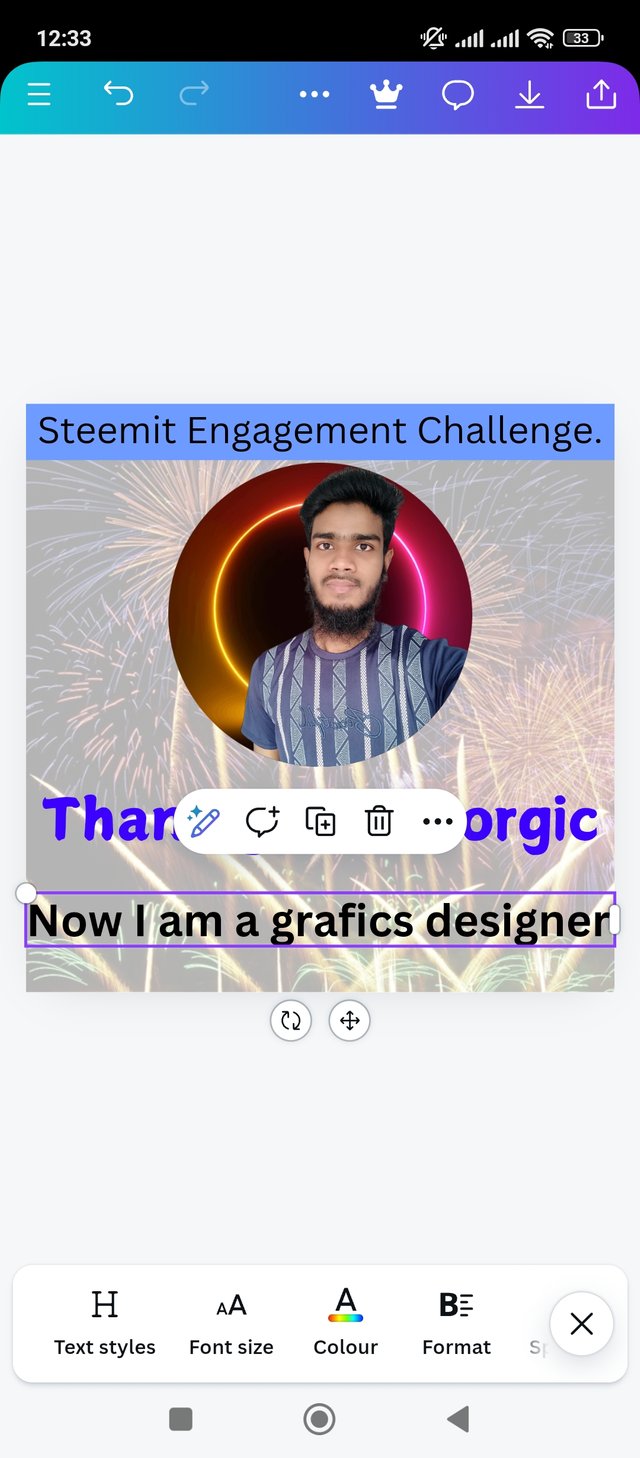
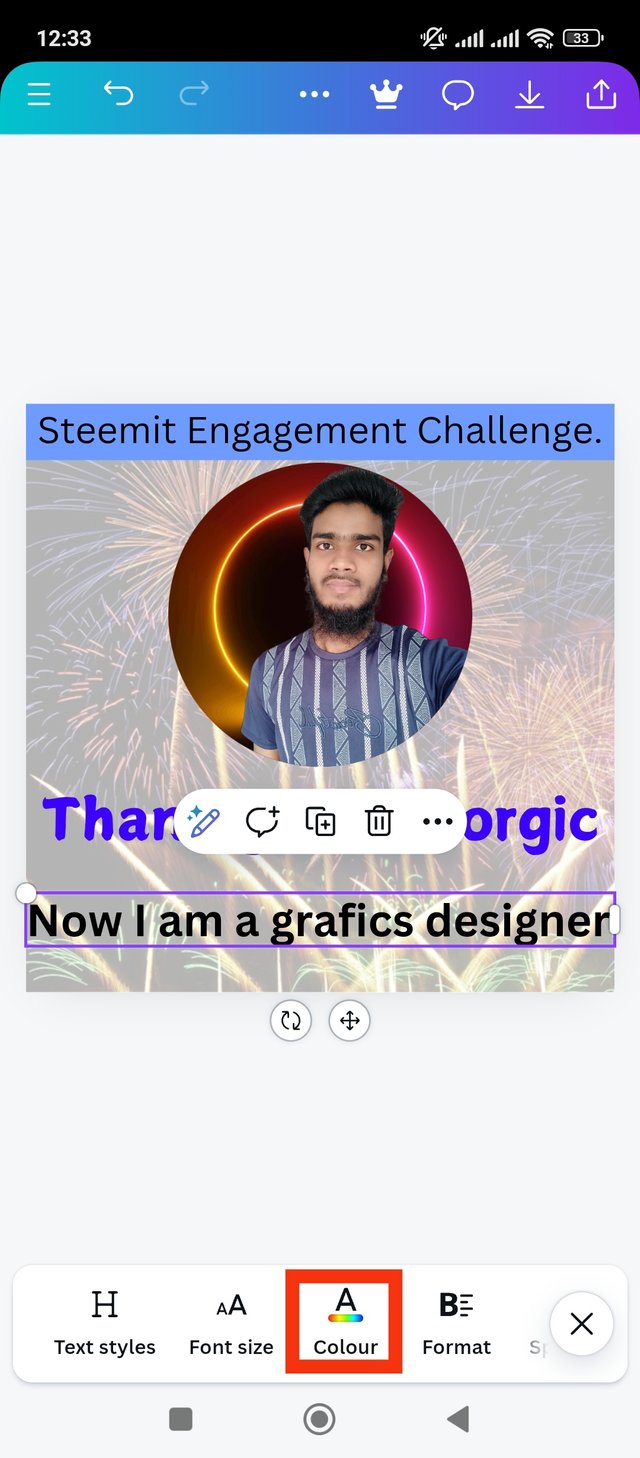
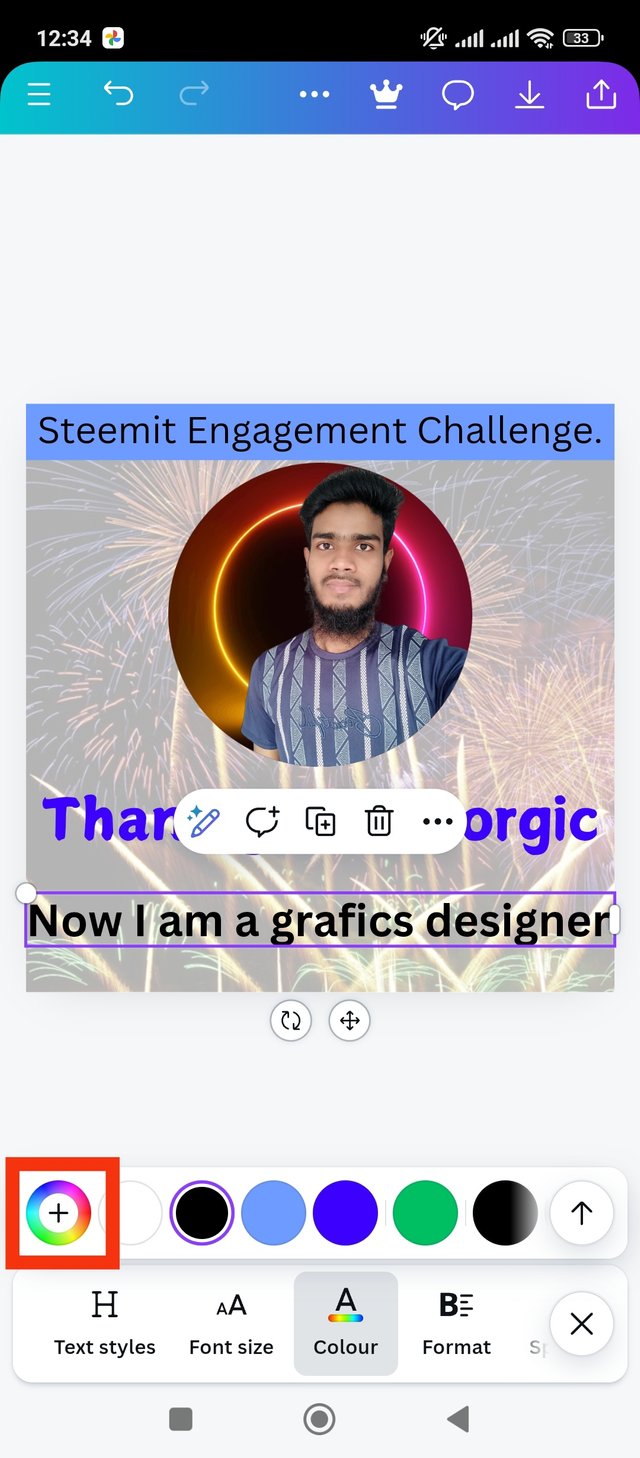
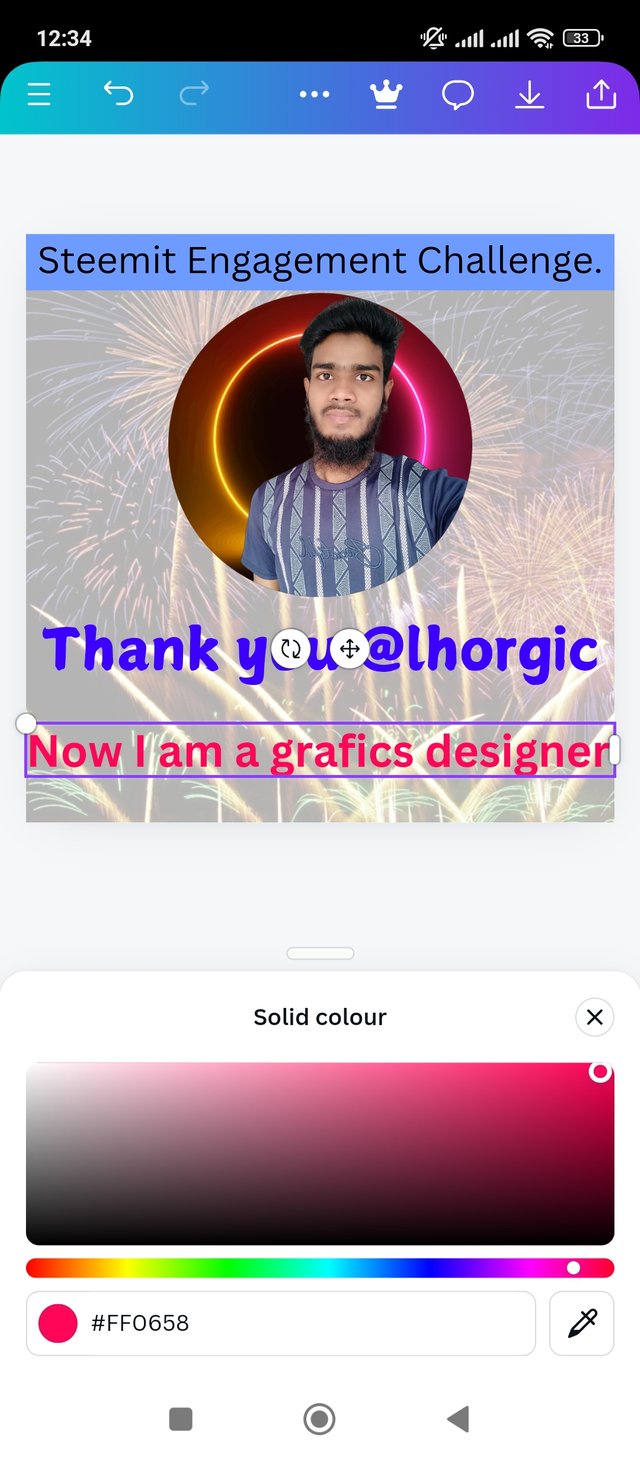
Now, Now I am a graphics designer, I will color this line. I want to color it red which is a happy sentence for me. Anyway I went to the color wheel to add color and added color as before. I got color hexa code in this line, #FFO658. Stay with me and move on to the next step.
 |  |  |
|---|
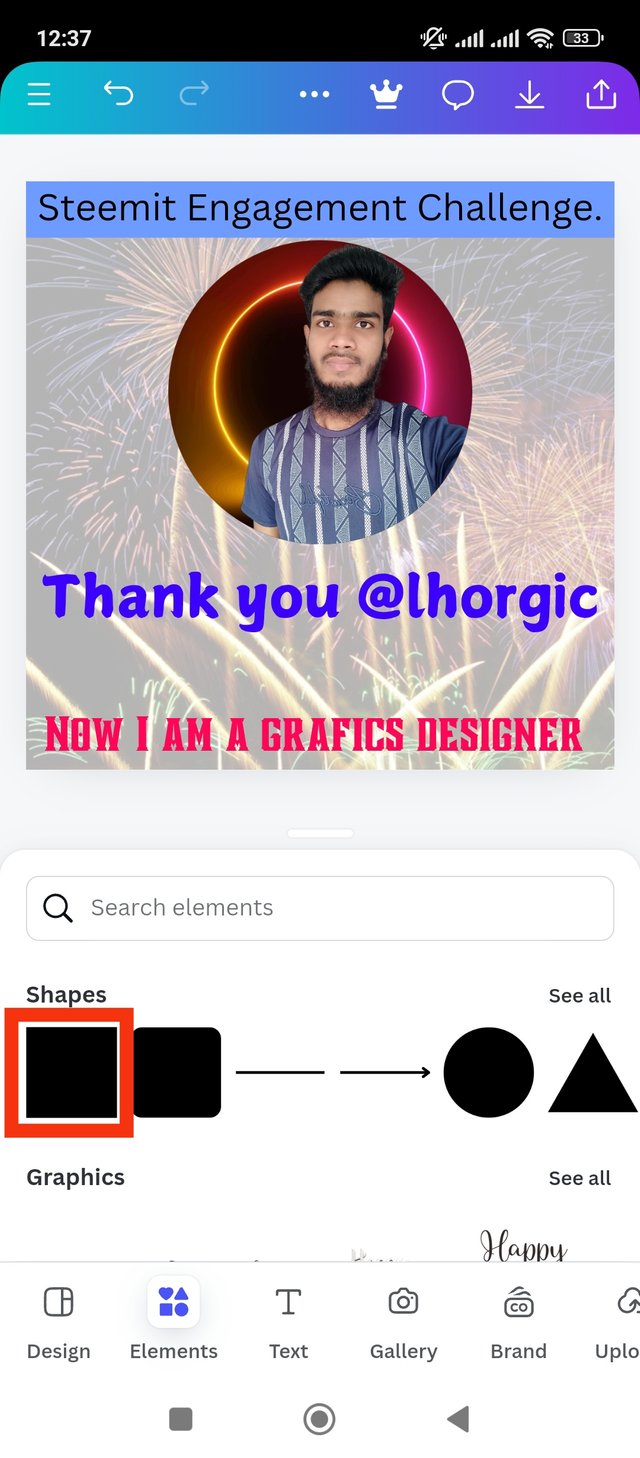
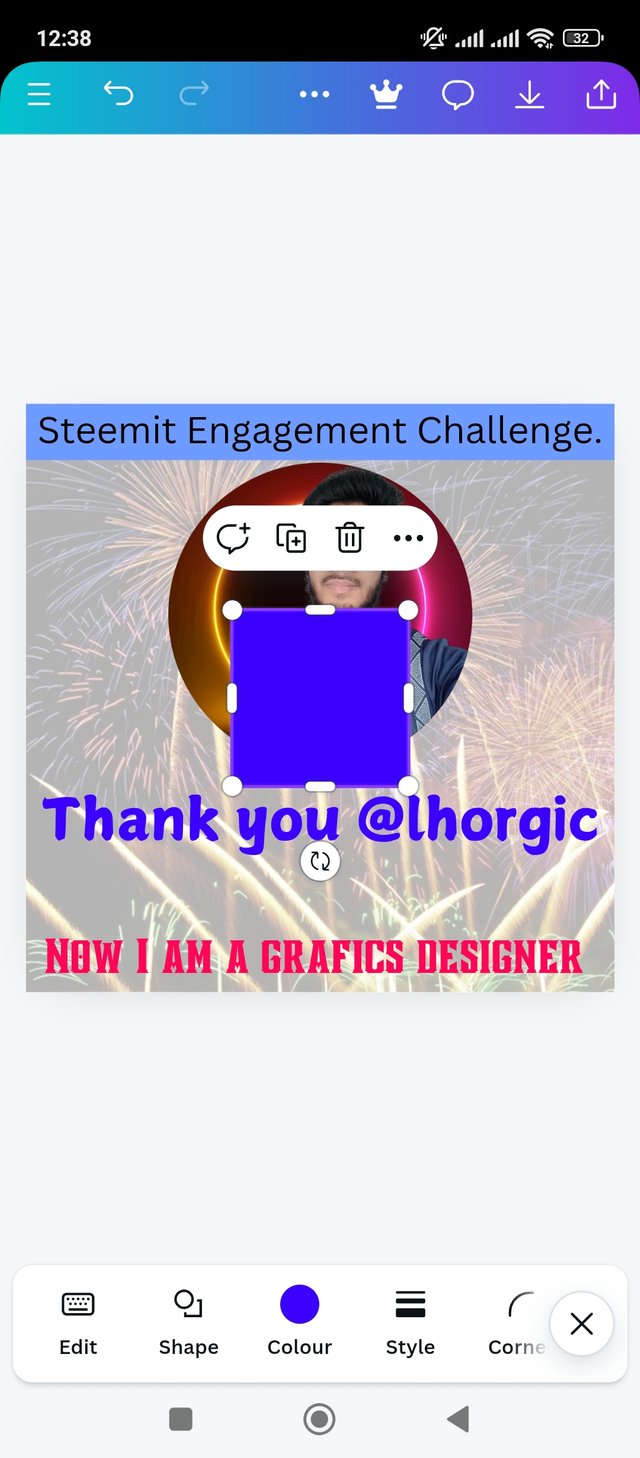
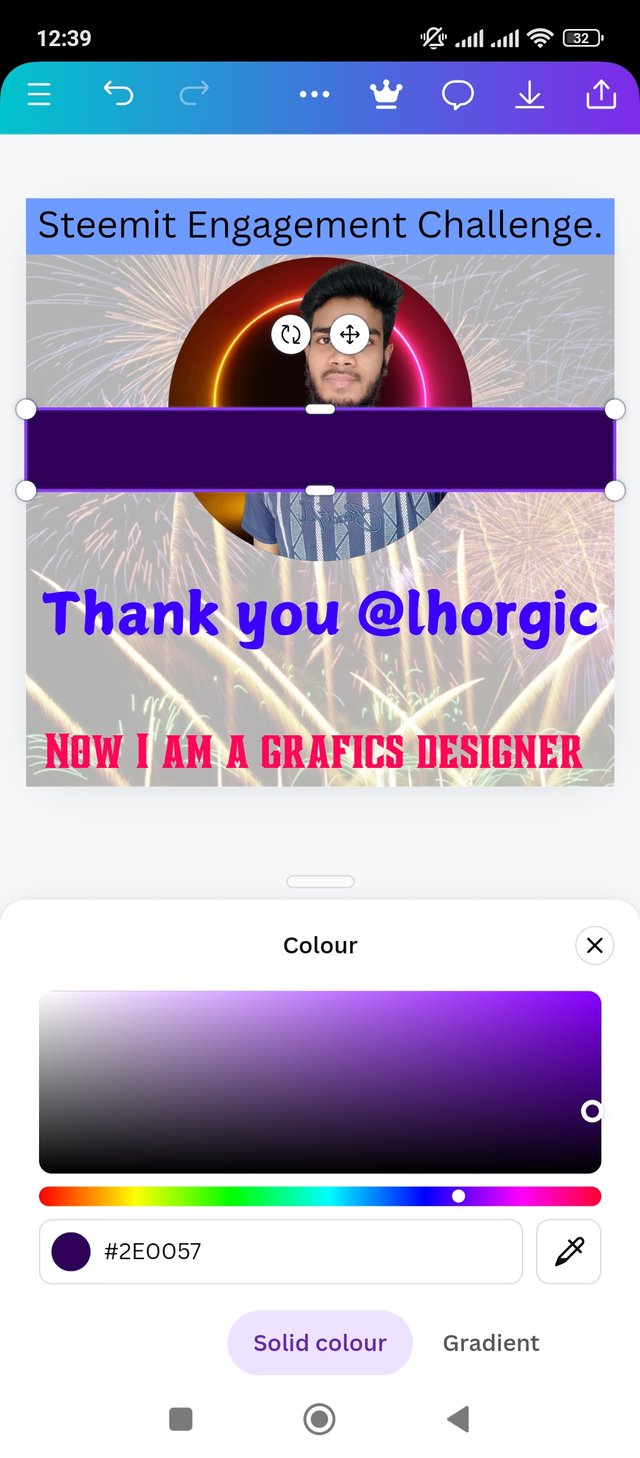
Now I'll add a shape below the line. That's why I clicked on the Elements option again. As before I chose the previous shape from the Elements option.Err I increased the length of the shape and reduced the width. Which would be perfect for the line. After I created the shape I colored it purple. whose hexa code I got, #2EOO57. Then I moved on to the next step. Stay with me for the latest.
 |  |  |
|---|
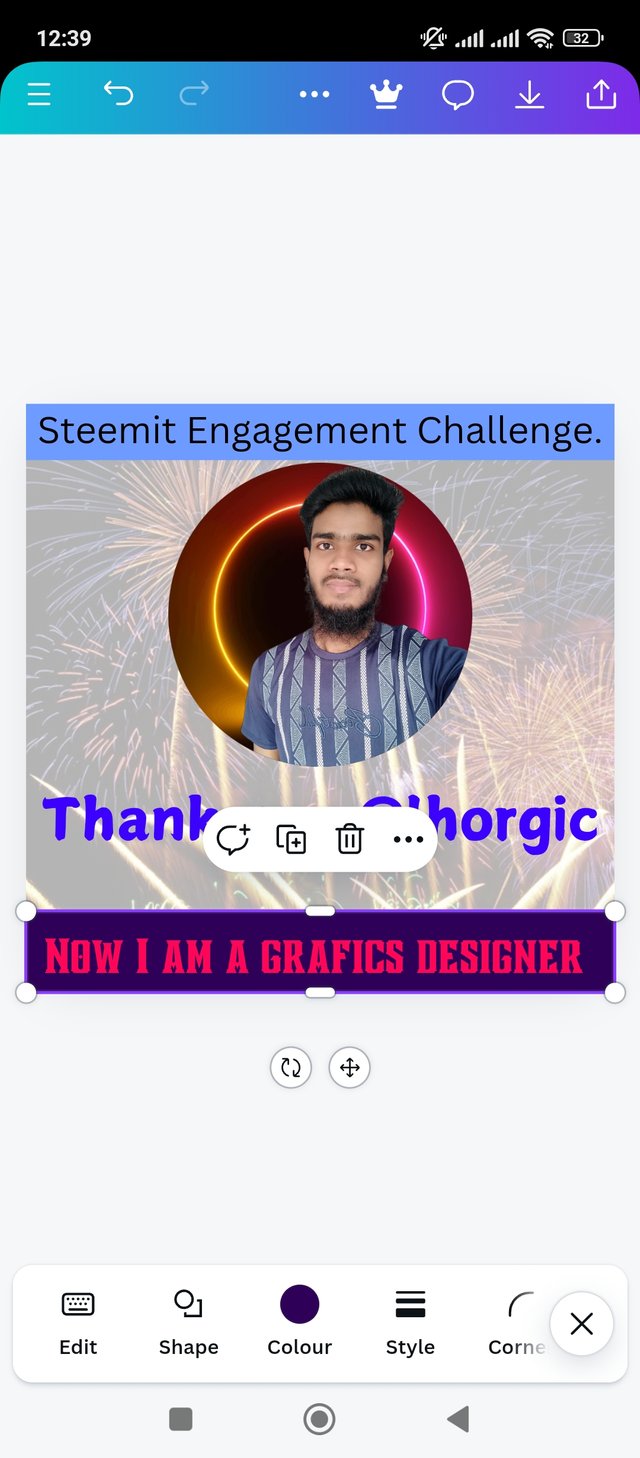
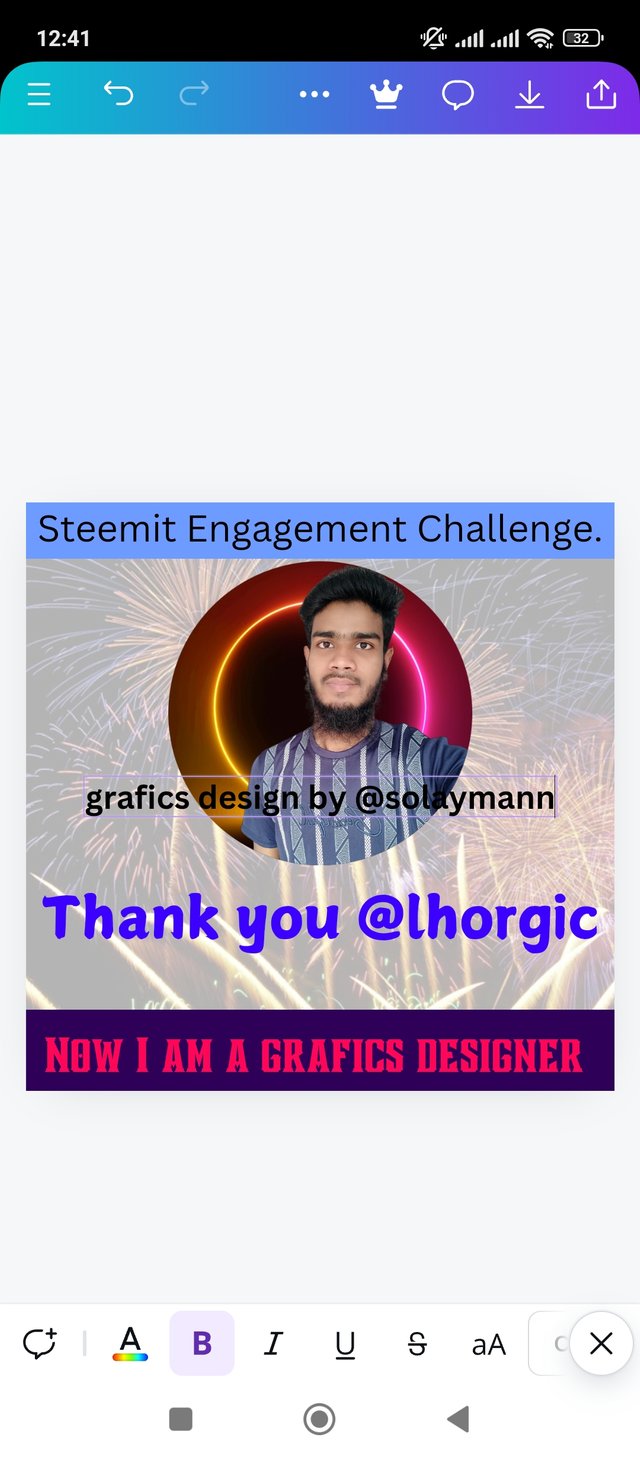
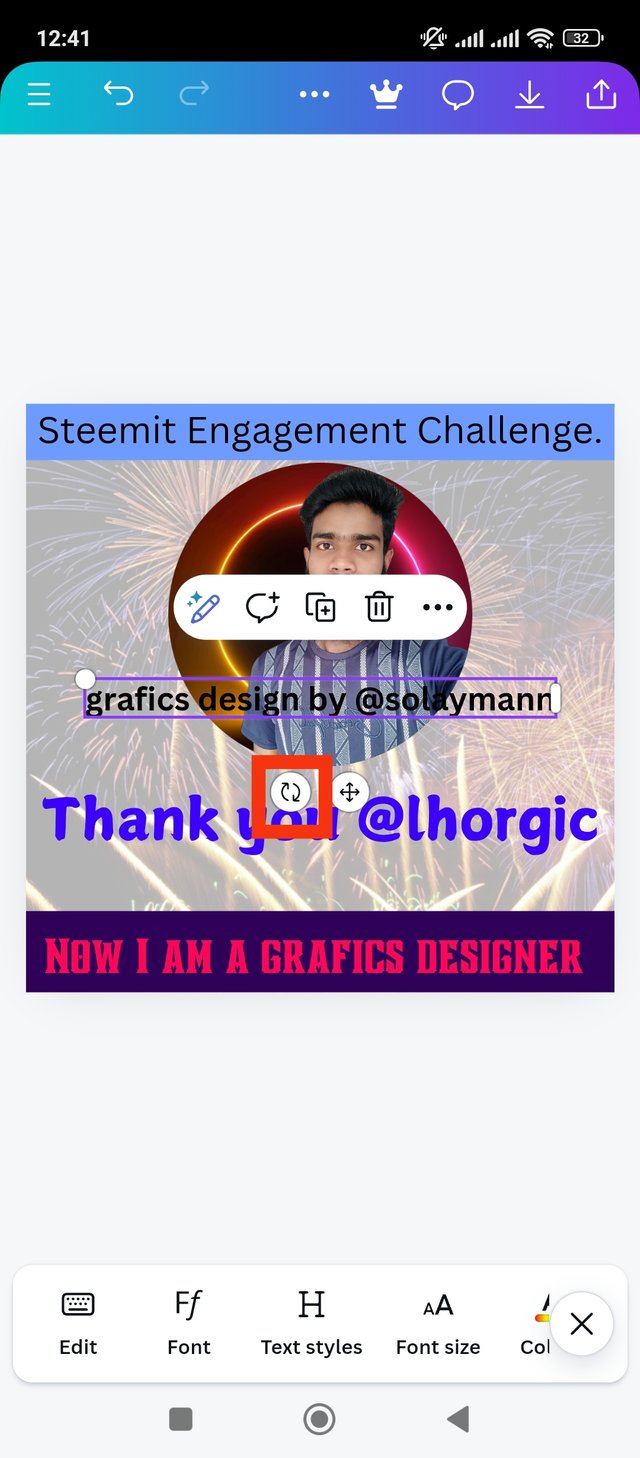
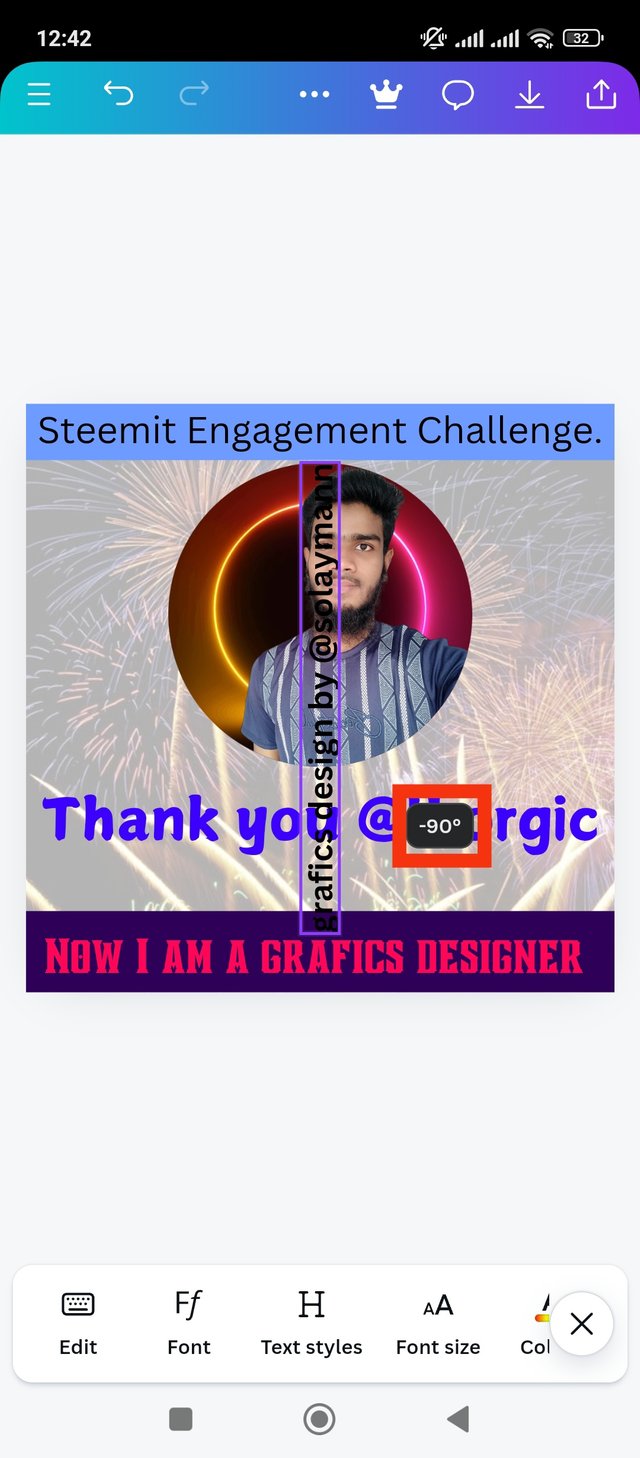
Now I place the shape below the line in the specified location. The purple under the red writing looks great. Anyway, now my writing has appeared. Now I design a line on the left side of the page, Graphics design by solaymann, added. I went to added this line vertically. Go to next page.
 |  |  |
|---|
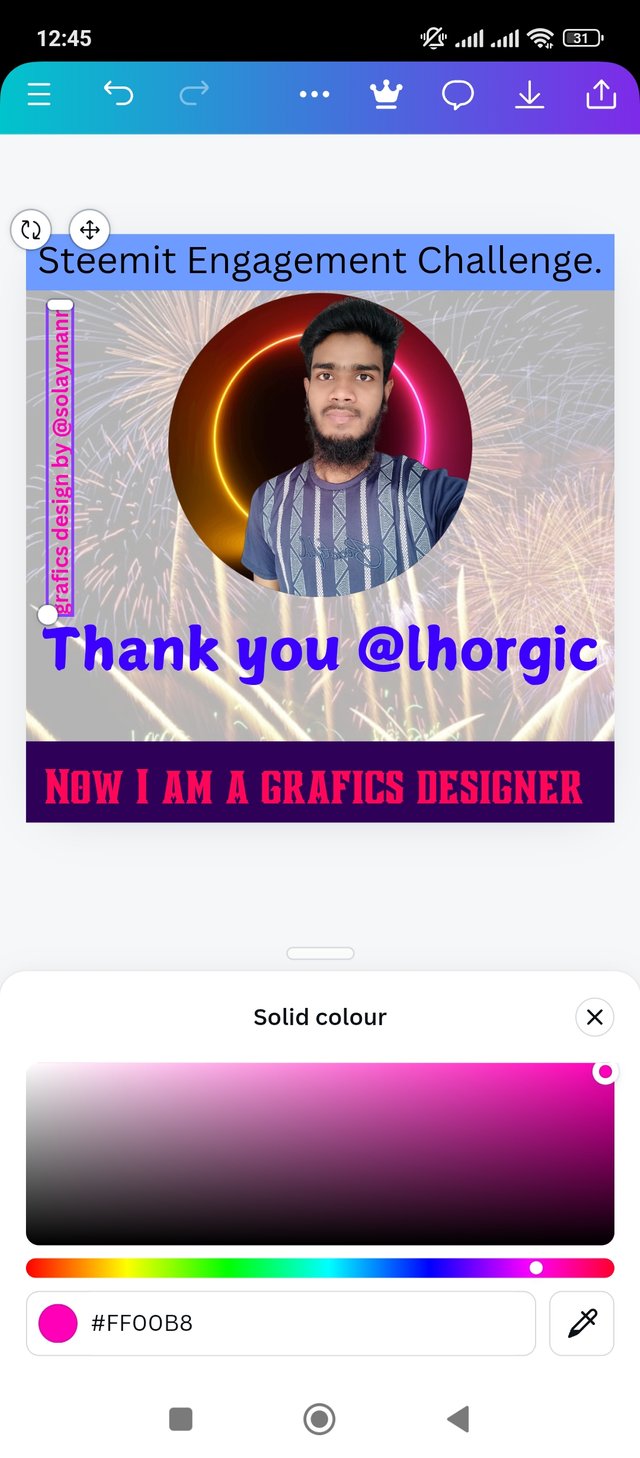
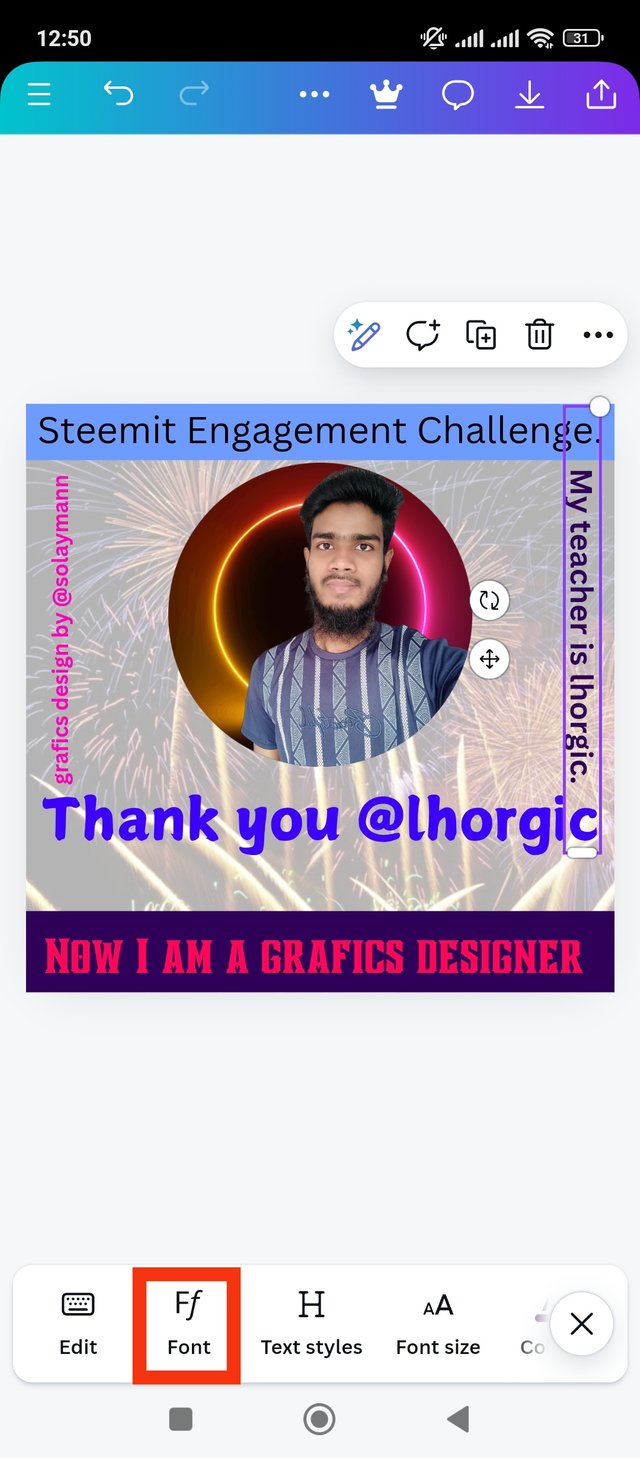
Now I have positioned the text vertically. Then I painted it pink after installation. got its hexa code, #FFOOB8. Then I added another line, my teacher is lhrogic. I placed the line parallel to the line on the left side.
 |  |  |
|---|
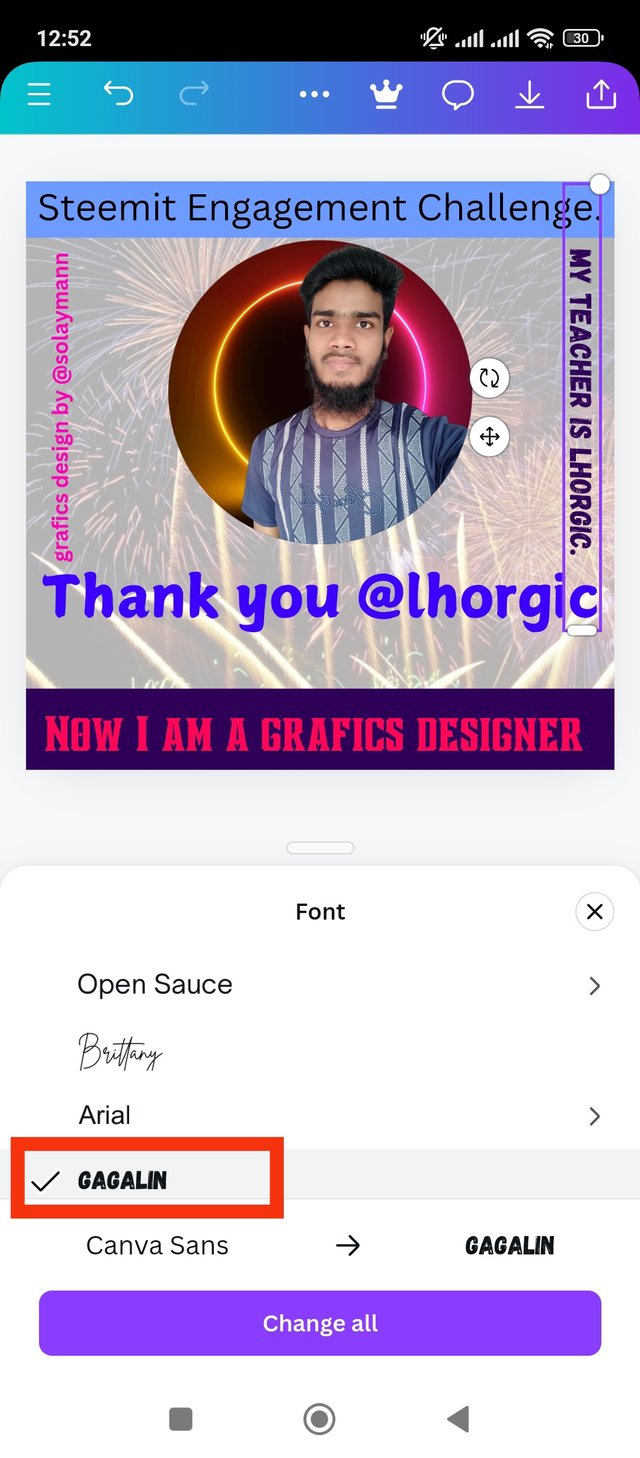
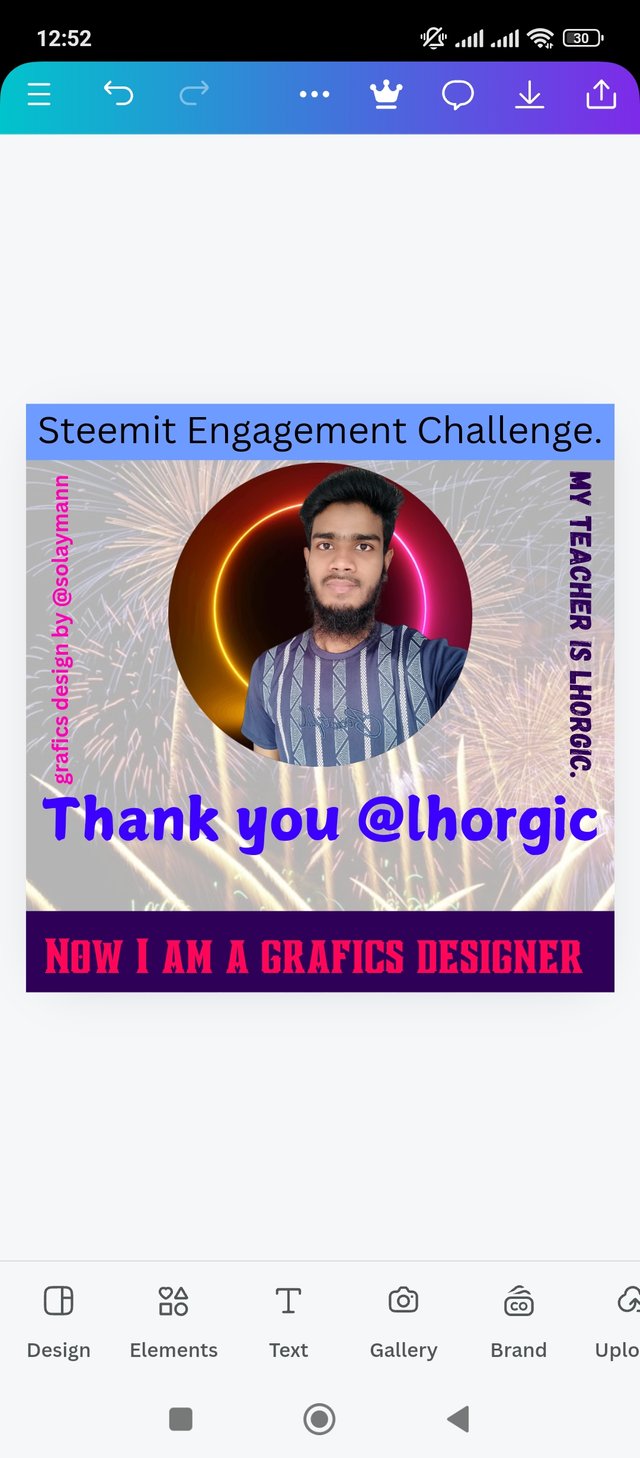
I want to keep the font type different in this line. So I used GAGALIN font type here. Then I added colors to my liking. This is how I finished my design.
I put a lot of thought into creating this design. Because I try to make any work very carefully and error free. I learned to create my designs in different ways through six weeks of teaching. I can claim to be much better at creating designs now than before. I must thank the teacher for that. The principles I followed to make my design attractive are discussed below.
Background effect: I selected the background first when creating my design. I was focused on adding a background that would make my graphics design look better. That's why I first drew attention to the background. Tried to make it transparent properly.
font type: I used font type principles very carefully while creating my designs. I tried and selected multiple font types. I have used font type that looks good with the design. I was very focused on the font type. Because the font types will make my design look attractive to the reader.
balance on the line: I added several lines to my graphics design. I have balanced each line. I put each line to be two lives at the middle point. It will make my designs look nice and the lines will be clear. So I keep the balance of lines as my basic design principle.
Color hexa code: The hexa code of the colors I use in any design is very important. Because we can easily find that color by color hexa code. If you want a color without the hexa code, it's hard to find a second time. So I tried to make the color codes clear in the design. Color hexa code is important as the principle of color.
Design Consistency: I have kept any line or element consistent in creating this design. I have tried to make any topic so consistent that it looks more interesting. Also, I have paid attention to everything from adding images, lines, font types, colors. Above all I have maintained the consistency of all the elements in the design, which is very important in making a design.
Thank you very much for reading my post. It is a very nice competition. Here I happily participated. So I invite my dear friends to participate in this contest, @ripon0630 @wilmer1988 @patjewell @malikusman1 Hope you will participate in this contest with pleasure.
| cc: @lhorgic |
|---|
Hello @solaymann thank you for participating in this week's lesson. We have assessed your entry and we present the result of our assessment below.
Feedback:
Let me start by appreciating you for coming this far with me on this six weeks course and also commending you for the effort put into this practical, I love the outcome of your step, your design looks cool.
Your design is not bad but it lacks structure, you have not maximized the use of the graphics principles you were taught in the previous lessons.
In all, you did beautifully well and I must commend you for a job weldone. Thanks for staying through the whole process, I hope we continue this journey together in the next season. I wish us the very best.
Regards
@lhorgic❤️
0.00 SBD,
0.19 STEEM,
0.19 SP
X share link
https://x.com/solaymankabirr/status/1847935927739637760
Upvoted. Thank You for sending some of your rewards to @null. It will make Steem stronger.
Thank you so much dear brother @malikusman1♥️
Congratulations, your post has been upvoted by @scilwa, which is a curating account for @R2cornell's Discord Community. We can also be found on our hive community & peakd as well as on my Discord Server
Felicitaciones, su publication ha sido votado por @scilwa. También puedo ser encontrado en nuestra comunidad de colmena y Peakd así como en mi servidor de discordia