Furniture Art Workshop
I haven't attended many workshops in life, just a couple of IEEE ones during my bachelor's. Little did I know, I would be attending a Furniture Art workshop a decade later.
Such contrasting fields.
I was dragged into the first one by friends doing Electrical and was politely voluntold to attend the latter. Though I wasn't very reluctant this time, I wanted to learn a thing or two because I badly need to revamp some chipped furniture which is mostly the aftermath of our moves.
So, there's this lady who came all the way from the capital city to our little remote setup to deliver this workshop. The event was organized by the ladies' club which is kind of a mandatory thing in my community - sometimes overwhelming but mostly it grooms you a lot as a person.
So this lady is a renowned furniture artist and runs a successful business by the name of Niche Designs. You can find her page on Instagram.
In my opinion, it's a little expensive hobby if you are to get high quality supplies. But still affordable than buying a new piece of chic furniture.
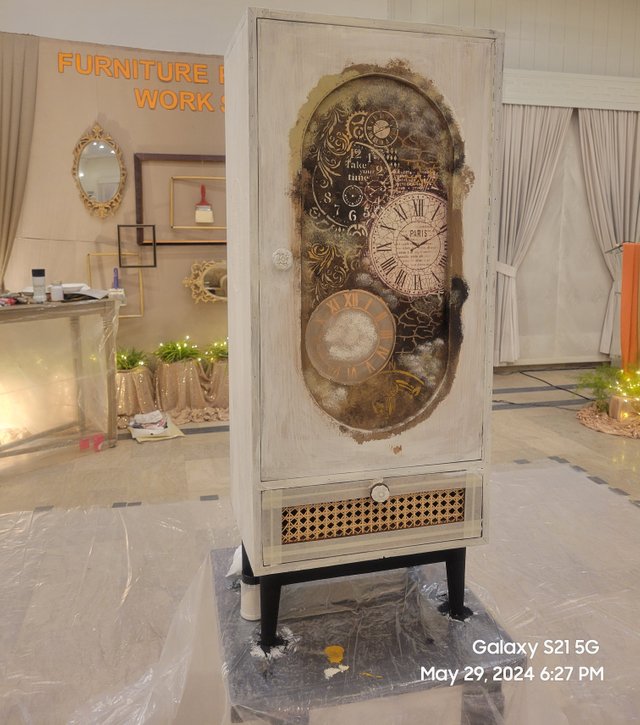
She chose to revamp an old standing cabinet for demonstration while explaining all the dos amd don'ts and sharing a dozen tips.
I was so engrossed in listening and watching her do the magic that I forgot to take pictures. I did take one in the middle and one at the end, though. Also, it wasn't on my mind to write about it here, only when it turned out to be so informative that I felt like sharing, it might help someone or invoke feelings for a new passion. 😄
Let me walk you through the whole process...
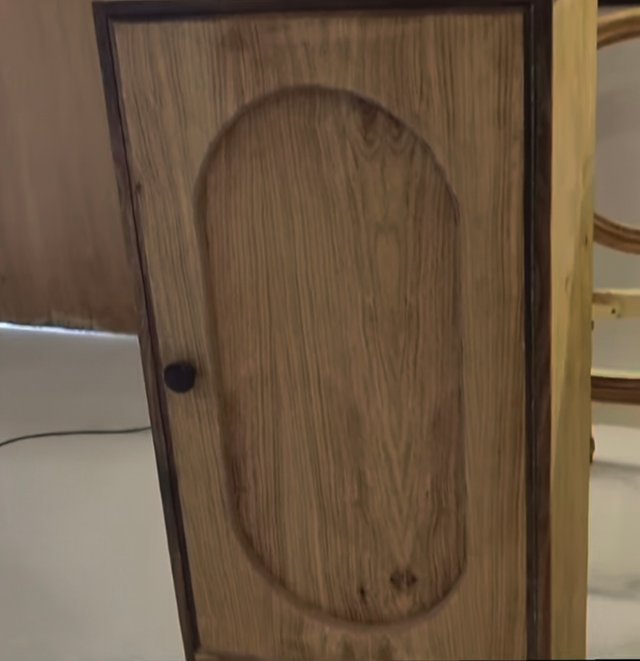
1- Cleaning
The artist first wiped the cabinet with a citrus liquid dish soap because it's important to clean the surface before painting. Otherwise, the paint will chip off if there are debris or oil patches.
White vinegar and baking soda mixture can also be used. Basically, anything that can get rid of grease and dirt.
2- Wood Filling
If the furniture is old then there's a chance of cracks, scratches, holes, or dents. I'm sure you already know there are wood-fillers for this purpose. Take a palette knife or any spatula for filling and then even out the surface but scraping off the excess paste.
The artist used an icecream stick for this. It worked great.
3- Sanding
Then comes sanding. The artist scuffed all the uneven areas with a sand block especially the places where she added fillers.
4- Priming
I always thought that priming is done to bring out the colour of the paint. The artist told us that sometimes there's oil seeped into the wood so a primer keeps it locked in and makes the paint more durable. She applied thin layers of a water soluble primer with a roller.
5- Painting
Always apply thin layers of paint. Heavily loaded brush always makes the surface thick and uneven. So, always unload a little after loading.
For painting, you can either use acrylics or oil paints. And for a more antique look, you might want to go for chalk paints.
The artist used chalk paints because she was going for antique look.
6- Sealing
Always seal your work off with a top coat. Over time, wood sap comes out of the surface making it moist and causing the paint to chip off. A sealer wouldn't let that happen. Polyurethane or wax sealers are used for a top coat on wood.
The artist didn't apply the top coat during the workshop because the paint was still wet. Although she told us that once the top coat is applied, it takes around 20 days to cure properly.
The artist also showed us different decoration techniques which are trendy these days. It's better to do all the decor before applying the top coat.
1- Decoupage
Sounds fancy but it's simply gluing rice paper or napkins on the wood surface. The effect is such that the design seamlessly becomes part of the medium/surface. It feels as if it's directly painted.
There's decoupage glue for this purpose sometimes known as Mod Podge or German glue. This glue becomes transparent when it dries.
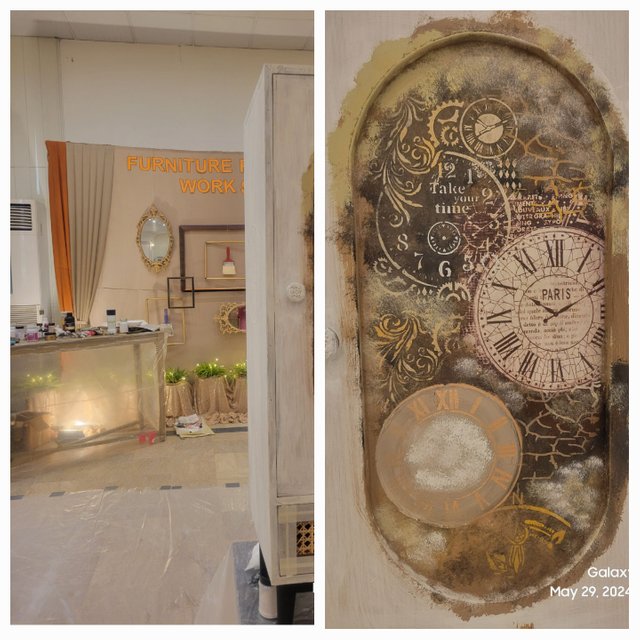
The different kinds of clocks you see are rice paper cut-outs which are pasted through the decoupage technique.
2- Distressing
This technique involves revamping old furniture to make it look worn out, aged, or distressed again. Ironic, isn't it?
Apparently, this kind of furniture is trending. The artist didn't use this technique on the cabinet but it's done by simply sanding the painted surface.
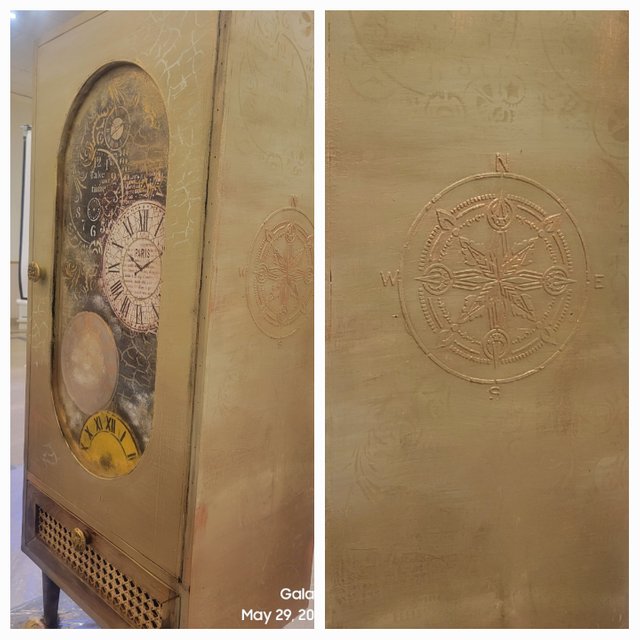
3- Antiquing
The artist did a beautiful demonstration of antiquing by using dark toned paint to accentuate the edges and crevices of the cabinet. The cabinet immediately looked aged but I think I couldn't capture such details in the pictures.

Some other techniques used on the cabinet were Stenciling and Dry brushing. The latter is used for creating a weathered effect.
It looked a lot better in real. I wish I could take more pictures of the process.
I have a chipped chester that I want to revamp. I'm gonna do some research on the products and if they are easily accessible and affordable then you might see a facelift in my blogs.
It is always nice to learn a new hands on skill and this is such a cool course to go on @event-horizon :)
Really love the piece the instructor is busy revamping. That detailing on the front looks amazing!!!
So was it a one off course or something you go to for several lessons? And if so, would you get to be guided with a piece of your own furniture...? That would be fun!
I think most hobbies are expensive when you really look into the details of how much money we spend on things haha - but you are right, it is definitely cheaper than buying something new from a boutique store - or even second hand from a store that have done the revamping themselves... plus you get the feeling of personal reward having done it yourself!
I was skeptical in the beginning but it turned out to be so beautiful.
It was a one off course. I will definitely apply the newly gained knowledge on my furniture.😀
If I get stuck maybe I will try seeking her out through her business page.
That sounds like it was a great thing to add to your "belt of knowledge" @event-horizon - I am sure it is going to be loads of fun when you start revamping something for yourself :D
Yes...I'm already excited but waiting for something until I can finally do it.
It will come... and when it does, you will know :)
Oh, that's just gorgeous, I know it is very slow and requires huuuge patience :)
Working with wood could be very tricky and really requires a lot of dedication...
When I was in primary school, we had those classes of "work training" or "industrial arts", I can't think of better English translation, sorry; where we used to process wood, metals, cook, make pottery from clay, etc... I loved those as it was very different from just sitting on the bench, listen to the teacher or being examined, hehe. I really liked handling wood, so I was into wood-carving for a couple of years until my father bought me a small film camera and then also computers became popular so I shifted my attention and time there :)
I had a small forthcoming revamping project as well, our garden bench. If that turns out well, I may share the process and results :)))
Have a lovely day!
Oh yes, a lot of patience but I guess if one is passionate enough then it doesn't matter. It becomes a therapy.
I think you are the second person I know on Steem who has been into wood craft at some point.
Please update on the bench. ;-)
Yes, the therapeutic effect and side of it :) True, true...
I guess, I feel I'm somehow broken, I couldn't spend much time on one thing. Probably my last long job where I was forced to multitask...
Will try to do that, if I like how the bench looks like in the end :)))
Thank you :)
In that aspect, I'm also like you. I lose interest very quickly in hobbies. But as long as I do them, I enjoy to the fullest. The second they start feeling like a burden, I quit. 🤭
You can share a picture of the bench under this thread if you don't want to dedicate a post to it. But I'm sure it will be beautiful and post-worthy.
The furniture works are very beautiful and have a classic impression. Only certain people can have I really like furniture pieces like those in Bali, Indonesia
You made me curious. I will have to check up on Indonesian furniture.
Hello my sister @event-horizon🤗, nice to meet you, the photo of the clock is very beautiful, I see it as if it is alive in my mind, continued success, have a nice day sister 💕💕
The clock was painted on a rice paper. I love how it looks on the cabinet.
Oh yes sister, I really like it too. Thank you sister @event-horizon , for responding to my comment🤗💕
Your post is manually rewarded by the
World of Xpilar Community Curation Trail
STEEM AUTO OPERATED AND MAINTAINED BY XPILAR TEAM
https://steemit.com/~witnesses vote xpilar.witness
"Become successful with @wox-helpfund!"
If you want to know more click on the link
https://steemit.com/@wox-helpfund ❤️
Thanks for sharing such awesome content
@event-horizon!
It has been featured in
THIS BLOG SPOTLIGHT POST!
You will receive 10% of the rewards
earned on that curation post.
We have also given you an upvote and a resteem!
An initiative by @jaynie
Please feel free to show your support to this initiative as well as to the authors featured within!
HAVE AN AMAZING DAY!