Basis helplines to make patterns in Islamic Art

Hi friends!
It all starts with a circle, but first, draw a vertical line across the drawing surface and place the compass needle on the line to draw the circle. It is very important not to lose the centre point of the circle to continue the development of the pattern we intend to draw now.

Then, using the same opening of the drawing compass, place it on the intersection point upper, between the circle and the vertical line to draw a semi-circle passing on the centre of the first circle, as shown below.
Repeat the same process from down in the opposite sense to draw the next semi-circle.

Now we need to draw a horizontal line that passes through the center point of the circle. To do this, we need the intersection points between the central circle and the two semicircles on both sides, right and left. These intersection points allow us to establish, on the left and right, the two reference points that we need to draw the horizontal segment.

The two intersection points obtained between the horizontal line and the circle serve as centre points to draw the next semi-circles on each side, always using the same initial compass opening.
Thus we obtain four "petals" that protrude beyond the limits of the central circle.

The four points of the "petals" are the four reference points for drawing an external square and tracing the two diagonals that cross it.

Well, the four new intersection points between the diagonal lines and the circle will be the reference points for drawing an internal square, as you can see in the image below.

Using as a reference the four intersection points obtained by crossing the horizontal and vertical lines of our drawing, we will draw another square, which is inclined at 45°. We say that this is a rotational symmetry because the result can also be obtained by rotating the square drawn previously.

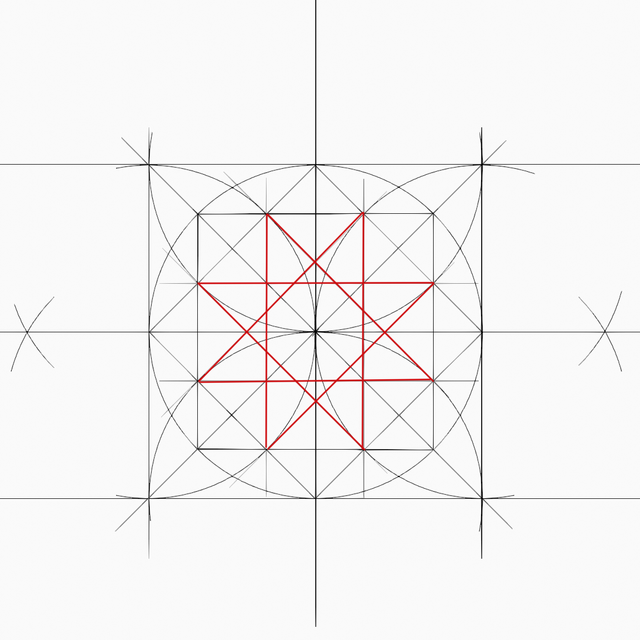
Here (barely visible), I drew the lines passing from each intersection point between the two squares just drawn. They form a grid as you can see.

Here, highlighted in red to make the drawing a little more understandable, are the eight lines drawn.

Returning to the previous drawing, here we have finished with all the helplines that will allow us to draw different patterns. Practising and understanding the development to obtain these helplines is crucial to drawing the patterns that form the basis of the designs of Islamic art.

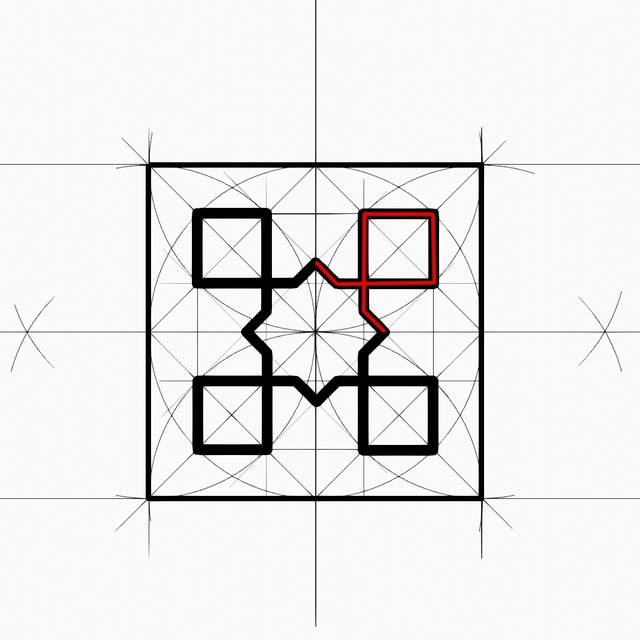
By outlining the external square and following logically some helplines we can obtain this pattern:

Here, highlighted in red, you can see the "sub pattern" that by rotation forms the pattern we had obtained previously.

Finally, we add a different color to each shape resulting in this pattern.


