[ENG-ESP] Tutorial on Easy Sweet Packaging (Idea for Mothers Day) // Tutorial de Empaque Dulce Fácil (Ideas para el Día de Las Madres )


If you need a quick and original gift, and you don't know what you can do, this is the best idea I can propose, since in less than 10 minutes you can solve it. You can make this packaging to give sweets, candies or chocolates. Do it yourself and surprise that special someone with a sweet detail in an original packaging.
Si necesitas un regalo rápido y original, y no sabes qué puedes hacer, esta es la mejor idea que te puedo proponer, ya que en menos de 10 min puedes solucionarlo. Puedes hacer esta empaque para regalar dulces, caramelos o chocolates. Hazlo tú mismo y sorprende a esa persona especial con un detalle dulce en un empaque original.
Materials:
• 1 Bottle of PET Soft Drink.
• Decorated Cardboard or the Color of your Preference.
• Mouse Tail Ribbon.
• Exact or Cutter
• Scissor
• Pencil
• Rule
• Cold sylicon
Materiales:
• 1 Botella de Refresco PET.
• Cartulina Decorada o del Color de tu Preferencia.
• Cinta Rabo de Ratón.
• Exacto o Cutter
• Tijera
• Lápiz
• Regla
• Silicón frio

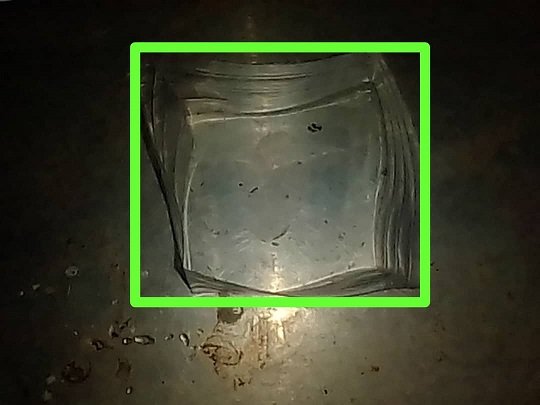
Step 1: We cut the 2 ends of the bottle, keeping the center, as indicated in the image.
Paso 1: Cortamos los 2 extremos de la botella, conservando el centro, así como se señala en la imagen.


Step 2: We fold the cylinder, to obtain two corners, and we fold again making them coincide.
Paso 2: Doblamos el cilindro, para obtener dos esquinas, y doblamos nuevamente haciéndolas coincidir.

So we have the perfect square shape.
Así nos queda la forma de cuadrado perfecto.


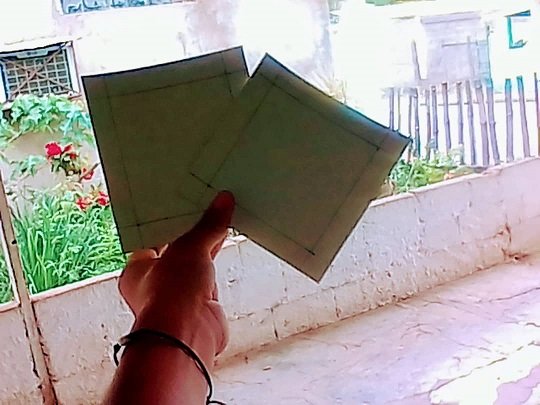
Step 3: On the cardboard, we mark a square with the same size as the plastic. We attach to the measurements, 1.5 cm for the lid tabs. We cut.
Paso 3: En la cartulina, marcamos un cuadrado con el mismo tamaño del plástico. Anexamos a las medidas, 1,5 cm para las pestañas de la tapa. Cortamos.

With this reference, we cut another exactly the same.
Con esta referencia, cortamos otra exactamente igual.


Step 4: We proceed to fold the eyelashes and make a small cut at each end of the strips to join them as follows:
Paso 4: Procedemos a doblar las pestañas y a realizar un pequeño corte en cada extremo de las tiras para unirlas así:


Step 5: At this point, we glue the plastic square to the lid.
Paso 5: En este punto, pegamos el cuadrado plástico a la tapa.


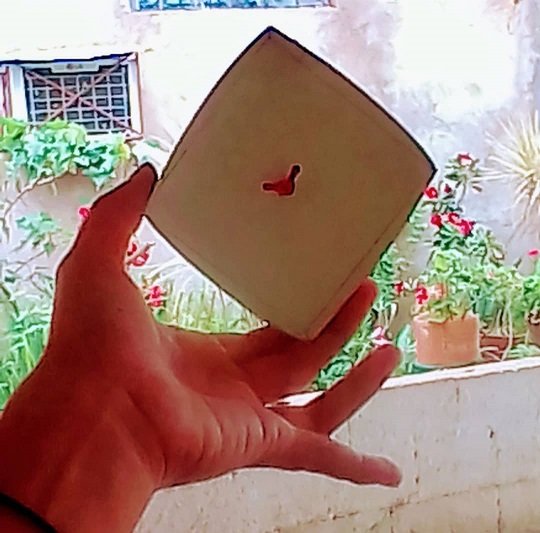
Step 6: With the other cardboard, on the inside we make a hole and introduce the tape, securing with a knot and a little silicone. In this way, we have a handle to open the box.
Paso 6: Con la otra cartulina, en la parte interior hacemos un hueco e introducimos la cinta, asegurando con un nudo y un poco de silicón. De esta forma, nos queda un asa para abrir la caja.

We proceed to fold and glue the tabs just as we did with the first lid.
Procedemos a doblar y pegar las pestañas igual que como lo hicimos con la primera tapa.


And this would be the end result, a simple and very original packaging. You can use this packaging for any special occasion, and give an original gift of chocolates, sweets or candies. I hope this idea helps you.
Y este sería el resultado final, un empaque sencillo y muy original. Puedes usar este empaque para cualquier ocasión especial, y obsequiar de forma original bombones, dulces o caramelos. Espero te sirva esta idea.


Did you like the result? Comment if you liked the idea.
¿Te gustó el resultado? Comenta si te gustó la idea.

Exelente paso a paso amiga todo esta impecable felicidades por tu gran post. ¡Saludos!