Hatching Duck Eggs: Part 1
Hey all so if you have had a chance to stop by the farm or explore the blog you know about the ducks at Sweetie's Orchard. We've been hoping for ducklings since the last farm tour in January, but no such luck yet.
Time to make some magic happen!

I have been doing some research however and hatching them yourself is not too difficult a process. There are few things you will need if you choose to do so. An incubator is the first and most important. Check out a local feed store like Tractor Supply or even online at Amazon. They can get pricey quickly but luckily you can also build one if you don't plan to hatch a large amount at one time.
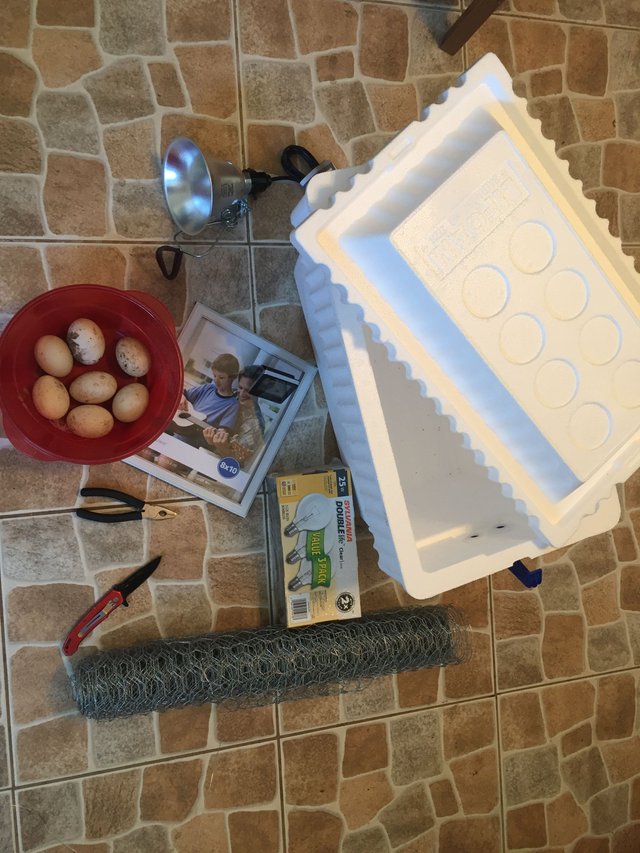
If you choose to build your own I included a photo above with most of the materials you'll need.
Styrofoam Cooler
Lamp
25W bulb
Knife
Mesh Wire (not a large amount 12"x12" square is more than enough)
Wire Cutters
Gloves (I got some pretty nasty cuts because I forgot these)
8x10 picture frame
Humidity Monitor
Thermometer
Small Dish
Sponge
Electric Kettle
Small Fan
Duck Eggs
I used a styrofoam cooler for the body of the incubator because it helps maintain the conditions inside of your incubator.
You'll also need a heat source. I am using a clip on lamp (I removed the clip on feature) with a 75W maximum and a 25W bulb. Generally speaking you don't want too much heat but you could increase your wattage if for example your cooler was larger.
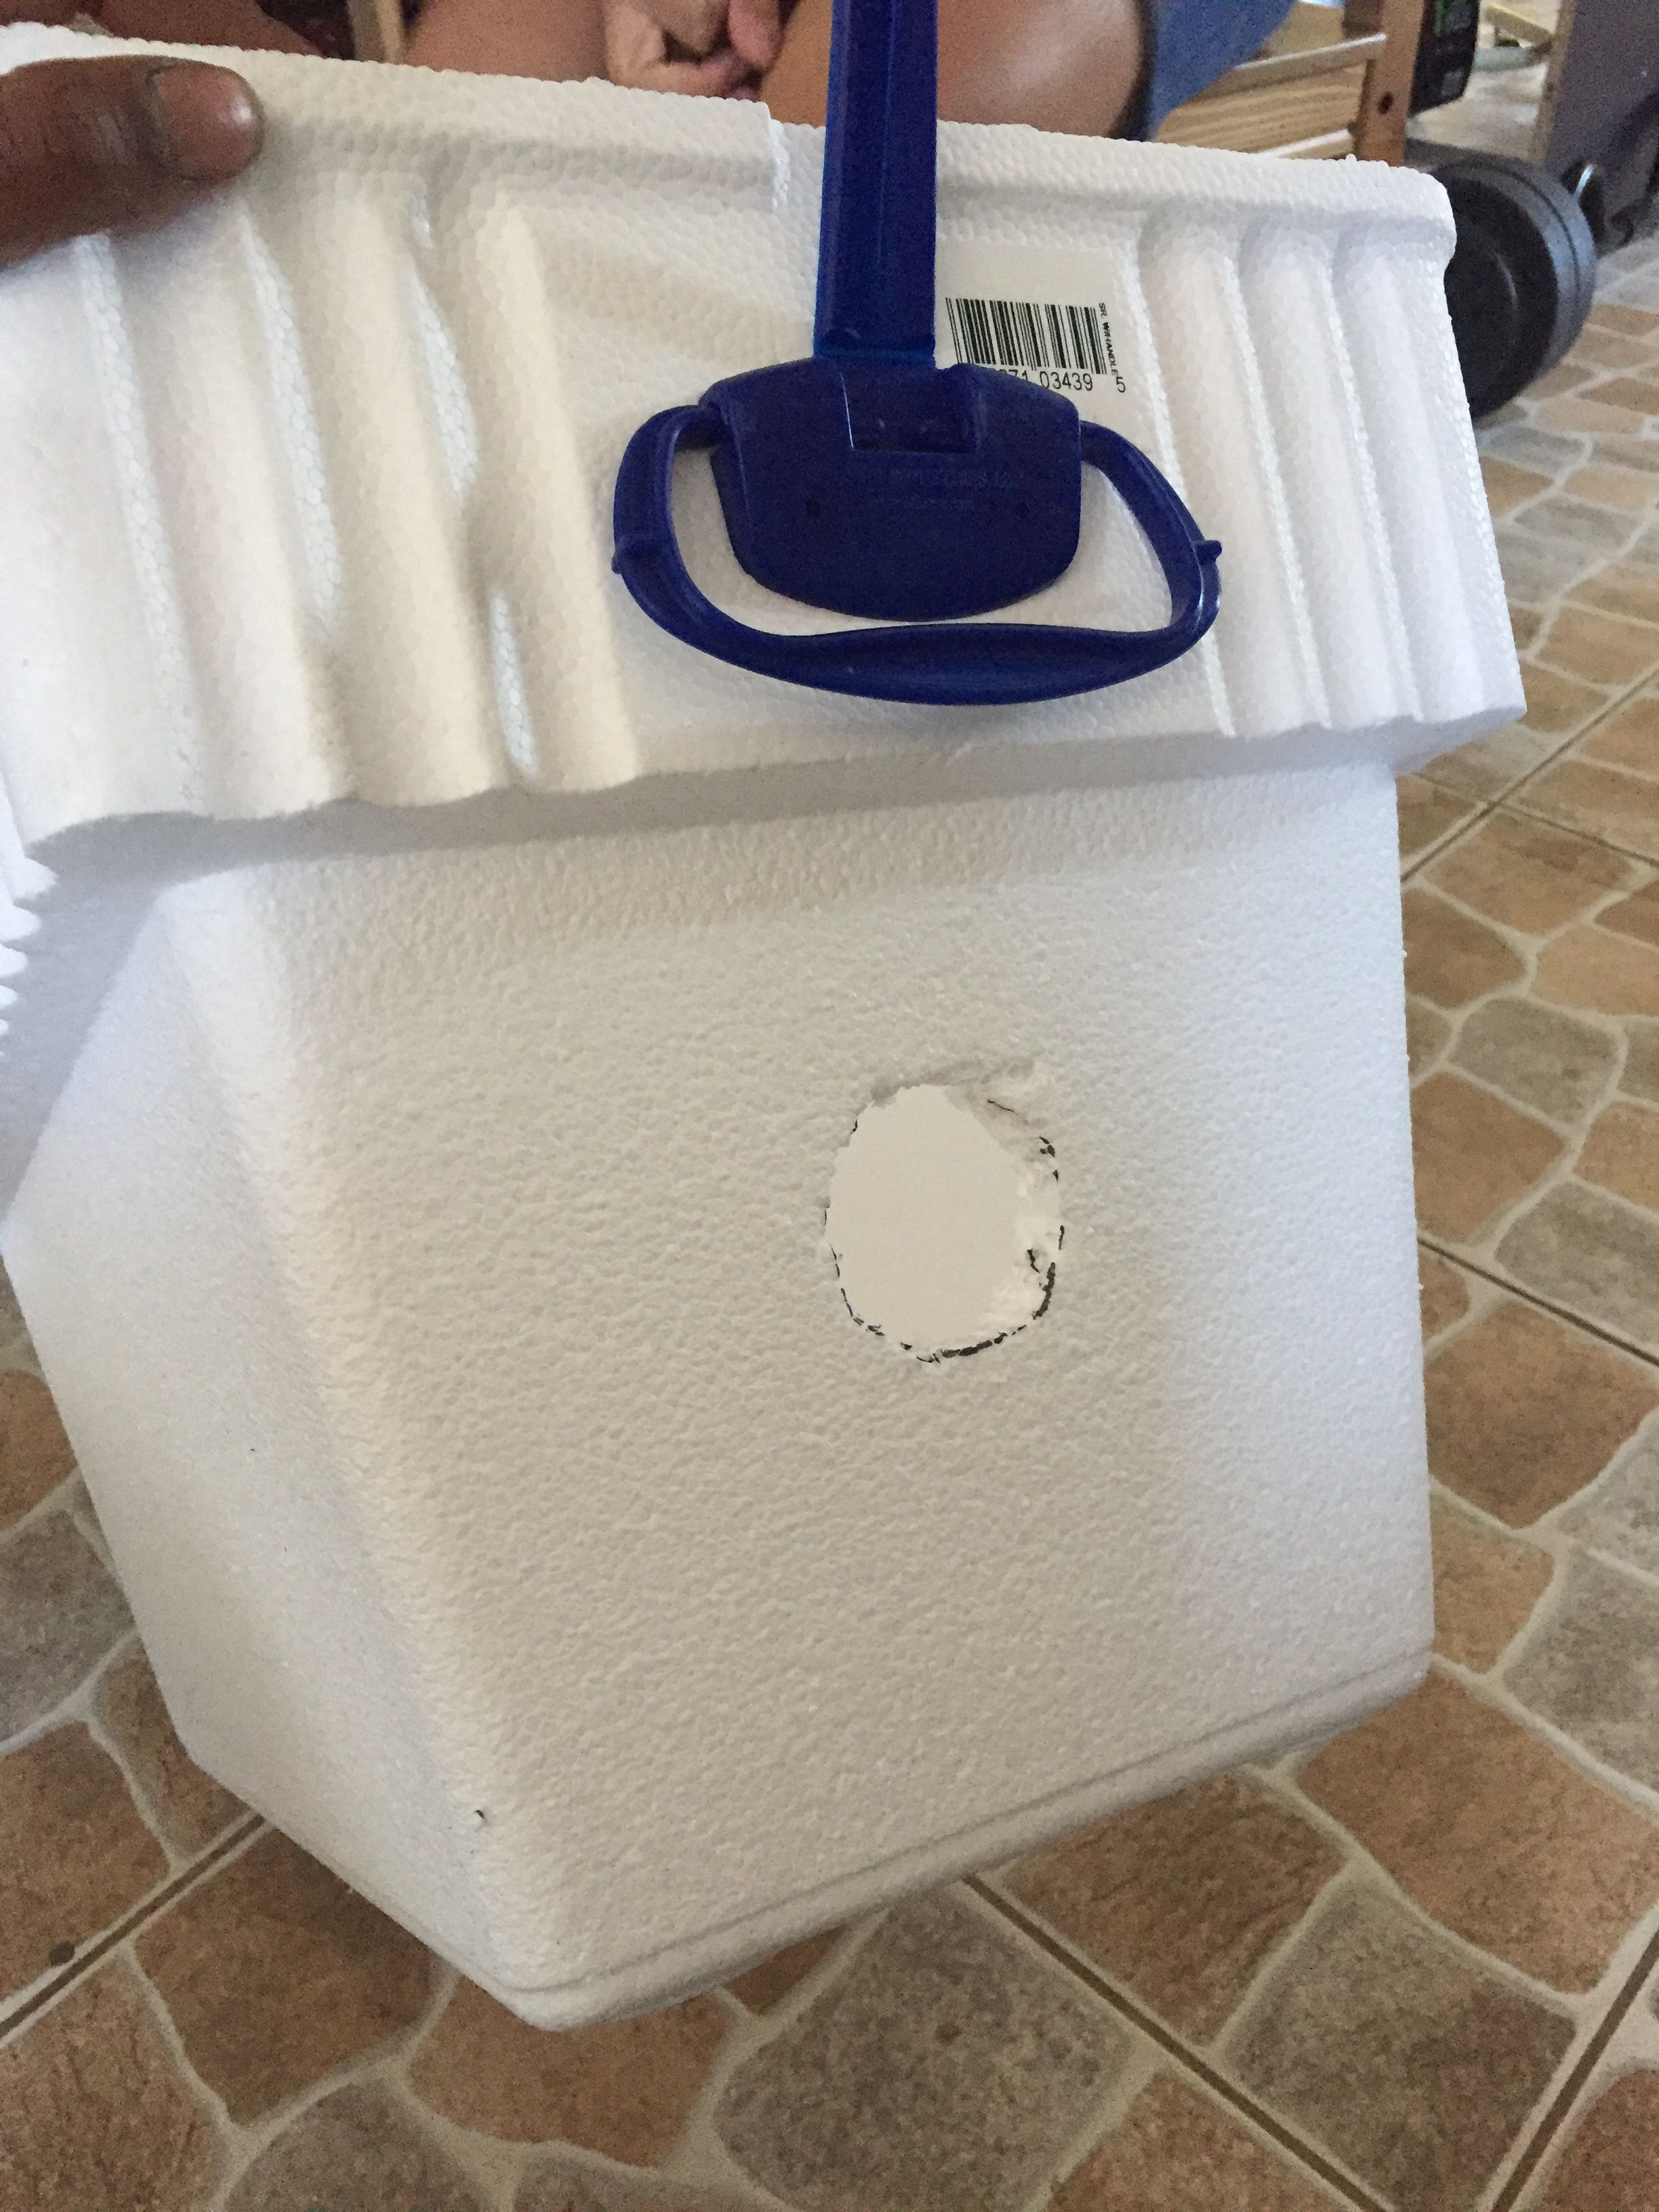
I cut a hole in the side of the incubator that allows the heat lamp to feed through and secure it with Gorilla Tape (shameless plug this stuff is a must have around the house).
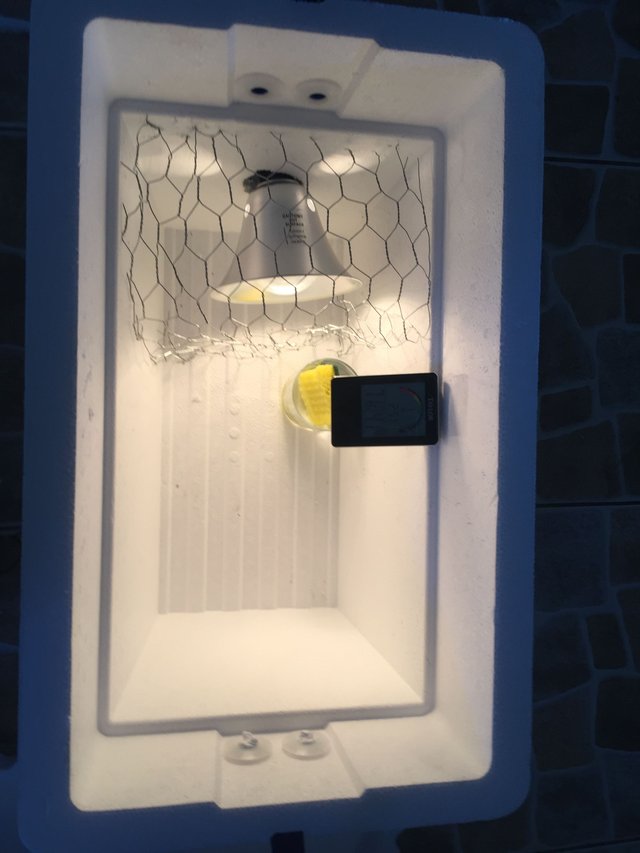
Use the chicken wire to partition the incubator in two, make sure that it is secure otherwise you run the risk of the hatchlings burning themselves. Once your light is secured and blocked off add a dish of water with the sponge to help control humidity. place the thermometer/humidity monitor (get you a gadget that can do both) in the incubator in view of the window.
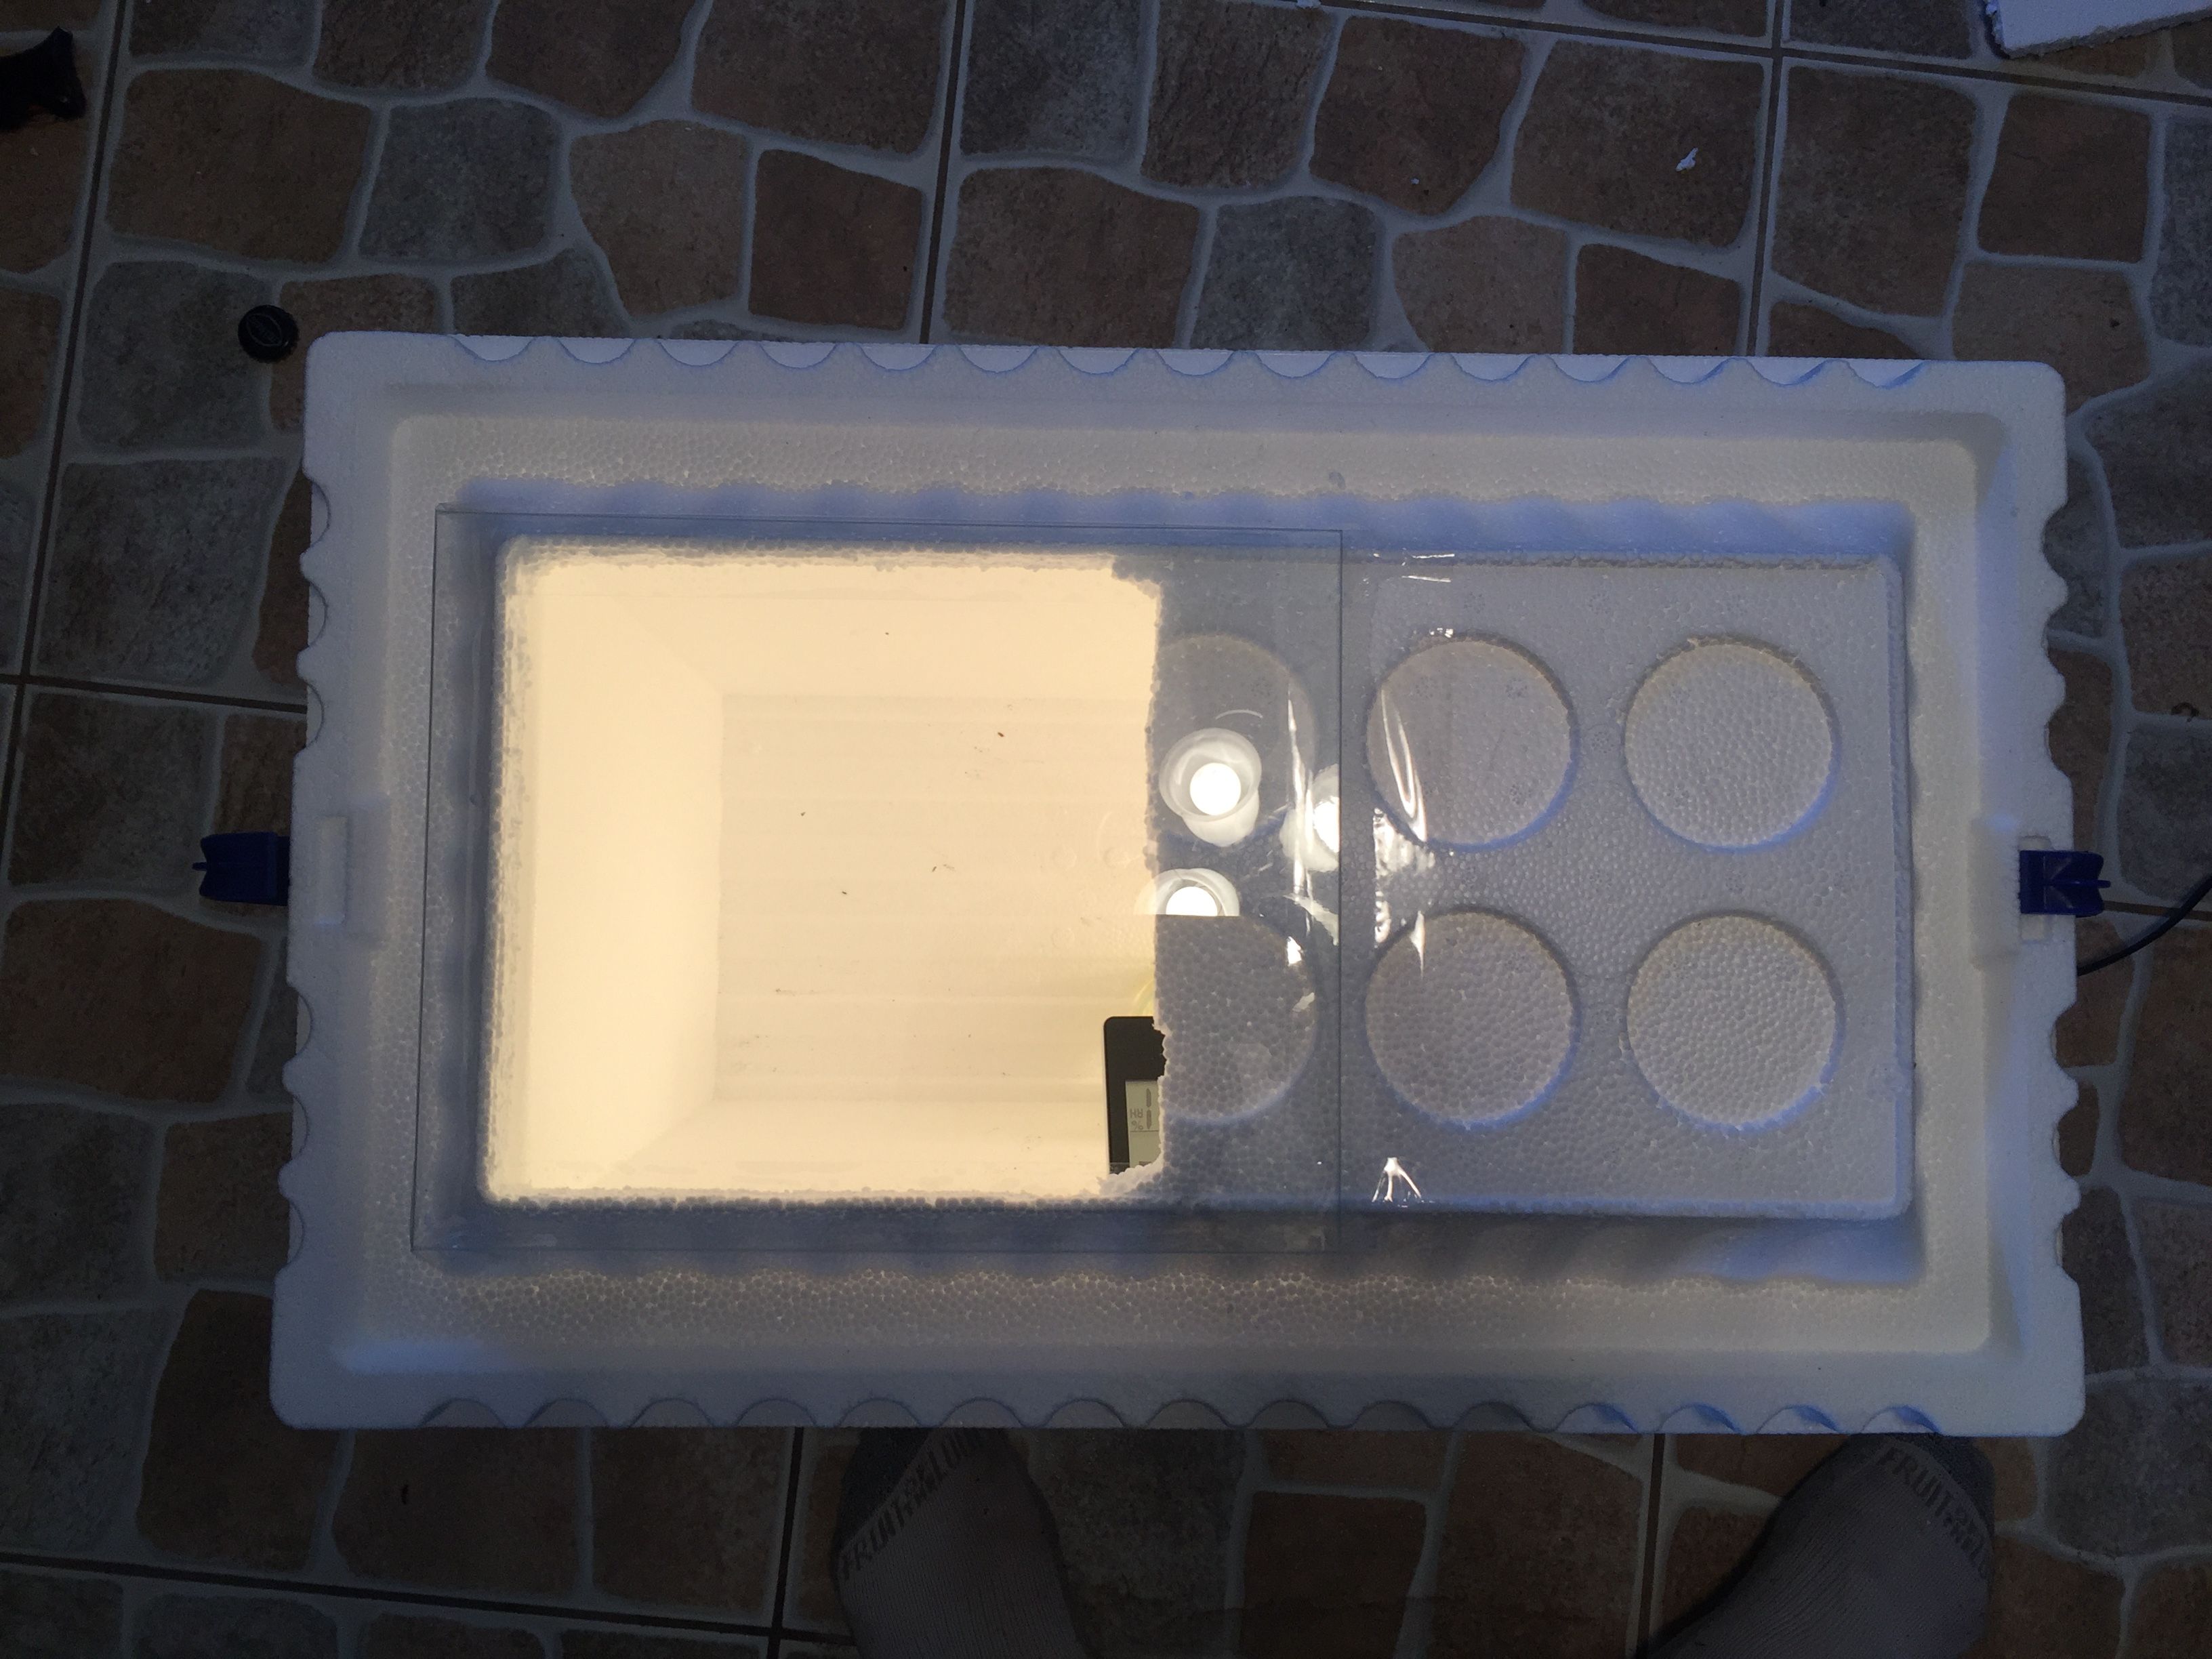
I also cut a hole in the lid (smaller than the 8x10 frame) and fit the glass over the opening. This is so I can monitor the eggs with out releasing hot air.

It is important to keep the eggs at a temperature of 99 degrees Fahrenheit and the relative humidity at 55-58%. It is worse for the eggs to be at a higher temperature for an extended period of time than it is for them to be exposed to lower temperatures.
I have been monitoring the weather in the incubator for the last 24 hours or so. One trick I've used to increase humidity is adding near boiling water using the electric kettle. I also poked holes along the side and a larger one in the top of the cooler(where there are cup holders). I kept the piece and plug the hole up - but it allows me to read the monitors when the glass is too foggy - an obvious occurrence but something I had not prepared for. I also changed the container holding the water to a wider dish. Increasing the surface area I can allow water to evaporate faster. For temperature control the holes serve the same process and you can also use the fan. Just place it next to the holes on the lowest setting but be sure to monitor it closely because it will also affect humidity.
I also plan to add another monitor placed on the bottom so I can get a more accurate reading by averaging the two. Since hot air rises you either want multiple monitors or a lower placement, halfway up the eggs, for the readings to be more precise.
You will want to put the eggs in right after you finish your incubator but it is important to monitor the settings inside for about a day or two. This is important especially overnight because you do want to be able to sleep with confidence. I have been taking notes in a simple chart with columns for: Time, Temperature, and Humidity. I also keep notes on whether or not the fan is on, holes I've plugged or unplugged etc.
I tried to put a lot of information into this post, because I am excited about this project. I focused on the incubator in this post but if you've more information about your own DIY incubators definitely post as well as if you've any questions. My next post will focus on egg care and introducing the eggs to their new home.
Good luck!! Interested in seeing how well it works for you.