Our rocket stove hot tub
For many homesteaders water on demand is a luxury, a tub of hot water to soak in? Nirvana. At Dogwood, we have a well at our house site. The cabin we are living in as we build has a small on demand water system ( I will cover that in another post,so stay tuned) that includes a shower stall and a sink in the kitchen,. So while we are extremely blessed to have a shower, there is nothing quite like taking a long hot soak after you’ve been working all day, which is why we decided to build a wood fired hot tub.
This design is simple and easily finished in a day. We have about $150 in materials.
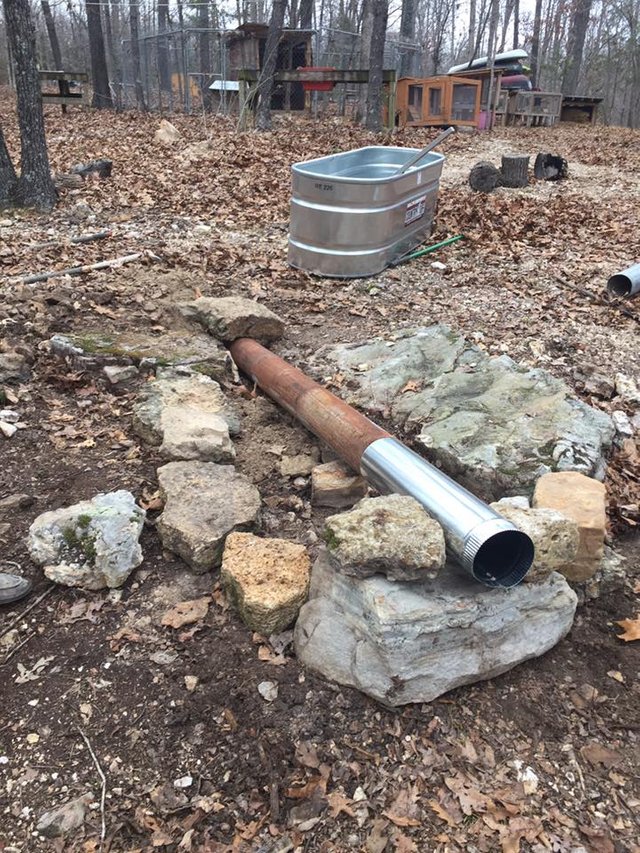
Step 1: Gather materials and tools. We used a 2 X 2 X 6 126 gallon galvanized stock tank ,1 elbow and 6 three foot sections of 6 inch stove pipe. A shovel, a rake, a rock bar and a skid steer were the tools we used, but there are any number of hand tools that could get the job done.
Step 2: Gather rocks and build a foundation a bit larger that your tub.
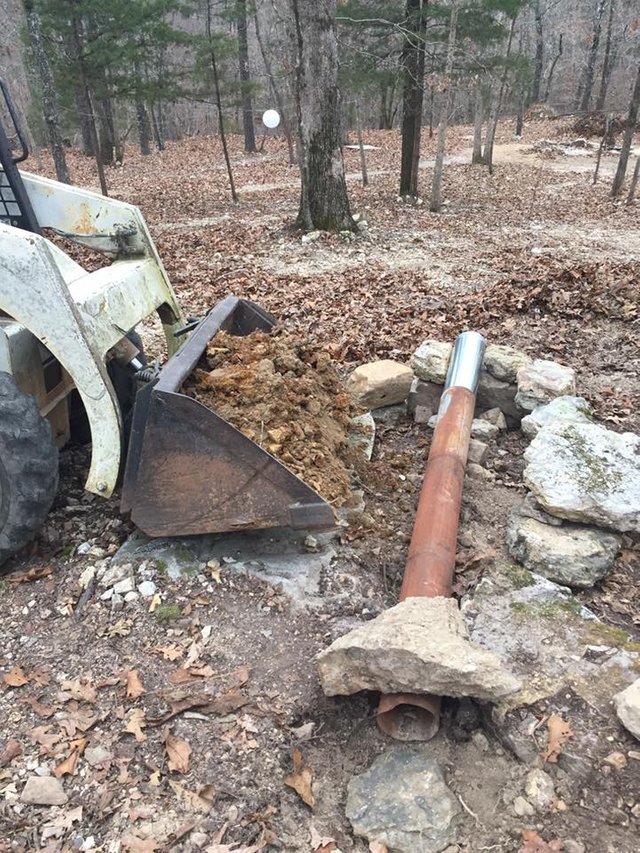
Step 3: Lay sections of stove pipe so that it runs through the middle. Level the pipe, so that your stove will draw correctly. One thing we would change here would be to replace the stove pipe with 8 inch 1/4 wall pipe. This would cut down on heat time and last longer than the stove pipe. 
Step 4: Fill the foundation with thermal mass. In the Ozarks we have plenty of red clay and rock, so thats what we used. Sand, gravel or dirt would work , just keep in mind that each materiel will have different properties. Do your research and plan accordingly. Make sure and pack your fill tightly, less air space equals less wasted energy, fewer hot spots and faster heating time.
Step 5: Attach the elbow and the upright portion of your stove pipe, make sure its high enough to draw well and not blast heat straight into your face. 
Step 6: Place your tub and level it up.
Step 7: Fill er up! It took about 20 min for us.
Step 7.5 This is important!! Cover your tub. We put a yoga mat directly on top of the water, and a tarp over the top of the tub with a rope wrapped round. Doing this will cut your heat time in half.
Step 8: Gather enough fuel to keep your fire stoked. We use a combination of cedar bark, cedar knots and split oak as fuel. Our tub took about 3 1/2 hours to reach a temperature we felt comfortable in, so make sure you have a nice stockpile.
Step 9: Blast off! That don’t call it rocket stove for nothing, when it starts sounding like a rocket you’ll know you did it right!

Step 10: Hop in and enjoy!
The bottom of the tub gets pretty hot, so you may want something to sit on, we just push the yoga mat to the bottom and sit on it.
We were doubtful at first that this design would be very efficient,the tub isn’t insulated, and we speculated that the cool air temperature ( it was in the low 40’s F ) would sap the heat. There is a small percentage of heat loss, but with such a large thermal mass beneath it, it does not seem to make a difference. The first night we used our tub, we stayed in it about 30 min, stoked the fire and left to have dinner with friends. It was 4:00 when we left and when we got back at 9:30 it was TOO HOT to get in!
The next day, we added a few aesthetic and functional changes. We added more rock to our foundation, both to add mass and to cover up they clay, and we are going to add sand to the top of the clay. I peeled the stickers off the side of the tub , and I’m thinking of painting a mandala on it. We placed a cedar stump behind he tub and very close to it to use as a table. There are two more stumps in the front to use as stools, and we are going to drive a cedar post into the ground nearby for hanging robes and towels on. Finally, we ran a string of solar powered lights around a nearby tree, since night is our favorite time to have a soak.
We were in the tub again tonight and the air temp is 38 F, after a 4 hour fire the temp in the tub was 101 F.
For us this design was a huge success, hopefully it will be for you too. Thermal mass for the win!

The thermal mass heats up and transfers the heat to the tub?
I think we could make that work indoors, a rocket stove to heat the main part of the house and the thermal mass under the bath instead of a bench?
Yes, it should work well, just keep in mind you'll need some lead time for a hot bath!
You made this look ridiculously easy! I am totally going to try this! Thanks for sharing!
It really was ridiculously easy! Can't wait to see how yours turns out.
Great build guys! I always talk about taking a soak out under the trees! Looks like a win.
Thanks, we are really enjoying it!
This post has been voted on from MSP3K courtesy of @torico from the Minnow Support Project ( @minnowsupport ).
Bots Information:
Join the P.A.L. Discord | Check out MSPSteem | Listen to MSP-Waves
This post has been resteemed from MSP3K courtesy of @torico from the Minnow Support Project ( @minnowsupport ).
Bots Information:
Join the P.A.L. Discord | Check out MSPSteem | Listen to MSP-Waves
Love this idea!! Thank you!!
Sweet set up and great execution on the design. Well done!
Thank you! We sure have been enjoying it!
Love it! This is in my future plans on my homestead for sure thankyou for sharing :)