Jamie Learns Tricks
... about markdown and embedding photos from Flickr. Sharing one of them with you today! *disclaimer: I am not a programmer, there might be a simpler way to do this, but this is one way that I stumbled upon. I know just enough to be dangerous.
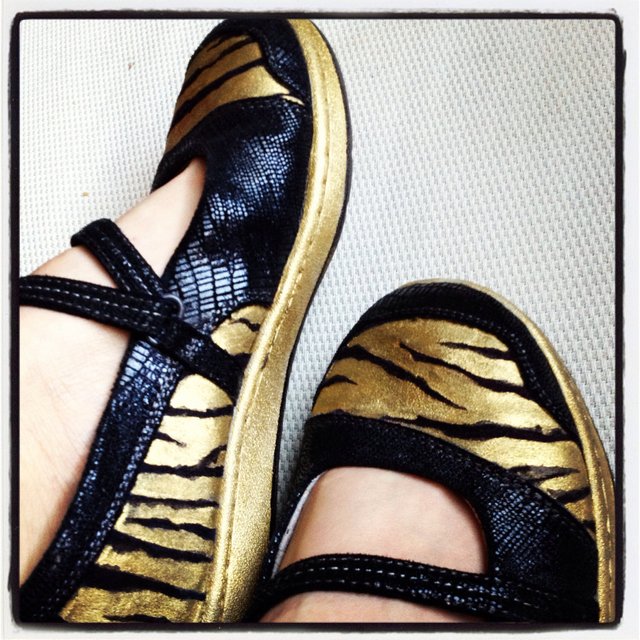
(Oh--- and by the way, this is a pair of Sketchers shoes that I painted gold. )
When I found out you had to HOST your Steemit photos elsewhere , I'm like "Okay, I already have an Imgur account, I'll just dig through my photos, edit them, then upload them to Imgur, then figure out which 'share' link to copy, then paste the link to the Steemit draft."
...
Today I realized that this was neanderthal of me.
I already have a TON of photos in my Flickr account. And Flickr already has a "Share" icon with options. I thought "IS THIS TOO GOOD TO BE TRUE??"
Turns out it works perfectly fine, with some adjustments. As of now. I know Steemit is probably going to go through a lot of awesome changes as the community evolves. So if the image here suddenly turns into "IMAGE NOT FOUND" you'll know that we are movin' on up to better and brighter days 'round here.
Below is my photo tutorial with notes.
First log into your Flickr account, of course.
The photo that you want to put on to Steemit will have to be publicly accessible (at least, that's the way I interpret it), so if you want to use separate accounts for different photo purposes, you may want to consider your various photo storage options.
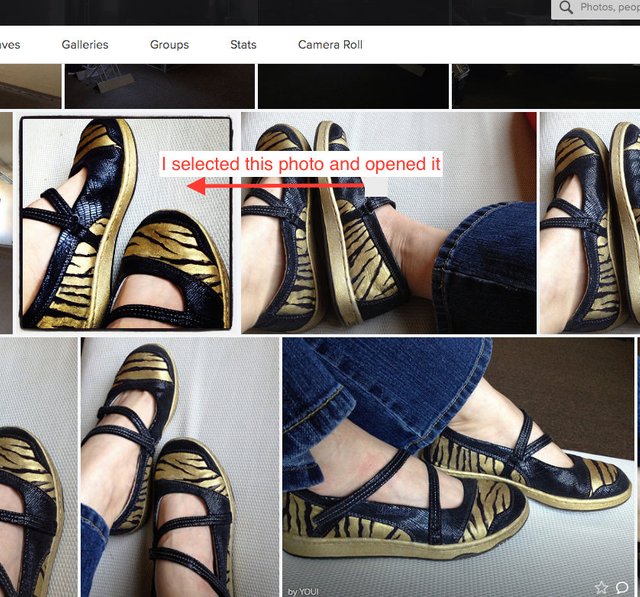
Step ONE: Select the photo that you wish to upload to your Steemit post.
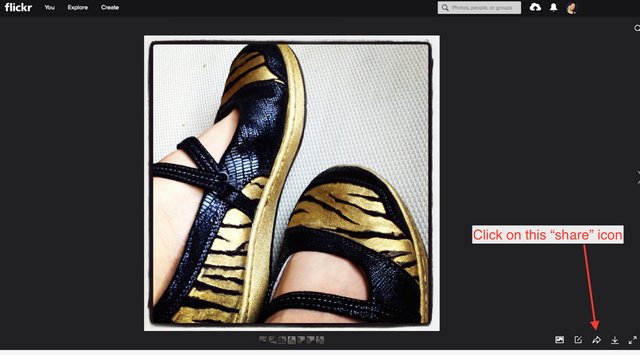
Step TWO: Click on the 'share arrow' at the bottom right of the screen interface.
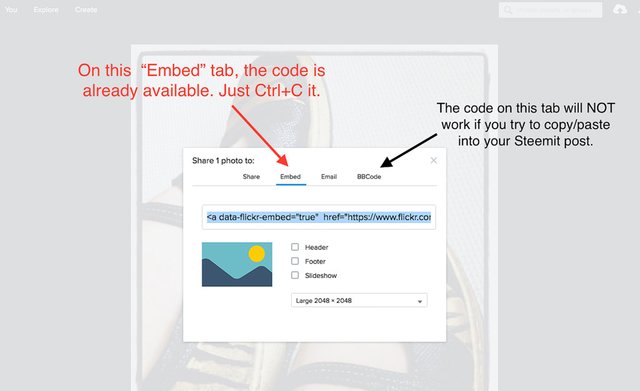
Step THREE: Copy the code that it offers in the box.
...If you care about the final size of the image, and you have not already MANUALLY resized your image to the perfect ratio, you can select a preset now. Personally, I always choose a large size under the assumption that Steemit will downgrade the width of the photo to fit into the maximum width of the post allowance. Tiny photos suck!!
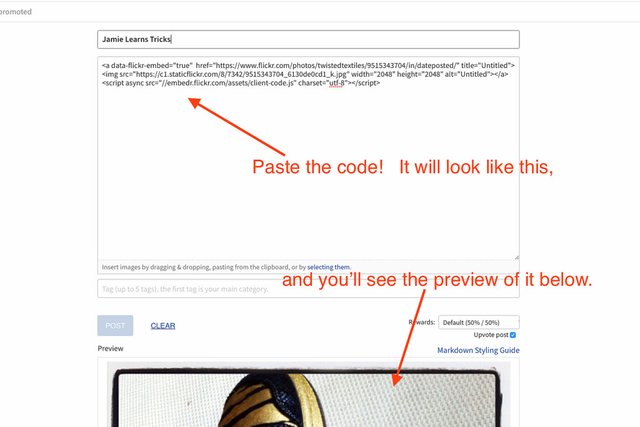
Step FOUR: Paste the copied code into your post.
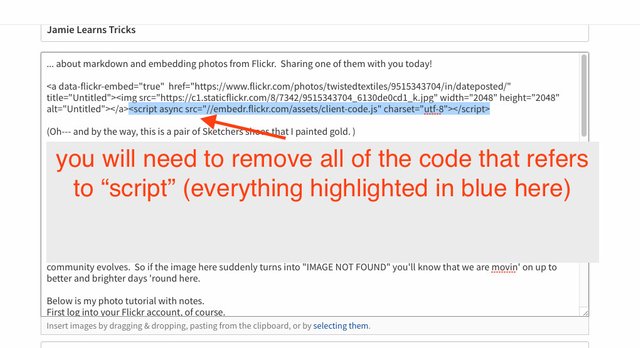
Step FIVE: Remove part of the end of the code that you've pasted. This was an irritating step that I discovered at the last minute, because the preview showed the photos perfectly fine with that bit of code. When I clicked "post" I received a Steemit error that told me to remove the code. So I removed it and crossed my fingers.
I really enjoy browsing around Steemit and connecting with people, but I think I'm having JUST as much fun researching new ways to use this basic interface. I mean, lets face it. The user interface here is ... frugal. But I love a challenge, and I love teaching myself new stuff. So I thought y'all might find this tip helpful.
PS: I also searched for a Markdown Tips page (link below) to teach myself a tiny bit about html codes, because my initial steps "list" was not working. I gave up doing a numbered list for now, but will research it and get it right soon. (I LOVE LISTS! Need them!!) --- So much fun stuff to learn, down the road.
https://github.com/adam-p/markdown-here/wiki/Markdown-Cheatsheet#emphasis
