How to install a U part wig?
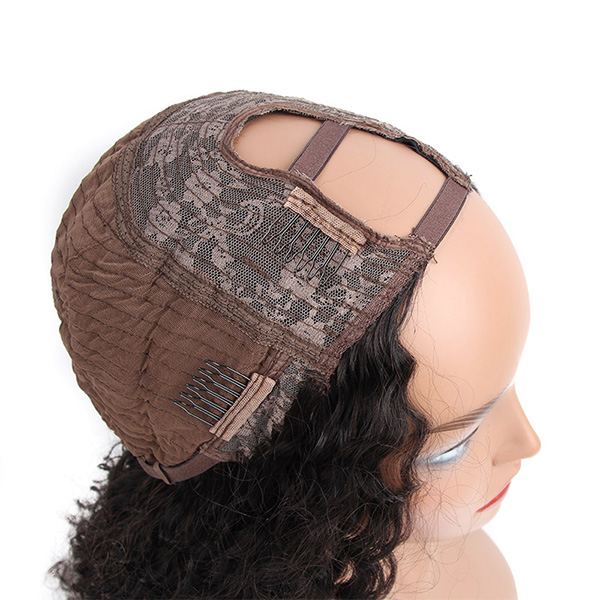
U-part wig is a type of wig that features a U-shaped opening at the top, creating a natural parting area. This opening allows you to leave out a section of your own hair, creating a seamless and realistic look.
It belongs to human hair wigs. It’s characteristic is that it does not have a hairline or lace part, and needs to use his own hair part to create a hairstyle.
Let’s learn more about how to install a U part wig.
How to install a U part wig?
Installing a U-part wig involves several steps to ensure a secure and natural fit. Here's a detailed guide:
Materials Needed: U-part wig, hair comb, wig cap (optional), hair clips, bobby pins, hair glue or adhesive (optional), scalp protector (optional), rat tail comb
Instructions:
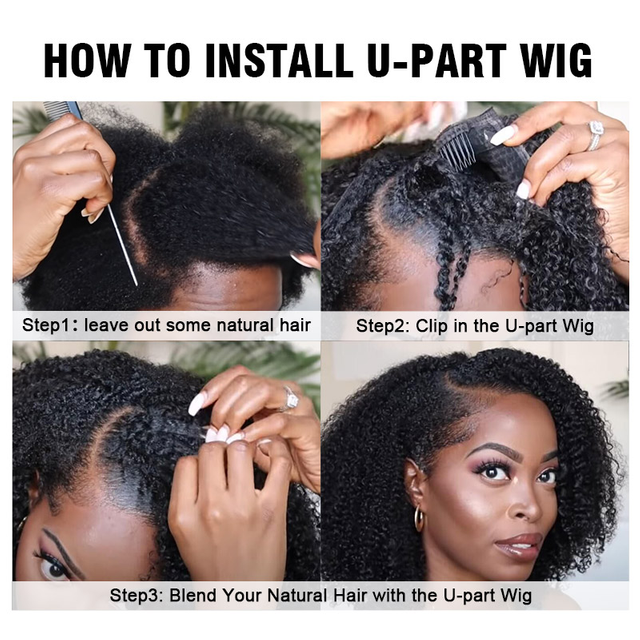
- Prep Your Hair: Wash and condition your hair as usual. Let it dry completely. You can also flat iron or curl your hair to match the wig texture.
- Section Your Hair: Use a rat tail comb to create a clean U-section on your scalp. The U-section should be wide enough to fit the U-part wig and should be positioned where you want the wig to part. You can use hair clips to secure the rest of your hair out of the way.
- Apply Scalp Protector (Optional): If you're using hair glue or adhesive, apply a scalp protector to the U-section to prevent irritation or damage.
- Apply Hair Glue or Adhesive (Optional): If desired, apply a thin layer of hair glue or adhesive along the edges of the U-section. Allow it to dry slightly until it becomes tacky.
- Position the Wig: Place the U-part wig on your head, aligning the U-section with your own U-section. Make sure the wig is centered and the parting is in the desired location.
- Secure the Wig: Use bobby pins to secure the wig to your hair along the edges of the U-section. Start from the front and work your way around to the back.
- Adjust the Wig: Adjust the wig as needed to ensure a comfortable and secure fit. You can also use hair clips to further secure the wig if necessary.
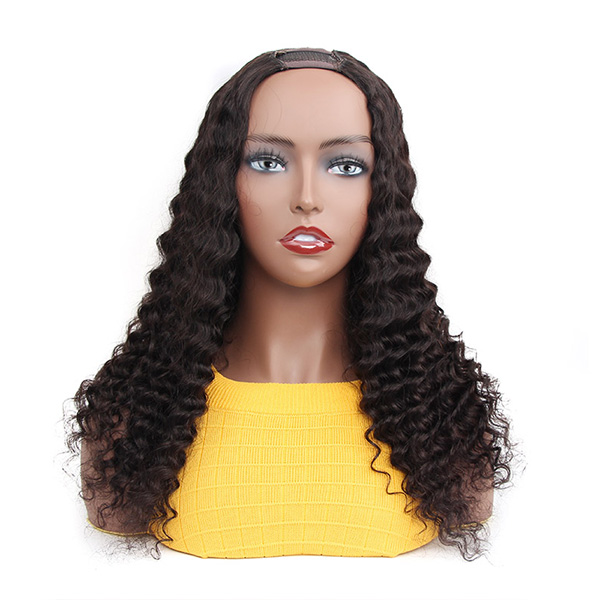
- Style the Wig: Style the wig as desired. You can use a comb, brush, or styling products to achieve your desired look.
- Finish the Look: Use a hairspray or shine spray to finish the look and keep the wig in place.
Tips:
- Practice makes perfect. The first time you install a U-part wig might take some time, but with practice, you'll become more efficient.
- Choose a wig that complements your face shape and style.
- Use a wig cap to create a smooth base for the wig and prevent hair from showing through.
- Regularly clean and care for your wig to keep it looking its best.
- Consider using a scalp protector to prevent irritation or damage.
Remember, the key to a successful U-part wig installation is to take your time and be patient. With a little practice, you'll be able to achieve a natural and beautiful look. If you want to wear a wig more quickly, then I recommend you to choose our glueless wigs. It is also very popular because of its ease of wearing. You can try it.