Superlative Guide to Export IMAP to PST File
Occasionally creating a backup of your IMAP account database can help you avoid experiencing data loss problems. Thus, we'll go over how to easily export IMAP to PST Outlook 2019, 2016, 2013, etc. in the next section. With the aid of a common question that consumers these days ask, let's examine the procedure.
IMAP represents Web Message Access Convention and there are numerous Webmail accounts who involves IMAP Server for information synchronization. However, in the event that you need to trade IMAP messages to Standpoint, then there are a few difficulties that you can confront. Additionally, a few specialized procedures are accessible yet they should be carried out appropriately and under master direction. Likewise, there are a few unique arrangements that can cause information misfortune and information debasement too.
It is therefore preferable to choose a solution that ensures a correct and efficient export of an IMAP account to Outlook in order to prevent such situations. Try the sophisticated and effective IMAP to PST Export Tool, which enables you to add numerous IMAP accounts and export each one's mailboxes to Outlook at the same time without experiencing data loss issues.
How to Product IMAP to PST in a Simple Manner?
Stage 1. Download, send off and introduce IMAP to Viewpoint Device on Windows.
Stage 2. Click on Add Record button to add various IMAP records and snap Straightaway.
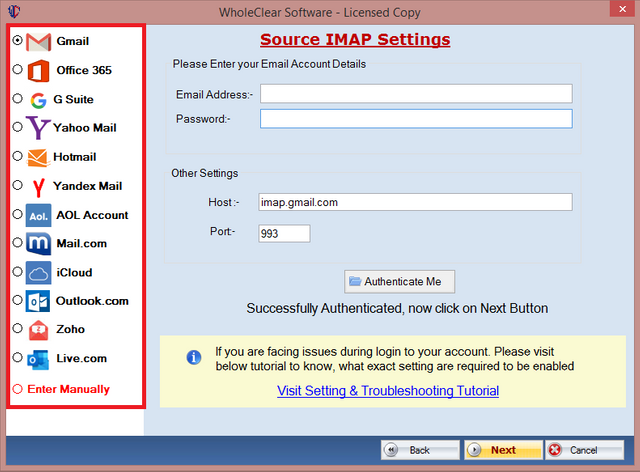
Stage 3. Enter IMAP Server subtleties - Email Address, Secret key, IMAP Host and IMAP Port Number. Click Validate. Programming will check the subtleties and shows the message once it gets finished "Record verified effectively". Click alright to continue.
Stage 4. All confirmed records will show up on the screen. Click Straightaway.
Step 5: The tool will now load folders connected to the account along with checkboxes on the left pane. Utilise them in the process of selected export.
Step 6: Select PST from the menu that appears by going to Select Saving Options.
Step 7: Choose the PST file's sub-options, such as Filters, Destination Path, and Create Separate PST for Each User.
Step 8: Finally, click Backup to initiate the export procedure. "Process Completed Successfully" will be the message that shows on the screen when it is finished.
To go out, click the OK button. The application will then immediately produce an export process log report in a TXT file. All the export information, including the item count, destination path, and saving choice, will be displayed.
How can I export several IMAP accounts from Outlook to a PST file for conversion?
Stage 1. Run IMAP to PST Device on Windows
Stage 2. Click on Add Record button to add IMAP account.
Stage 3. Give IMAP subtleties - Email Address, Secret word, IMAP Host and IMAP Port Number. Click Confirm.
Stage 4. Whenever account is confirmed, message will show up "Record Validated Effectively".
Stage 6. Presently, you can see every one of the additional records on the product screen. Click Straightaway.
Stage 7. Programming begin stacking IMAP letter boxes on the left sheet.
Stage 8. Explore to Choose Saving Choice and pick PST from the rundown.
Stage 9. Set other PST choices like Channels, Make Separate PST per client and Objective.
Stage 10. Click Reinforcement button to begin the bunch relocation..
End
IMAP to PST Device is an easy and efficient email reinforcement answer for all clients who needs to send out different records on the double. You can attempt the product by utilizing the free demo adaptation that permits to send out initial 25 records from every organizer liberated from cost. By using it, you might get the thought along with experience of programming working and elements.
Read more :- https://www.wholeclear.com/backup/imap-to-pst/