20171205 / 매지카복셀을 이용한 복셀 모델링 강좌 2 – 매지카복셀 알아보기 1
이제부터 매지카복셀의 기능을 설명할텐데요.
From now on, I will explain the function of MagicaVoxel.
자주 사용하는 기능만 배워보도록 합시다.
Let's try to learn the functions that we use frequently.
우선 팔레트 탭에 대해 알아봅시다.
Let's find out about the palette tabs first.
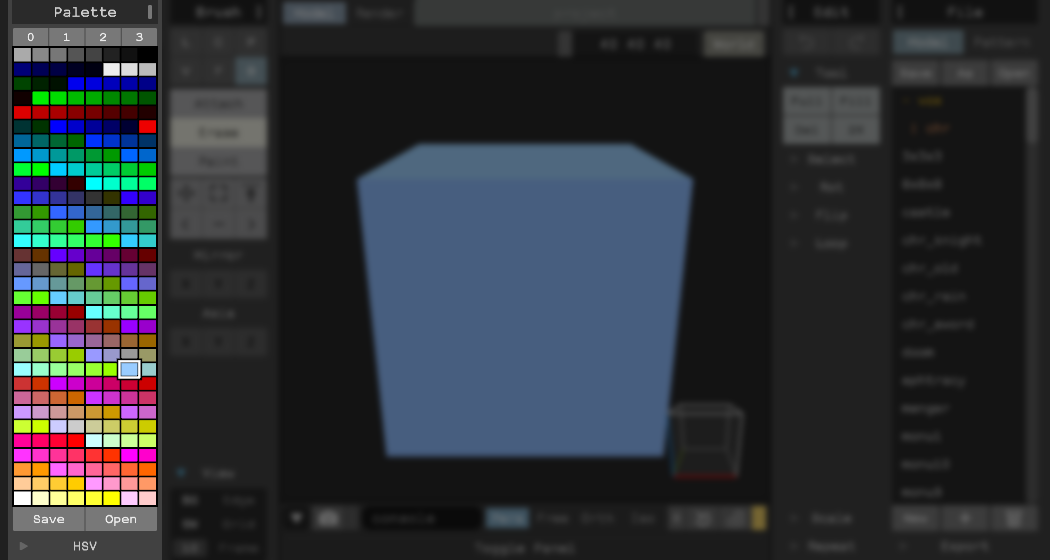
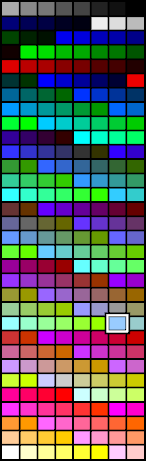
팔레트 탭은 위 사진과 같이 이루어져 있습니다.
The palette tabs are made up of the above pictures.
- 팔레트 탭 닫기 / 열기 (Close / Open the palette tabs)

Palette 버튼을 클릭해서 팔레트 탭을 닫고 엽니다.
Click the Palette button to close and open the Palette tab.
- 팔레트 불러오기 (Load the palette)

버튼을 클릭해서 이미 설정되어있는 팔레트를 불러옵니다.
Click the button to call up the palette that is already set.
0 : 기본 팔레트 (Basic Palette)
1 : 파스텔 톤 팔레트 (Pastel tone palette)
2 : 흑백 음영 팔레트 (Black Palettes)
3 : 회색 팔레트 (Gray Palettes)
- 색 선택 (Color selection)
사용하고 싶은 색을 클릭해서 색을 선택합니다.
Click the color you want to use to select the color.
- 팔레트 저장 (Save the palette)

Save 버튼을 클릭해서 변경한 팔레트를 저장합니다.
Click the Save button to save the changed palette.
- 팔레트 열기 (Open the palette)

Open 버튼을 클릭해서 팔레트를 엽니다.
Open the palette by clicking the Open button.
- 사용자 지정 색 만들기 (Create Custom Color)
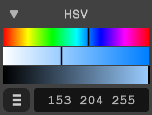
사용자 지정 색을 만듭니다.
Creates a custom color.
화살표 버튼으로 열고 닫을 수 있으며, RGB 방식과 HSV 방식으로 만들 수 있습니다.
It can be opened and closed with the arrow buttons, and can be made using RGB mode and HSV.
그 다음은 브러쉬 탭입니다.
Next is the Brush tab.
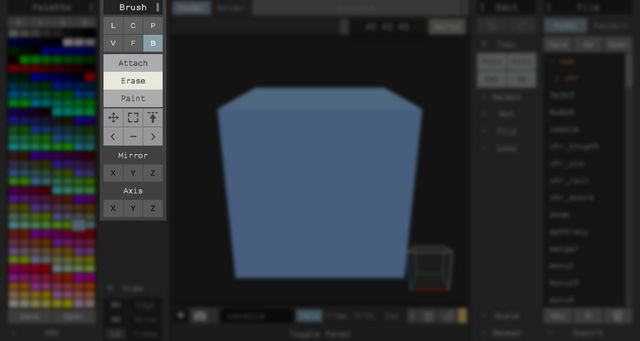
브러쉬 탭은 위 사진과 같이 이루어져 있습니다.
The Brush tab is made up of the above pictures.
- 브러쉬 탭 닫기 / 열기 (Close / Open the brush tabs)

Brush 버튼을 클릭해서 브러쉬 탭을 닫고 엽니다.
Click the Brush button to close and open the Brush tab.
- 모드 선택 (Mode selection)

버튼을 클릭해서 적용될 공간을 선택합니다.
Click the button to select the space to be applied.
L : 처음 클릭한 부분부터 마우스를 뗀 부분까지의 선에 사용됩니다.
L : Used for the line from the first part to the mouse apart from the mouse.
C : 처음 클릭한 부분을 중심으로 마우스를 뗀 부분까지를 반지름으로 하는 원에 사용됩니다.
C : Used in a circle with a radius of one-half the first part of the mouse.
P : 불러온 패턴이 사용됩니다. 자세한 사용법은 후에 설명할 예정입니다.
P : The imported pattern is used. Further instructions will be discussed later.
V : 클릭한 복셀의 한 면에 사용됩니다.
V : Used in one side of the clicked voxel.
F : 클릭한 면에 사용됩니다.
F : Used on the clicked side.
B : 직육면체에 사용됩니다.
B : Used in a rectangular body.
이 모드들은 모두 '선택한 면' 을 기준으로 사용됩니다. 한 복셀에 사용하더라도 선택한 면에 따라 모양이 다르게 만들어집니다.
These modes are all used by the 'selected side'. Even though it is used for one voxel, it is shaped differently depending on the selected side.
- 적용할 효과 설정 (Set effect to apply)

적용될 효과를 설정합니다.
Set the effect to apply.
Attach : 복셀을 배치합니다. 배치되는 복셀의 색은 팔레트에서 선택된 색입니다.
Attach : Place the voxels. The color of the voxel is chosen in the palette chosen by the palette.
Erase : 복셀을 제거합니다.
Erase : Remove the voxels.
Paint : 복셀을 색칠합니다. 색칠되는 복셀의 색은 팔레트에서 선택된 색입니다.
Paint : Color the voxel. The color of the voxel is chosen in the palette chosen by the palette.
- 범위 선택 (Range selection)
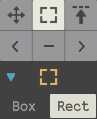
마우스를 클릭 후 끌어서 범위를 선택합니다.
Click and drag the mouse to select the range.
Box : 직육면체 형태의 범위를 선택합니다.
Box : Select the range of the rectangular shape.
Rect : 현재 바라보는 시점을 기준으로 사각형의 범위를 선택합니다.
Rect : Select the range of squares based on the point at which you view the current view.
- 빠른 색 선택 (Quick color selection)
클릭한 복셀의 색이 팔레트에 선택됩니다.
The color of the selected voxel is chosen in the palette.
- 빠른 복셀 제거 (Quick voxels with fast voxels)
클릭한 복셀의 색을 가진 복셀들을 모두 제거합니다.
Remove all voxels with the color of the voxels that have been clicked.
- 빠른 색 변경 (Quick color change)
클릭한 복셀과 같은 복셀의 색을 팔레트에 선택되어 있는 색으로 변경합니다.
Change the color of voxels, such as voxels that you clicked, to the palette selected in the palette.
다음 강좌는 에딧 탭과 파일 탭에 대해서 알아보겠습니다.
The following course will learn about the Edit tab and the File tab.
읽어주셔서 감사합니다.
Thank you for reading it.