Four is the magic number! The four basic operations of 3D modeling
As mathematics, also 3D modeling has its own basic operations, which are almost the same, no matter what software you work with. There are four main operations you have to master in your journey from newbies to experts.
Let's start with their names; I'm talking about extrude, revolve, sweep and loft. There are other features available in parametric modeling softwares, of course, but those four are the basic ones.
1. EXTRUDE
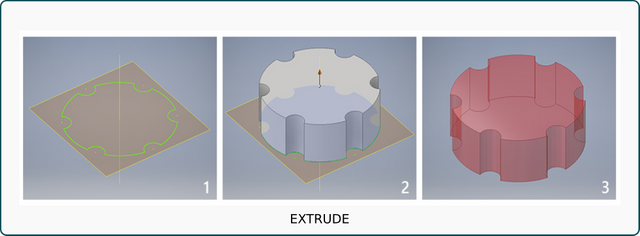
Let's start from the easiest one: extrusion! Its name comes from the same operation used in manufacturing. The peculiarity of extruded objects is a constant section (like in cylinders, cubes and prisms in general). What does it mean? Imagine to cut a cylinder into slices along its length, just like a carrot. All the slices – or sections – share the same diameter.
Extrude operation requires a 2D sketch – the constant section, which can be either a closed or an open profile (the first one creates a solid, the second one a surface) - a vector as direction (it is perpendicular to the plane where the profile was sketched on) and a measure as height.
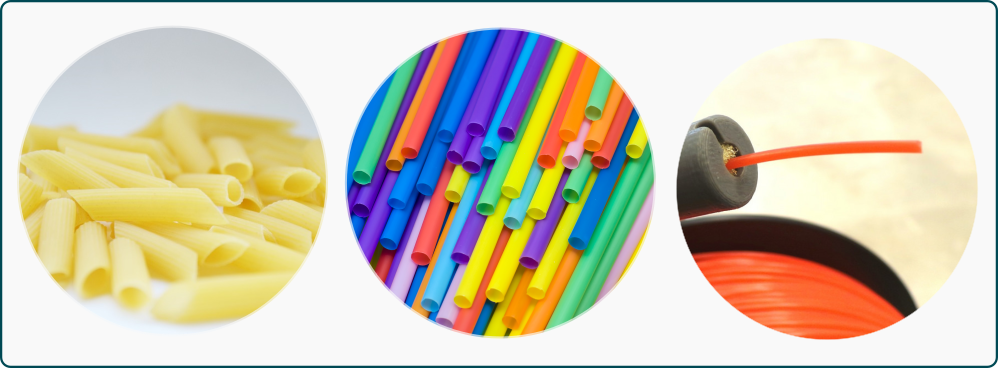
Some pipes, filaments for 3D printers and some shapes of pasta are actually manufactured with extrusion machines.
2. REVOLVE
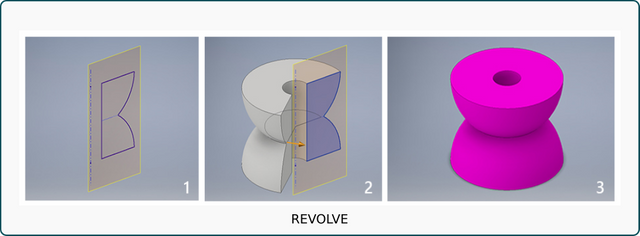
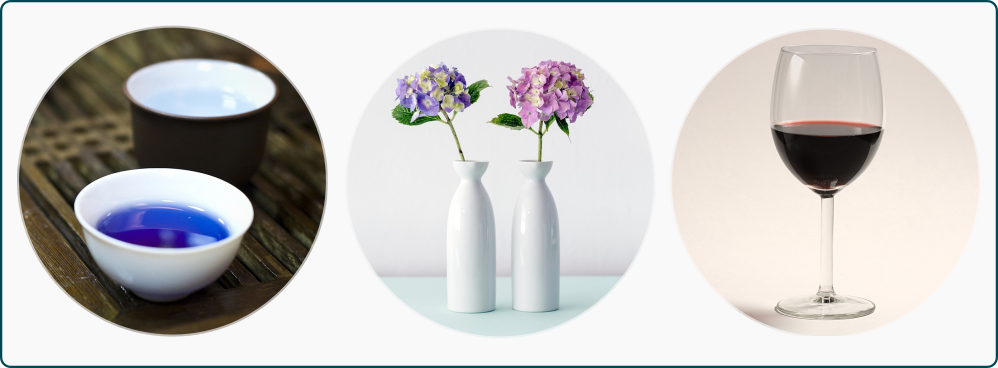
In geometry a revolved surface is created by a curve (profile) rotating around a line (axis). The same definition is valid for 3D modeling too. A good example is a donut: you can create a donut-shaped solid by revolving a circle around a central axis; also a cylinder, as well as spheres, cones and so on. Many everyday things can be modeled by revolution, some examples are bottles, glasses, vases, plates, mugs (without handle!), bowls and so on.
Revolve operation requires a 2D sketch as section – it can be either an open or a closed curve – a line as axis and an angle between 0° and 360° - partial or full revolution.
3.SWEEP
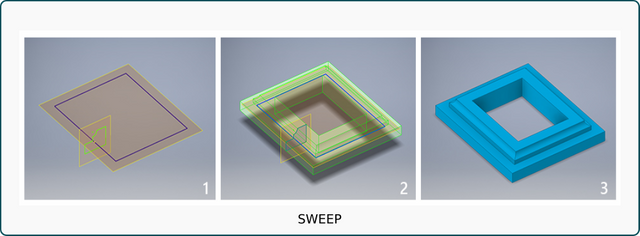
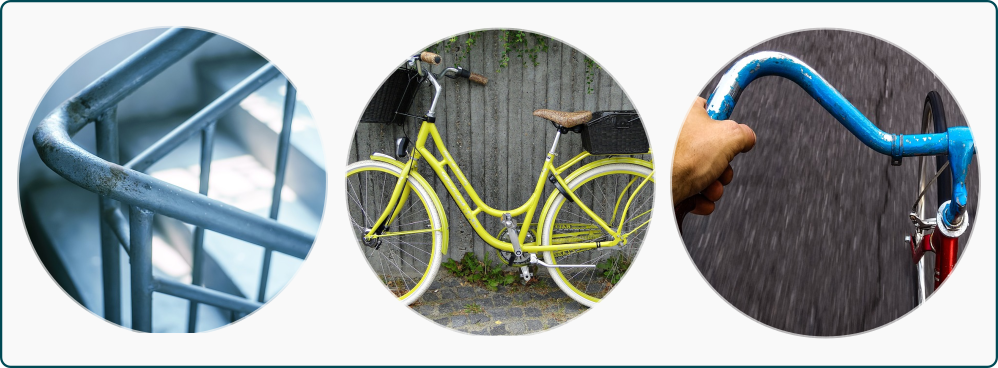
Sweep operation is an extrusion along a path. Every continuous curve can be a path (a line, a square, a spline, an arc, a circle, etc.). An example of sweep is a picture frame: it has always the same section. Also handrails and some part of bycicles can be modeled using the sweep
Sweep requires a 2D sketch as section and a curve as path; the section can be either a closed or open profile (solid/surface resulting object).
4.LOFT
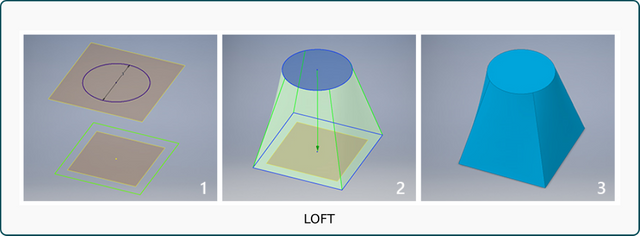
Loft operation is more complex; it creates a “transition” solid or surface, interpolating many cross sections one after another in a specific order. The word “loft” comes from shipbuilding techniques, think about how ships hulls are made, using sections and planking. What everyday things can we model using lofts? There are many, like handles for a door, a pot or a mug; the ergonomic grip of a toothbrush; the plastic shell of an hair dryer, even a plane!
A loft requires at least two (or more) suitable profile curves as sections, lying on different planes; depending on the section shapes, the result may be a solid body or a surface.

These four operations are all based on sketches, they are, properly speaking, “sketch-based features”.
There are some additional options for each feature, like control curves for loft and sweep and the taper for extruded objects. I will talk about those options in detail in the the future posts, for now feel free to practice a bit on the basic operations in the software that you prefer. I suggest you to have a look at Autodesk Inventor and Fusion360, because I am planning to post some tutorials using these two softwares.
The four basic modeling operations allow us to create a new object from sketches but also to modify existing ones by adding or subtracting volume to them (boolean operations). What?!
Don't worry, my next post will cover boolean operations, I will explain you how to add and remove volume after the creation of a basic model.
Thanks everyone for reading this post, stay tuned for the next one!
Note: all the images in this post were created by the author using original material or images found on google and labeled as freely reusable.
If you want to know a bit more about 3D parametric modeling, you might be interested in reading my previous posts (they provide an introduction to this modeling approach):