Making An Album Cover Ourselves // PART 4 // Photoshop
Part 4
Photoshop
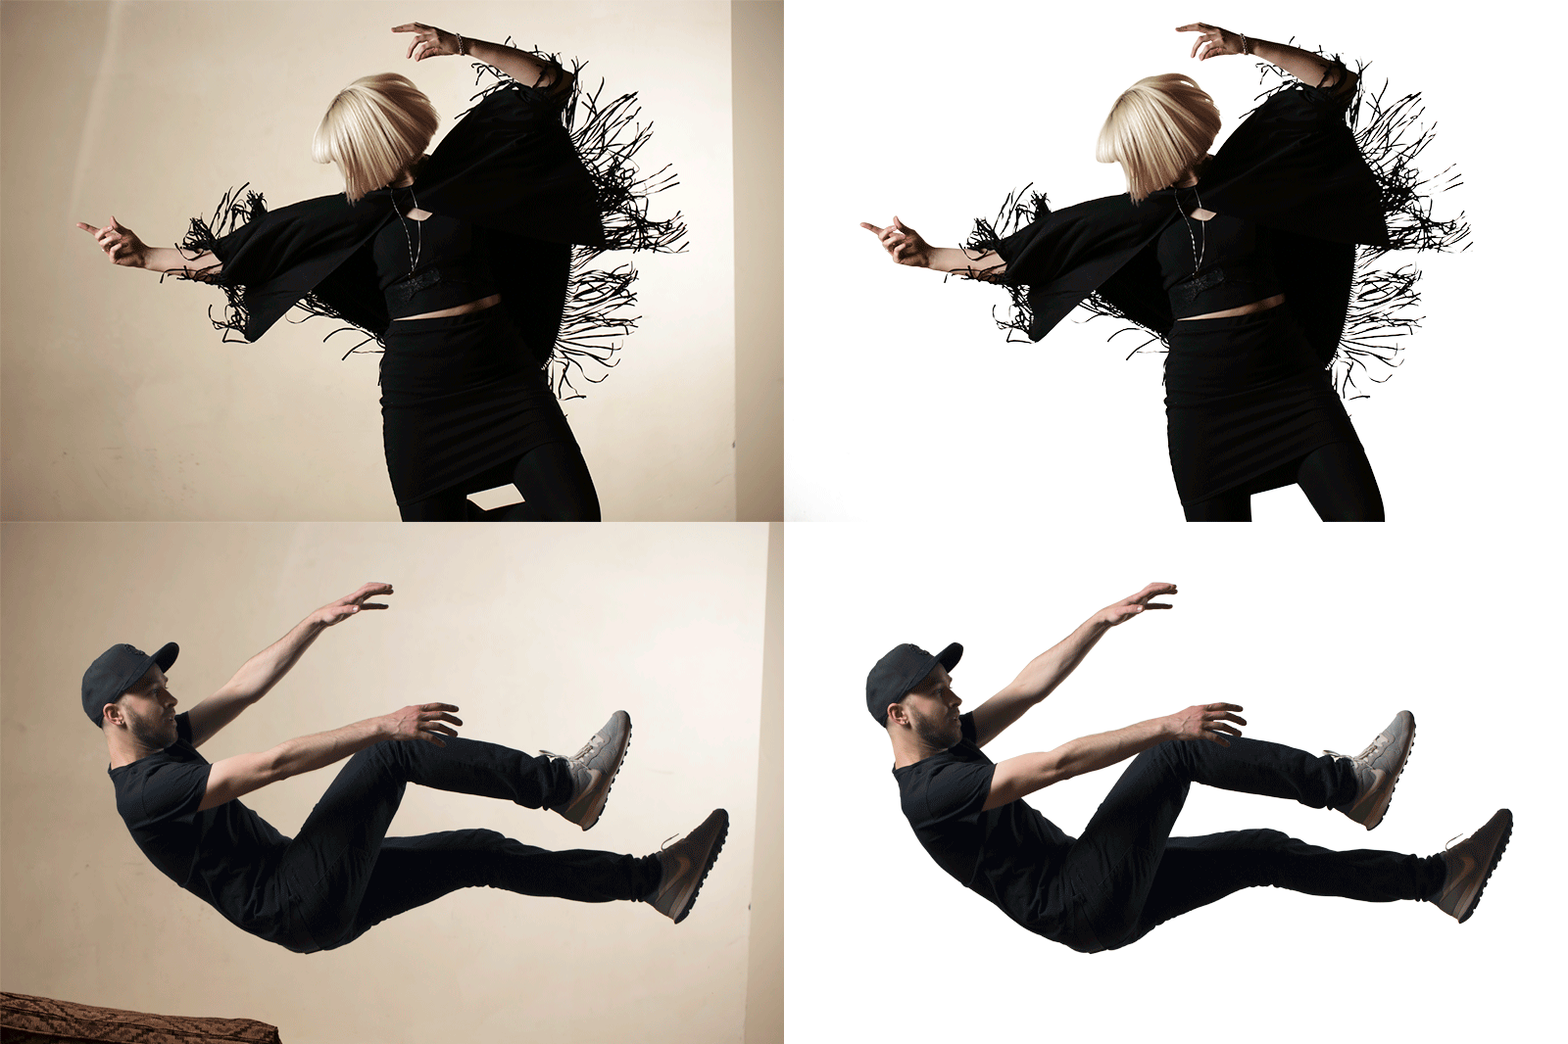
In order to use these photos we needed to clean them up. As you can see the background is quite dark, yellow and uneven. By removing the background we could place the photos of us in any scenario / colour scheme etc that we wanted. This is a very long and pain full process using the pen tool to go around every single pixel of the outline of us. This was especially long for Alice's photo as she was wearing a cape with tassels. It was hours of work but absolutely vital to the finished product.

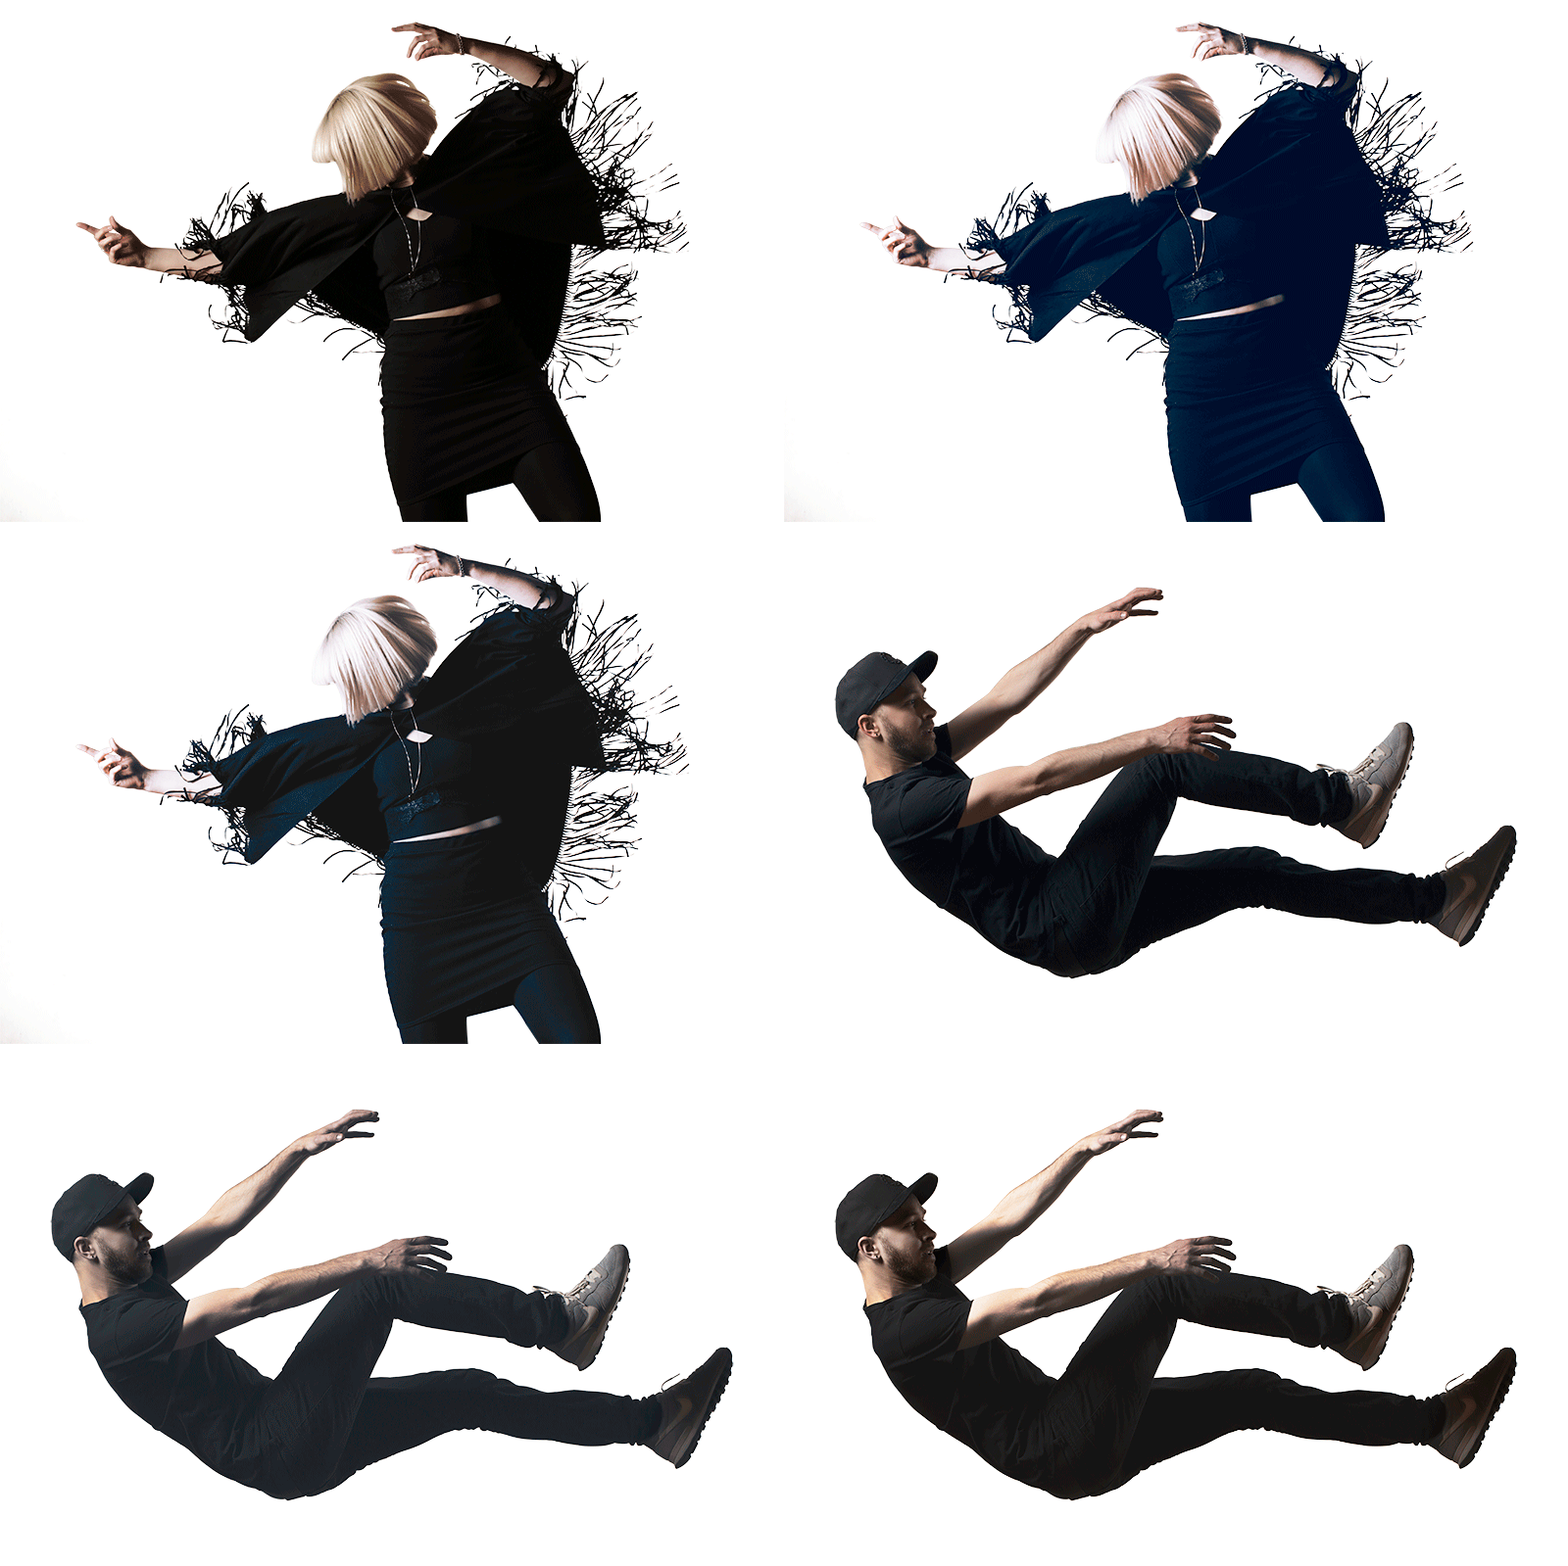
Next are the adjustment layers. A fairly crude way of explaining adjustment layers is to visualise the filters on Instagram. These are a collection of adjustments to the hue, contrast, brightness, colour balance etc. Photoshop has a huge suite of professional adjustments that can be made to photographs in order to get them exactly how you want. I took each photo and spent hours fine tuning them exactly how I wanted.

This post received a 2.0% upvote from @randowhale thanks to @avecsans! For more information, click here!
If you have some free time on your hands, why not make some extra money each week? Learn more-> >http://Path70.com
Nice. Is there any special tool that we can use to improve this aside form Photoshop?
P.s. nice post, really like it. cheers!!!
Thanks, you can use free tools like https://www.gimp.org/ but Photoshop is by far the best.
Awesome! thanks brother...
Nice! Great job. Thank you for sharing.
Thank you :)
Good call on shooting on a WELL LIT and CLEAN background. I am sure this made your job even that much easier. You didn't even need a green screen to key out the colors!
This is so cool!!! You have talent, keep up the good work!