🎨 [Step by Step] Tutorial: ✨ 🌹 👗 Waistband with Super Fluffy Satin Rose 👗 🌹 ✨ - By: @Tesmoforia.
“In some way, life is like jazz... it’s so much better when you improvise.”

• Photos by @Tesmoforia, with a Lumix/Panasonic DMC-FH2. Gif by @Vanuzza •

I accepted a little commission to elaborate a waistband; a neighbor bought 2 child courtship dresses for her 2 little daughters (do you know those flower girls who throw blossoms on the bride’s path to the altar? well those) buuut those attires were too big for them.
In order to save the investment and make the oldest daughter’s dress look tighter, I was commissioned to make a waistband/belt with "a big flower" 🌺 👀
Almost all the time, I do this kind of work by night because when the moon shines upon me, I’m just like a fat kitten, that’s the reason behind the bad quality of the pictures, sowwy ~ 🌙 💦 😹
« T O O L S
&
M A T E R I A L S »

| • Ruler and Pencil. | • White Lining Fabric |
|---|---|
| • Regular Needle. | • Big and Small Pins. |
| • Fabric Scissors. | • Fine white tulle for Petticoat. |
| • White Thread. | • Bridal Satin or “Di Fidanzantta Satin”. |
| • Sewing Machine. | • Little Metal Clasps (2 pairs). |
| • Clothing Iron. | • White Japan Satin (cheap, and soft satin fabric) or Pearl Charmuse. |
• Waistband for Little Girl Dresses •
« Satin Rose »
« Making of the Waistband »

• Photos by @Tesmoforia, with a Lumix/Panasonic DMC-FH2.

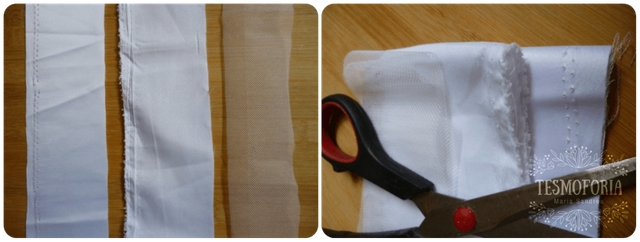
✔ Cut 1 stripe of 8 cm width x [the waist length of the model using the dress] of the Bridal Satin, and lining fabric.


• Photos by @Tesmoforia, with a Lumix/Panasonic DMC-FH2.


• Photos by @Tesmoforia, with a Lumix/Panasonic DMC-FH2.

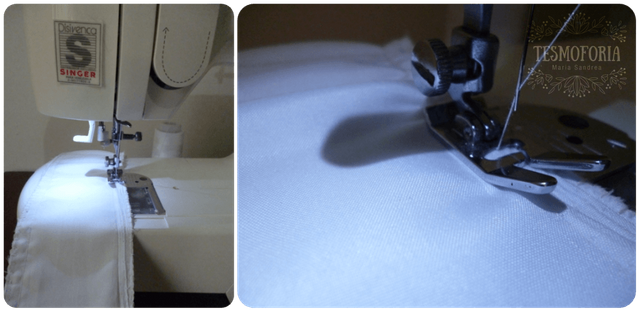
✔ Take it to the sewing machine, using Stitch No.3 and needle No.10.
✔ Turn around and iron the piece at mild temperature.
✔ Cut 1 stripe of 6 cm width x [the length of the piece resulting from the Satin and the Lining placed together] of Petticoat Tulle.
✔ Place the stripe of tulle inside the “belt”, and close it with invisible stitch by hand.
✔ Hand sew the clasps at the end of the waistband.
« Making the Rose »

• Photos by @Tesmoforia, with a Lumix/Panasonic DMC-FH2.

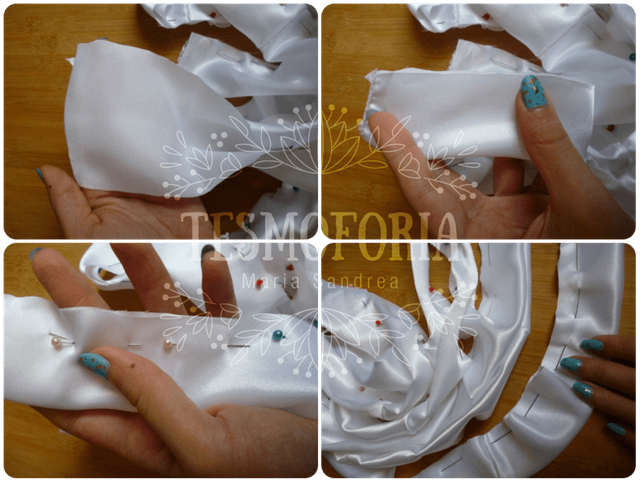
✔ Cut a stripe of 8 cm width of Japan Satin/Charmuse, x (at least) 1,5 meters length.
✔ Fold in half, and fix with small pins.

• Photos by @Tesmoforia, with a Lumix/Panasonic DMC-FH2.

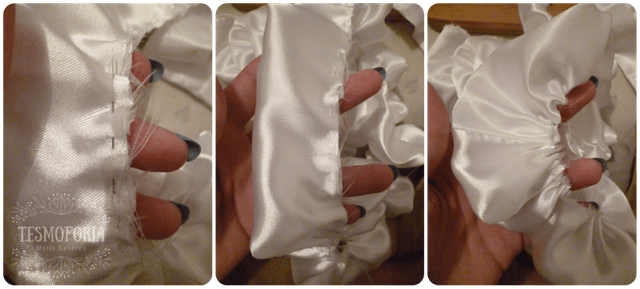
✔ Loosely sew it with 1 single piece of thread, and medium stitch (approximately 1 cm).
✔ When you reach the end, pull from the thread and slightly push the fabric backwards, in order to form the “ruches/waves” of the rose.
✔ Close one end with invisible stitch.

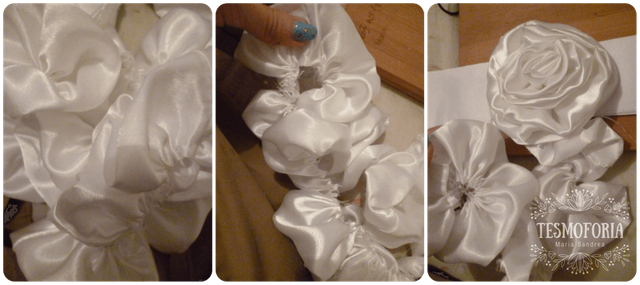
• Photos by @Tesmoforia, with a Lumix/Panasonic DMC-FH2.


• Photos by @Tesmoforia, with a Lumix/Panasonic DMC-FH2.

✔ [OPTIONAL] Use a regular needle, and make stitches at the base of the rose as you go.

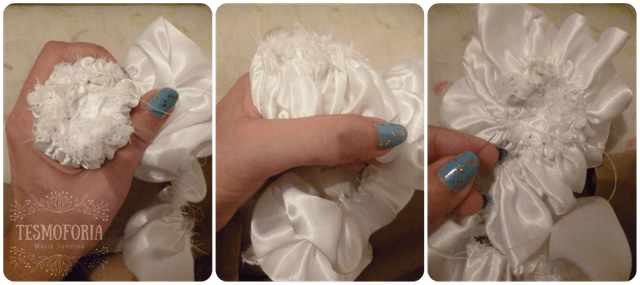
• Photos by @Tesmoforia, with a Lumix/Panasonic DMC-FH2.

✔ When the desired size and volume is reached, the excess is cut and the base of the rose is tightly squeezed.
✔ Load the needle with thread once again, and sew a trillion of time in different directions through the base of the rose, 1 or 2 cm from its end [ok, no a trillion; only until we feel that by releasing it, it won’t lose its shape].

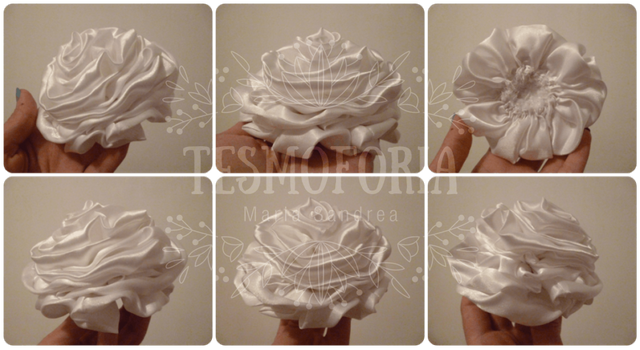
• Photos by @Tesmoforia, with a Lumix/Panasonic DMC-FH2.

✔ ✨ Enjoy the satisfying and fluffy result ✨
✔ Sew the rose to the waistband with a stitch that crosses the center of the flower, and finally its ends.
« R E S U L T »

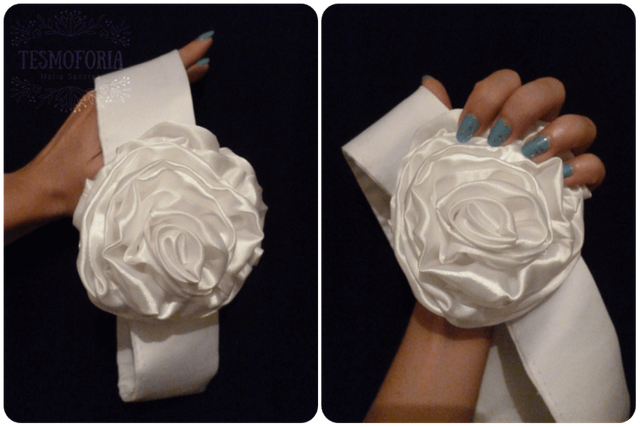
• Photos by @Tesmoforia, with a Lumix/Panasonic DMC-FH2 •

• The world burns down around me and I insist on being happy •
To those of us who are still in Venezuela, I know it feels like time has stopped, that all will still getting worse, and how each day it seems more and more difficult to survive, HOWEVER: The resourcefulness of the human being is a brilliant thing; no book will teach us what we have learned.
.png) Discord Discord .png) | |
|---|---|
 Would you like to ask me Something? Would you like to ask me Something?  | |
 Do you play Drugwars? Do you play Drugwars?  |

.png) Would you like to support me?, you can help me acquire more and better supplies to continue crafting
Would you like to support me?, you can help me acquire more and better supplies to continue crafting .png)

  .png) .png)
|

 I like Tacos
.png) And Coffee too!
And Coffee too! 


#posh
Twitter ~ 💙