Aerial 360 degrees panoramas
Aerial 360 degrees panoramas are a great way to show the amazing landscape of Iceland. I invite you to fly with me and to look around in all directions. Meanwhile I’m sharing my tips for making great drone panoramas: preparation, composition, time and weather, making the photos, post-processing, stitching and publishing.
1.Preparation

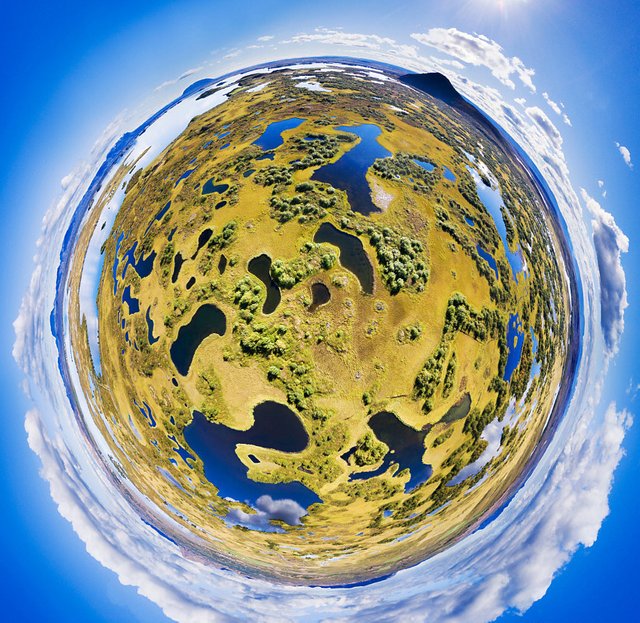
Making a great panorama starts with a good preparation. It is an advantage if you already know the area, but even then it’s a good idea to check maps and satellite photos (like in Google Maps or Apple Maps). They really help to find the best places, as you cannot see the aerial view when standing on the ground. This first panorama is made near the big lake Mývatn, in an area I had visited a few times before. But I never really noticed all the small lakes at the other side of the road, because only a few of them are visible from the road. If I had not examined the satellite views, I would not have been flying on this location. I prefer natural areas with a beautiful landscape in all directions, if possible without human traces (buildings, roads, people). Of course, I must be able to fly to these areas from a place I can visit, so I have to check the distances as well.
Especially when photographing in early or late daylight, I want to check the location of the sun and direction of the shadows. A great app and website for this is The Photographer's Ephemeris (TPE): it shows how the light (sun or moon) will fall on the land for every place on earth and any date and time. I also check the weather forecast (although the weather is very unpredictable in Iceland) and local rules (like maximum altitude, flight distance and no-fly zones).
2.Composition

For photographers on the ground, composition is one of the most important elements. General guidelines include the rule of thirds, leading lines, viewpoint, depth, foreground objects, backgrounds and framing/cropping. When making a panorama, composition may not be the first thing you think about. When making aerial photos, creating good compositions is more challenging than on the ground (see also my other tips stories). But then at least, you can frame your photo by repositioning your drone. In a panorama you cannot frame, as by definition you are looking around in all directions.
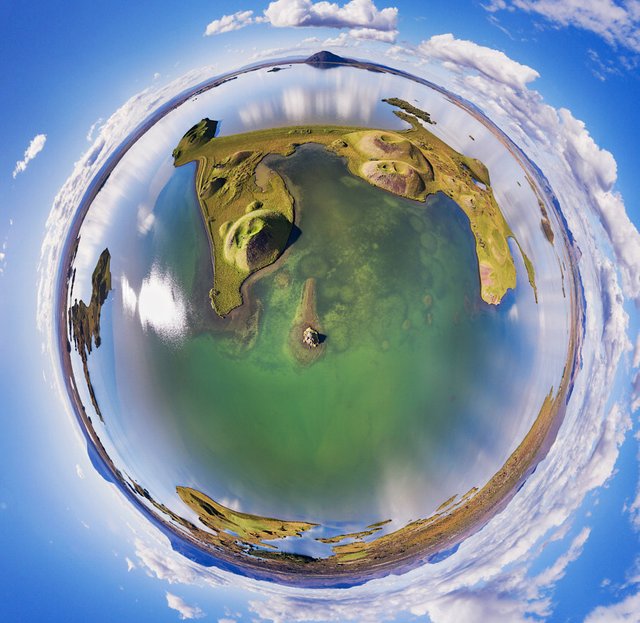
However, you can influence the composition by choosing your shooting point, altitude and weather conditions. I’m always looking for an interesting foreground subject, like this uninhabited island with pseudocraters. This should be an eye-catcher and the first thing people see when opening the full panorama. Also I want an interesting area right under the drone, in this case a mini island and underwater patterns. The shallow around the mini island is ‘pointing’ in the direction of the bigger island as well as the mountain on the horizon. The place right under your drone is normally the closest place (unless you are very close to a mountain or apartment building). It is also the place that appears in the middle of the tiny planet projection. Furthermore I want an interesting view in all directions without disturbing elements (like buildings, or the sun (reflection) on an annoying place). Altitude is also important: a higher altitude gives a ‘wider’ look while a lower altitude may be more intimate and reveals more details on the surface. When flying close to hills or mountains the altitude determines if the hills are topping out over the horizon. Choosing the right location and altitude also helps to give the right amount of depth to your panorama.
3.Time, weather, season

The moment you make the panorama certainly influences the result. In the middle of the day and with a clear sky, colours of the landscape are much brighter. With early or late daylight the light is often softer and nicer and you get long shadows if the sky is clear. Cloudy weather also gives softer light. Above water, a blue sky with small clouds gives a beautiful reflection. Fog or low clouds can make a panorama of photo much more attractive, while mist can limit the viewing distance and hide disturbing elements at a larger distance. On the longer term, choose the right season. Winter may bring snow and frost, while spring and autumn have their own distinctive colours.
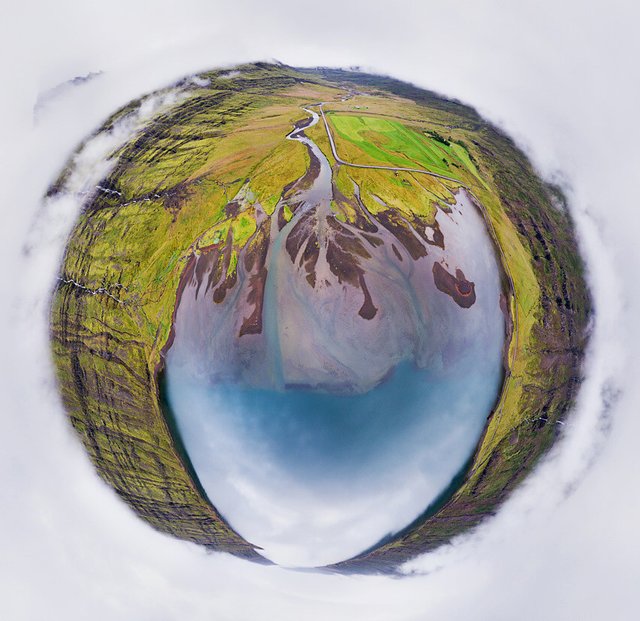
This panorama was made at the beginning of a fjord in east Iceland. The fjord is enclosed by mountains with their tops covered in clouds. At the end of the water (under in the tiny planet) is a small corridor to the ocean. Right opposite (at the top of the tiny planet), the only road to this fjord winds over a mountain pass. I love the sandbars and the shallows where the river floats into the fjord and placed them in the center. The road and the fjord are the main leading lines.
Because the photos for this panorama were made at the end of a cloudy day I had shutter times between 1/25 and 1/50 seconds. In that case it’s important that the camera stands totally still. With a Phantom I have to yaw (turn) the aircraft to make photos in other directions. After any yaw, the Phantom and gimbal needs one or two seconds to stabilize again. So in low light conditions I always wait one or two seconds after yawing before I make the photos - to prevent a blurred image. With an Inspire, it’s probably better to turn the camera instead of the drone.
If you’re inspired to make your own panoramas, I wish you good luck! Thank you for watching and reading!