Study Design with Nicole #12 : How to create your watermark or PNG【 跟妮可讀設計 #12:如何製作屬於你的水印 /PNG】
Hello Steemit friends ❤️,
Welcome to my post and hope you are doing good today! 🌞
Today I will share a easy way for you to create your name or own watermarks on steemit or your photos.
I believes all of you can do it! It is the simplest tutorial ever.
歡迎來到我的帖子,大家好!🌞
今天會向大家介紹如何在照片上加Steemit 用戶名字或水印。
What is watermark? 什麼是水印?
When it is on paper: Watermark is a faint design made in some paper during manufacture that is visible when held against the light and typically identifies the maker.
When it is on digital: Watermark is a logo or signature that placed on the picture or photos to identifies the file's copyright information. You will need a png image to placed it above your photos. ( A watermark logo is placed on the left-top corner of my cover image above.)
當它在紙上:水印是在製造過程中在某些紙張中製成的不明顯設計,在與光線相對照時可見,並通常識別製造商。
當它在數碼上:水印是放置在圖片或照片上的標誌或簽名,用於標識文件的版權信息。 您將需要一個png圖像將其放在照片上。(我上面封面圖片的左上角放了水印標誌)
Here we come 2 simple methods to create your watermark on Steemit's photos:
這裡我們來介紹兩種簡單的方法來創建Steemit照片上的水印:
- Text-watermark 文字水印
- Logo-watermark 標誌水印
Method 1) Create your text-watermark
方法1)創建文字水印
Step 1: Open below link and start creating the PNG-text.
步驟1:打開下方的鏈接並開始創建PNG文本。
免費在線PNG文本創建

Step 2 : Scroll down the page and enter the information according to your favours.
Enter the text, color, fonts.
步驟2:向下滾動頁面,並根據您的喜好輸入信息。輸入您想 顯示的水印名字,字形,顏色。
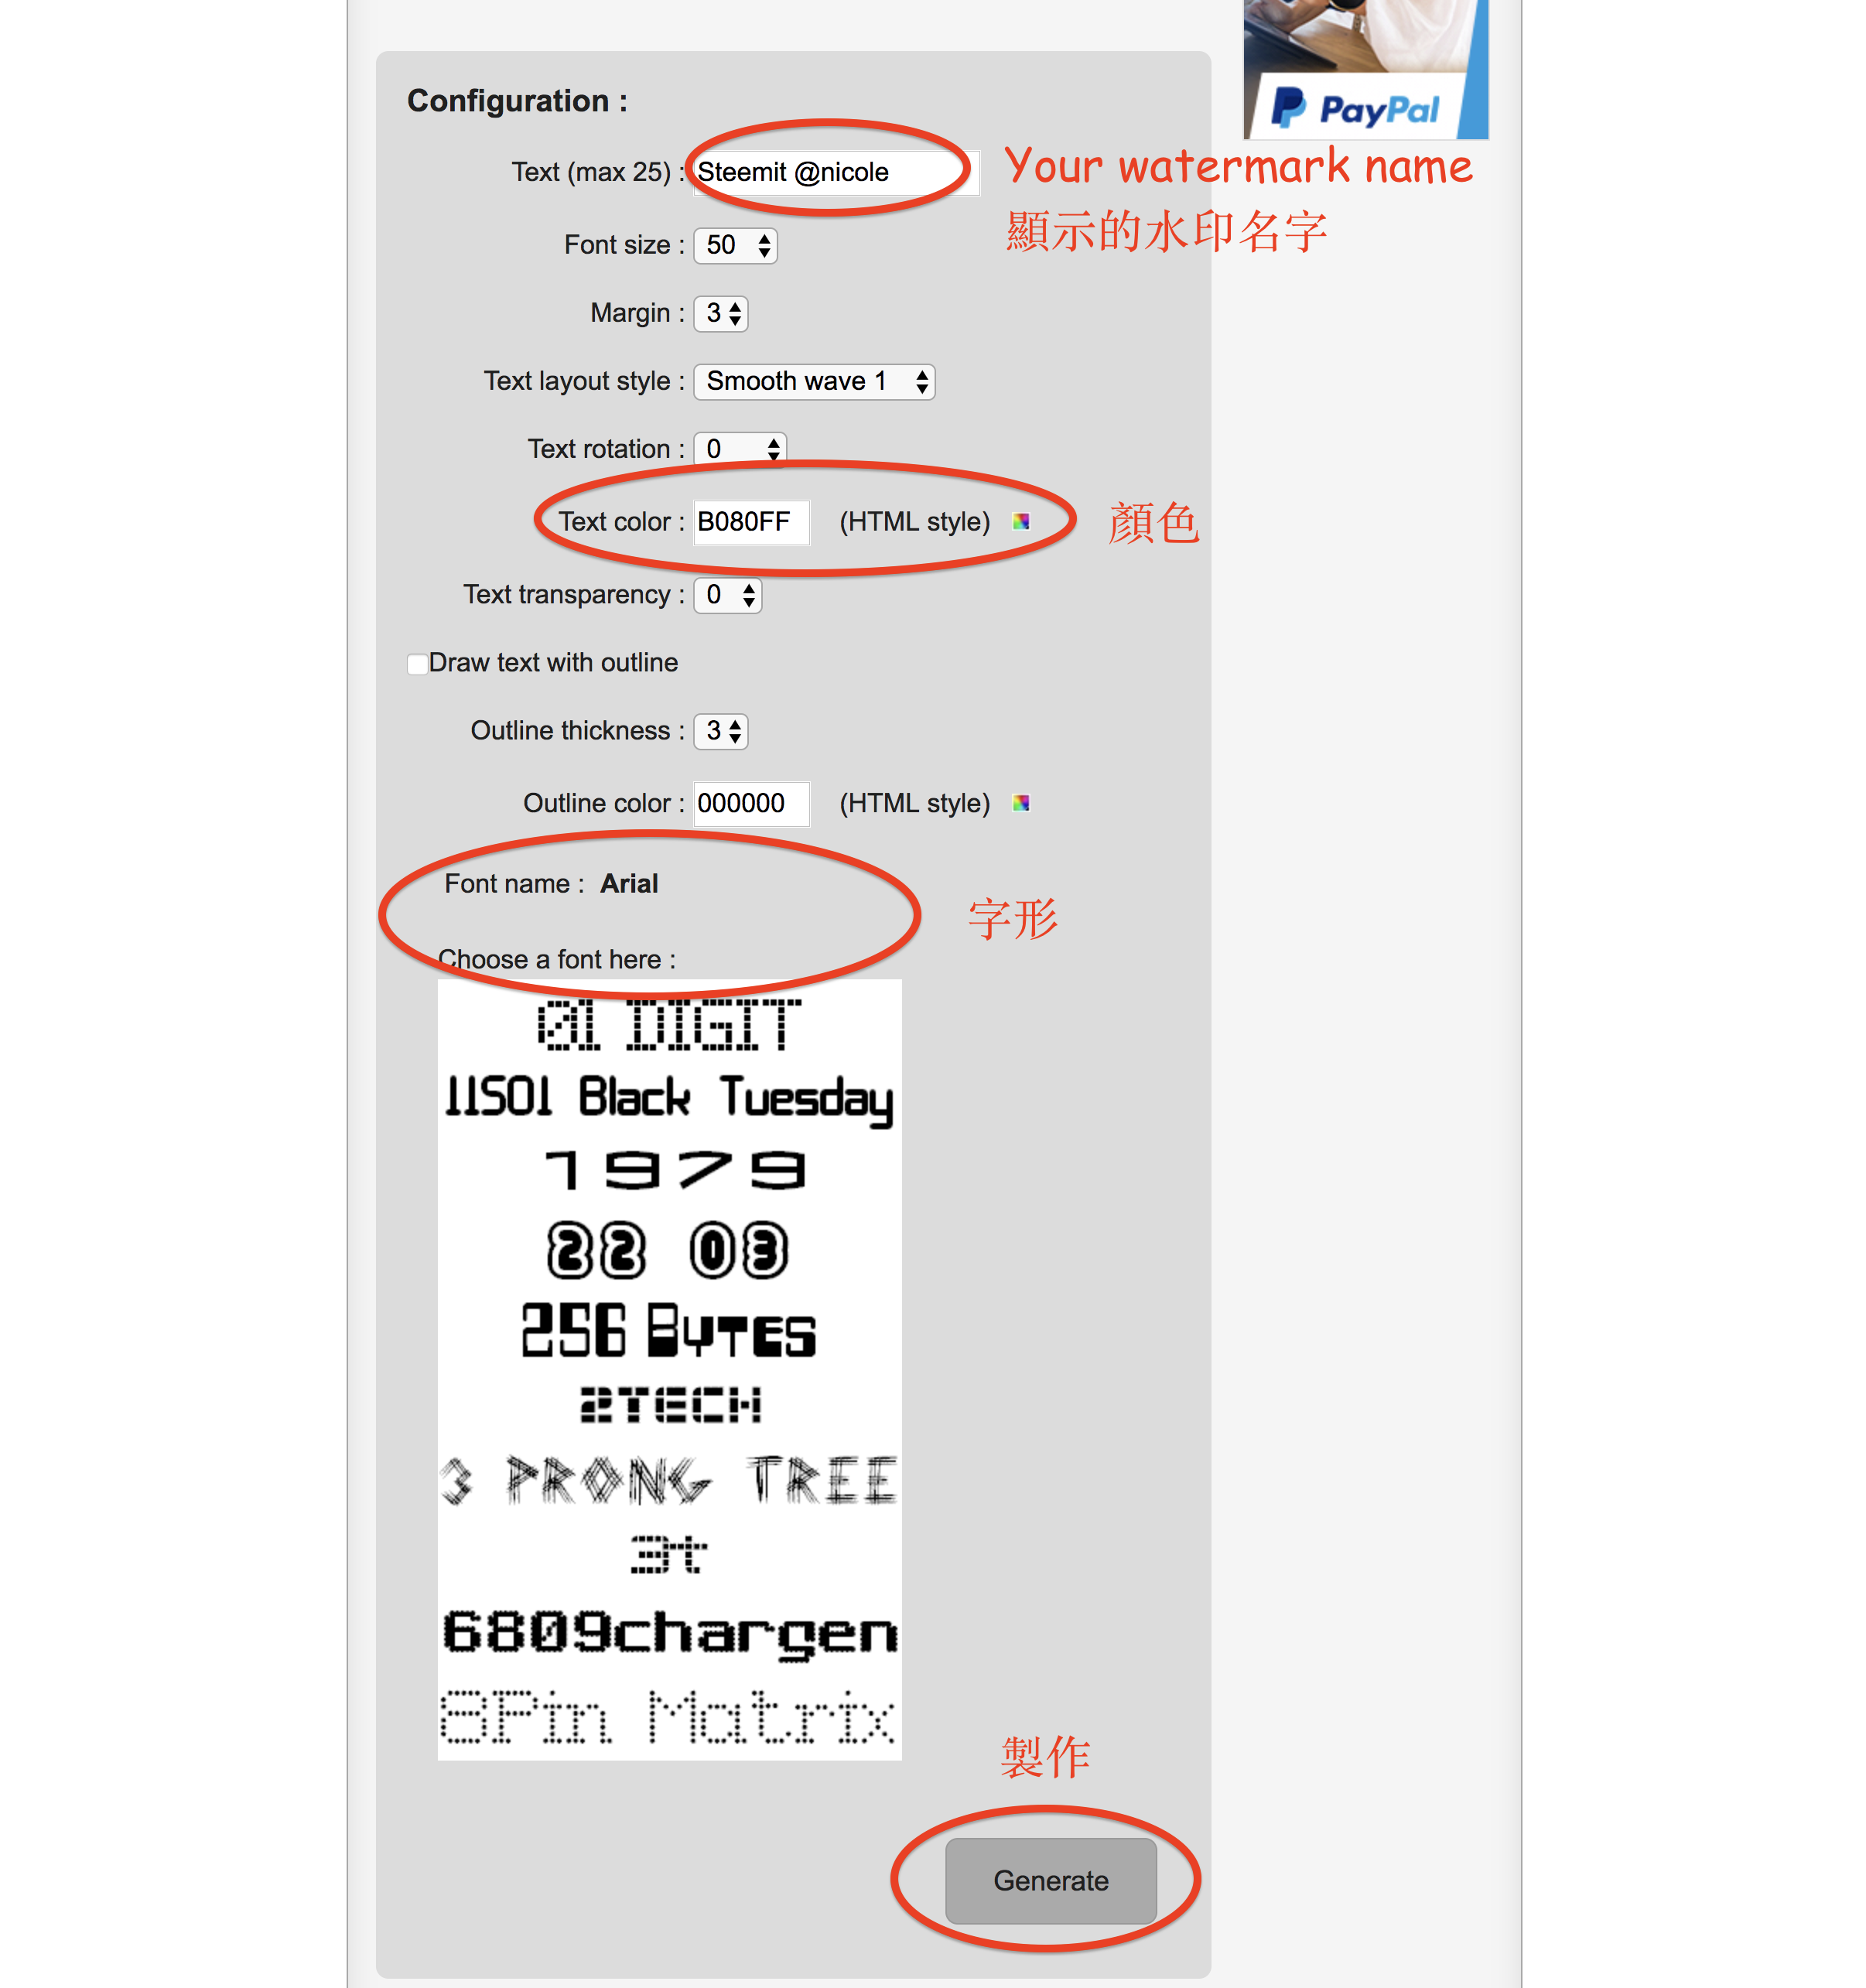
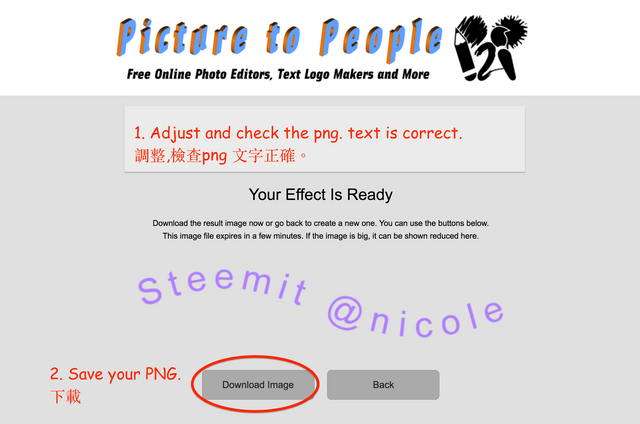
Step 3 : Check your text is correct, if not go back and adjust it. Download and save. DONE!
步驟3:檢查您的文字是否正確,否則回去調整。 下載並保存。完成!
2) Create your own logo to watermark
創建自己的標誌水印
Step 1: This is a tutorial for beginners or non-designers. Designer please close the tab right now! :P
步驟1:這是初學者或非設計師的教程。 設計師請立即關閉這帖子!:P
Step 2: Draw your own logo and take the picture clearly.步驟2:繪製自己的標誌,並清晰地拍照。
步驟2:繪製自己的標誌,並清晰地拍照。
Step 3: Open below link and start creating the PNG-logo.
步驟3:打開下方的鏈接並開始創建PNG標誌。
免費在線PNG標誌創建
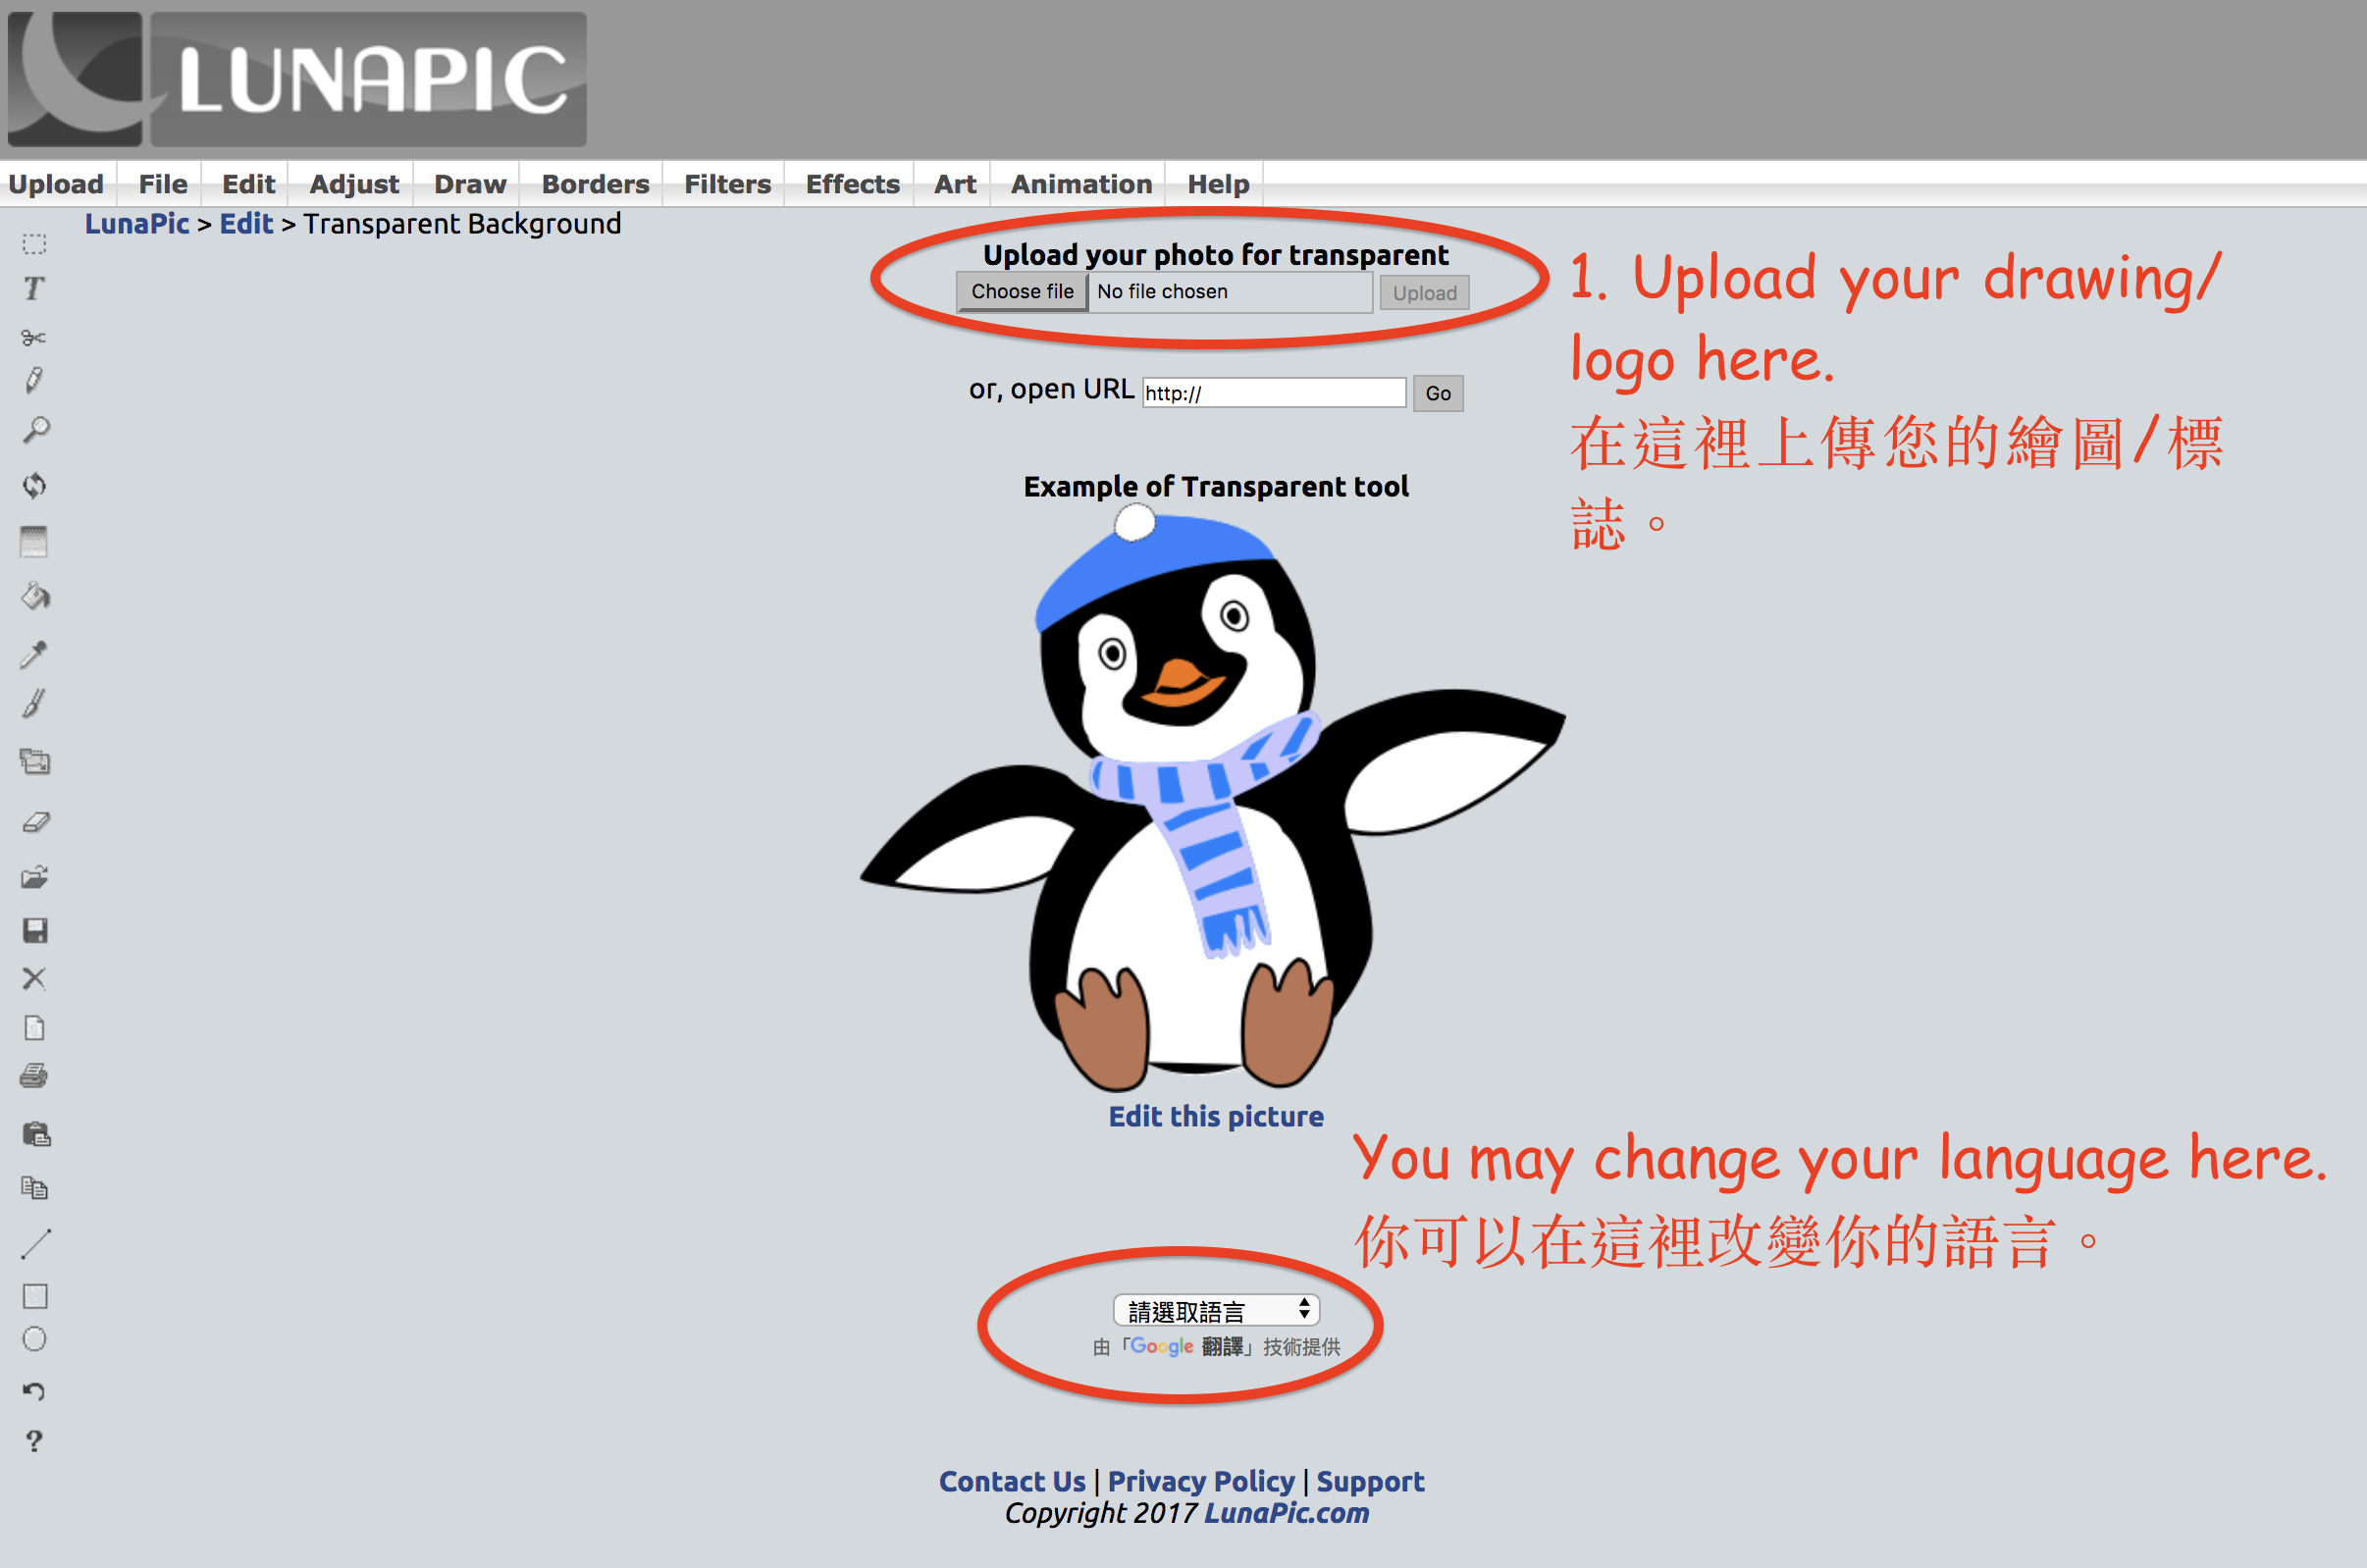
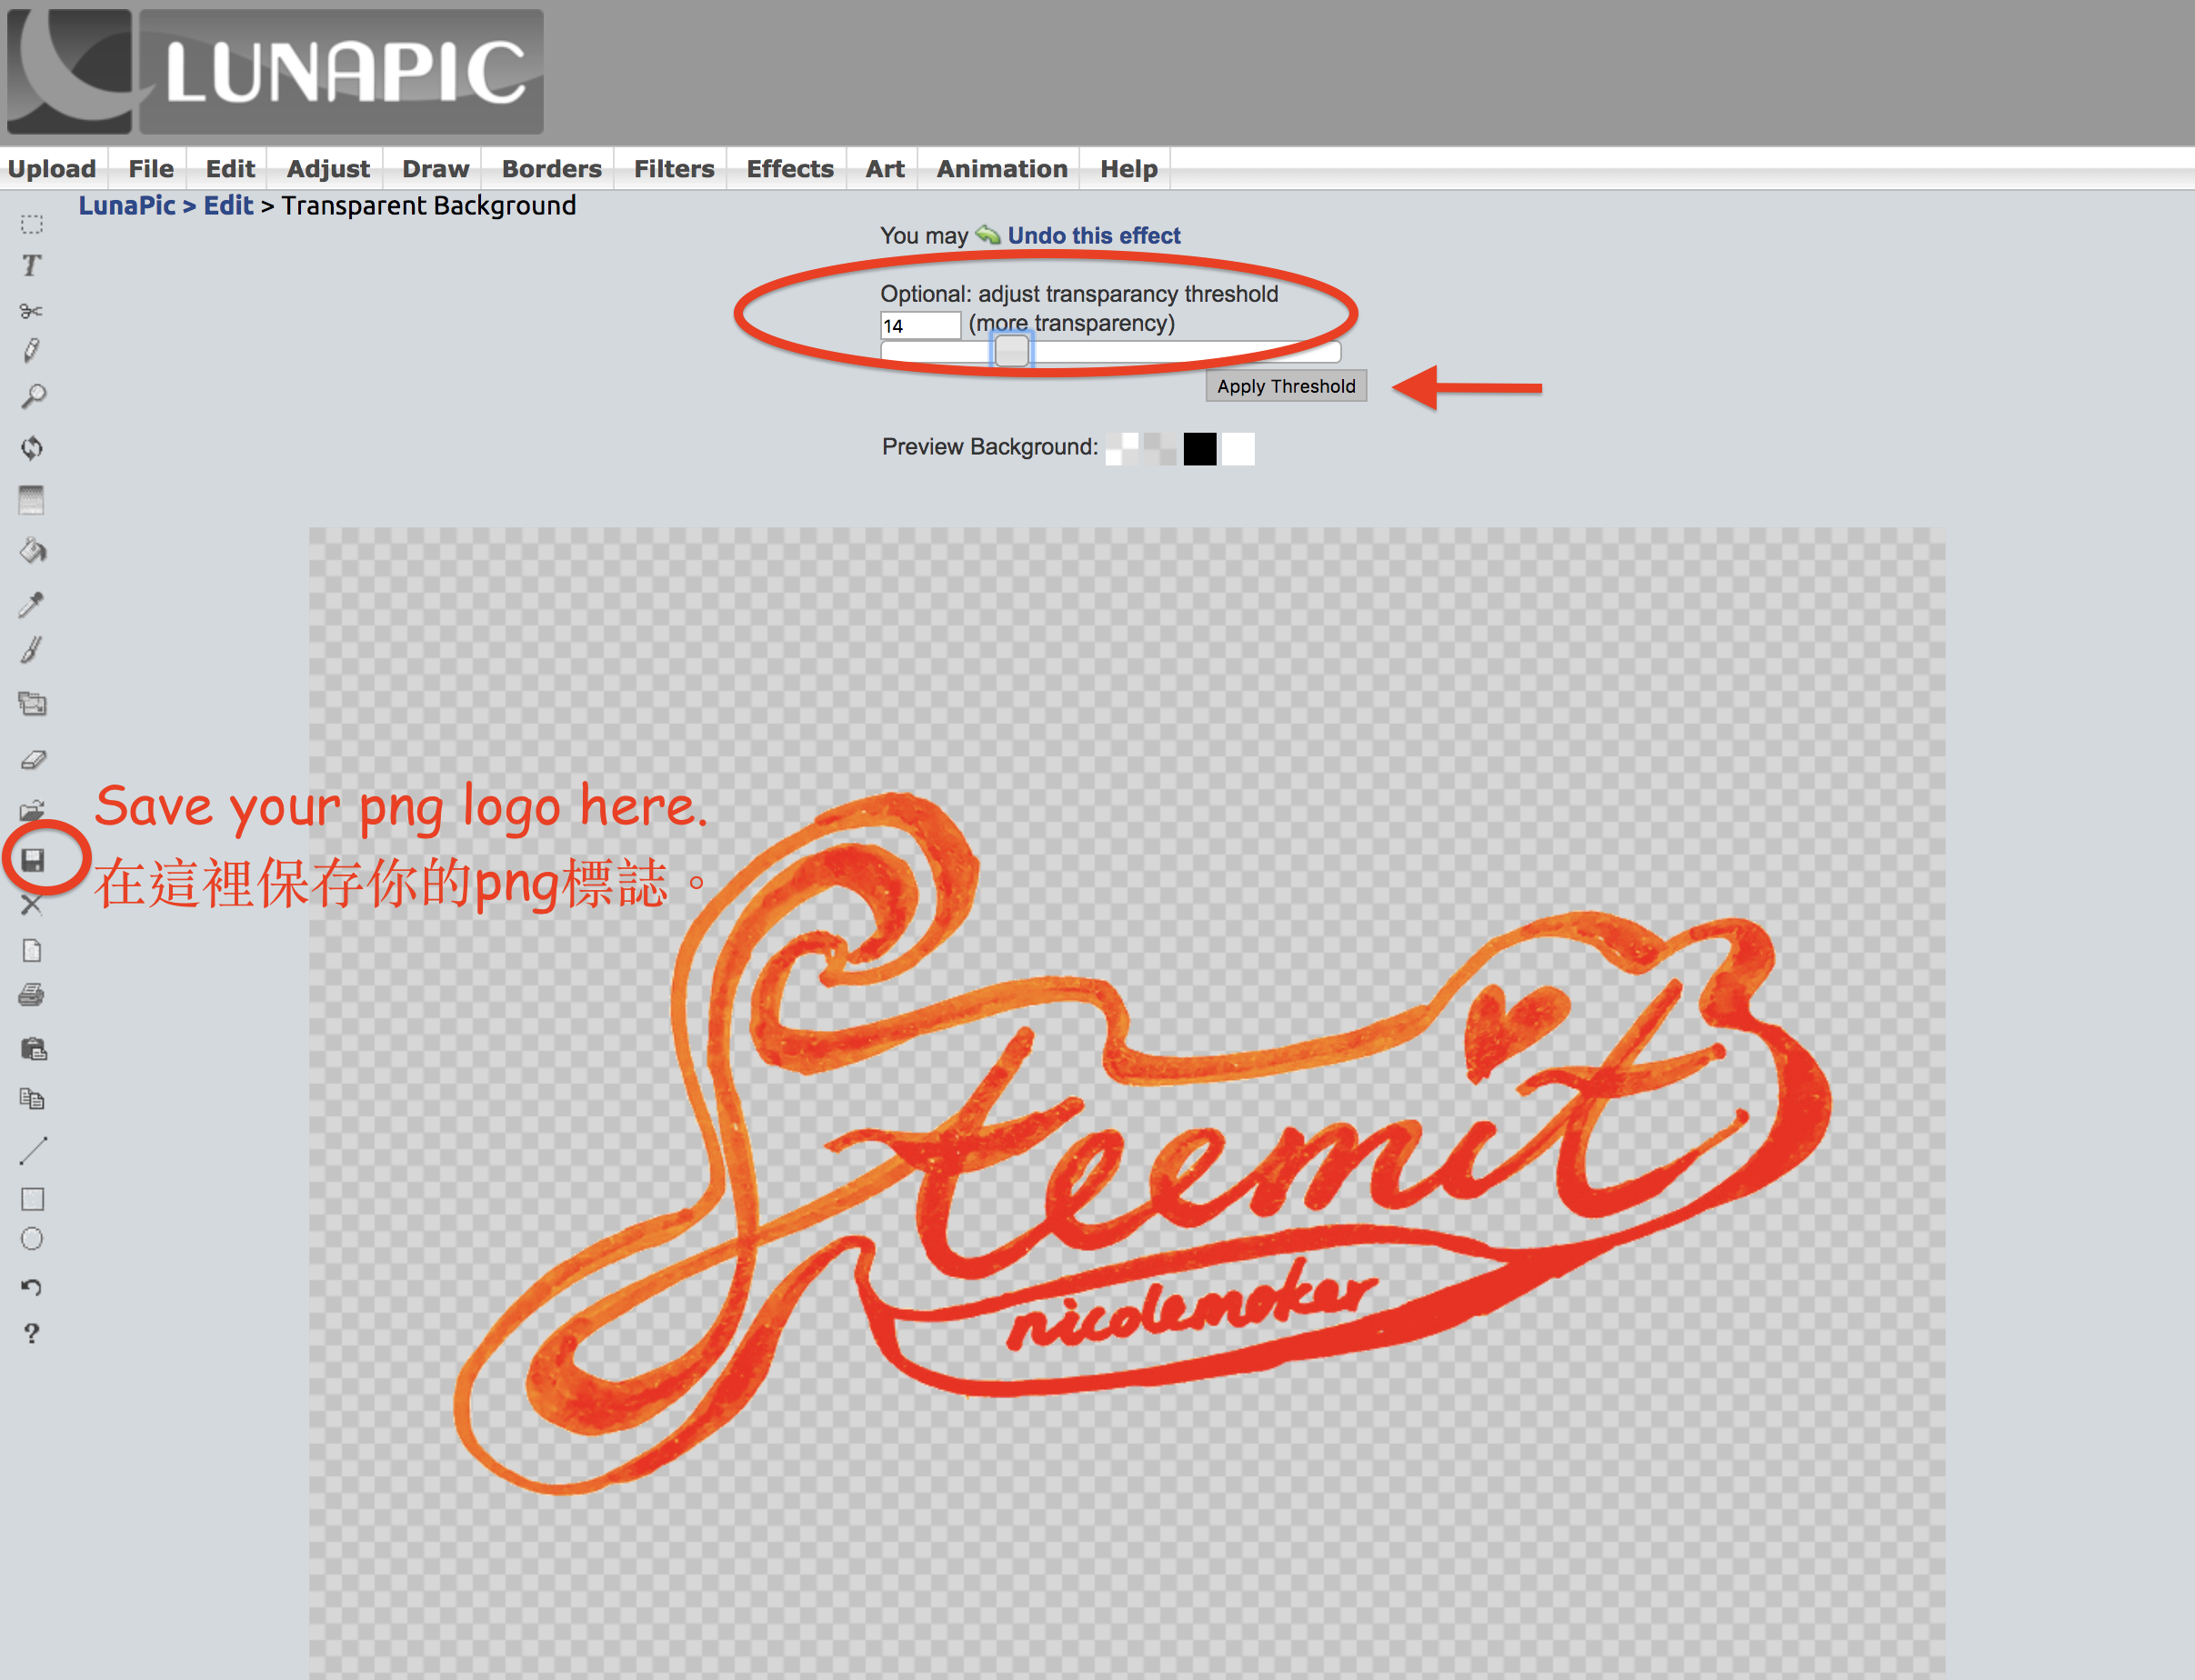
Step 4: Remove the background by clicking the color. Tips: If you need a white logo, draw it on black paper.
步驟4:點擊顏色刪除背景。 提示:如果您需要一個白色標誌,請將其畫在黑色紙上。
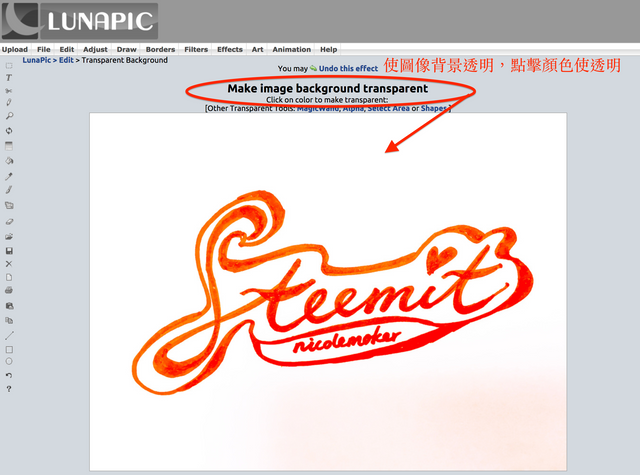
Step 5: Adjust the transparency threshold. Save it. DONE!
步驟5:調整透明度閾值。下載你的png標誌。完成!
If you have any questions about creating PNG or watermark, please feel free to ask me ❤️
Please tell us if there is any easier way you think it is good, don't hesitate to share in the comments box below!
如果您對創建PNG或水印有任何疑問,都可以留言問我呀 ❤️
你亦可以推介你認為好用的方式給大家~ 請你把好東西分享到下面的留言區~
👆🏻Upvote & Follow Nicole! 👆🏻


Dear friends,
This tutorial is created for steemian or blog beginners.
For professional users or designers, I believed that you can create better logo or watermarks on design software likes photoshops or illustrator:)
Please let us know if there is easier way for beginners too!
Thank you 💓💓
此教程為初學者或普通steemain 而設。
對於專業用戶或設計師,我相信你們有更好的技巧和方法,如果你們有更簡單的製作過程,請在下面分享給大家! 謝謝💓
Thanks for letting us know!
老師好~可以發一貼教有圖騰的Logo 嗎?
像下方有花邊那種~
搬椅子坐好了!(托腮)
有reference 看看? 😊
i usually use photoshop & illustrator to create my logo/watermark
Good idea. I'm using Ink Scape.
Ahhh ic, Actually u can do almost anything with photoshop and illustrator
I use Ai and Ps too :)... but it is not easy for steemain to create their logo/ watermark on professional software
It is a very good post
WOW thanks dear... u shared such a wonderful and useful information.. will try to follow the instructions and create one!
Nice:p have a try!
sure :) :)
可以幫我設計一個屬於我的水印嗎?
You made the world better !!!
Wonderful, I gotta make my own flashy handle. Thanks :)
nice
interesting...let me try~