My First Photo Restoration Project ft. My Father
My father’s funeral has needs already taken care of. The casket, the flowers, the funeral setup and services, the notice to the bereaved family’s friends and relatives, the interment arrangements, and the snacks, among others. Prior to our father’s passing, my 33-year-old brother already prepared for all of these, including finding the finances, leaving us little to do like accommodating grieving visitors.
But I thought I could do more.
I decided to make my father a wall of remembrance so that his friends and relatives could memorialize all the good times they spent with him. For this I had to look for his photos, both film and digital, across our family’s albums.
No problem with the photos online as they can be printed right away. But there were very few old pictures of my father in his younger years that are worthy to include in the wall. This one is the clearest solo.

I guess he was just 10 or 11 years old then, posing in his boy scouts uniform.
Having played with Photoshop before as a hobby, I thought I could still make use of this damaged picture and put it in my collage. The day after I gathered all his film photos, I scanned them all, and later worked on restoring digitally the photo of more than forty years old.
To be transparent about it, I only make simple text graphics on Photoshop like posters. And on February 16, the day after my father passed away and while he was being embalmed, I practiced my skills on the platform again but this time exploring on photo manipulation. So expect that my output, found far below in this blog post, would not be as good as those who do this for a living, I guess.
This is the scanned copy.

Using the tools in my Adobe Photoshop CS4, I started the task by editing the upper body, including the hair, the face and the shirt. It was a challenge since the most of the folds are found in this part of the photo. Also, I had to remove the printed part of his shirt which is no longer readable.
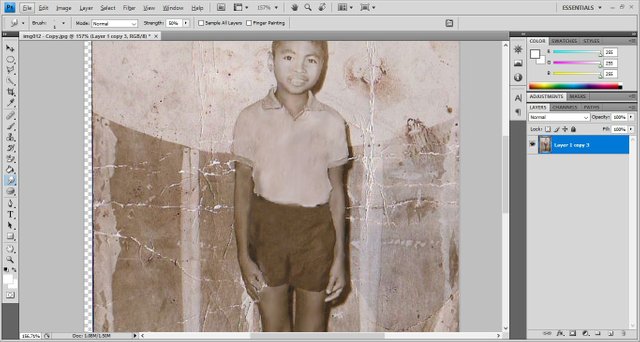
The shorts, legs, and shoes were next, which was simpler to do. But with the hands, particularly fingers, I had a hard time manipulating.
Fixing the background is considerably the easiest part because it does not have to be exact. I made some corrections with the colors too and cropped the entire photo a little.


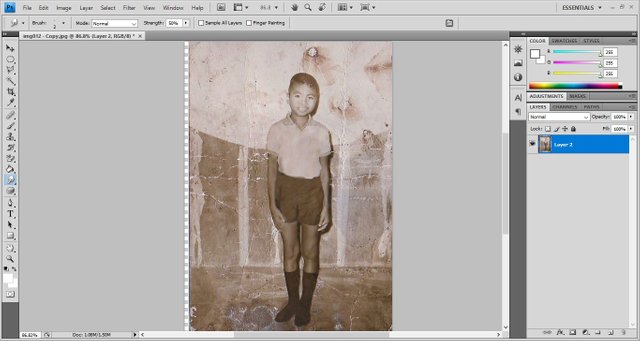
Here is the result after 3 to 4 hours of sitting straight in front of my laptop:

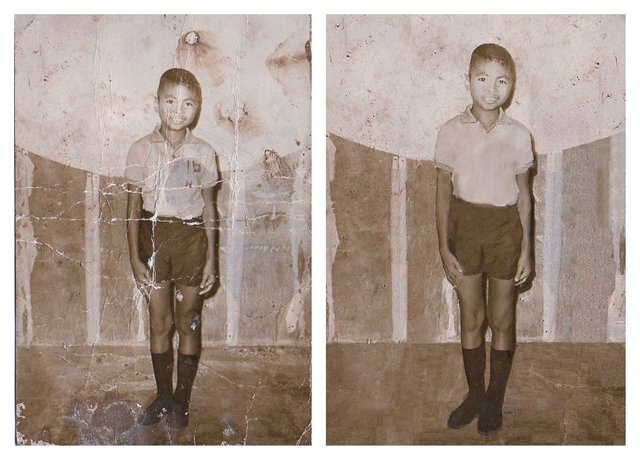
This is the photo before and after:
I finished it just in time for the restored photo to be included in the wall of remembrance. I was able to complete the last piece of ‘Remembering Greg’ for the visitors to reminisce my father’s life.

My plan is to restore more photos in the future, not necessarily my father’s. Because as I was going over our family pictures I saw many that were already washed out by the floods causing the quality to deteriorate. They have to be kept digitally or else the captured memories cannot be treasured the same anymore.
Thats amazing. Im sorry for your loss.