3DPrinting, Big Nozzles are cool !
Hi ! Very long time I did not write anything, super busy with the final work on the slicer.
I performed some tests with a relatively "big" 0.8mm nozzle to understand a bit better what are the difficulties to 3d print with this.
First, what is a "big" nozzle ?
- I consider a nozzle big above 0.6mm diameter. Most of 3d printers are provided with a 0.4 or 0.5 mm diameter nozzle.
What are the problems with such nozzle ?
- It can be difficult to cool, you can play with the print speed and the fan speed (last one is limited).
- You cannot print very detailed parts with very small features (miniatures typically), orientation matters.
- Extrusion flow limited by the extruder assembly.
- Super strong supports, but I have a solution for that :-).
What are the advantages ?
- Higher throughput: more surface/volume covered with less moves, less print time even if you use the same layer height !
- More choice in the layer height (up to 0.4 or 0.5mm per layer)
- Stronger parts (depends on several parameters)
- Extrusion flow can limit your print speed, you have to slow down and you improve the quality of your print.
- Better overhangs (in my case moved from 40/50 deg on 0.2mm layer height with 0.4mm nozzle to about 60/65 deg on 0.2mm layer height with 0.8mm nozzle)
What is the setup ?
- 0.8mm diameter nozzle
- Bowden Extruder, no gear reduction, Nema 17 2.5A stepper motor with low resistance and low inductance
- E3D Clone (not Volcano!), 40W Heater, with PTFE Heat Throat
- Flimsy Wood Chassis Printer
- Slicer settings:
- Layer Height: 0.2mm, Variable Print Speed: 40mm/s to 30 mm/s, Retraction Speed: 30 to 60 mm/s
- Temperature 195/200C, Filament PLA
- Different extrusion flows (see details after)
I was happily surprised to handle without hassle such big change on the extrusion flow.
Typically, I print with this speed for PETG with the 0.4mm nozzle.
The extrusion flow rate for 0.8mm diameter at 40mm/s is about 4 mm^3/s
(for 0.4mm diameter at 40mm/s is about 1 mm^3/s, to have the same flow with the 0.4mm diameter I would have to print at 160mm/s)
There is not any additional difficulty on the tuning, it depends on the filament of course. I had a bit more oozing, but not a big deal.
Examples
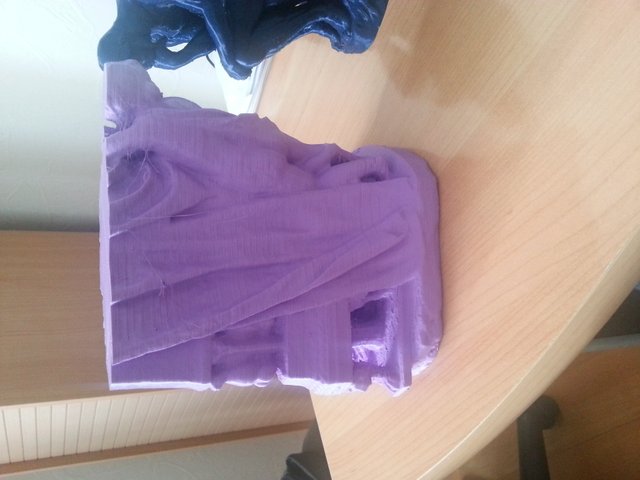
The Thinker, I used Z Hop at the retraction and the printer had some issue on few layers, but quiet happy with the result of this first test, they are small blobs for retractions. The print time was about 10 hours for 140mm height.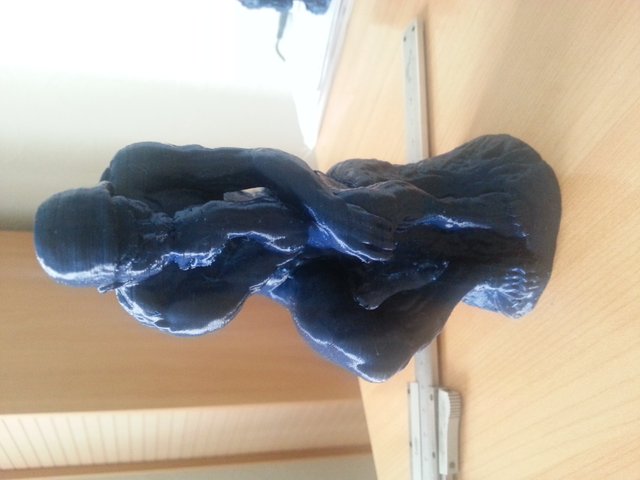 .
.
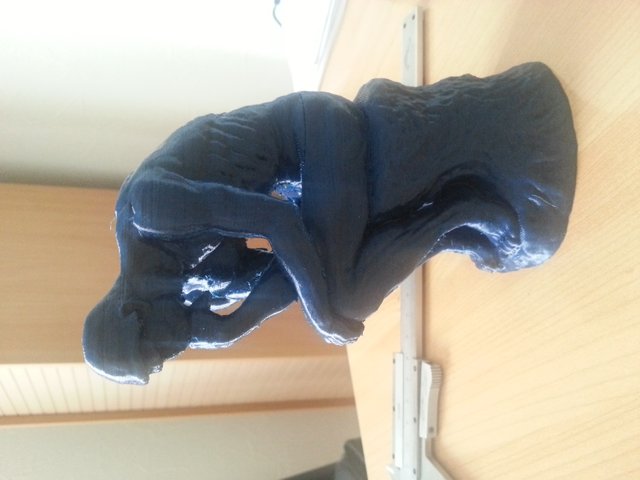
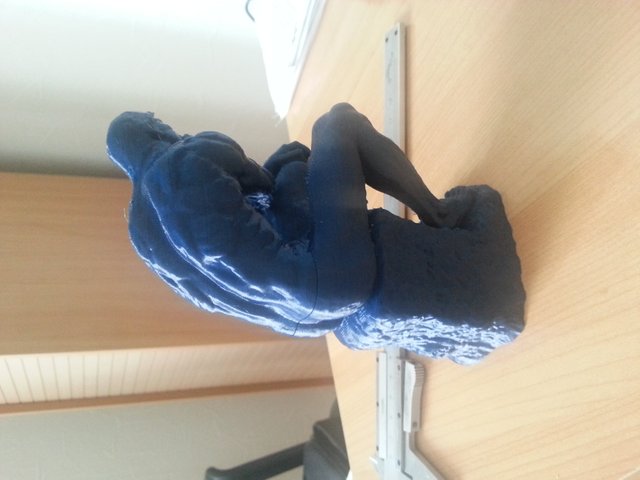
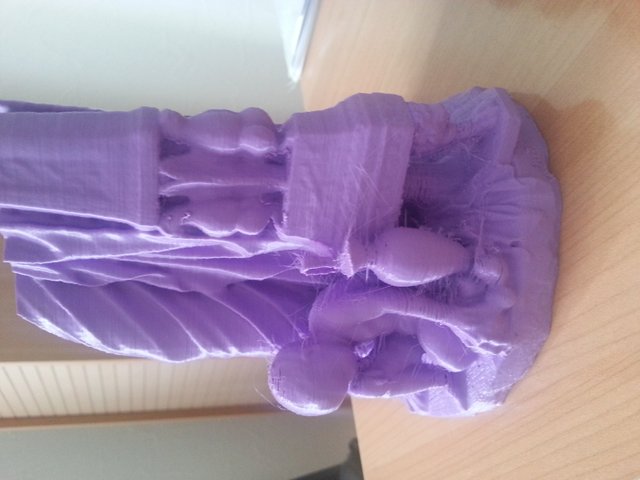
The next one I really pushed to see the limits, it is the low half of the Charité, I had not enough extrusion flow for the filament causing under-extrusion issues on small parts, but still not too bad. I set supports to 70 degrees for overhangs, that was a bit too much. The machine needs a new bed support, it is not rigid enough and it wobbles when I use most of the surface of the bed.
The print time was about 18h30m for 140mm height, just to give an idea it weights at least 250 grams :)
1.6mm for the Shell and 8 layers on Top/Bottom.
Supports all around, nearly all blobs/strings are from retractions not from supports.
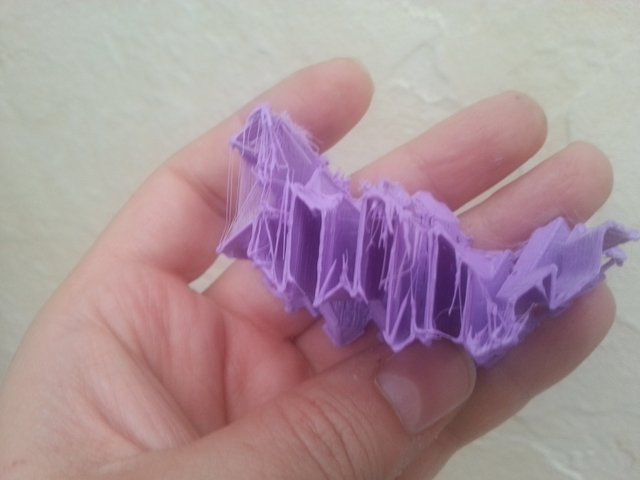
How to handle Strong Supports ?
When you have 0.8mm walls it is very difficult to remove them, they are quiet rigid and sometime you do not have the space to put your cutting plier. Also, you need to increase slightly the clearance on X/Y and the airgap on Z.
Sometime a bug is nice :-D: I had a bug on the speed of supports that was way to high and resulted in under-extrusion all around on supports. This is the solution to have easy to remove supports.
In my slicer, I can change as I want the extrusion flow rate for any print phase, for each kind of support phase I reduced additionally by 20 to 30% less. The result is strong enough supports to build the part on it, and you can break and remove supports easily without damaging delicate surrounding parts. You can break them with your fingers, except for the top/bottom layers. The cherry on top of it, you reduce the amount of filament wasted.
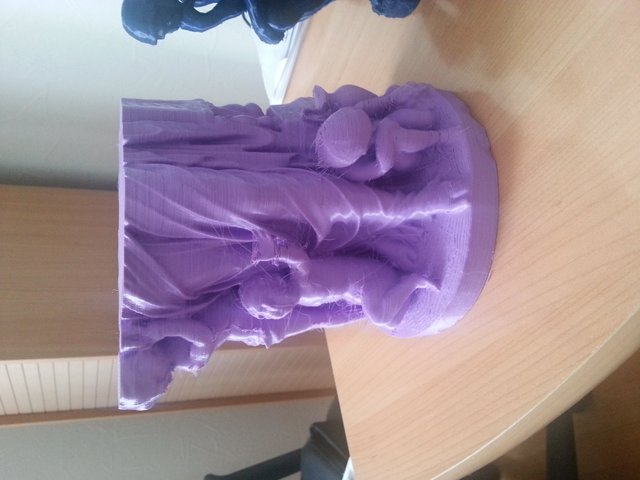
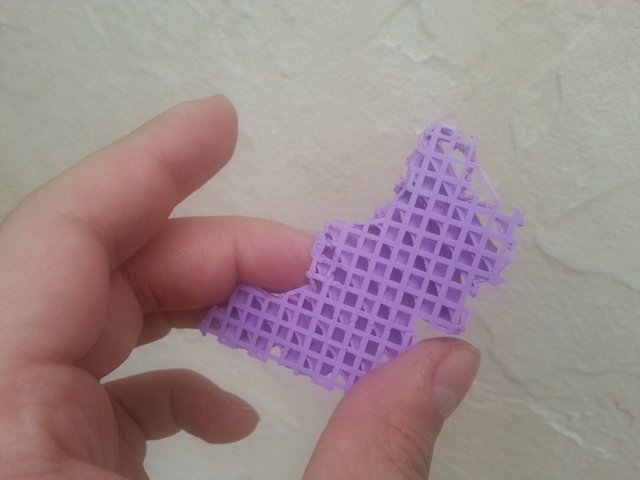
Supports for Bed Bottom Layers with regular 80% Extrusion Flow (4mm spaced grid to give you the scale, only 2 layers and already very difficult to break which is good in this case)
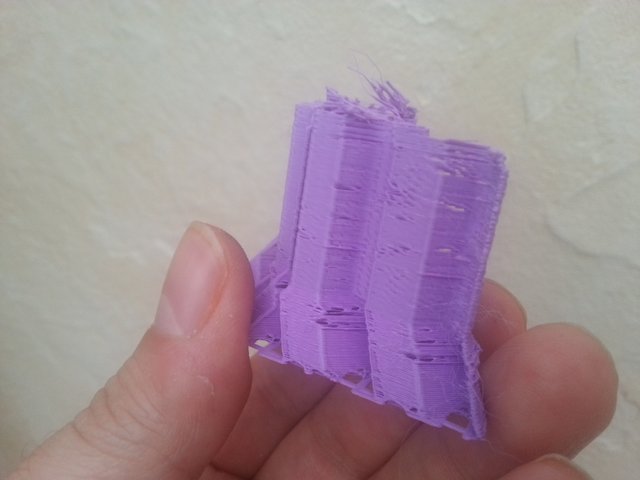
Supports for Bed Pillars with 50% Extrusion Flow, brittle and easy to break by hand, strong enough to support parts
Happy printing !
What an awsome and detailed post about such a underrated topic as "big nozzles" is. I would call the supportbug more a glitch and thanks also for this trick :)
When the summer tends to turn to fall it is 3d time again for me :D untill then I just print stuff I need to print :)
Thank you. It was really worth my time to expose all extruder parameters on anything printed. You can experiment with
ideas like this
Join our Discord Channel to connect with us and nominate your own or somebody else's posts in our review channel.
Help us to reward you for making it ! Join our voting trail or delegate steem power to the community account.
Your post is also presented on the community website www.steemmakers.com where you can find other selected content.
If you like our work, please consider upvoting this comment to support the growth of our community. Thank you.