Printing Orientation Examples for a Bust
Hi guys ! Long time I did not post anything on steemit, super busy.
A short post on the printing orientation.
Why it is really important ?
- the printing process used can be anisotropic (FDM typically), meaning that if you are building a structural part, you need to know where the forces apply.
- reduce print time (less height, less time to print)
- improve print quality (more height, more quality; use rotation to reduce supports or put them in a non critical place)
I am interested in print quality, I will show you the same model printed vertically and another one printed on an angle.
The model used is the head of the famous Michelangelo's David.
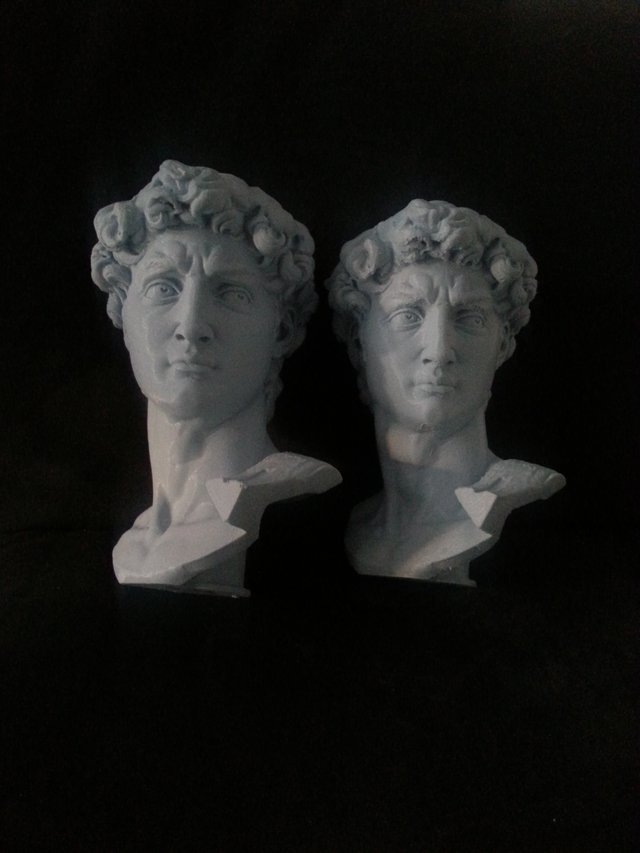
Let see the result first


The same profile was used: 0.1mm layer height, 5% R&D infill.
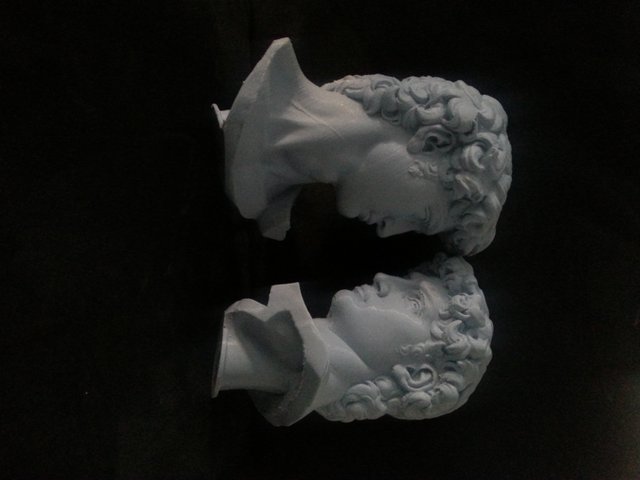
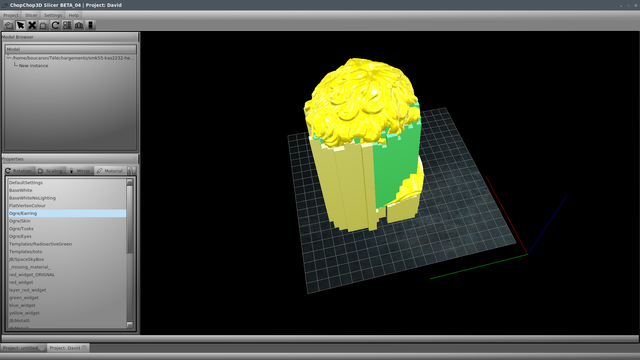
The left/top head is bigger, it using an angle, it has less supports overall on the head, it uses less filament, there is nearly no support around the face reducing the risk to damage the surface due to retractions. There are small surface defects due to supports at the back of the head/hairs. About 45 hours to print.
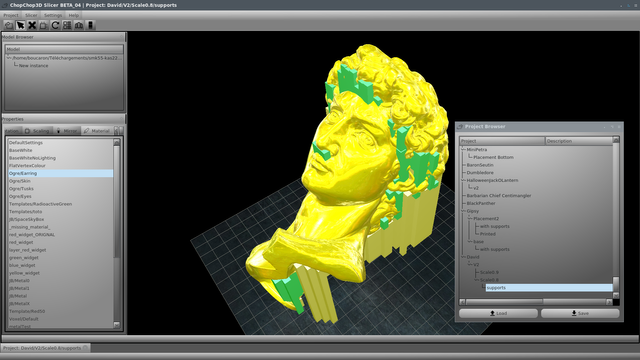
The right/bottom head is smaller while using the whole height of the printer, slightly more supports, there are small surface defects due to supports over the eyes, at the base of the chin and at the start of the hairs. About 48 hours to print.
Follows both orientations with the supports


Using this kind of orientation with an optional plane cut for a bust can be very useful to obtain a very good quality with lower risk of surface defects on the face.
There are two difficulties: you need to really know what is a good safe limit to print overhangs with your printer and you have to take the time to orient/rotate the model correctly while checking the good balance for the supports.
For the head of David, there is no choice for the hairs, there are supports because there are curly. So whatever orientation you do, you need supports. The key point here is to minimize them on the face. The orientation used is a good start. Of course, you need to have a very good working setup for supports in any case.
This kind of orientation may not work, it depends on the model and on the features to highlight, you need to check, to balance and sometimes it is better and simpler to print vertically.
ChopChop3D Slicer enables to load/save different iterations, orientations and different configurations, so you can spend sometime to play with it and be able to reuse them. Also, it has more detailed statistics so you can evaluate the time spent and the amount of filament with details for supports. Additionally you can open several instances of the project and be able to compare.
Happy printing !
Congratulations @boucaron! You have completed the following achievement on the Steem blockchain and have been rewarded with new badge(s) :
Click here to view your Board of Honor
If you no longer want to receive notifications, reply to this comment with the word
STOPDo not miss the last post from @steemitboard: