Swift for beginners: programming concepts
Hello everyone this is my first tutorial for anyone who wants to learn Swift and has no experience with programming.
This tutorial will cover really basic concepts of programming and the programming environment.
*Note: in order to follow this tutorial you’ll need a mac running macOS 10.12 or later.
Swift
Swift is a programming language developed by Apple back in 2014. This language was developed for Apple’s platforms such as iOS, macOS, tvOS and watchOS but it also works with Linux.
This language is being adopted by thousands of developers around the world because it’s really easy to use and also really flexible.
Xcode
To get started with your first program go ahead and download Xcode on the Mac App Store of simply click here.
Xcode is Apple’s IDE (Integrated Development Environment) which allows us to create apps for all of Apple’s platforms. It comes with a lot of great features for developers but we’ll start with the basics. This download may take some time depending on your wifi connection, so meanwhile you can grab a snack.
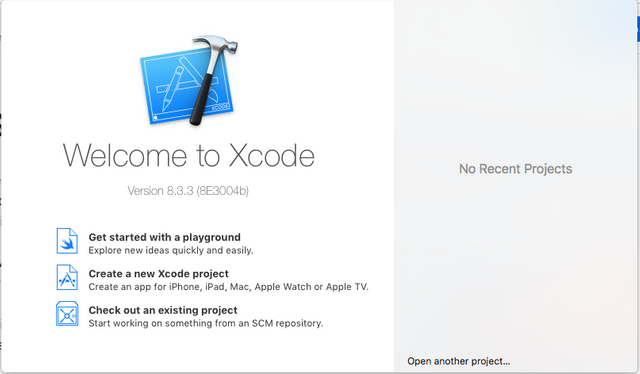
Once the download completes, go ahead an open up Xcode. You should see something like the next image.
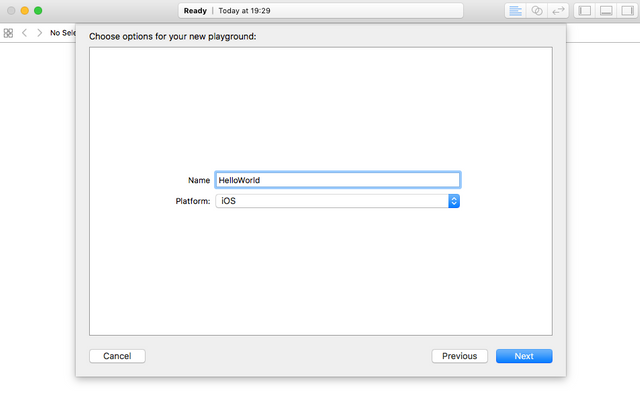
Click on “Get started with a playground”, save it as HelloWorld and make sure you select iOS as platform as shown in the next image.
You should see the default code like this.
*Note: my background color may look different. If you wish to change it you can go ahead to the menu and under Xcode > Preferences > Fonts & Colors. Here you can check out the default options, mine is called ‘Dusk’.
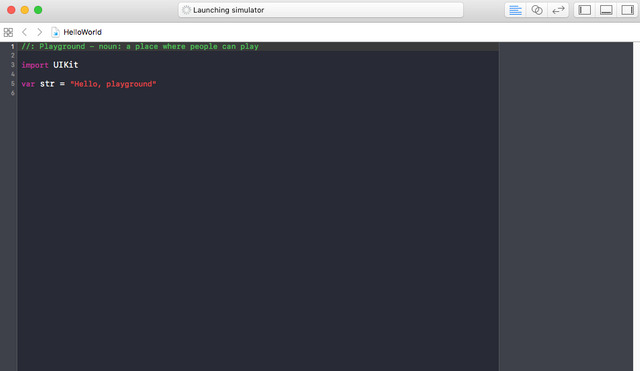
So lets see what’s happening here. The content on this window’s left side is your code editor, it’s just like a simple text editor but with a lot of functionality and autocompletion native for the programming language. The right side shows the results of your code. And the blue icon on the bottom bar is a run button, the one that starts the execution of the code you write. Those little numbers on the left side of the code editor represent lines of code and they are numbered for each line that has been written.
You can notice that there are different colors for some words. In this case the pink(ish) color represent reserved words. This words are special words for your computer so it can know what you are trying to do. I’ll explain more of this later.
As you can see in line 1 the text is a green text starting with // this is called a comment.
Comments
//: Playground - noun: a place where people can play
// This is a single line comment
A comment is just something for people to read, you can type anything you want after the // and the computer will ignore it. Otherwise if you type anything you will get an error. Try it, remove the // from that line and see what happens. Just put the // back again in order to get rid of the error.
You might use a comment for taking notes or just pointing out something but they are mainly used to describe a piece of code so others can understand what you are doing.
There are also multi-line comments and they are declared as followed.
/*
This is
a multi-line
comment.
Type anything you want here.
*/
You can see /* tells the computer a comment is about to start and */ ends it. You can find comments really helpful later on.
Moving on, we’ll ignore the third line for now as we’ll get more deep into that subject on the following tutorials.
Constants and Variables
If you take a look at line 5 you’ll see this:
var str = “Hello, playground”
The var word stands for variable. A variable is something you give a value to and can change multiple times. ‘str’ is the name of the variable you are creating, it can be any name you want as longs as it starts with a letter. The = sign is for assignment, so you are telling your computer to put the value “Hello, playground” inside of str.
For each new variable you need to add the var word and then giving it a name, followed by its value. Once you declared your variable, you can change its value just by typing the variable name and assigning something new. Go ahead and add this at line 6:
str = “Hello, everyone!”
var age = 23
age = 24
Now str has a new value because we modified it. And we created a new variable called age, assigned the number 23 to it and then changed it to 24. It makes sense because your age changes every year so setting up age as a variable is a good example.
As you can see I assigned a number to a variable, later on we’ll discuss the data types that can be used in Swift.
It’s time to talk about constants. A constant it’s like a variable but you can’t change it’s value.
You can declare a constant the same way as you would do it for a variable but instead of using the word var you use let.
Let’s try it out.
let firstName = “Jorge”
let lastName = “Perales”
We just declared two constants, one for first name and one for last name. Now try to change your first name and see what happens.
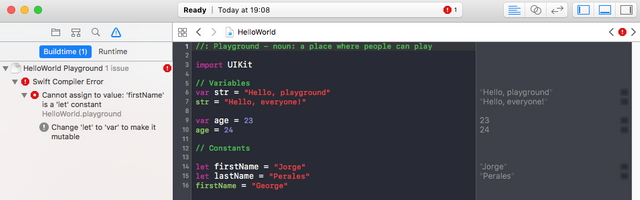
You get this error! As I mentioned before, you can’t change a constant’s value. So use constants just when you know the value you need will never change.
Data types
In Swift and any other programming language you can use the following data types:
- Int
- Double
- Float
- String
- Bool
- Char
Int
Int stands for integer, an integer number is a whole number, it doesn’t have fractions. If you try to divide 3 by 2 the result is 1 not 1.5 because you can only divide it once and the remainder is ignored. This might seem weird at first if you are new to programming but it will make sense later on, you just need to get used to it. Integers can be positive and negative and of course can be used in normal arithmetic operations such as addition (+) , subtraction (-), multiplication (*) and division (/). But we have one more operation called modulo or mod, represented with a %.
The modulo is used for the remainder in a division. If you are in the middle of a division with integers and you do need to get the remainder, you can use the % sign to do it. Let’s try this.

Float
A Float number is allowed to have fractions using the decimal point. For example 3.1416 of any other fractional number. It also can use the previously mentioned arithmetic operations (except modulo).
Double
A Double number is like a float number but with double capacity in memory, allowing it to have even more decimals for way more precision in an arithmetic operation.
To do:
- In your playground, try adding up an Int number with a Float.
- See what happens when you divide a Float with an Int and viceversa.
- Try out all the arithmetic operations.
- Try assigning numbers to different variables and test arithmetic operations on them to see what happens.

String
A string is a collection of characters wrapped around double quotations (“”). Yes, you guessed it. The “Hello, playground” that we reviewed before is called a string. So we were assigning a string to the variable str and we were also assigning a string to a constant when we typed our name.
Strings can contain almost any character inside of the double quotes. The first one (“) tells your computer you are using a String and it needs to end again with a (“) in order to finish it.
To do:
- Try putting numbers inside a String
- Play around with strings
Char
A Char is a character data type. It’s represented by a single character between single quotes. For example if you want to represent the letter c as a character you wold do this: ‘c’.
Bool
Booleans can have just one of two values, either true or false. This is mainly used with conditionals which we’ll review later on too. Here are some examples:

More about strings
There is something called “String interpolation”, this allows you to put any kind of variable’s value into a String. What if you want to convert a number into a string? You can do so this way. Let’s see a more practical example.
Suppose you have two variables, one is myAge with an integer value of 23 and the other one is called myName with a string “Jorge”, representing my name.

What if I want to complete the sentence “Hi, my name is Jorge and I’m 23 years old.”, but using my previous two variables? This can be done by putting \(something) inside a string, where you would insert your variables inside those characters to complete the sentence. Let’s see what I mean.

As you can see, the result shows the complete sentence and if you pay attention you’ll notice the whole sentence is surrounded by double quotes. This means we just created a whole new string using an integer variable and another string variable to compose it.
This is a really helpful feature that you’ll continue to use through most of your learning path. Soon enough you’ll start developing apps!
To do:
- Play around with string interpolation, use get familiar with it and practice a lot. But more importantly make sure you really understand how this works.
I think this is enough information for one day so we’ll continue on the next post where you’ll learn more about programming and it will be more practical. This post is intended for you to get familiar with Xcode playgrounds, learn about data types in Swift and the very basic operations.
I encourage you to play with all of this material reviewed here. It’s really important that you do understand this basic concepts in order to continue. Get comfortable, try new things, see which errors you encounter and feel free to comment below if you have any questions or message me on steemit chat @jorgelp94 if you need help.
If you liked this post please upvote it. I’ll post the next part of the tutorial soon. Also, if you have any suggestion to improve this tutorials you are welcome to help.
Thanks for taking the time for reading this.
Jorge
I'm not on a mac, so can't try right now, but that is a well organized post. Nice work! Steem could use more articles of this quality.
Thanks! It's nice to see you are interested!
Welcome to steemit programming and good contribution :)
I will keep an eye as have not coded in swift, always interesting to see other languages
Thank you! Yes, you should try it!
Congratulations @jorgelp! You have received a personal award!
Click on the badge to view your Board of Honor.
Do not miss the last post from @steemitboard:
SteemitBoard World Cup Contest - Quarter Finals - Day 2
Participate in the SteemitBoard World Cup Contest!
Collect World Cup badges and win free SBD
Support the Gold Sponsors of the contest: @good-karma and @lukestokes
Congratulations @jorgelp! You received a personal award!
You can view your badges on your Steem Board and compare to others on the Steem Ranking
Vote for @Steemitboard as a witness to get one more award and increased upvotes!