Jetson Nano Quadruped Robot Object Detection Tutorial
Nvidia Jetson Nano is a developer kit, which consists of a SoM(System on Module) and a reference carrier board. It is primarily targeted for creating embedded systems that require high processing power for machine learning, machine vision and video processing applications. You can watch detailed review for it on my YouTube channel.
Nvidia has been trying to make Jetson Nano as user-friendly and easy to develop projects with as possible. They even launched a little course on how-to build your robot with Jetson Nano, days after the board was launched. You can find the details about that project here.
However I myself had a few problems with the Jetbot as a project:
It wasn't EPIC enough for me. Jetson Nano is a very interesting board with great processing capabilities and making a simple wheeled robot with it just seemed like a very ... underwhelming thing to do.
The hardware choice. Jetbot requires some hardware that is expensive/can be replaced with other alternatives - for example they use joystick for teleoperation. Sounds like fun, but do I really need a joystick to control a robot?
So, immediately after I got my hands on Jetson Nano I started working on my own project, a Jetspider. The idea was to replicate basic demos Jetbot had, but with more common hardware and applicable to a wider variety of projects.
Step 1: Prepare Your Hardware

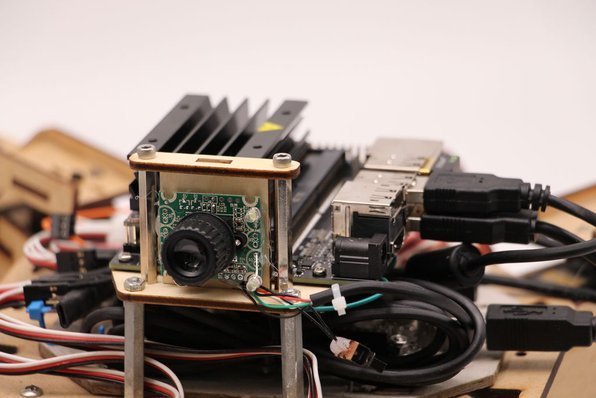
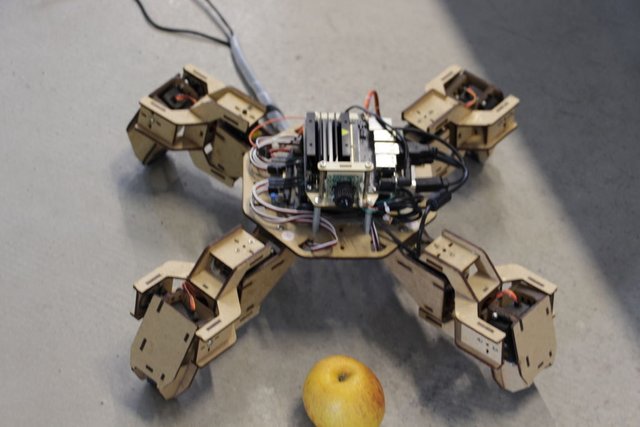
For this project I used an early prototype of Zuri quadruped robot, made by Zoobotics. It was lying around in our company's lab for a long time. I outfitted it with a laser-cut wooden mount for Jetson Nano and a camera mount. Their design is proprietary, so if for your Jetson Nano robot you want to create something similar, you can have a look at Meped project, which is a similar quadruped with an open-source design. In fact, since nobody had the source code for Zuri's microcontroller(Arduino Mega) in our lab, I used the code from Meped with some minor adjustments in legs/feet offset.
I used regular USB Raspberry Pi compatible web-cam and a Wifi USB dongle.
The main point is that since we're going to be using Pyserial for serial communication between microcontroller and Jetson Nano, your system is essentially can use any type of microcontroller, as long as it can be interfaced with Jetson Nano with USB serial cable. If your robot uses DC motors and a motor driver(for example L298P-based) it is possible to directly interface motor driver with Jetson Nano GPIO. But, unfortunately, for controlling servos you can only use another microcontroller or a dedicated I2C servo driver, since Jetson Nano doesn't have hardware GPIO PWM .
To summarize, you can use type of robot with any microcontroller that can be connected with Jetson Nano using USB data cable. I uploaded the code for Arduino Mega to the github repository for this tutorial and the part relevant to interfacing Jetson Nano with Arduino is here:
if(Serial.available()) {
switch(Serial.read()) {
{
case '1':
forward();
break;
case '2':
back();
break;
case '3':
turn_right();
break;
case '4':
turn_left();
break;
We check if there's data available, and if it is, pass it to the switch-case control structure. Pay attention, that data from the serial comes as characters, notice the single quotation mark around the numbers 1,2,3,4.
Step 2: Install the Necessary Packages
Fortunately for us, default Jetson Nano system image comes with a lot of stuff pre-installed (like OpenCV, TensorRT, etc), so we only need to install a couple of other packages to make the code work and enable SSH.
Let's start by enabling SSH in case you want to do all the rest of the work remotely.
sudo apt update
sudo apt install openssh-server
The SSH server will start automatically.
To connect to your Ubuntu machine over LAN you only need to enter the following command:
ssh username@ip_address
If you have Windows machine, you will need to install SSH client, for example Putty.
Let's start by installing Python Package Manager(pip) and Pillow for image manipulation.
sudo apt install python3-pip python3-pil
Then we'll install Jetbot repository, since we're relying on some parts of it's framework to perform object detection.
sudo apt install python3-smbus python-pyserial
git clone https://github.com/NVIDIA-AI-IOT/jetbot.git
cd jetbot
sudo apt-get install cmake
sudo python3 setup.py install
Finally clone my Github repository for this project to your home folder and install Flask and some other packages for robot's remote control using web server.
git clone https://github.com/AIWintermuteAI/jetspider_demos.git
cd jetspider_demos/jetspider_object_following
sudo pip3 install -r requirements-opencv
Download the pretrained SSD(Single Shot Detector)model from this link and place it in jetspider_demos folder.
Now we are good to go!
Step 3: Run the Code

I made two demos for Jetspider, the first one is a simple teleopration, very similar to the one I made earlier before for the Banana Pi rover and the second one uses TensorRT for object detection and sends the movement commands over the serial connection to the microcontroller.
Since most of the teleopration code is described in my other tutorial (I only made some minor tweaks, regrading video transmission) here I will focus on the Object Detection part.
Main script for object following is object_following.py in jetspider_object_following, for teleoperation is spider_teleop.py in jetspider_teleoperation.
The object following script starts with importing the necessary modules and declaring variables and class instances. Then we start Flask web server with this line
app.run(host='0.0.0.0', threaded=True)
As soon as we open 0.0.0.0(localhost) address in our web browser or Jetson Nano address on the network(can check with ifconfig command), this function will be executed
def index():
It renders the web page template we have in templates folder. The template has video source embedded in it, so once it finishes loading, def video_feed(): will be executed, that returns a Response object that is initialized with the generator function.
The secret to implement in-place updates(updating image in the web page for our video stream) is to use a multipart response. Multipart responses consist of a header that includes one of the multipart content types, followed by the parts, separated by a boundary marker and each having its own part specific content type.
In def gen(): function we implement the generator function in an infinite loop which captures the image, sends it to def execute(img): function, yielding an image to be sent to the web page after that.
def execute(img): function is where all the magic happens, it takes an image, resizes it with OpenCV and passes it to Jetbot ObjectDetector class instance "model". It returns returns the list of detections and we use OpenCV to draw blue rectangles around them and write annotations with object detected class. After that we check if there is an object of our interest detected
matching_detections = [d for d in detections[0] if d['label'] == 53]
You can change that number(53) to other number from CoCo dataset if you want your robot to follow other objects, 53 is an apple. The whole list is in categories.py file.
Finally if there's no object detected for 5 seconds we transmit the character "5" for robot to stop over the serial. If object is found we calculate how far is it from the center of the image and act accordingly(if close to center, go straight(character "1" on serial), if on the left, go left, etc). You can play with those values to determine the best for your particular setup!
Step 4: Final Thoughts
( )
)
This is the gist of the ObjectFollowing demo, if you want to know more about Flask webserver Video streaming, you can have a look at this great tutorial by Miguel Grinberg.
You can also have a look at Nvidia Jetbot Object Detection notebook here.
I hope my implementations of Jetbot demos will help to build your robot using Jetbot framework. I did not implement obstacle avoidance demo, since I think the choice of the model will not yield good obstacle avoidance results.
Add me on LinkedId if you have any question and subscribe to my YouTube channel to get notified about more interesting projects involving machine learning and robotics.
Congratulations @wintermuteai! You have completed the following achievement on the Steem blockchain and have been rewarded with new badge(s) :
You can view your badges on your Steem Board and compare to others on the Steem Ranking
If you no longer want to receive notifications, reply to this comment with the word
STOPTo support your work, I also upvoted your post!
Vote for @Steemitboard as a witness to get one more award and increased upvotes!