Build and sculpt a DIY mirror frame
How to build and sculpt a DIY mirror frame
Index of contents [ hide ]
1 Starting from scratch!
1.1 Choose wood
1.2 Define the structure of the mirror frame
1.3 Assemble your DIY mirror carefully
1.4 Refine the shape
1.5 Do not forget the back of your mirror frame
1.6 Sculpt the frame
1.7 Carteggia
1.8 It's over ... hang it up
1.8.1 Reading to deepen
... starting from scratch!
Building a wooden DIY mirror frame is an exercise that the Bioforme artistic carpentry teaches to do even for beginners and always reserves great satisfaction.
In this article we will see how it is possible to recycle some scraps coming from the processing of a fir panel to obtain a Bioforme wood mirror.
The material needed for this DIY mirror project are:
- scraps of 2 cm high fir panels
- vinyl glue
- self-tapping screws
- sand paper
- wooden thorns
- fantasy and desire to have fun :)
What we will illustrate is only one of the many ways to proceed, but has the advantage of being simple and therefore within everyone's reach.
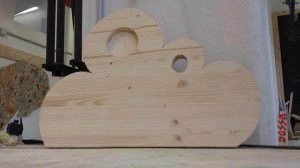
Choose wood
- Choose your piece of fir and draw what will be the head of the mirror. Draw the contours with a pencil and draw your shape by cutting the shape with a common alternative saw .
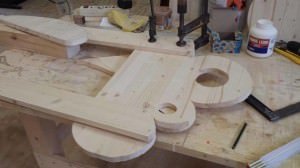
Define the structure of the mirror frame
- Take 2 fir boards 15 cm wide, long at your pleasure and at least 1.5 cm thick and screw on the back of the mirror head after gluing them. Use the clamps and tighten with force to guarantee a perfect seal.
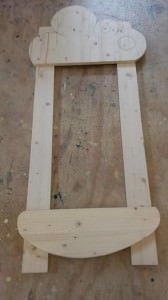
Assemble your DIY mirror carefully
- Repeat the steps described in point 1 to obtain the lower part of the mirror. Choose soft shapes and do not worry about symmetry, it will be easier to cut and the result will be more dynamic and interesting.
Paste and screw the new piece to the boards, taking care to insert the screws from the back so that they are not visible on the upper surface. You will be so halfway through the work and you can already imagine how your finished mirror will be.
If you want, make decorative holes in the two shapes that characterize the head and feet of your mirror.
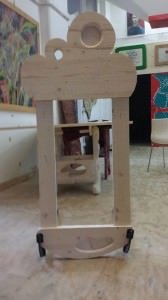
Refine the shape
- Use the jigsaw to eliminate the protruding parts of the two side axles and a rasp or cutter to round off the outer edges of the frame.
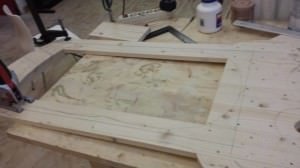
Do not forget the back of your mirror frame
5) Always with the only trusted help of the jigsaw cut on the back of the mirror the shape that in fact will frame your mirror
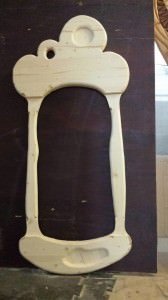
Turn the mirror and admire the result, it is not finished yet. A little patience ... few steps are missing😉
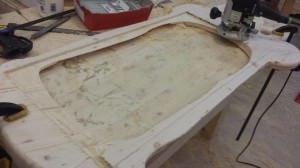
Cutter the back of the wooden frame to obtain the stop (about 8 mm) necessary to house the mirror itself.
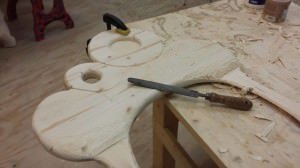
Sculpt the frame
- Now act on the upper face of your mirror and, with a traditional wooden rasp , round and round the steps to give the impression that your mirror is made of one piece.
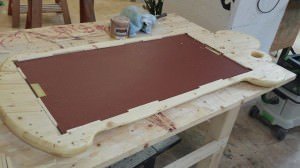
sands
- mirror -1Finished the finishing work with glass sheets of 40, 80 and 120 to smooth the surface and give it the maximum pleasantness to the touch, it houses the mirror inside the frame taking advantage of the stop made in point 9 and lock it with wooden stops . We are there ... or rather, you're there eh eh!
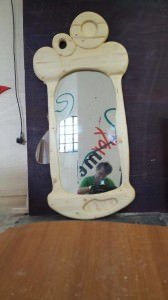
It's over ... hang it up 😉
- The wall mirror is finished. Send us your pictures and we will gladly publish them, if you do not feel like going alone, come visit us or attend one of our short courses on creativity on wood .
In two days we will teach you how to make a project like this and at the end, you will take home a wonderful wooden mirror made with your own hands.
Our course costs 240 euros, lasts 2 days, includes all the materials and the use of all the tools to make the frame. The mirror, on the other hand, is excluded and you will have it made by your trusted glassmaker. In just 2 days we promise that you will learn to use all the tools necessary to continue to have fun alone and / or create new mirrors to give away, or why not sell to friends and ... customers?
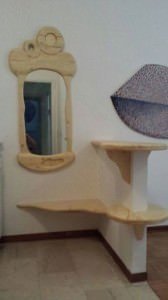
Here is the mirror finished and placed inside the house, along with some specially made shelves to keep him company.