SEC | S20W6 | Data Analysis with Google Sheets: (Importing and Exporting Data: Convert Excel to Google Sheets Etc)
Hello steemians,
I am glad to participate in the contest for the Steemit Engagement Challenge Season 20 Week 6 of the class of Professor @josepha, SEC | S20W6 | Analyzing Data with Google Sheets: (Importing and Exporting Data: Converting Excel to Google Sheets, etc.). and here are my answers. Happy reading!
Task 1 - What do you understand by importing and exporting data in Google Sheets? Use the Coefficient method and input the Excel Work that you did in previous lesson 2 into a new Google sheet and shared with us all the necessary procedures.
What do you understand by importing and exporting data in Google Sheets?
Talking about my understanding of importing and exporting data in Google Sheets, I can consider them to be the fundamental capability that allows me to move data between different platforms or environments by manipulating multiple formats, which guarantees a smooth workflow and collaboration between members of the same team, this is the case when we worked within the curation teams on Steemit.
Importing data consists of extracting data from external sources such as csv files, excel files or even databases to integrate them into Google Sheets. This operation allows to modify and share this data on a centralized platform based on the cloud or any external storage space which is so useful especially when the data was initially created offline or in a different software environment , but now needs to be made available to multiple users in real time for collaboration or presentation.
Exporting, on the other hand, allows me to save or download the data I’ve worked on in Google Sheets in different formats that can be used offline or in other software systems. This includes exporting to Excel for users who prefer to work in offline environments to CSV for processing raw data or integrating with databases, or to PDF for static data presentations.
Both importing and exporting in Google Sheets provide the flexibility to manage data across different platforms ensuring compatibility and ease of use. Whether I’m integrating data from external sources into a collaborative project or saving my work in a format that can be used elsewhere these features help me bridge the gap between different tools and environments. This flexibility is especially important when working on complex projects that involve multiple users, tools or systems, as it ensures that the data remains accessible, editable and shareable regardless of the platform or format involved.
Use the Coefficient method and input the Excel Work that you did in previous lesson 2 into a new Google sheet and shared with us all the necessary procedures.
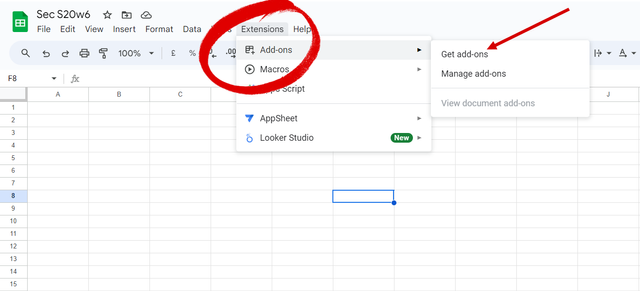
- I start by opening my Google Sheets file. At the top of the screen, I click on the Extensions tab, which brings up a drop-down menu. From this menu, I select Add-ons to access the available add-ons. Then, I click on Get add-ons to open the Google Workspace Marketplace, where I can search for and install new add-ons to enhance the functionality of Google Sheets.
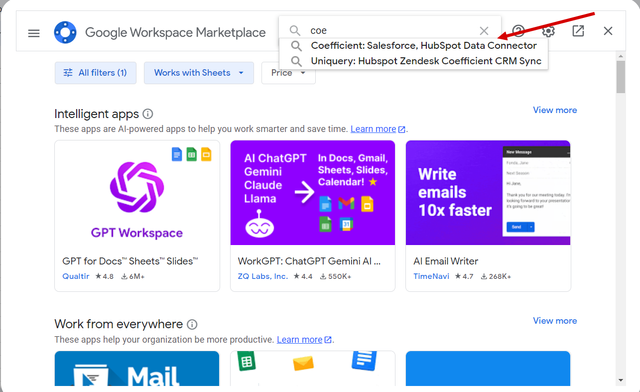
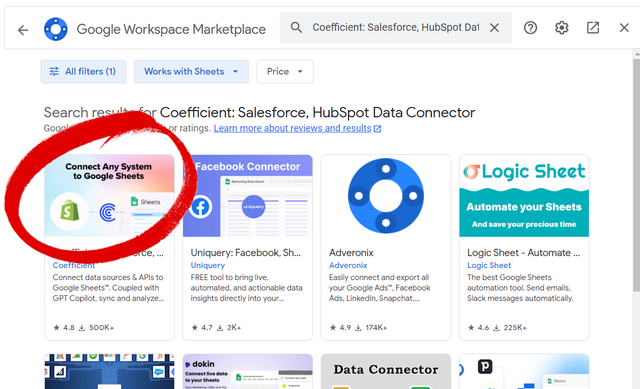
- Once in the Google Workspace Marketplace, a search bar is available at the top of the window. I type "Coefficient" in this bar to search for the Coefficient: Salesforce, HubSpot Data Connector add-on, which allows you to connect data from external sources like Salesforce or HubSpot to Google Sheets. As I type, a list of results appears, and I select the Coefficient module from this list.
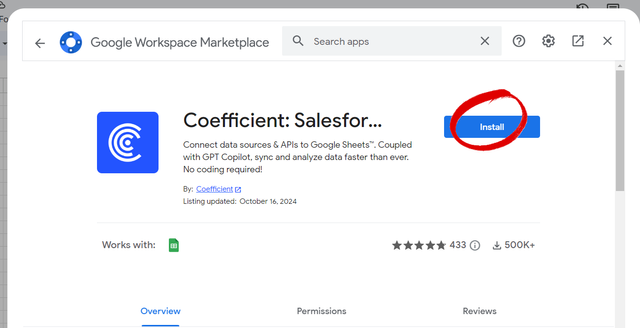
- After clicking on Coefficient in the search results, I am redirected to the add-on page. Here I see a brief description of the app and its features, such as connecting API data to Google Sheets, syncing with services like Salesforce or HubSpot, and the ability to analyze data. I click Install to begin the installation process.
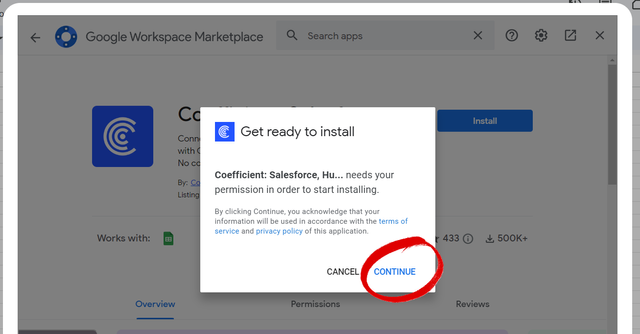
- A dialog box opens asking if I want to continue installing Coefficient. It states that permissions are required for the module to work properly. I click Continue to accept and move on to the next step.
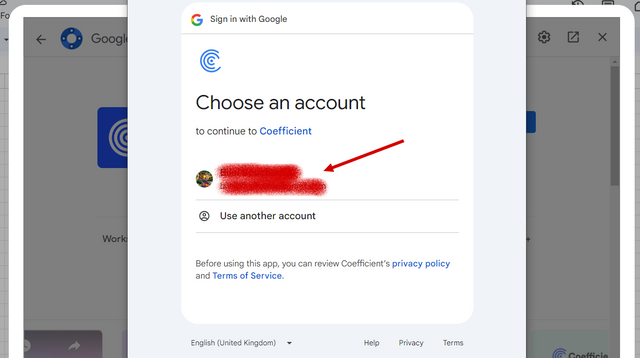
- Next, a new window appears, asking me to choose a Google account to connect Coefficient to. I select my Google account by clicking on my email address. This links Coefficient to my account in order to use it with my Google Sheets files.
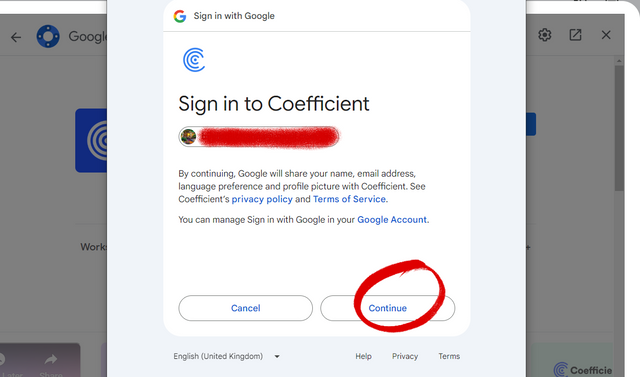
- After selecting my Google account, I click Continue again to allow Google to share necessary information with Coefficient, such as my name, email address, and language used. This allows the add-on to work properly in connection with my Google Sheets data.
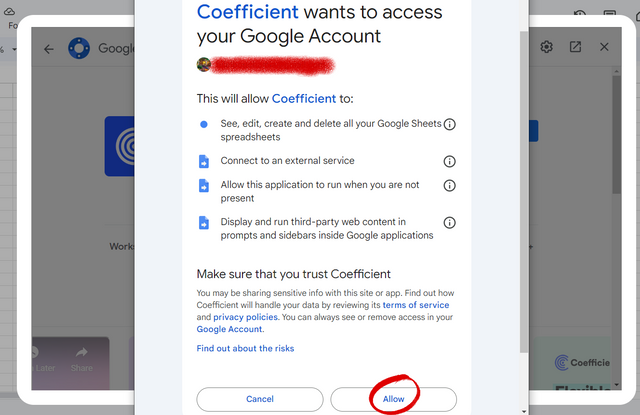
- A permissions request window appears. Coefficient requests access to my Google Sheets so that it can view, edit, create, and delete spreadsheets. Additionally, it requires the ability to connect to external services and display third-party content in Google Sheets windows and sidebars. If I agree to these permissions, I click Allow to continue.
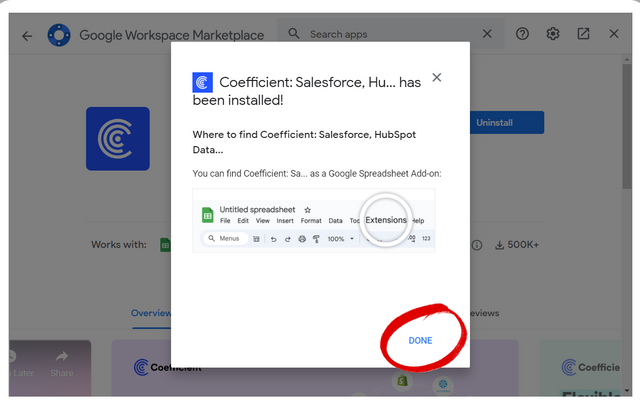
- Once I have granted all the necessary permissions, a window opens to confirm that Coefficient has been installed. I receive information on how to access the add-on, which will now be available in the Extensions tab of Google Sheets. I click Done to complete the installation.
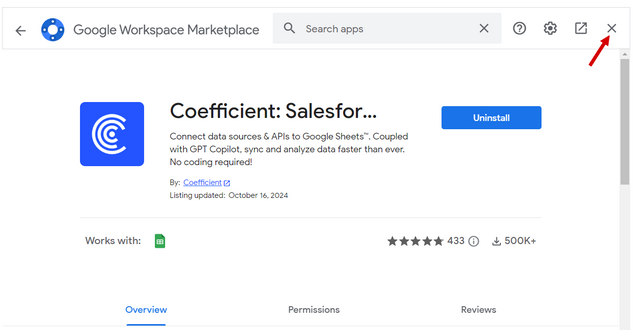
- After successfully installing Coefficient, I click on the close icon at the top right to exit the installation screen.
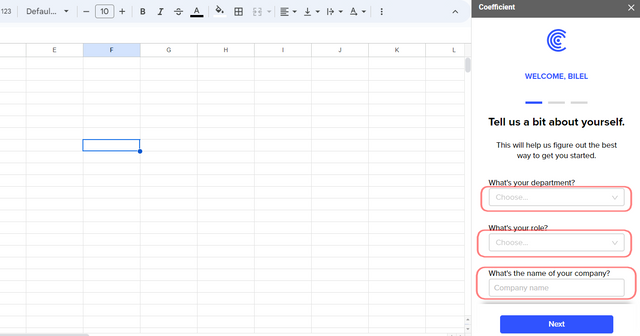
- I return to my Google Sheets spreadsheet. Once Coefficient is installed, it asks me for configuration information. I filled in my department, my role, and the name of my company, then I clicked on "Next" to continue.
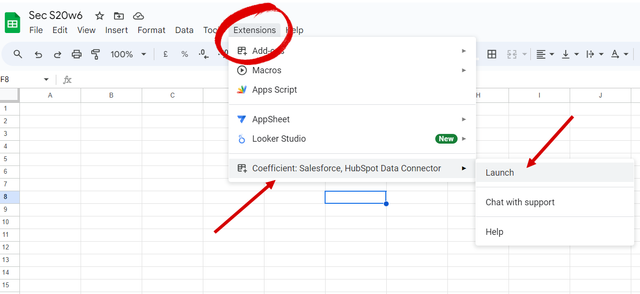
- I go to the "Extensions" tab of my spreadsheet, I select "Coefficient: Salesforce, HubSpot Data Connector", then I click on "Launch" to launch the tool.
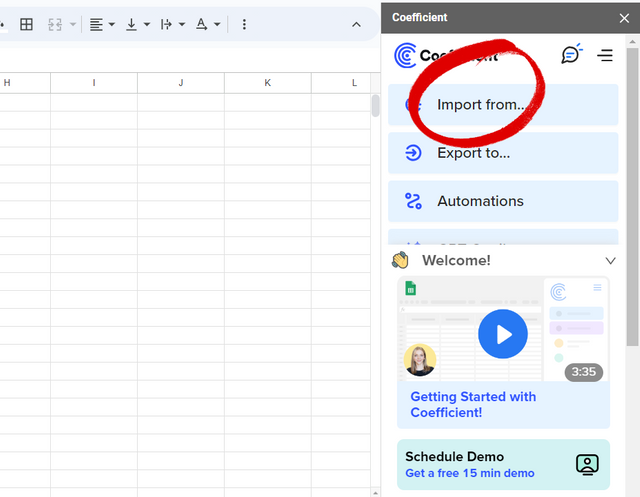
- Once Coefficient is launched, I click on the "Import from..." option to start importing external data.
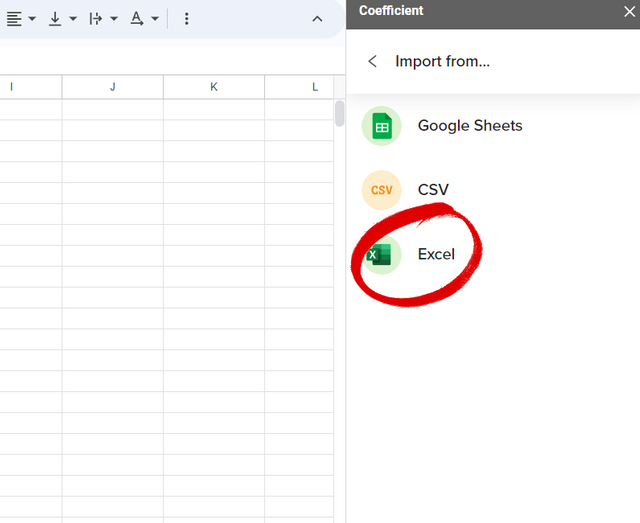
- I selected the "Files" option, which allows you to import Google Sheets, Excel or CSV files. I then choose "Excel" to import a file in Excel format.

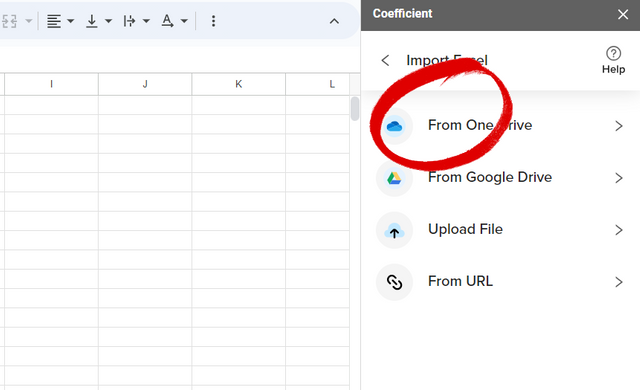
- I then have the option to choose the location of the Excel file. I choose "From One Drive" since my file is on OneDrive.
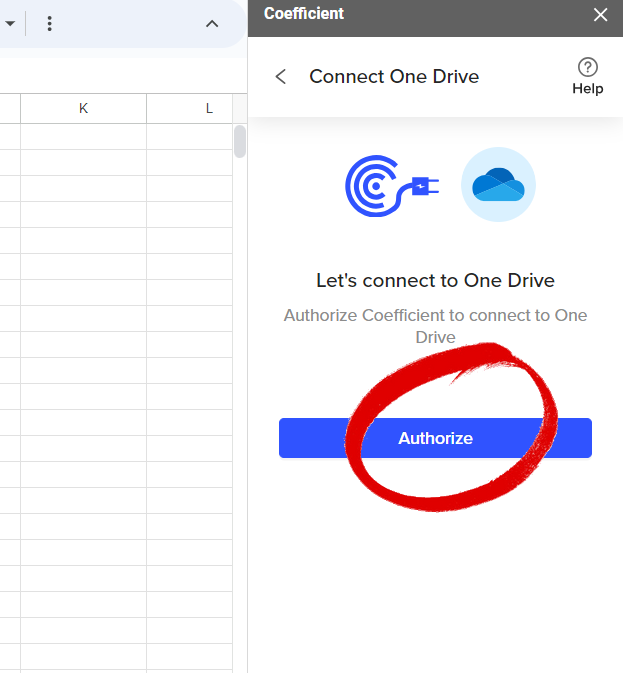
- To allow Coefficient to connect to OneDrive, I click on "Authorize".
- A Microsoft window appears asking me to authorize Coefficient to access my OneDrive files. I click on "Accept" to allow access.
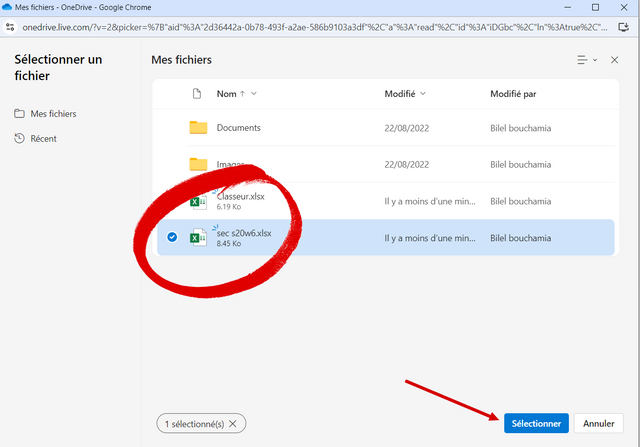
- Search and select the file you want to import into Google Sheets, then press [Select].

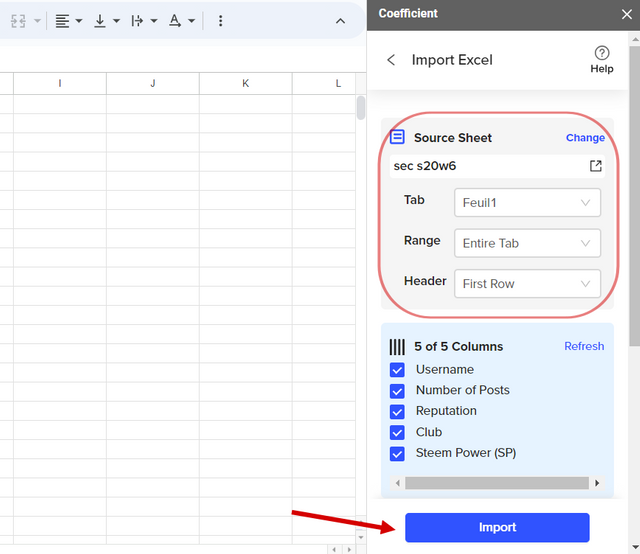
- Configure the necessary settings to choose which tabs (sheets) to import, as Coefficient cannot import the entire workbook at once. Also set the data range (if you want to import the entire sheet, select [Entire Sheet]) and the header. Press [Next] to continue.
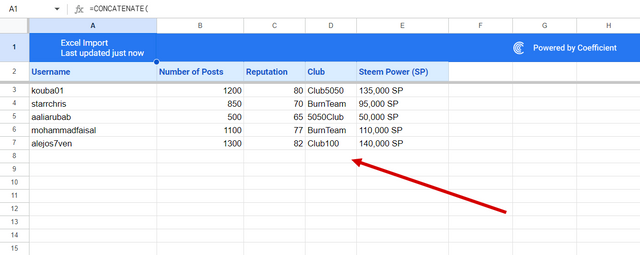
- Make additional settings, including naming the tabs (otherwise the name will be the same as the original file). To execute the import, click [Import].
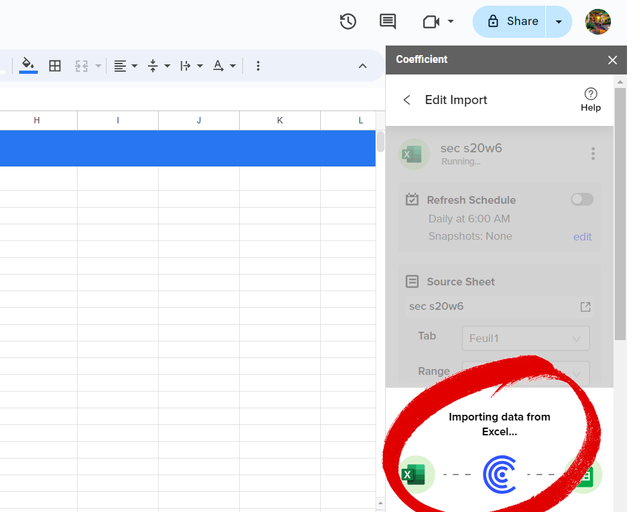
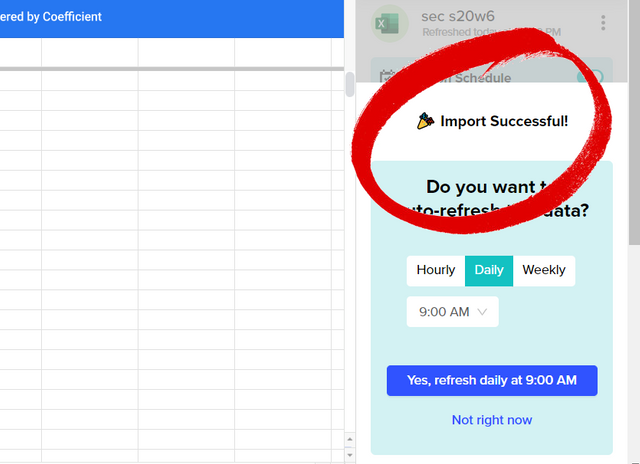
- Once the import is complete, a confirmation message appears in the sidebar. Users can then set how often the data is updated, which allows Google Sheets to automatically sync changes to the source file.
Task 2 - Share with us the needed procedures for converting Google Sheets Files to Excel File using the Google Sheet that You created in Lesson 4 and detail out the limitations that you observe while importing and exporting your data.
Here is the description of the steps to export my Google Sheets file to an Excel file, using the images:
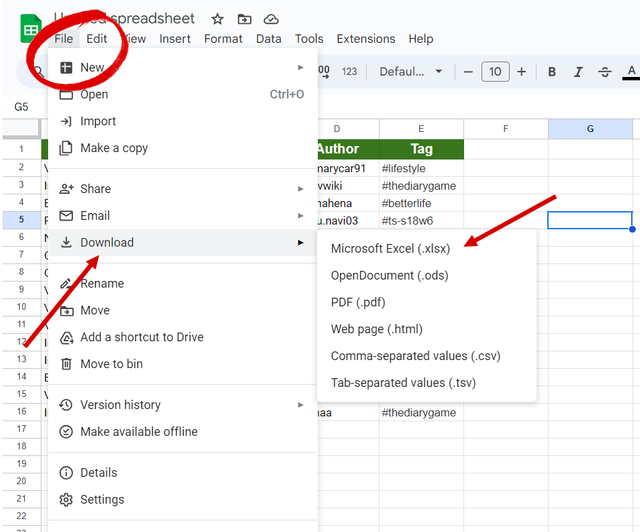
- In the main menu of Google Sheets, I click on File, then I select the Download option. A dropdown list appears with several available formats. I click on Microsoft Excel (.xlsx) to start downloading the file in Excel format.
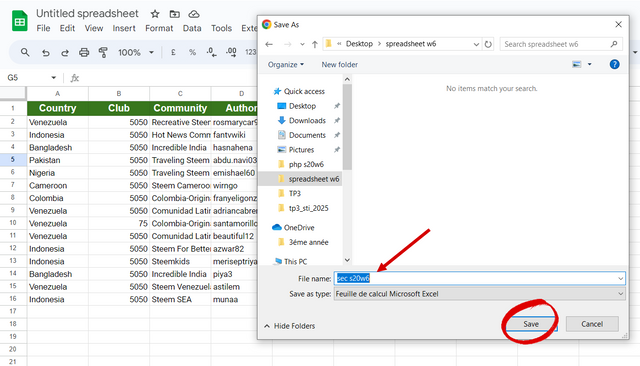
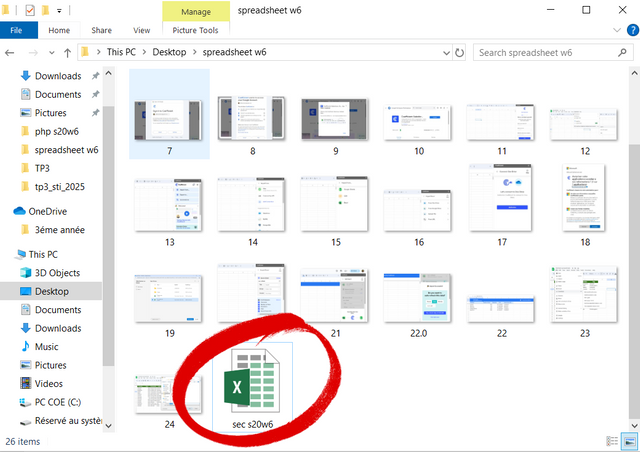
- A dialog window opens, allowing me to choose the location to save the file on my computer. I enter the name I want to give to the file, for example, "sec s20w6", then I click on Save to confirm the export of the Excel file.
- The file is now saved on my computer, and I can see it in the selected destination folder. The file appears as an Excel icon with the name I gave it, ready to be opened and used.
Detail out the limitations that you observe while importing and exporting your data.
When I import data from Excel to Google Sheets, I often face several challenges. One of the main limitations I observe is that some of the advanced Excel features such as pivot tables, data validation rules or complex conditional formatting, don’t transfer perfectly what means that after the import I have to manually adjust the settings or reapply the formatting in Google Sheets.
If I have an Excel file that has multiple sheets I can't import the entire work at once using some tools then I have to import each sheet individually which can be time consuming if the file has many sheets. As I also notice that some Excel functions especially those related to data analysis or macros are not fully compatible with Google Sheets. As a result, formulas or macros can break or produce errors which forces me to modify them to fit the limitations of Google Sheets.
When exporting data from Google Sheets to Excel I also noticed that some features specific to Google Sheets are missing, such as Google Apps Script functions or real-time data connections using add-ons. For example, if I have set up automatic data refreshes or used Google-specific features (like Google Finance), these will no longer work in Excel. I also notice that sometimes the layout or formatting of cells is different in Excel after exporting, such as fonts or cell sizes, forcing me to spend some time manually adjusting them in the exported Excel file.
Since I frequently use collaborative features in Google Sheets such as comments or version history, once I export the file to Excel, these features are no longer available and I lose all tracking or collaboration details unless I manually copy or summarize them before exporting. Finally, I find that the file size can sometimes increase significantly when exporting from Google Sheets to Excel, especially when dealing with large datasets or embedded images, which can slow down Excel performance.
Task 3 - Between the use of Google sheet and Excel spreadsheet which do you find more user-friendly and acquainted to?
For me I prefer to use Google Sheets because it is easier to use and practical especially for my tasks which require collaboration and remote access through the cloud which allows me to work in real time with several users at the same time like my team or my students. I also like that I can access Google Sheets from any device with an internet connection, which makes it very flexible and convenient. The auto-save feature ensures that my work is always saved and I don’t have to worry about losing my progress.
Another feature that makes Google Sheets easy to use is the availability of add-ons and integrations, such as data import/export or Google Apps Script, which allow me to automate repetitive tasks. The simplicity of its interface, combined with the fact that it is browser-based, makes it lighter and faster for most tasks, such as organizing competition data or managing weekly reports.
Although I am more familiar with Excel when it comes to advanced features, especially when it comes to handling complex data analysis, pivot tables, and more powerful data visualization. Excel macros and VBA (Visual Basic for Applications) are incredibly powerful automation tools that I sometimes find lacking or limited in Google Sheets. I also prefer to use Excel when working offline because I don’t need an internet connection, and I feel more comfortable using Excel for tasks that involve large sets of data because it handles them more efficiently without slowing down.
Thank you very much for reading, it's time to invite my friends @pelon53, @sahar78, @chant to participate in this contest.
Best Regards,
@kouba01

Thank you so much for your invitation...
I am admired by knowledge that you have about Google sheets for analysis of data...
This is really super that you have watermarked your images....
I wish you good luck with this challenge....