Fetch.ai (FET) Staking Guide via Keplr Wallet
Fetch.ai is a cryptocurrency that is within the Top 100 in market capitalization and is Top 3 in the AI and Big Data ecosystem. Fetch.ai democratizes access to AI technology with a permissionless network based on a cryptographic economy where anyone can connect to and access secure data sets by using autonomous AI to execute tasks that leverage its global network of data. The Fetch.AI model has use cases such as optimization of DeFi trading services, transportation networks, smart energy grids, travel, essentially any complex digital system that is based on large-scale data sets. Fetch.ai solves the problem of traditional centralized learning as well as incentivizes others to contribute to its model thus empowering P2P applications with automation and AI capabilities
The Fetch.ai network is completely decentralized through the use of blockchain technology which provides data privacy, security and resistance to censorship. This blockchain supports smart contracts that allow efficient and auditable coordination and governance.
FET is the native token of the Fetch.ai blockchain, it is the primary medium of exchange for paying for transactions and can be used to pay agents for the provision of services. FET was designed to find, create, deploy and train autonomous digital twins and implement collective intelligence on the network and is an essential part of smart contracts and oracles on the platform. All resulting deals between agents are recorded on the Fetch.ai blockchain using FET.
Through FET Staking you can earn income from your FET tokens while contributing to the operations of the Fetch network. Delegating your tokens to a trusted validator like Coinpayu has an important role in maintaining the integrity of the network. Validation nodes are enabled through the participation of FET tokens, making validation easier and network reputation as a result.
You can buy or sell FET tokens on numerous exchanges such as Binance, Coinbase, BitAsset, BiONE, Bitrue, MEXC.
Next, a step-by-step guide to FET staking using Coinpayu as a validator will be presented.
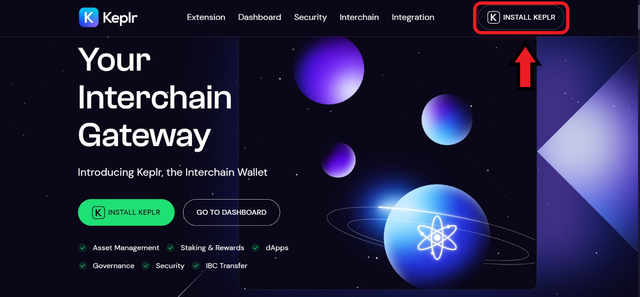
First step: Create an account in Keplr Wallet
The first step is to create an account in the Keplr wallet, which is a non-custom (decentralized) wallet that allows you to interact with the COSMOS ecosystem. For this, you must enter https://www.keplr.app/ and follow the steps explained below to register.
Keplr wallet is available for Google or Firefox browser extension and mobile app on IOS or Android.
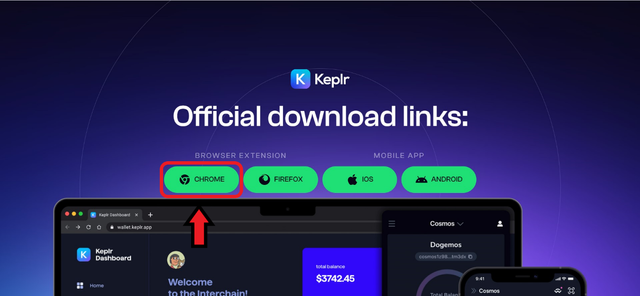
In this case, we will download the extension for the Google browser
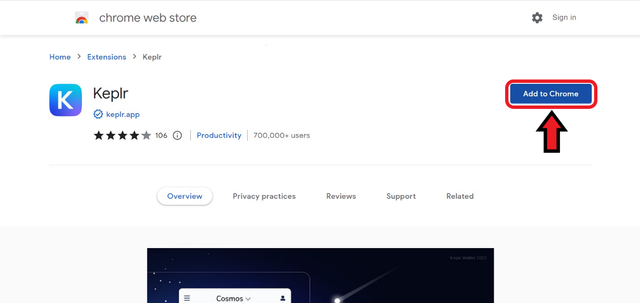
Once downloaded, you can view the wallet from the extensions tab.
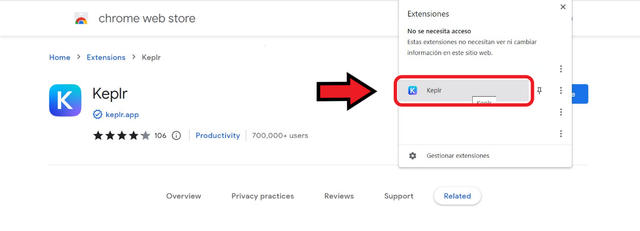
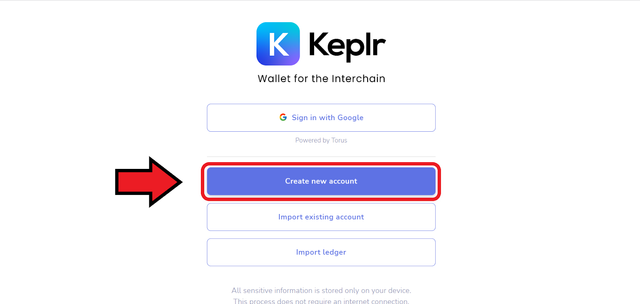
Once we select the extension, the following panel will appear and we will choose the “Create new account” option.
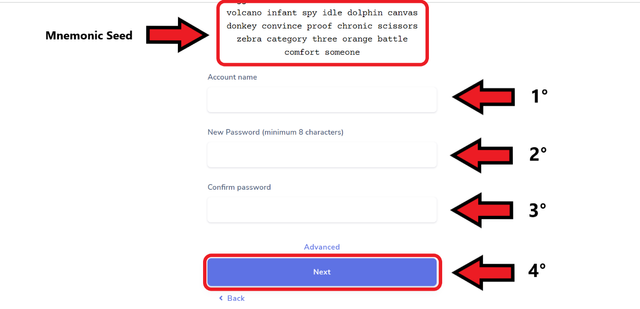
Next, the option to select the mnemonic seed will appear, here you can choose between 12 or 24 words. It is important that you write the words in order on a piece of paper and keep it in a safe place. Then you must choose a username, a password and confirm it.
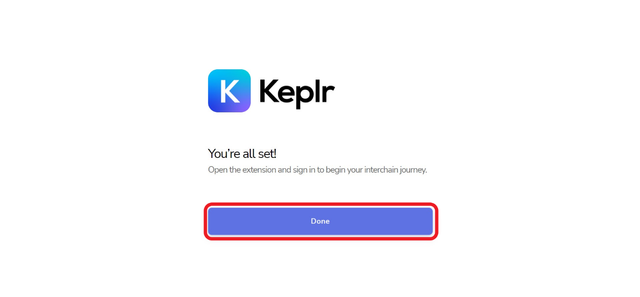
Once this is done, you will be asked to enter the Mnemonic Seed again and the process will be finished successfully. You have already created your account in Keplr Wallet!
Second step: Deposit FET in Keplr Wallet
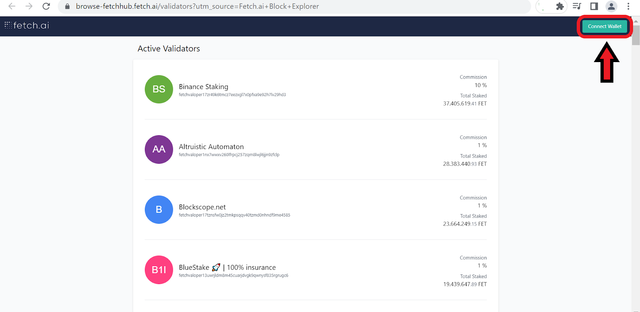
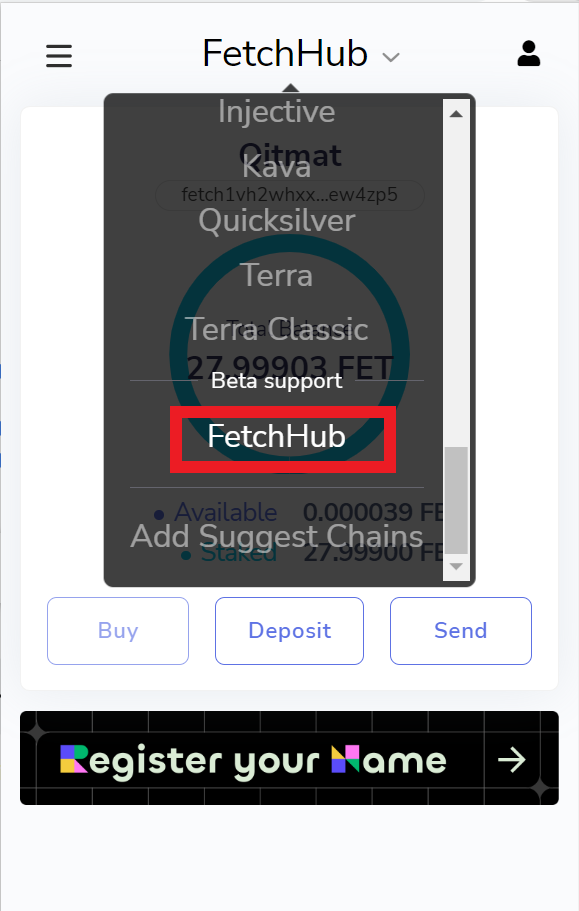
Before performing this operation, you must add the FET network to Keplr. So, go to the website where the active Fetch validators are and select “Connect Wallet”.
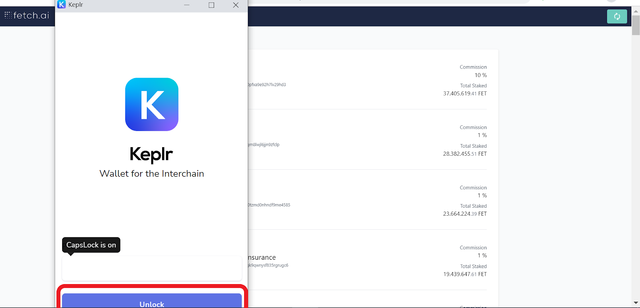
Following this, you will need to login to Keplr Wallet and approve the “Fetch Hub” network.
Now, you can deposit FET tokens from an exchange or another wallet. For this, you can copy the FET address or select "Deposit" and scan the QR code.

Once the FET tokens are received and available, you can stake them.
Third step: FET Staking
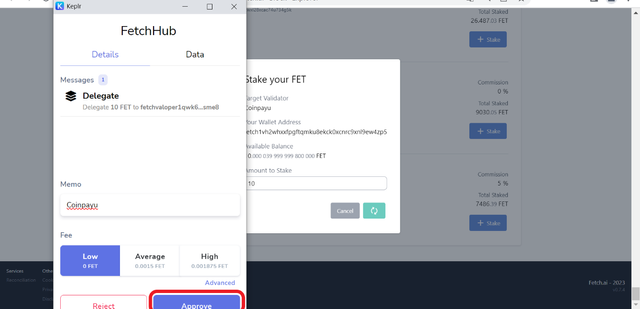
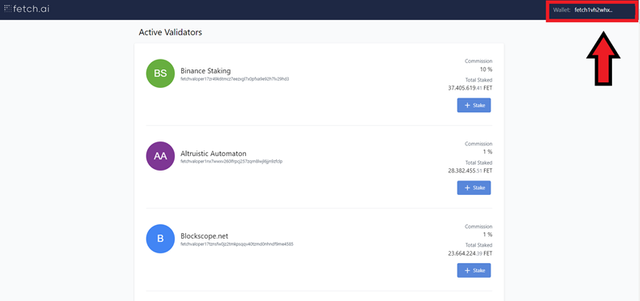
Finally, you now need to stake the FET. For which, go back to the site where the FET validators are located and selecting “Connect Wallet” will connect you directly with the Keplr wallet.
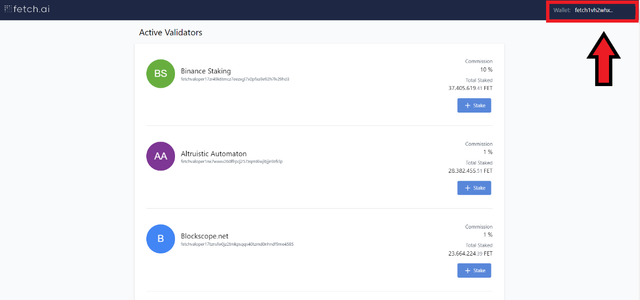
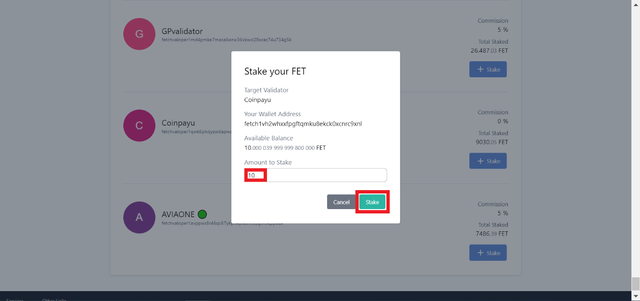
Then, you must proceed to search for the Coinpayu validator and once you find it, select “Stake”.
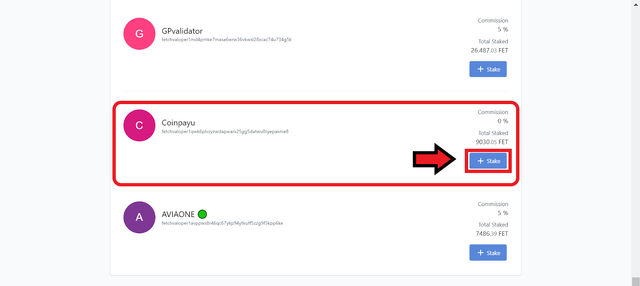
Next, a box will be displayed where you must select the amount of FET token you want to delegate and once you choose the amount, select "Stake".
To view the status of the Staking, from the FET validators page you can double click on the address of the Keplr Wallet and it will indicate the status of the tokens. From here you can claim the rewards or remove the Staking.
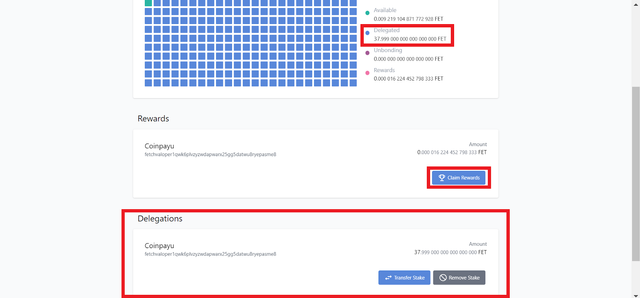
You can also notice that FET tokens are staked from the Keplr Wallet directly.

The address of the Coinpayu validator is: fetchvaloper1qwk6plvzyzwdapwarx25gg5datwu8ryepasme8 and you can check its status from the MINTSCAN page as shown in the following image.
If you have any questions or inconveniences during the process, you can ask them in the comments.
P.S.: Here you can see a small introduction about FET Staking.